
Related Manuals for Memorex EMI47103PWHT


Summary of Contents for Memorex EMI47103PWHT
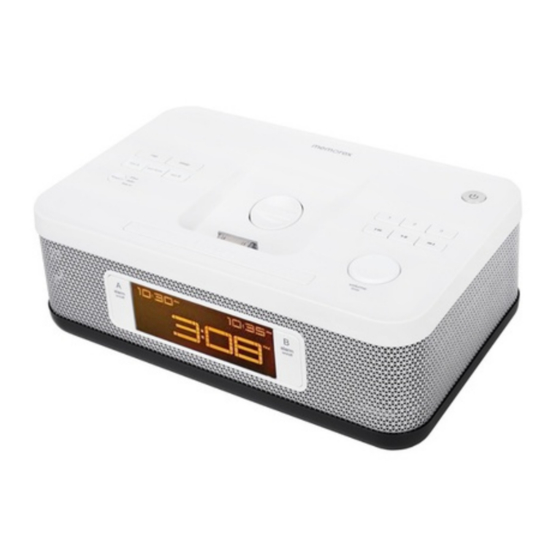
- Page 1 MARQUE: MEMOREX REFERENCE: EMI47103PWHT CODIC: 1316605 NOTICE EN ANGLAIS UNIQUEMENT...
-
Page 2: Safety Precautions
SAFETY PRECAUTIONS CAUTION RISK OF ELECTRIC SHOCK DO NOT OPEN CAUTION: TO REDUCE THE RISK OF ELECTRIC SHOCK, DO NOT REMOVE COVER (OR BACK). NO USER-SERVICEABLE PARTS INSIDE. REFER SERVICING TO QUALIFIED SERVICE PERSONNEL. DANGEROUS VOLTAGE: The lightning flash with arrowhead symbol within an equilateral triangle is intended to alert the user to the presence of uninsulated dangerous voltage within the product’s enclosure that may be of sufficient magnitude to... - Page 3 SAFETY PRECAUTIONS NOTE: This equipment has been tested and found to comply with the limits for a Class B digital device, pursuant to part 15 of the FCC Rules. These limits are designed to provide reasonable protection against harmful interference in a residential installation. This equipment generates, uses and can radiate radio frequency energy and, if not installed and used in accordance with the instructions, may cause harmful interference to radio communications.
-
Page 4: Important Safety Instructions
IMPORTANT SAFETY INSTRUCTIONS Read these Instructions. Keep these Instructions. Heed all Warnings. Follow all instructions. Do not use this apparatus near water. Clean only with a dry cloth. Do not block any of the ventilation openings. Install in accordance with the manufacturer’s instructions. -
Page 5: Location Of Controls
LOCATION OF CONTROLS FRONT/ 3 4 5 1112 14 15 19 20 21 Set Alarm A Button 15. Left Speaker Nap Button 16. Alarm A On/Off Button Set Time (Sync) Button 17. Snooze Button Set Alarm B Button 18. LCD Display Sleep Button 19. -
Page 6: Rear Panel
LOCATION OF CONTROLS (CONTINUED) REAR PANEL 1. Dimmer Button 2. 24/12 Hour Button 3. Line In Jack 4. DC In Jack (AC ADAPTER PART NO. bLK: 11.2.007.0039*, WHT: 11.2.007.0028*) 5. FM In Jack (FM WIRE PART NO. bLK: 11.1.290.0005*, WHT: 11.1.290.0004*) *Consumer Replaceable Part (See page 19 to order.) -
Page 7: Power Source
POWER SOURCE AC CONNECTION Insert the small end of the AC adapter into the DC In jack (located on the rear of the unit). Connect the other end to a wall outlet having 120V AC, 60 Hz. AC Adapter, DC 9V Z NOTES: •... - Page 8 POWER SOURCE (CONTINUED) bATTERY PRECAUTIONS Follow these precautions when using batteries in this device: Warning – Danger of explosion if battery is incorrectly replaced. Replace only with the same or equivalent type. Use only the size and type of batteries specified. Be sure to follow the correct polarity when installing the batteries as indicated in the Battery Compartment.
-
Page 9: Inserting An Ipod
INSERTING AN iPod Raise Lower Rotate the adjustable iPod Gently slide in the iPod/iPhone support knob counter-clockwise so the connector on the iPod/ to raise or clockwise to lower the iPhone slides onto the connector support position as desired. on this unit. NOTES: •... -
Page 10: Operation
OPERATION USING AN iPod WITH THIS UNIT With an iPod/iPhone connected (see you can operate the iPod/iPhone previous page), if not already on, turn using its own controls, as per its this unit on by pressing the Power owner’s manual, or you can use button 1. - Page 11 OPERATION (CONTINUED) SETTING THE FM RADIO REGION This unit allows you to set the desired radio region. For region details, see the section on the bottom of this page. With the unit on and in Radio mode, Within four seconds, rotate the Volume/Time control clockwise press and hold the Preset 1 1, one full revolution to increase or...
-
Page 12: Using The Fm Radio
OPERATION (CONTINUED) USING THE FM RADIO Turn this unit on by pressing the Repeatedly press the Source button to select the FM Radio mode; “Radio Power button. FM” will appear in the display. NOTES: • To turn this unit off, press the Power button. - Page 13 OPERATION (CONTINUED) SETTING THE THREE RADIO PRESETS Follow Steps 1-3 on the previous page to tune a station. Press and hold one of the 3 Preset buttons. The display will blink twice and the preset will be set. RETRIEVING THE THREE RADIO PRESETS Follow Steps 1-2 on the previous page to turn the unit on and select the Radio mode.
- Page 14 OPERATION (CONTINUED) TO SET OR RESET THE ACTUAL TIME Follow the instructions below to manually set the time. To automatically set the time with the iPod, see the following page. To set the clock to 24 hour Press the Set Time (Sync) button 1; (Military) time, press the 24/12 the display will blink and the Volume/Time control will light up.
-
Page 15: Continued On The Next Page
OPERATION (CONTINUED) TO SYNC THE TIME With the power on, connect an iPod as shown on page 8. Press and hold the Set Time (Sync) button until the current time appears and the display blinks twice. The time will then be synced. NOTES: •... - Page 16 OPERATION (CONTINUED) Within five seconds, press the When the alarm is set, the alarm Source button to select the mode will be On; the respective desired source (iPod, Radio or alarm's time will appear in the Buzzer) as desired. display to indicate it is activated. NOTE: you cannot select Line In.
- Page 17 OPERATION (CONTINUED) TO SHUT THE ALARM OFF To turn the alarm off, simply press To turn the alarm off so it will not sound the next day, press the the Alarm A 1 or Alarm B 2 On/Off button corresponding to the alarm desired Alarm A 1 or Alarm B 2 that is sounding.
-
Page 18: Dimmer Button
OPERATION (CONTINUED) SLEEP With the unit on, press the Sleep With the unit off, press the Nap button button; “SLEEP” and "10" will blink in 1; “NAP” and "10" will blink in the display five seconds which the display for five seconds which indicates the buzzer will sound after 10 indicates the unit will turn off after 10 minutes. -
Page 19: Troubleshooting Guide
TROUbLESHOOTING GUIDE If you experience a problem with this unit, check the chart below before calling for service. SYMPTOM CAUSE SOLUTION No sound. Volume is set Increase volume. to minimum. Radio, no sound. Power is not on. Press the Power button to turn the power on. -
Page 20: Specifications
NUMbER(S) ON PAGES 4 AND 5, THEN CONTACT OUR PARTS AND ACCESSORIES FULFILLMENT CENTER AT: 1-800-379-8439. Imation Electronic Products 1 Imation Way, Oakdale, MN 55128-3414 USA • memorex.com © Imation Corp. Memorex and the Memorex logo are trademarks of Imation Corp. and its affiliates.
Need help?
Do you have a question about the EMI47103PWHT and is the answer not in the manual?
Questions and answers