
Related Manuals for Creative Cedar Designs Jungle Fun 3201


Summary of Contents for Creative Cedar Designs Jungle Fun 3201
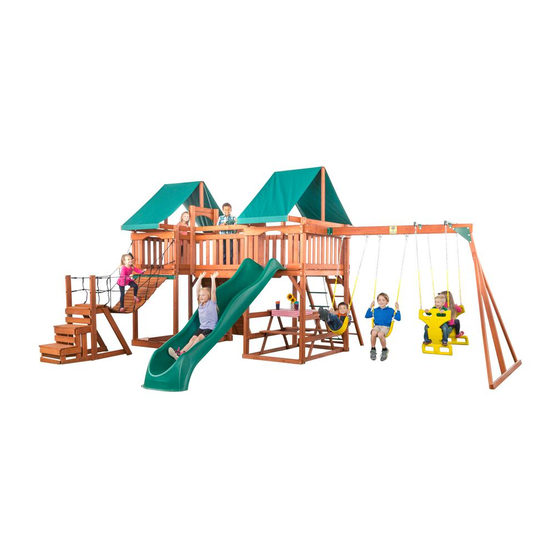
- Page 1 Jungle Fun Model: 3201 Follow the Sequoia plans thru phase 23, then proceed with these instructions. For FSC certified products look for the FSC label SGS-COC-005310 1996 Forest Stewardship Council A.C.
-
Page 2: Table Of Contents
Thank you for purchasing a Creative Cedar Designs Playcenter. We hope it will bring you and your children many years of safe and enjoyable backyard fun. Table of Contents Letter to Customer Positioning Your Playcenter Tools Required for Assembly Helpful Installation Hints... - Page 3 STOP…PLEASE READ!! IF YOU HAVE ANY QUESTION OR ARE MISSING A PART, PLEASE DO NOT CONTACT THE RETAILER THAT YOU PURCHASED THIS PRODUCT FROM. PLEASE VISIT www.creativecedardesigns.com OR CONTACT US DIRECTLY AT OUR OFFICE, 1-888-363-4967 WE WILL ANSWER YOUR QUESTIONS, OR HELP WITH WHAT YOU NEED. For more efficient service, please log onto our website at www.creativecedardesigns.com...
- Page 4 Creative Cedar Designs equipment is recommended for use by children 3 to 10 years of age. Creative Cedar Designs structures are not intended for public use. Creative Cedar Designs does not warranty any of its residential structures subjected to commercial use.
-
Page 5: Positioning Your Playcenter
The instructions and owner’s manual for your new Playcenter should be read in its entirety before assembly, to minimize problems and safety issues. We recommend reading the owner’s manual thoroughly after you have identified all of the parts for your Playcenter as discussed in the Helpful Installations Hints section below. -
Page 6: Helpful Installation Hints
8. Swing hangers should be buried past the threads, so that the loop is against the swing beam. Creative Cedar Designs is not responsible for incorrect installations of swing hangers. Failure to properly install swing hangers may cause severe injury. -
Page 7: Suggested Playground Surfacing
Suggested Playground Surfacing Playground equipment should never be placed on hard surfaces such as concrete or asphalt. Do not install loose fill surfacing over hard surfaces such as concrete or asphalt. Shredded bark mulch, wood chips, fine sand and fine gravel, are added as shock absorbing materials after assembly. -
Page 8: Operating Instructions
Operating Instructions: NOTE: Your children’s safety is our #1 concern. Observing the following statements and warnings reduces the likelihood of serious or fatal injury. Please review these safety rules regularly with your children. 1. This Playcenter is designed for the use of 6 occupants, per tower, who have a combined weight not exceeding 420 pounds, per tower, 4 occupants on the bridge, who have a combined weight of 280 pounds, 4 occupants on the swing area, who have a combined weight of 350 pounds, for a total unit cpacity of 20 occupants who have a combined total weight of 1,470 pounds. -
Page 9: Maintenance Instructions
Ropes, cables and chains should be removed and replaced if excessive wear is found. Contact Creative Cedar Designs for replacement parts. 6. For rusted areas on metallic members such as monkey bars, hand supports, brackets, etc., sand and repaint, using a non lead-based paint meeting the requirements of Title 16 CRF Part 1303. - Page 10 APPENDIX A Information on Playground Surfacing Materials: The following information is from the United States Consumer Product Safety Commission’s Information Sheet for playground surfacing material Also see the following website for additional information: https://www.cpsc.gov/PageFiles/122146/324.pdf X3. CONSUMER INFORMATION SHEET FOR PLAYGROUND SURFACING MATERIALS X3.1 The U.S.
-
Page 11: Assembly Instructions
Assembly Instructions Jungle Fun Swing Set Assembly Instructions WARNING: CHOKING HAZARD Unassembled parts may be a choking hazard to children 3 years and younger. The plastic bags that contain the hardware may present a choking hazard to small children. Please keep these bags and all plastic bags out of the reach of children. - Page 12 Basic Setup Dimensions Place the set on level ground, not less than 6ft (1.83M) from any structure or obstruction such as a fence, garage, house, overhanging branches, laundry lines or electrical wires. 33'-3" [10.1M] Important Assembly Notes Fig. i 1) While assembling unit, take time before and after each phase to make sure Fort is level.
- Page 13 Parts Identification Wood Components Wooden Bridge (6) 5/8 X 1 X 18 BRIDGE CLEAT - PF3783 (1) 1 X 5 X 27 1/2 BRIDGE-D - PF3823 (2) 1 3/8 X 3 3/8 X 12 1/2 UPPER STEP JOIST - PF3803 (1) 1 X 5 X 28 BRIDGE-C - PF3824 (4) 1X 3 1/2 X 13 1/2...
- Page 14 Parts Identification Wooden Bridge Accessories (1) BRIDGE SUPPORT STRAP M301 (2) ROPE RAILING - Q (4) GREEN L-BRACKET (1) BRIDGE CABLE - O1 M002 (26) BRIDGE SPACERS (8) CABLE CLAMP - O2 (4) FENCE STAPLE - H P301...
- Page 15 Hardware Indentification Wooden Bridge Fastener 5/16" x 4 5/16" Eye Bolt 5/16EB4 5/16 1 1/4" Deck Screws #8DS1 1/4 A1 (22) J2 (2) 2" Deck Screws #8DS2 A2 (81) 5/16” x 1 1/2" Lag Bolt 2 1/2" Deck Screws #8DS 2 1/2 L (8) A3 (56) 5/16”...
- Page 16 Phase 24: BRIDGE ASSEMBLY OVERVIEW WZ 2359 PF 3826 PF 3828 PF 3825 PF 3824 PF 3823 M 301 PF 3822 PF 3836 PF 3821 PF 3783 PF 3820 PF 3816 TITLE THICKNESS WIDTH LENGTH PF 3829 .625 PF 3783 5/8 x 1 x 18 BRIDGE CLEAT PF 3819 PF 3803...
- Page 17 SLIDE Phase Hardware Phase 25: ATTACHMENT 1” Truss Head Screw S (4) Phase Parts LARGE WAVE SLIDE (GREEN) POSITION SLIDE CENTERED IN AN OPENING AND 4” INTO THE TOWER AS SHOWN. INSTALL (4) TRUSS SCREWS PER SLIDE...
- Page 18 Phase Hardware Phase Hardware BRIDGE ASSEMBLY Phase 26: 2" Deck Screws A2 (58) 2 1/2" Deck Screws A3 (8) Phase Parts (4) 1 X 3 1/2 X 13 1/2 LOWER STEP JOIST - PF3805 (3) 1 X 3 3/8 X 24 LOWER STEP FRONT - PF3830 (1) 1 X 3 1/2 X 22 BASE-SHORT - PF3806 (2) 1 3/8 X 3 3/8 X 10 1/4 LOWER STEP SUPPORT - PF3834 (2) 1 X 3 1/2 X 32 1/2 BASE LONG - PF3808...
- Page 19 Phase Hardware Phase Hardware BRIDGE ASSEMBLY Phase 27: 2" Deck Screws 2-1/2" Deck Screws A2 (18) A3 (32) Phase Parts (2) 1 1/2 X 3 1/2 X 72 ROPE RAILING SUPPORT - PF3836 (2) 1 3/8 X 3 3/8 X12 1/2 UPPER STEP JOIST - PF3803 (2) 1 X 3 1/2 X 27 STEP FRONT - PF3807 (2) 1 1/2 X 3 1/2 X 40 ANGLED STEP SUPPORT - PF3835 (3) 1 X 3 5/8 X 24 STEPS- PF3815...
- Page 20 Phase Hardware Phase Hardware Phase 28: BRIDGE ASSEMBLY 2 1/2" Deck Screws A3 (8) Phase Parts (2) 1 X 5 X 24 STEPS- PF3829 (8) 2 1/2” STEP 1: DECK SCREWS WARNING: 1/2” GAP DO NOT ALLOW ANY CHILDREN ON THE BRIDGE UNTIL IT IS ANCHORED PF 3829...
- Page 21 Phase 29: BRIDGE ASSEMBLY 5/16" x 3 1/2” Lag Screw 5/16LS31/2 R (4) Phase Parts (1) 3 5/16 X 3 5/16 X 39 1/8 BRIDGE SUPPORT - WZ3259 5/16" Flat K1 (4) Washer 5/16FW STEP 1: 1. MARK TWO HOLES ON UPRIGHTS AS SHOWN 2.
- Page 22 Phase Hardware Phase Hardware BRIDGE ASSEMBLY Phase 30: 5/16” x 1 1/2” Lag Bolt 1 1/4" Deck Screws Green L-Bracket A1 (4) L (8) M002 (4) 5/16” SPLIT Phase Parts WASHER M (4) (1) 1/16 x 2-3/4 x 44-11/16 BRIDGE SUPPORT STRAP 5/16“...
- Page 23 BRIDGE ASSEMBLY Phase 31: 5/16" x 6” DRILL BIT LD203 UPRIGHT 80-1/16” 65-1/16” Bridge Tower Prep: Rope Railing Step 1: Mark hole locations, centered on uprights as shown Step 2: Drill 5/16” holes at locations...
- Page 24 Phase Hardware Phase Hardware Phase 32: BRIDGE ASSEMBLY 5/16" Lock Nut G1 (8) 5/16" Flat Washer 5/16" Nut Cap K1 (8) P (8) (2) ROPE RAILING STEP 2: 12” SPACE STEP 1: 10” SPACE Rope Railing Eye Bolt 5/16" Washer 5/16"Nut Cap UPRIGHT 5/16"...
- Page 25 Phase 33: BRIDGE ASSEMBLY Phase Hardware Phase Hardware (1) 1 X 5 X 29 BRIDGE - A -PF3826 (1) 1 X 5 X 27 BRIDGE-E - PF3822 (1) 1 X 5 X 25 BRIDGE-I - PF3818 (1) 1 X 5 X 26 1/2 BRIDGE-F - PF3821 (1) 1 X 5 X 28 1/2 BRIDGE-B - PF3825...
- Page 26 BRIDGE ASSEMBLY Phase 34: Phase Hardware Phase Hardware A2 (5) 2" Deck Screws Tower Side STEP 1: STEP 2: Bridge Platform Side Tower Side STEP 4: 2" Deck Screws 1” STEP 3: Assemble Bridge: Step 1: Route cable through left side of Bridge Boards as described in previous page. Step 2: Thread cable through Platform down through the top, across to the opposite side.
- Page 27 Phase Hardware Phase Hardware BRIDGE ASSEMBLY Phase 35: A1 (18) 1-1/4” Deck Screws H (2) Fence Staple Phase Parts (6) 5/8 X 1 X 18 BRIDGE CLEAT -PF3783 STEP 1: (2) FENCE STAPLES Under Bridge Platform View STEP 2: (6) PF 3783 5/8”...
- Page 28 BRIDGE ASSEMBLY Phase 36: STEP 1 Bridge Cable LM211 LD203 WZ3259 Bridge Bridge Cable Spacers M301 Bridge Spacers Assemble Bridge: Secure Cable and Attach tower: 1. Thread Bridge Cable thru M301 Bracket & WZ3259 Support as shown in STEP1. NOTE: Deck boards are removed for clarity...
- Page 29 Phase Hardware Phase Hardware BRIDGE ASSEMBLY Phase 37: Fence Staple Cable Clamp H (2) O2 (2) STEP 1: Fence Staple LM219 O1 Wire rope O2 Cable Clamp M301 Cable Clamp LD203 STEP 2: STEP 3: LM226 WALL RAIL LM219 END FLOOR 1-1/4”...
- Page 30 BRIDGE ASSEMBLY Phase 38: Phase Hardware Phase Hardware 5/16" Flat Washer 5/16" x 4 5/16" Eye Bolt 5/16" Lock Nut Cable Clamp J2 (2) G1 (2) K1 (2) O2 (6) 5/16" Nut Cap P (2) M301 BRIDGE 4 3/8” EYE BOLT SUPPORT STRAP 1-11/16”...
- Page 31 Phase Parts Phase Hardware ANCHORING Phase 39: (8) FLAT WASHER (8) 1-1/2’’ LAG BOLT (2) ANCHOR 4-PACK w/ HDW BP001-B STAKE STAKE STAKE STAKE STAKE STAKE FLAT WASHER 1-1/2’’ LAG BOLT METAL STRAP ANCHOR STAKE STAKE NOTE: Failure to use stakes can cause injury & void the warranty. FINAL STEPS - Double check and make sure every bolt, screw and nut is tight.
-
Page 32: Limited Warranty
LIMITED WARRANTY Creative Cedar Design (CCD) offers many fun, interactive, and safe play sets. We only guarantee the original purchaser that this product is free of defects for 30 days from the date of purchase. The product registration card, along with a dated purchase receipt, must be returned to CCD within 30 days. Within a 30 day period, CCD will repair or replace, at our option, defective merchandise free of charge, provided that the defective part is a manufacturer’s defect and not seasonal check. -
Page 33: Warranty Claim Procedure
3. Photos of warranted parts and of the entire play system. If any of the above steps are not completed, there may be delays in the completion of your claim, or possibly warranty cancellation. Mail information to: Creative Cedar Designs 2700 Riverside Dr Chattanooga, TN 37406 Or email at custservice@creativecedardesigns.com... - Page 34 PRODUCT REGISTRATION CARD Please complete this Product Registration Card along with a copy of the receipt and return to Creative Cedar Designs, within 30 days of original purchase in order to validate time of purchase for warranty. Or register at www.creativecedardesigns.com Name:________________________________________________________________ Address: _______________________________________________________________ City, State, Zip Code: ___________________________________________________...
- Page 35 Please complete this Product Registration Card along with a copy of the receipt and return to Creative Cedar Designs, within 30 days of original purchase in order to validate time of purchase for warranty. FOLD HERE Place Stamp Here Creative Cedar Designs 2700 Riverside Dr. Chattanooga, TN 37406...
Need help?
Do you have a question about the Jungle Fun 3201 and is the answer not in the manual?
Questions and answers