Table of Contents
Advertisement
Quick Links
Advertisement
Table of Contents

Related Manuals for Ego Power+ LM2000


Summary of Contents for Ego Power+ LM2000
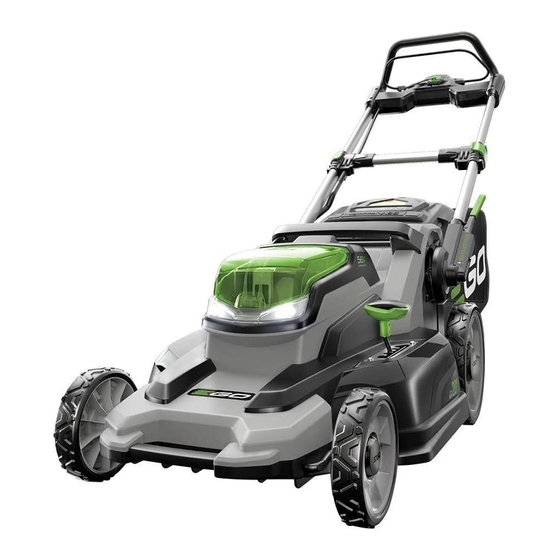
- Page 1 Operating manual 56-VOLT LITHIUM-ION cOrdLess MOwer español p. 33 MOdeL NUMBer LM2000 WARNING: To reduce the risk of injury, the user must read and understand the Operator’s Manual before using this product. Save these instructions for future reference.
-
Page 2: Specifications
3300 rpm Cutting Height 1.2” to 3.5” (30mm to 90mm) Cutting Height positions Deck Size 20” (510mm) grass Bag Volume 1.7 Bushel/60l mower Weight (Without battery pack; with grass bag) 56.2lb. (25.5 kg) 56-VOlt litHium-iOn COrDleSS laWn mOWer — lm2000... -
Page 3: List Of Parts
if any parts are damaged or missing, please return the mower to the place of purchase. list of Parts part name QuantitY lawn mower grass bag grass bag frame mulching insert Side discharge chute Safety key Operator’s manual 56-VOlt litHium-iOn COrDleSS laWn mOWer — lm2000... - Page 4 WARNING: the safe use of this product requires an understanding of the information on the tool and in this operator’s manual, as well as knowledge of the project you are attempting. Before use of this product, familiarize yourself with all operating features and safety rules. 56-VOlt litHium-iOn COrDleSS laWn mOWer — lm2000...
- Page 5 Led wOrK LIGHTs the leD work lights are located in the front of the mower. this feature provides extra light for increased visibility. sprING-LOaded cUTTING HeIGHT adJUsTMeNT LeVer One handed cutting height adjustment 56-VOlt litHium-iOn COrDleSS laWn mOWer — lm2000...
-
Page 6: Operation
3. assemble the top clips to the frame, as shown in Fig. 3, then assemble the two side clips. assemble the bottom clip last. 4. the completely assembled grass bag is shown in Fig. 4. Clips 56-VOlt litHium-iOn COrDleSS laWn mOWer — lm2000... -
Page 7: Operating Positions
Operating position. Fully extend the side rails and securely close the two handle-locking clamps (Fig. 7 & 8). indication line 56-VOlt litHium-iOn COrDleSS laWn mOWer — lm2000... - Page 8 4. release the discharge door and make sure it rests firmly against the mulching insert. NOTICE: the mulching insert must be removed in order to install and use the grass bag and must be re-installed when the grass bag is removed. 56-VOlt litHium-iOn COrDleSS laWn mOWer — lm2000...
- Page 9 to lower the blade height, grasp the height adjustment Height adjustment lever lever outwards and move it toward the front of the mower and engage the lever in the desired cutting height position on the mower deck. 56-VOlt litHium-iOn COrDleSS laWn mOWer — lm2000...
- Page 10 DANGER: rotating blades can cause serious injury. to prevent serious injury, remove the safety key when the mower is unattended, or when adjusting, cleaning, servicing, transporting, lifting, or storing the mower. 56-VOlt litHium-iOn COrDleSS laWn mOWer — lm2000...
- Page 11 Once the bail switch is released, it will activate the “automatic Braking mechanism. ” the motor has an electric brake; the mower blade will stop rotating in 3 seconds. Bail Switch (released position) 56-VOlt litHium-iOn COrDleSS laWn mOWer — lm2000...
- Page 12 the blinking red light indicates that the battery pack is depleted completely. in this situation, the circuit will shut off the mower to protect the battery pack from over discharging. power indicator Switch Button for leD Work light 56-VOlt litHium-iOn COrDleSS laWn mOWer — lm2000...
-
Page 13: Mowing Tips
For a healthy lawn, cut off only one-third or less of the total length of the grass. the average lawn should be approximately 1-1/2 to 2 inches long during cool months, and between 2 to 3-1/4 inches long during hot months. if there is growth, the lawn should be cut in the fall. 56-VOlt litHium-iOn COrDleSS laWn mOWer — lm2000... -
Page 14: Mulching Tips
For mulching extremely thick or tall grass, it is advisable to first cut at a high cut-height setting, and then re-cut to the final cut height. Otherwise, make narrower cuts and mow slowly. alWaYS maKe Sure tHe BlaDe iS SHarp. 56-VOlt litHium-iOn COrDleSS laWn mOWer — lm2000... -
Page 15: Cleaning The Mower
Washer Bolt when performing any maintenance on the mower blade. always remove the safety key and battery pack when servicing or transporting the mower, 56-VOlt litHium-iOn COrDleSS laWn mOWer — lm2000... - Page 16 9/16 inch (14mm) torque wrench (not included) to tighten the bolt clockwise. the recommended torque for the blade bolt is 36-43 ft-lb (49-59nm) (Fig. 21). round pin and Hole Semi-round pin and Hole 56-VOlt litHium-iOn COrDleSS laWn mOWer — lm2000...
- Page 17 (Fig. 26). 56-VOlt litHium-iOn COrDleSS laWn mOWer — lm2000...
- Page 18 2. turn the mower on its side. Shield 3. remove the four screws with a phillips screwdriver; remove the press bar (Fig. 28). 4. replace with a new trailing shield and reattach it with the press bar and screws. 56-VOlt litHium-iOn COrDleSS laWn mOWer — lm2000...
-
Page 19: Storing The Mower
WARNING: if the mower to tips over from the upright position, mower damage or personal injury may result. always keep the mower stable and out of the reach of children when it is in the upright position. if possible, lay it flat for storage. 56-VOlt litHium-iOn COrDleSS laWn mOWer — lm2000... -
Page 20: Troubleshooting
Contact the service center. the handle locking clamps can the side rails are not fully extended. Fully extend the side rails, then lock the clamps. not be closed in position. 56-VOlt litHium-iOn COrDleSS laWn mOWer — lm2000... -
Page 21: Warranty
For warranty service, please contact egO customer service toll-free at 1-855-eGO-5656. When requesting warranty service, you must present the original dated sales receipt. an authorized service center will be selected to repair the product according to the stated warranty terms. 56-VOlt litHium-iOn COrDleSS laWn mOWer — lm2000... -
Page 22: Additional Limitations
For customer service contact us toll-free at: 1-855-eGO-5656 or eGOpOwerpLUs.cOM egO Customer Service, 120 ionia Street SW / Suite 102 grand rapids, mi 49503 56-VOlt litHium-iOn COrDleSS laWn mOWer — lm2000... -
Page 23: Parts List
Parts list 56V LITHIUM-ION cOrdLess LawN MOwer MOdeL NUMBer LM2000 the model number will be found on the nameplate attached to the rear discharge door of the lawn mower. always mention the model number when ordering parts for this tool. - Page 24 SERVICE WARNING: Grass bag components, the discharge cover, side discharge chute, mulching insert and trailing shield are subject to wear and damage, which could expose moving parts or allow objects to be thrown and could increase the risk of injury. For safety protection, frequently check all components and replace damaged components immediately with identical replacement parts, listed in this manual.
- Page 25 INTRODUCTION Congratulations on your selection of a new generation of 56V Lithium-ion powered lawn mower. It has been designed, engineered and manufactured to give you the best possible dependability and performance. Should you experience any problem you cannot easily remedy, please contact EGO customer service center 1-855-EGO-5656.
- Page 26 Mower Weight (Without battery pack; 55.34 lb. (25.1Kg) 62.61 lb. (28.4Kg) with mulching insert) APPROXIMATE RUNNING TIME With BA2800 56V Battery 5.0Ah With BA4200 56V Battery 7.5Ah Light load 45 min. 60 min. Medium load 30 min. 45 min. Heavy load 20 min. 30 min.
- Page 27 DESCRIPTION Safety Button Handle Self-Propel Trigger Bail switch (Switch Lever) Self-Propel Speed-Control Lever Handle-Locking Clamp Side Rail Rear-Discharge Door Handle-Locking Clamp Rear Handle Quick-Adjust Lever Battery-Pack Cover Grass Bag LED Headlights Cutting-Height Adjustment Lever Rear Wheel Mower Deck Front Handle Front Wheel Switch Button for Support for...
-
Page 28: Electric Brake
Side Discharge Chute Battery-Release (available separately) Button Mulching Insert WARNING: The safe use of this product requires an understanding of the information on the tool and in this operator’s manual, as well as knowledge of the project you are attempting. Before use of this product, familiarize yourself with all operating features and safety rules. - Page 29 QUICK-ADJUST LEVER Locks/unlocks the handle position when adjusting the angle of the mower handle: 1. Locked Storage Position 2. Grass Bag Attachment/Removal Position 3. Upper Operating Position 4. Middle Operating Position 5. Lower Operating Position TRAILING SHIELD & REAR DISCHARGE DOOR The trailing shield is designed to minimize stones or other objects being thrown backward by the mower blade.
- Page 30 ADJUSTING THE FOLDABLE HANDLE WARNING: Do not attempt to start the mower until the handle has been locked at one of the three preset operating positions. 1. LOCKED STORAGE POSITION: Your mower is shipped with the handle in the compact, locked position (Fig. 5). Press the Quick- Adjust Lever 2.
- Page 31 ATTACHING/REMOVING THE GRASS BAG WARNING: Do not at any time make any adjustment to the lawn mower without first stopping the motor, removing the battery pack and waiting for the blade to stop rotating. Rear Discharge NOTICE: Remove the mulching insert or side discharge chute Door before attaching the grass bag on the mower;...
- Page 32 ATTACHING/REMOVING THE SIDE DISCHARGE CHUTE (available separately) (Fig. 11a & b) WARNING: Do not at any time make any adjustment to the lawn mower without first stopping the motor, removing the battery pack and waiting for the blade to stop rotating. 1.
- Page 33 TO ATTACH/DETACH THE BATTERY PACK (Fig. 13) Battery-Pack Cover CHARGE BEFORE FIRST USE. Battery-Release Button WARNING: If any parts are broken or missing, do not attempt to attach the battery pack to the mower or operate the mower until the broken or missing parts are replaced. Failure to do so could result in serious injury.
- Page 34 STARTING/STOPPING THE MOWER (Fig. 14, 15 & 16) WARNING: The operation of any lawn mower can result in foreign objects being thrown into your or others’ eyes, which can damage eyes severely. Always wear safety glasses while operating the mower or while performing any adjustments or repairs on the mower.
- Page 35 LED HEADLIGHTS (Fig. 18) The LED headlights are located on the front of the battery compartment. To turn on the lights, press the switch button (Fig. 19). The headlights provide bright light in front of the mower. LED Headlights To turn off the headlights, press the switch button again. POWER INDICATOR ON THE MOWER (Fig.
- Page 36 MOWER OVERLOAD PROTECTION To prevent overload conditions, do not try to remove too much grass at one time. Slow down your cutting pace or raise the cut height. Your mower has built-in overload circuit protection. When the mower is overloaded, the motor will stop and the power indicator on the mower will flash orange.
- Page 37 ◾ ◾ For effective mulching, do not cut wet grass; it tends to stick to the underside of the deck, preventing the proper mulching of grass clippings. The best time to mow grass is in the late afternoon, when the grass is dry and the newly cut area will not be exposed to direct sunlight.
-
Page 38: Removing The Blade
MAINTENANCE WARNING: To avoid serious personal injury, always remove the battery pack from the mower before cleaning or performing any maintenance. WARNING: When servicing, use only identical replacement parts. Use of any other parts may create a hazard or cause product damage. To ensure safety and reliability, all repairs should be performed by a qualified service technician. CLEANING THE MOWER WARNING: Always remove the battery pack when servicing or transporting the mower. - Page 39 6. While wearing protective gloves, remove the bolt, outer flange and the blade (Fig. 24). INSTALLING THE BLADE WARNING: Always protect your hands by wearing heavy Inner flange gloves or wrapping the cutting edges with rags or other materials when performing any maintenance on the mower blade. Always remove the battery pack when servicing or transporting Blade the mower.
-
Page 40: Sharpening The Blade
3. While wearing protective gloves, position the blade on the inner flange with the surface stating “THIS SIDE FACING GRASS” facing toward the outside (Fig. 27). 4. Align the outer flange with the shaft and assemble it in place. 5. Mount the bolt into the shaft and turn it clockwise by hand to pre-tighten it. - Page 41 SHARPING FREQUENCY Sharpening the blade twice during a mowing season is usually sufficient under normal circumstances. Sand causes the blade to dull quickly; if your lawn has sandy soil, more frequent sharpening may be required. WHEN SHARPENING THE BLADE: ◾ ◾ Make sure that the blade remains balanced.
- Page 42 LUBRICATION Lubricate with light oil as directed below at least once each season. Spring ◾ ◾ Periodically lubricate the spring Pivot and pivot pin in the quick-adjust Torsion Spring lever, the torsion spring and pivot of the rear-discharge door with light oil to prevent rust (Fig. Pivot Pin 32a &...
- Page 43 REPLACING THE WHEELS (Fig. 33a, 33b & 33c) WARNING: Always remove the battery pack when servicing or transporting the mower. Dust Cover 1. Turn the mower on its side with the upper surface against Bolt a wall. 2. Use a flat blade screwdriver to pry the dust cover away from the wheel.
- Page 44 REPLACING THE TRAILING SHIELD WARNING: Always remove the battery pack when servicing or transporting the mower. WARNING: Never operate the mower unless the trailing Wheel Cover shield is in place and working. Never operate the mower with Wheel Axle Locking Screw damaged safety devices.
- Page 45 7. Replace with a new trailing shield and attach it with the two Dust Cover locking screws and flat washers. 8. Re-install the rear wheel covers (LM2100SP) and rear Bolt wheels; be sure to replace the parts in the exact order in Rear Wheel which they were removed (Fig.
- Page 46 STORING THE MOWER The following steps should be taken in order to prepare the lawn mower for storage. 1. Remove the battery pack from the mower and store it at room temperature in a dry location. 2. Clean the mower as described earlier in the maintenance section. 3.
- Page 47 TROUBLESHOOTING WARNING: Always remove the battery pack when servicing or transporting the mower. Always protect your hands by wearing heavy gloves or wrapping the cutting edges with rags or other materials when performing any maintenance on the mower blade. Problem Cause Solution ◾...
- Page 48 Problem Cause Solution ◾ ◾ ◾ ◾ The mower does not Wet grass clippings are sticking to the Wait until the grass dries before mulch properly underside of the deck. mowing. ◾ ◾ ◾ ◾ The mower is set to cut too much grass Raise the deck to a higher cutting at once.
- Page 49 WARRANTY EGO WARRANTY POLICY 5 year limited warranty on EGO outdoor power equipment and 3 year limited warranty on EGO Power+ System battery packs and chargers. Please contact EGO Customer Service Toll-Free at 1-855-EGO-5656 any time you have questions or warranty claims. LIMITED SERVICE WARRANTY FOR FIVE YEARS from the date of original retail purchase, this EGO product is warranted against defects in material or workmanship.
- Page 50 PARTS LIST 56V LITHIUM-ION CORDLESS LAWN MOWER MODEL NUMBER LM2100SP/LM2100. The Model Number will be found on the Nameplate attached to the rear-discharge door of the lawn mower. Always mention the Model Number when ordering parts for this tool. EXPLODED DRAWING FOR LM2100SP PARTS LIST FOR LM2100SP Part Number Part Name...
- Page 51 3128057000 Gear 5620040000 Screw 5650007000 Spring Washer 3127923000 Wheel Cover 5650453000 Wave Washer 5620065000 Screw 3321478000 Height-Adjusting Lever 3126769000 Front Hubcap 2823662000 Front Wheel Assembly 3705938000 Blade 5640226000 Flange Bolt 5650510000 Outer Flange 3520852000 Inner Flange 3127847000 2823714000 Handle-Locking Clamp Set EXPLODED DRAWING FOR LM2100 56-VOLT LITHIUM-ION CORDLESS LAWN MOWER —...
- Page 52 PARTS LIST FOR LM2100 Part Number Part Name Quantity 3800109000 Grass Bag 3705442000 Bag Frame 3127911000 Side Discharge Chute 3127924000 Mulching Insert 5610042000 Tapping Screw 5650004000 Plain Washer 3126391000 Trailing Shield 3126765000 Rear Hubcap 5640010000 Hexagon Flange Bolt 2824279000 Rear Wheel Assembly 5650453000 Wave Washer 5620065000...
Need help?
Do you have a question about the LM2000 and is the answer not in the manual?
Questions and answers