Bella PRO Series Instruction Manual
Airpro cook & fry with optipot technology
Hide thumbs
Also See for PRO Series:
- User manual ,
- Instruction manual (44 pages) ,
- Instruction manual (20 pages)
Table of Contents
Advertisement
Advertisement
Table of Contents

Subscribe to Our Youtube Channel
Related Manuals for Bella PRO Series


Summary of Contents for Bella PRO Series
- Page 1 AIRPRO COOK & FRY WITH OPTIPOT TECHNOLOGY Instruction Manual...
- Page 2 Thank You for your purchase Register & sign up for special announcements and trendy recipes! Tell us what you think! Rate, review or ask us a question. @bellahousewares.com #getinspired BellaLife BellaLifestyle...
-
Page 3: Table Of Contents
TABLE OF CONTENTS Important Safeguards ......................5-7 Additional Important Safeguards .................8-10 Notes on the Plug ......................10 Notes on the Cord ......................10 Plasticizer Warning ......................10 Electric Power ........................10 Notes on Pressure Release Valve ..................11 Notes on Safety Locking Lid .................... 11 Getting To Know Your AirPro .................. - Page 4 Pressure Cook Functions .................... 20-25 How to Pressure Cook .......................20 How to Slow Cook ......................21 How to Steam ........................22 How to Use the Yogurt Function..................23 How to Cook Rice ......................24 How to Sear/Sauté ......................25 Air Fry Functions......................26-28 How to Air Fry ......................26 How to Bake / Roast ....................27 How to Broil .........................27 How to Dehydrate ......................28...
-
Page 5: Important Safeguards
IMPORTANT SAFEGUARDS When using electrical appliances, basic safety precautions should always be followed, including the following: READ ALL INSTRUCTIONS. 2. Do not touch hot surfaces. Use handles or knobs. 3. To protect against electrical shock, do not immerse cord, plugs or appliance in water or other liquid. - Page 6 12. Extreme caution must be used when moving an appliance containing hot oil or other hot liquids. CAUTION: To protect against damage or electric shock, do not cook in the base unit. Cook only in the cooking pot provided. 13. Use extreme caution when removing tray or disposing of hot grease. 14.
- Page 7 25. Always ensure the appliance is properly assembled before use. 26. This appliance cooks under pressure. Improper use may result in scalding injury. Make certain unit is properly closed before operating. 27. When using the pressure plate, always ensure pressure plate is installed and lid is properly closed before operating.
-
Page 8: Additional Important Safeguards
ADDITIONAL IMPORTANT SAFEGUARDS CAUTION, HOT SURFACES: This appliance generates heat and escaping steam during use. Proper precautions must be taken to prevent the risk of burns, fires or other injury to persons or damage to property. A person who has not read and understood all operating and safety instructions is not qualified to operate this appliance. - Page 9 8. Never use the cooking pot on a gas or electric cook top or on an open flame. 9. Always keep your hands and face away from the pressure release valve, when releasing the pressure. 10. Never attempt to open the lid while cooking, or before the pressure has dropped.
-
Page 10: Notes On The Plug
20. Do not use the appliance near or below combustible materials, e.g: curtains. 21. To open rotate the knob on the lid counterclockwise to the ‘unlock’ position. 22. Never use sharp objects inside the cooking pot as this will damage the non-stick coating. 23. Do not use the unit for deep frying. NOTES ON THE PLUG This appliance has a grounded 3-prong plug. -
Page 11: Notes On Pressure Release Valve
NOTES ON PRESSURE RELEASE VALVE • The pressure release valve is used to regulate pressure inside the unit while cooking. Small amounts of steam may escape during cooking, this is normal. • Never operate the unit under cabinets. When releasing steam, make sure the area several feet above the pressure release valve is clear from all lighting fixtures, furniture or cabinetry. -
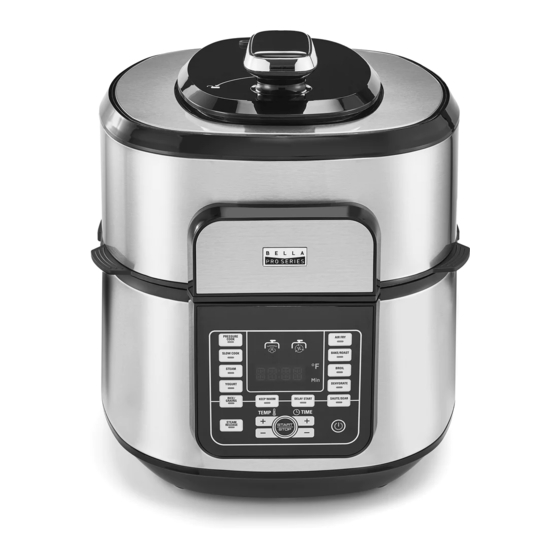
Page 12: Getting To Know Your Airpro
Getting To Know Your AirPro Cook & Fry Product may vary slightly from illustration Pressure plate Air fry grate Steam rack Air fry basket Plate handle Airflow stand Control panel Non-stick cooking pot Condensation tray... -
Page 13: Lid Inserts
Lid Inserts The AirPro unit comes with two different lid inserts, the Pressure Plate and the Air Fry Grate. The two inserts allow users to pressure cook, air fry, and more in the same unit by interchanging the plates. Air Fry Grate (A) The Air Fry Grate will need to be installed for access to these cooking functions: •... -
Page 14: Control Panel
Control Panel PRESSURE AIR FRY COOK SLOW COOK BAKE/ROAST °F STEAM BROIL YOGURT DEHYDRATE RICE/ KEEP WARM DELAY START SAUTE/SEAR GRAINS TIME TEMP STEAM START RELEASE STOP... -
Page 15: Control Panel
Control Panel Power On/Off Button Press this button to power the unit on and off. Once plugged in, the power button will illuminate in red. Once the button is pressed, the light will switch to white. Pressure Cooker Icon This icon will illuminate automatically once the pressure plate is securely inserted and the unit is ready for pressure cooking functions. - Page 16 Keep Warm Function – once cooking is complete, the unit will automatically turn KEEP WARM to Keep Warm. Delay Start Function - Press this button to delay cooking until your desired start time DELAY START (range: 30mins – 12hrs). Press desired cook function first, then press the delay timer button, the light will flicker, once this happens adjust to the desired delayed cook and press START to set.
-
Page 17: Before Using For The First Time
Before Using for the First Time • Remove the unit and all accessories from their packaging. Place the unit and the accessories on a sturdy flat surface. • Remove all promotional stickers from the unit and accessories. • Wash all of the removable parts (cooking pot, air fry basket, airflow stand, steam rack, pressure plate, air fry grate, plate handle, and condensation tray) in warm soapy water with a soft cloth. -
Page 18: Removing The Pressure Plate Insert Or Air Fry Grate
Removing the Pressure Plate Insert or Air Fry Grate Where possible, leave the hot pressure plate insert or air fry grate in place until the unit has completely cooled. For recipes where switching the plate or insert is needed during the cooking process, always use the included plate handle. -
Page 19: Pressure Cook Functions
Pressure Cook Functions How to Pressure Cook Open the top lid by turning the knob counter clock wise. Ensure the air fry grate has been removed. Always use the plate handle. Insert the pressure plate. Place the non-stick cooking pot inside the unit and place food inside the cooking pot. Close the lid and lock by turning clock wise. -
Page 20: How To Slow Cook
How to Slow Cook Open the top lid by turning the knob counter clock wise. Ensure the air fry grate has been removed. Always use the plate handle. Insert the pressure plate. Place the non-stick cooking pot inside the unit and place food inside the cooking pot. Close the lid and lock by turning clock wise. -
Page 21: How To Steam
How to Steam Open the top lid by turning the knob counter clock wise. Ensure the air fry grate has been removed. Always use the plate handle. Insert the pressure plate. Place the non-stick cooking pot inside the unit. Arrange the food on the steam rack provided. Never fill the cooking pot more than 2/3 full. -
Page 22: How To Use The Yogurt Function
How to Use the Yogurt Function Open the top lid by turning the knob counter clock wise. Ensure the air fry grate has been removed. Always use the plate handle. Insert the pressure plate. Place the non-stick cooking pot inside the unit and place food inside the cooking pot. Close the lid and lock by turning clock wise. -
Page 23: How To Cook Rice
How to Cook Rice Open the top lid by turning the knob counter clock wise. Ensure the air fry grate has been removed. Always use the plate handle. Insert the pressure plate. Place the non-stick cooking pot inside the unit. Place uncooked rice and liquid inside the cooking pot. -
Page 24: How To Sear/Sauté
How to Sear/Sauté Open the top lid by turning the knob counter clock wise. Ensure the air fry grate has been removed. Always use the plate handle if plates are hot. Insert the pressure plate. Place the non-stick cooking pot inside the unit. The lid can remain in the open position during when using the Sear/Sauté... -
Page 25: Air Fry Functions
Air Fry Functions How to Air Fry Open the top lid by turning the lid knob counter clock wise. Ensure the pressure plate insert is removed. Always use the plate handle if plates are hot. Insert the air fry grate. Place the non-stick cooking pot inside the unit. -
Page 26: How To Bake / Roast
How to Bake / Roast Open the top lid by turning the lid knob counter clock wise. Ensure the pressure plate insert is removed. Always use the plate handle if plates are hot. Insert the air fry grate. Place the non-stick cooking pot inside the unit. If needed, add the steam rack inside the cooking pot, and arrange food on top of the steam rack. -
Page 27: How To Dehydrate
How to Dehydrate Open the top lid by turning the lid knob counter clock wise. Ensure the pressure plate insert is removed. Always use the plate handle if plates are hot. Insert the air fry grate. Place the non-stick cooking pot inside the unit. Place the air fry basket inside the cooking pot. -
Page 28: Usda Cooking Guidelines
USDA Cooking Guidelines PLEASE NOTE: Cook all food to these minimum internal temperatures as measured with a food thermometer before removing food from the heat source. For reasons of personal preference, consumers may choose to cook food to higher temperatures. This chart is intended as a general guide by the USDA. -
Page 29: Care & Cleaning Instructions
Care & Cleaning Instructions Use a soft damp cloth to wipe clean the base and lid of the unit after every use. Use a small brush or cotton swab if necessary. Never pour any liquid into the base of the unit. Wash the removable parts (cooking pot, air fry basket, airflow stand, steam rack, pressure plate, air fry grate, plate handle, and condensation tray) in warm soapy water with a soft cloth or sponge. -
Page 30: Trouble Shooting
Trouble Shooting The unit is equipped with safety features that will shut the unit down if an abnormal condition is encountered during cooking. An error signal will be displayed on the control panel. Depending on the error, audible beeping may be heard. Once the problem has been identified and corrected, plug in the unit and resume pressure cooking. -
Page 31: Cooking Charts
Cooking charts Dehydrate • Turn food several times during DEHYDRATE for even drying. HERB TEMP TIME HERB TEMP TIME Oregano 135°F 2 – 3 hrs Parsley 135°F 2 – 3 hrs Thyme 135°F 3 – 4 hrs Rosemary 135°F 2 – 3 hrs Tarragon 135°F 3 –... -
Page 32: Steam
DEHYDRATE TEMP TIME Beef Jerky 150°F 5 – 6 hrs 1/2 lb London Broil or Flank CHICKPEAS seasoned 160°F 10 – 12 hrs Canned, rinsed Steam • Add 2 cups water to the cooking pot. • Use steaming rack. VEGETABLES TIME VEGETABLES TIME... -
Page 33: Air Fry
Air fry VEGETABLES TEMP TIME VEGETABLES TEMP TIME Asparagus 400°F 5 – 7 min Broccoli Florets 400°F 15 – 20 min 1 bunch, thin spears 3 – 4 cups Asparagus 400°F 7 – 9 min Brussels Sprouts 375°F 12 – 15 min 1 bunch, thick spears 1 lb Cauliflower Florets... - Page 34 BEEF TEMP TIME BEEF TEMP TIME Hamburgers 360°F 12 – 16 min Steaks 360°F 8 – 12 min 1/4 lb (up to 4) 2 (8 oz) steaks Hot Dogs / Sausages 360°F 10 – 15 min Beef Tenderloin 360°F 16 min 1 lb, rare Meatloaf 360°F...
- Page 35 FROZEN FOODS* TEMP TIME FROZEN FOODS* TEMP TIME Cheese Sticks 350°F 6 – 9 min Chicken Nuggets 360°F 10 – 15 min 12 oz box French Fries thick 400°F 17 – 21 min Fish Sticks 400°F 12 – 18 min 2 cups French Fries thin 400°F...
-
Page 36: Pressure Cook
Pressure cook POULTRY WEIGHT WATER PRESSURE TIME RELEASE Chicken Breasts bone in 2 lbs 1 cup 15 – 20 min Steam release Chicken Breasts boneless 6 small/4 large 1 cup 8 – 13 min Steam 2 lbs release Chicken Breasts boneless, frozen 4 large, 2 lbs 1 cup 20 –... - Page 37 RIBS WEIGHT WATER PRESSURE TIME RELEASE Pork Baby Back cut into thirds 2 1/2 – 3 1/2 lbs 1 cup 18 min Steam AIR FRY 400°F release 15 min Beef Ribs 1 1/2 lbs 1 cup 8 – 10 min Steam BROIL 10 min release...
- Page 38 VEGETABLES QUANTITY WATER PRESSURE TIME RELEASE Beets rinse well, trim tops 8 small or 1/2 cup 15 – 20 min Natural 4 large Peel after cooking Release 10 min Broccoli Florets 2 cups 1/2 cup 1 – 2 min Steam release Brussels Sprouts cut in half 4 cups...
-
Page 39: Legumes
Legumes • All beans, except lentils, should be soaked 8 – 24 hours before cooking. • All beans and legumes use Natural Release for 10 min. then Steam Release. LEGUMES WEIGHT SOAK WATER PRESSURE RELEASE TIME TIME Black Beans 1 lb 8 –... -
Page 40: Warranty
Limited Two-Year Warranty SENSIO Inc. hereby warrants that for The warranty is only valid for the a period of TWO YEARS from the date original retail purchaser from the date of purchase, this product will be free of initial retail purchase and is not from mechanical defects in material transferable. -
Page 41: Warranty
How To Obtain Warranty Service: You must contact Customer Service at Also, include a copy of the original sales our toll-free number: 1-866-832-4843. receipt. Carefully package the tagged A Customer Service Representative product with the sales receipt, and send will attempt to resolve warranty issues it (with shipping and insurance prepaid) over the phone. - Page 42 For customer service questions or comments 1-866-832-4843 bellahousewares.com BELLA Pro Series is a registered trademark of Sensio Inc., Montreal, Canada H3C 4S9. All rights reserved.
Need help?
Do you have a question about the PRO Series and is the answer not in the manual?
Questions and answers