Daikin Sky Air Advance Series Installation Manual
Hide thumbs
Also See for Sky Air Advance Series:
- Installer's reference manual (32 pages) ,
- Installer's reference manual (36 pages) ,
- Installation manual (24 pages)

Related Manuals for Daikin Sky Air Advance Series


Summary of Contents for Daikin Sky Air Advance Series
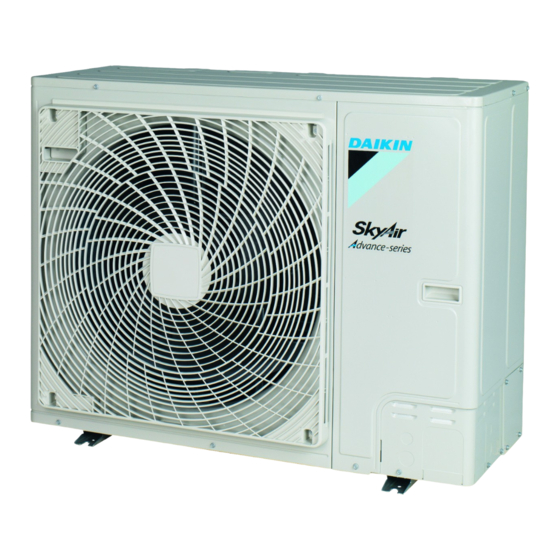
- Page 1 Installation manual Sky Air Advance-series Installation manual RZA200D7Y1B English Sky Air Advance-series RZA250D7Y1B...
- Page 2 (mm) — ≥100 A, B, C — ≥100 ≥100 ≥100 B, E — ≥100 ≥1000 ≤500 A, B, C, E — ≥150 ≥150 ≥150 ≥1000 ≤500 — ≥500 D, E — ≥500 ≥1000 ≤500 >H B, D ≥100 ≥500 ≤H ≥100 ≥500 B, D, E...
- Page 3 2P573424-2B...
- Page 4 2P573424-2B...
-
Page 5: Table Of Contents
4.2.2 To determine if oil traps are required ......Daikin website (publicly accessible). Checking the refrigerant piping ..........▪ The full set of latest technical data is available on the Daikin 4.3.1 Checking refrigerant piping: Setup......Business Portal (authentication required). -
Page 6: To Remove The Transportation Stay
3 Preparation To remove the transportation stay Installation NOTICE Mounting the outdoor unit If the unit is operated with the transportation stay attached, abnormal vibration or noise may be generated. 4.1.1 To provide the installation structure The transportation stay protects the unit during transport. During installation it must be removed. -
Page 7: To Install The Outdoor Unit
4 Installation 4.1.2 To install the outdoor unit INFORMATION We suggest to install the optional bottom plate heater (EKBPH250D7) when the unit is installed in cold climates. 4.1.4 To prevent the outdoor unit from falling over In case the unit is installed in places where strong wind can tilt the unit, take following measure: 1 Prepare 2 cables as indicated in the following illustration (field supply). - Page 8 4 Installation Rear Bottom INFORMATION ▪ Remove the knockout hole (a) in the bottom plate or cover plate by tapping on the attachment points with a flat head screwdriver and a hammer. ▪ Optionally, cut out the slits (b) with a metal saw. NOTICE Precautions when making knockout holes: ▪...
-
Page 9: To Determine If Oil Traps Are Required
4 Installation 4.2.2 To determine if oil traps are required NOTICE Make sure to use a recommended bubble test solution If oil flows back into the outdoor unit's compressor, this might cause from your wholesaler. Do not use soap water, which may liquid compression or deterioration of oil return. -
Page 10: About The Refrigerant
4 Installation NOTICE WARNING: FLAMMABLE MATERIAL To perform vacuum drying or a complete recharge of the The refrigerant inside this unit is mildly flammable. outdoor unit’s internal refrigerant piping it is necessary to WARNING activate the vacuum mode (see "To activate/deactivate the [ 4 ... -
Page 11: Charging Additional Refrigerant
4 Installation Height difference between the highest and the lowest Standard liquid pipe size indoor unit Length (m) Refrigerant branch kit 0~10 10~20 20~30 30~40 40~50 50~60 60~70 4.4.5 Charging additional refrigerant To determine the additional refrigerant amount Size‑up liquid pipe size Length (m) To determine if adding additional refrigerant is necessary 5~10... -
Page 12: To Fix The Fluorinated Greenhouse Gases Label
4 Installation To activate/deactivate the vacuum mode field To completely recharge refrigerant setting WARNING Description ▪ Only use R32 as refrigerant. Other substances may To perform vacuum drying or a complete recharge of the outdoor cause explosions and accidents. unit’s internal refrigerant piping it is necessary to activate the ▪... -
Page 13: About Electrical Compliance
4 Installation 3N~ 50 Hz WARNING 380-415 V L1 L2 L3 ALWAYS use multicore cable for power supply cables. CAUTION For use of units in applications with temperature alarm settings it is recommended to foresee a delay of 10 minutes for signalling the alarm in case the alarm temperature is exceeded. -
Page 14: Finishing The Outdoor Unit Installation
▪ After making the knockout holes, we recommend to commissioning instructions in this chapter, a general remove the burrs and paint the edges and areas commissioning checklist is also available on the Daikin around the edges using repair paint to prevent rusting. Business Portal (authentication required). -
Page 15: To Perform A Test Run
5 Commissioning In case a wireless user interface is used: The indoor unit Action Result decoration panel with infrared receiver is installed. Press at least 4 seconds. The Service Settings menu The outdoor unit is properly mounted. is displayed. The following field wiring has been carried out according to this document and the applicable legislation: Select Test Operation. -
Page 16: Error Codes When Performing A Test Run
6 Disposal Error codes when performing a test run If the installation of the outdoor unit has NOT been done correctly, the following error codes may be displayed on the user interface: Error code Possible cause Nothing displayed ▪ The wiring is disconnected or there is a wiring error (between power supply and (the currently set outdoor unit, between outdoor unit and... -
Page 17: Technical Data
7 Technical data Technical data A subset of the latest technical data is available on the regional Daikin website (publicly accessible). The full set of latest technical data is available on the Daikin Business Portal (authentication required). Service space: Outdoor unit Suction side In the illustrations below, the service space at the suction side is based on 35°C DB and cooling operation. -
Page 18: Wiring Diagram: Outdoor Unit
7 Technical data Printed circuit board (fan) Wiring diagram: Outdoor unit Printed circuit board (demand) The wiring diagram is delivered with the unit, located at the inside of C503, C506 C507 Capacitor the service cover. (A3P) (1) Connection diagram DS1,DS2 (A1P) DIP switch English Translation... - Page 20 4P573384-1 0000000S 4P573384-1 2019.04...
Need help?
Do you have a question about the Sky Air Advance Series and is the answer not in the manual?
Questions and answers