
Related Manuals for HIKVISION DS-19S08N-04F/K Series


Summary of Contents for HIKVISION DS-19S08N-04F/K Series
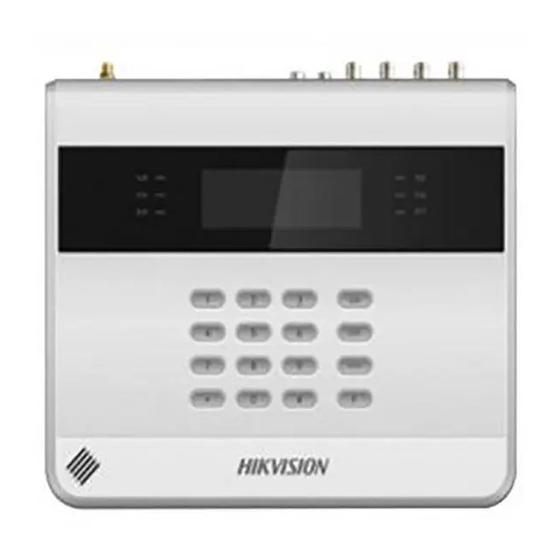
- Page 1 Video Security Control Panel User Manual Video Security Control Panel User Manual UD.6L0206D1028A01 --1--...
- Page 2 Any and all information, including, among others, wordings, pictures, graphs are the properties of Hangzhou Hikvision Digital Technology Co., Ltd. or its subsidiaries (hereinafter referred to be “Hikvision”). This user manual (hereinafter referred to be “the Manual”) cannot be reproduced, changed, translated, or distributed, partially or wholly, by any means, without the prior written permission of Hikvision.
- Page 3 Video Security Control Panel User Manual NOT BE LIABLE IN THE EVENT THAT THIS PRODUCT IS USED WITH ILLEGITIMATE PURPOSES. IN THE EVENT OF ANY CONFLICTS BETWEEN THIS MANUAL AND THE APPLICABLE LAW, THE LATER PREVAILS. 0200001050505 --3--...
- Page 4 Video Security Control Panel User Manual Regulatory Information FCC Information FCC compliance: This equipment has been tested and found to comply with the limits for a digital device, pursuant to part 15 of the FCC Rules. These limits are designed to provide reasonable protection against harmful interference when the equipment is operated in a commercial environment.
- Page 5 Video Security Control Panel User Manual Safety Instruction These instructions are intended to ensure that the user can use the product correctly to avoid danger or property loss. The precaution measure is divided into ‘Warnings’ and ‘Cautions’: Warnings: Serious injury or death may be caused if any of these warnings are neglected. Cautions: Injury or equipment damage may be caused if any of these cautions are neglected.
- Page 6 Video Security Control Panel User Manual Cautions: Make sure the power supply voltage is correct before using the product. Do not drop the product or subject it to physical shock. Do not install the product on vibratory surface or places.
-
Page 7: Table Of Contents
Video Security Control Panel User Manual Content Chapter 1 Introduction ______________________________________________ 11 1.1 Overview ___________________________________________________________ 11 1.2 Feature ____________________________________________________________ 11 Chapter 2 Installation and Wiring _____________________________________ 13 2.1 Main Board Overview _________________________________________________ 13 Main Board Description ________________________________________________________ 15 2.2 Wiring Device _______________________________________________________ 16 2.2.1 Wiring Detector _______________________________________________________ 16 2.2.2... - Page 8 Video Security Control Panel User Manual 3.1.12 Gateway Settings ______________________________________________________ 42 3.1.13 Uploading Center IP Settings _____________________________________________ 42 3.1.14 Uploading Center Port Settings ___________________________________________ 43 3.1.15 Center Protocol and Account Settings ______________________________________ 43 3.1.16 Printer Parameters Settings ______________________________________________ 44 3.1.17 Alarm Message Settings _________________________________________________ 45 3.1.18 Device Information Settings ______________________________________________ 45...
- Page 9 Video Security Control Panel User Manual 3.2.9 Emergency Alarm ______________________________________________________ 79 3.2.10 System Status Query ___________________________________________________ 79 3.2.11 Main Operator Password Changing ________________________________________ 80 3.2.12 Entering Partition System ________________________________________________ 80 3.2.13 Control Panel Programming Operation _____________________________________ 80 3.2.14 Alarm Center Test ______________________________________________________ 81 3.2.15 Project Mode _________________________________________________________ 81 3.2.16...
- Page 10 Video Security Control Panel User Manual : Appendix2 CID Report ______________________________________________ 148 : Appendix3 LED Keypad Prompt Sound _________________________________ 150 : Appendix4 Conversion Table _________________________________________ 150 --10--...
-
Page 11: Chapter 1 Introduction
Video Security Control Panel User Manual Chapter 1 Introduction Overview These series of commercial-grade video control panels implement multi-functions of alarm input/output, scheduled arming/disarming, video signal processing and so on. It is mainly applied to the security systems of shopping mall, stores, residence, apartments, communities, etc. It can be used cooperatively with the video surveillance and access control partition through the software operation. - Page 12 Video Security Control Panel User Manual 2 transmission modes: network transmission, 3G/4G transmission (DS-19S08N-4F/KxGx supports GPRS transmission); 2 groups of stand-alone Ethernet alarm centers; 2 groups of stand-alone 3G/4G alarm centers (DS-19S08N-4F/KxGx supports 3G/4G alarm center); External Equipment ...
-
Page 13: Chapter 2 Installation And Wiring
Video Security Control Panel User Manual Chapter 2 Installation and Wiring Main Board Overview DS-19S08-04F/Kx (Gx) --13--... - Page 14 Video Security Control Panel User Manual DS-19S08N-04F/Kx (Gx) --14--...
-
Page 15: Main Board Description
Video Security Control Panel User Manual Main Board Description The main board description is shown as follows. Take the model of DS-19S08-04F/Kx (Gx) as an example. This module varies depending on the models of control panel. Description Description Keypad Board Interface Reset Button Switch SATA HDD Interface Tampering Prevention... -
Page 16: Wiring Device
Video Security Control Panel User Manual Wiring Device Wiring Detector 2.2.1 The alarm input interfaces of the control panel are show as follows. Take the model of DS-19S08-04F/Kx (Gx) as an example. The wiring of sensor is shown as follows. Peripheral Security Detector Alarm Host Peripheral Security Detector... -
Page 17: Wiring Alarm Output
Video Security Control Panel User Manual The Tamper-proof wiring is shown below. 2.2KΩ TAMPER ZONE DETECTOR The resistance of 2.2KΩ or 3.3KΩ supports tamper-proof and non-tamper-proof wiring. The resistance of 4.7KΩ only supports tamper-proof wiring. The resistance of 5.6KΩor 8.2KΩ only supports non-tamper-proof wiring. Wiring Alarm Output 2.2.2 Take the model of DS-19S08-04F/Kx (Gx) as an example, the alarm output interfaces of the video security control... - Page 18 Video Security Control Panel User Manual The wiring of alarm output is shown as follows: DC12V DC12V AC220V Relay NO/NC NO/NC Breaker Breaker External Device External Device External DC Load External AC Load The DC current supplied by the control panel can be used for external devices. The load current cannot be over --18--...
-
Page 19: Wiring Keypad
Video Security Control Panel User Manual Wiring Keypad 2.2.3 The keypad wiring is shown as follows. Take the model of DS-19S08-04F/Kx (Gx) as an example. Wiring Video/Audio Input 2.2.4 The video/audio wiring is shown as follows. Take the model of DS-19S08-04F/Kx (Gx) as an example. --19--... -
Page 20: Wiring Video/Audio Output
Video Security Control Panel User Manual Wiring Video/Audio Output 2.2.5 Take the model of DS-19S08-04F/Kx (Gx) as an example --20--... - Page 21 Video Security Control Panel User Manual --21--...
-
Page 22: System Start-Up
Video Security Control Panel User Manual System Start-up For configuring the video security control panel, you should restore the system of the control panel after start-up. 2.3.1 Video Security Control Panel Start-up The keypad registration will be completed in 10 seconds after the video security control panel is being powered on. - Page 23 Video Security Control Panel User Manual Working Status Indicator Status Working Status Indicator Status Alarm Red (Flickering) Bypass Green (Continuously Light) LED Alarm Keypad Channel Status in Status Mode Description Description AC Power Outages Keypad Disconnection Low Battery for Accumulator Network Disconnection Control Panel Tampering Alarm No SIM Card...
-
Page 24: Keypad Address
Video Security Control Panel User Manual Working Status Indicator Status Working Status Indicator Status System Ready Green (Continuously Light) LCD Partition Keypad Indicator LCD Partition Keypad Arming/Disarming Status Working Status Indicator Status Working Status Indicator Status In Programming Green (Flickering) Parameters Initialization Green (Flickering) Re-searching... -
Page 25: Factory Settings
Video Security Control Panel User Manual Address Address The DIP switch 4 and 5 are for reservation, and should be in the status of OFF. 2.3.4 Factory Settings If you power on the system before zone connection, a 2.2k Ohm resistance is required for bridge connection between each zone. - Page 26 Video Security Control Panel User Manual For Detailed CID code, Please refer to CID Report. Zone: Zone 1to8: Real-time zone Urgent Soft zone: Buzzing prompt sound Test: Testing Report Interval:N/A Timing: Entering Delay Duration: 10 sec Exiting Delay Duration: 30 sec Belling Duration: 5 min Network Parameters: IP Address: 192.0.0.64...
-
Page 27: Activating The Control Panel
Video Security Control Panel User Manual 2.3.5 Activating the Control Panel Purpose: You are required to activate the control panel first before you can use the control panel. Activation via SADP, and Activation via client software are supported. Activation via SADP Software SADP software is used for detecting the online device, activating the device, and resetting the password. - Page 28 Video Security Control Panel User Manual STRONG PASSWORD RECOMMENDED– We highly recommend you create a strong password of your own choosing (using a minimum of 8 characters, including upper case letters, lower case letters, numbers, and special characters) in order to increase the security of your product. And we recommend you reset your password regularly, especially in the high security system, resetting the password monthly or weekly can better protect your product.
- Page 29 Video Security Control Panel User Manual Click the Device Management icon to enter the Device Management interface, as shown in the figure below. --29--...
- Page 30 Video Security Control Panel User Manual Check the device status from the device list, and select an inactive device. Click the Activate button to pop up the Activation interface. Create a password and input the password in the password field, and confirm the password. STRONG PASSWORD RECOMMENDED–...
- Page 31 Video Security Control Panel User Manual Change the device IP address to the same subnet with your computer by either modifying the IP address manually or checking the checkbox of Enable DHCP. Input the password to activate your IP address modification. --31--...
-
Page 32: Chapter 3 Keypad Operation
Video Security Control Panel User Manual Chapter 3 Keypad Operation (Local Operation) Alarm Keypad Settings You should access the programming mode (only installer can access the programming mode) before keypad configuration. The command is shown below: 012345 *0# Installer Password: 012345 Command Key: *0 # The command for exiting programming mode is *#. -
Page 33: Operator Settings
Video Security Control Panel User Manual 3.1.2 Operator Settings The operator configuration programming command is shown below. 001 *2 1234 # Operator Programming Address: 001~200. User Permission: 12 permissions. For details, please refer to the following table. Permission Permission Arming Disarming No Arming Report No Disarming Report... -
Page 34: Zone Parameters Settings
Video Security Control Panel User Manual The user name and password cannot be empty. If the password is configured as 0, the user will be deleted. The password of 00, 000, 0000, or 00000 are all signified of deleting the user. 3.1.3 Zone Parameters Settings The parameters of zone include zone response time, zone arming type, linked local alarm output, linked siren... - Page 35 Video Security Control Panel User Manual Command Command Description Command Command Description Zone Linked Trigger Command Command Description Command Command Description Non-linked Local Alarm Linked Local 1 Alarm Output Output Reserved Reserved Reserved Reserved Reserved Reserved Reserved Reserved Reserved Reserved Reserved Reserved Reserved...
- Page 36 Video Security Control Panel User Manual Command Command Description NO Type of Loop with Tampering Prevention Zone Loop The fire alarm zone does not support the configuration of zone loop type, and can only be set as 0, or an error value will be returned. Tampering Prevention Linked Trigger Command Command Description...
-
Page 37: Zone Linked Trigger Settings
Video Security Control Panel User Manual Command Command Description Command Command Description 4.7KΩ 5.6KΩ 8.2KΩ {13} End the command. . 3.1.4 Zone Linked Trigger Settings The detailed programming command is shown below. 467 000 0 00 # Trigger Settings Programming Address: 467 Zone No. - Page 38 Video Security Control Panel User Manual Command Function Description Command Function Description Enable Trigger Event Disable Trigger Event Linkage Linkage Trigger No. Adding /Deleting Trigger Command Function Description Command Function Description Delete Trigger Add Trigger Selecting Device/System Command Function Description Command Function Description Device...
-
Page 39: Trigger Time Settings
Video Security Control Panel User Manual 3.1.6 Trigger Time Settings For Trigger output time settings, please refer to the command below. 470 00 00 00 # Trigger Time Programming Address: 470 Trigger No. Duration: In minute Duration: In second End the command. The maximum duration of triggering is 99 minutes and 59 seconds. -
Page 40: Control Panel Time Settings
Video Security Control Panel User Manual Control Panel Time Settings 3.1.8 For control panel time settings, please refer to the command below. 472 2013 01 01 08 00 00 # Control Panel Time Settings Programming Address: 472 Year Month Hour Minute Second End the command. -
Page 41: Local Port Number Settings
Video Security Control Panel User Manual Local Port Number Settings 3.1.10 The programming commands of local port number setting are as below: 474 0 8 0 0 0 # {1} The programming command address of local port number setting is: 474; {2} Port: Ten Thousands’... -
Page 42: Gateway Settings
Video Security Control Panel User Manual Gateway Settings 3.1.12 The programming commands of control panel gateway setting are as below: 476 000 000 000 000 # {1} The programming command address of control panel gateway setting is: 476; {2} The First Unit; {3} The Second Unit;... -
Page 43: Uploading Center Port Settings
Video Security Control Panel User Manual This function varies depending on the models of the control panel. Uploading Center Port Settings 3.1.14 The programming commands of uploading center port setting are as below: 486 00000 # {1} The programming command address of uploading center port setting are: 486, 489, 492, 495; Command Description Command... -
Page 44: Printer Parameters Settings
Video Security Control Panel User Manual Command Description Command Description GPRS Center 1 Protocol and GPRS Center 2 Protocol and Programming Address of Programming Address of Account Setting Account Setting {2} Protocol Type: Command Description Command Description NAL2300 {3} Account (control panel No., 6~9 digits); {4} End the command. -
Page 45: Alarm Message Settings
Video Security Control Panel User Manual Alarm Message Settings 3.1.17 The programming commands of print setting of alarm message are as below: 500 0 0 0 # 2 3 4 5 {1} The programming command address of alarm message printing is: 500. {2} Enable/disable the sensor alarm;... -
Page 46: Operation Programming Information Settings
Video Security Control Panel User Manual {6} Tamper-proof of the Control Panel; {7} The 485 device is off-line; {8} Network error; {9} GPRS exception. It indicates disabled status when 2) ~9) are set to be 0, and indicates enabled status when 2) ~9) are set to be 1. Command Description Command... -
Page 47: Device Recovering Information Settings
Video Security Control Panel User Manual 503 0 0 # 2 3 4 {1} The programming command address of print setting of restoring information of alarm and bypass is: 503; {2} Sensor Alarm Recovering; Command Description Command Description Disabled Enabled {3} Bypass Recovering;... -
Page 48: Siren Linked Event Settings
Video Security Control Panel User Manual Siren Linked Event Settings 3.1.22 509 0 00 00 00 # The programming command address of siren linked event configuration is 509(default: null) Add/Delete Event Settings Command Description Command Description Delete Event Add Event Event Type Command Description... -
Page 49: Emergency Alarm Linkage Siren Setting
Video Security Control Panel User Manual Command Description Command Description Command Description Global Partition No.1 Partition No.2 Partition System System System No.3 Partition No.4 Partition No.5 Partition System System System No.6 Partition No.7 Partition No.8 Partition System System System End the command. Emergency Alarm Linkage Siren Setting 3.1.23 The programming commands of emergency alarm linkage siren setting are as below:... -
Page 50: Testing Report Settings
Video Security Control Panel User Manual The programming command address of control panel tamper-proof disconnecting linkage siren is: 511; {2} It indicates whether to link the siren or not; Command Description Command Description Not link the Siren Link the Siren {3} End the command. -
Page 51: Partition Settings
Video Security Control Panel User Manual Command Command Description Command Command Description Testing Report Sending Interval Command Command Description Command Command Description End the command Partition Settings 3.1.26 Partition Start-up Settings The programming command of the partition start-up configuration is shown below. 531 1 1 # The programming of partition start-up configuration is: 531~538. - Page 52 Video Security Control Panel User Manual Only the No.1 partition is enabled as the default settings. Partition Keypad User Settings The programming command of keypad user configuration of the partition is shown as follows. 531 2 0 000 # The programming command address of keypad user configuration is 531~538. The configuration item of 2 indicates the keypad user configuration.
- Page 53 Video Security Control Panel User Manual Partition Zone Settings The programming command of zone configuration of the partition is shown below. 531 3 0 000 # The programming command addressof zone configuration is 531~538. The configuration item of 3 indicates zone configuration of the partition. Add/Delete Zone Command Command Description...
- Page 54 Video Security Control Panel User Manual Command Command Description Command Command Description Delete Keypad No. End the command. There are three mode to add/delete zones for the partition , adding/deleting separately, adding/ deleting continually and adding/deleting in batch, for details, refer to the Partition Keypad User Settings. Partition Time and Control Panel Duress Report Settings To configure the system time and control panel duress report, please see the command below.
- Page 55 Video Security Control Panel User Manual Command Command Command Command Command Command Description Description Description 10sec 60sec 110sec 20sec 70sec 120sec 30sec 80sec 130sec 40sec 90sec 140sec 50sec 100sec 150sec Siren Working Duration Command Command Command Command Command Command Description Description Description 2min...
- Page 56 Video Security Control Panel User Manual Manual Testing Report Sending Prompt Sound. Prompting sound of arming succeeded. Prompting sound of disarming succeeded {3}~{6} Command Command Description Command Command Description Disable Enable End the command. Partition Key User Permission Settings To configure the permission of key user, please see the command below. 531 7 1 1 1 1 # System key user permission programming address: 531.
-
Page 57: Control Panel System Fault Detection Settings
Video Security Control Panel User Manual Control Panel System Fault Detection Settings 3.1.27 To configure control panel system fault detection, please see the command below. 564 1 1 1 1 1 1 1 # 7 8 9 Control panel system fault detection address: 564. Ac Power Down Low Battery Control Panel Tampering Alarm... -
Page 58: Partition Fault Prompt Sound Settings
Video Security Control Panel User Manual Low Battery control panel Tampering Alarm Reserved, enter 0 Main keypad Disconnection Network Exception {10} GPRS Exception Command Command Description Command Command Description Disable Enable {11} End the command. Partition Fault Prompt Sound Settings 3.1.29 To configure the partition fault prompt sound, please see the command below. -
Page 59: Delay Zone Time Settings
Video Security Control Panel User Manual 570 0 The DHCP configuration address is 570 Enable DHCP function? Command Description Command Description Disable Enable End the command. Delay Zone Time Settings 3.1.31 The programming command of configuring zone time is shown below. 610 0 0 The configuration address of delay zone time settings is 610. -
Page 60: Center Group Enabling Settings
Video Security Control Panel User Manual Center Group Enabling Settings 3.1.32 To enable the center group, please see the command below. 611 0 # Center Group Enabling Programming Address: 611, 615, 619, 623, 627and 631. Command Command Description Command Command Description Center Group 1 Enabling Center Group22 Enabling Programming Address... -
Page 61: Center Group Zone Alarm Report Settings
Video Security Control Panel User Manual Center Group Uploading Mode Programming Address: 612, 616, 620, 624, 628 and 632. Command Command Description Command Command Description Center Group1 Uploading Center Group 2 Uploading Mode Programming Address Mode Programming Address Center Group 3 Uploading Center Group 4 Uploading Mode Programming Address Mode Programming... -
Page 62: Center Group Non-Zone Alarm Report Settings
Video Security Control Panel User Manual 613 0 000 # Center group zone alarm report Programming address: 613, 617, 621, 625, 629 and 633. Command Command Description Command Command Description Center group 1 zone alarm Center group 2 zone alarm report Programming address report Programming address... -
Page 63: White-List Parameters Settings
Video Security Control Panel User Manual Command Command Description Command Command Description Alarm Report Programming Alarm Report Programming Address Address Center Group3 Non-zone Center Group 4 Non-zone Alarm Report Programming Alarm Report Programming Address Address Center Group 5 Non-zone Center Group 6 Non-zone Alarm Report Programming Alarm Report Programming Address... - Page 64 Video Security Control Panel User Manual Non-zone Alarm Report Settings Command Address: 680. It indicates the white list number. 01~08 indicate white list No.1~No.8. It indicates to enable/disable the Non-zone Alarm Report. Command Command Description Command Command Description Disable Enable Soft zone Report System Status Report Alarm Clearing Report...
- Page 65 Video Security Control Panel User Manual The Arming Permission of Partition 6 The Arming Permission of Partition 7 {10} The Arming Permission of Partition 8 {3}~{10} It indicates to enable/disable the permission of Partition Arming. Command Command Description Command Command Description Disable Enable {11} End the command.
- Page 66 Video Security Control Panel User Manual 683 00 0 0 0 0 0 0 0 0 # 9 10 11 Partition Alarm Clearing Permission Settings Command Address: 683 It indicates the white list number. 01~08 indicate white list No.1~No.8. The Alarm Clearing Permission of Partition 1 The Alarm Clearing Permission of Partition 2 The Alarm Clearing Permission of Partition 3 The Alarm Clearing Permission of Partition 4...
- Page 67 Video Security Control Panel User Manual Command Description Command Description 5-10min User Defined 1min The user defined interval time: Thousands’ Digit The user defined interval time: Hundreds’ Digit The user defined interval time: Tens’ Digit The user defined interval time: Digit {4}~{7}Valid only when {3} is 6.
-
Page 68: Schedule Settings
Video Security Control Panel User Manual Zone Report Type Settings To configure the zone report type, please refer to the command below. 686 01 0 0 0 0 # Zone Report Type Settings Command Address: 686. It indicates the white list number. 01~08 indicate white list No.1~No.8. Set the value as 1 to send the report. - Page 69 Video Security Control Panel User Manual 690 01 0 0 # Enabling Weekly Schedule Command Address: 690. It indicates the partition number. 01~08 indicate partitions No.1~No.8. Command Command Description Command Command Description Not mandatory Mandatory It indicates to enable/disable the weekly schedule. Command Command Description Command...
- Page 70 Video Security Control Panel User Manual {5}~{12} It indicates the start time and end time during the time bucket of {4}. Start Time: {5}{6}:{7}{8} End Time: {9}{10}:{11}{12} When you set the start and end time as 00:00 and 00:00, all the settings from the present time bucket to the maximum time bucket will be cleared.
- Page 71 Video Security Control Panel User Manual Command Description Command Description Monday Friday Tuesday Saturday Wednesday Sunday Thursday It indicates the value range of the day (l). Command Description Command Description Monday Friday Tuesday Saturday Wednesday Sunday Thursday End the command. Copy Weekly Schedule of Partition To copy the settings of partition (m) to partition (n), please refer to the command below.
- Page 72 Video Security Control Panel User Manual 694 00 0 0 0 0 0 0 0 0 0 0 # 9 10 11 12 13 Prior Schedule Date Parameter Settings Command Address: 694. It indicates the prior schedule number. 00~30 indicate prior schedules No.00~No.30. It indicates to enable/disable the mandatory arming/disarming.
- Page 73 Video Security Control Panel User Manual Partition 5 Partition 6 Partition 7 {10} Partition 8 {3}~{10} It indicates to enable/disable prior schedule of Partition No.1~No.8. Command Command Description Command Command Description Disable Enable {11} End the command. Prior Schedule Time Parameter Settings To configure the time parameters of the prior schedule, please refer to the command below.
- Page 74 Video Security Control Panel User Manual Command Command Description General Arming Instant Arming Stay Arming Disarming None {13} End the command. Enabling Trigger Schedule To enable the trigger schedule, please refer to the command below. 697 0 # Enabling Trigger Schedule Command Address: 697. It indicates to enable/disable the trigger schedule.
- Page 75 Video Security Control Panel User Manual Command Command Description Command Command Description Delete Trigger No.: Hundreds’ Digit Trigger No.: Tens’ Digit Trigger No.: Digit End the command. Trigger Schedule Time Parameter Settings To configure the time parameters of the trigger schedule, please refer to the command below. 699 0 0 0 0 0 0 0 0 0 E # 9 10 11 12 Trigger Schedule Time Parameter Settings Command Address: 699.
-
Page 76: Wireless User Permission Settings
Video Security Control Panel User Manual Command Command Description Command Command Description Enable Disable {12} End the command. Wireless User Permission Settings 3.1.38 To configure the permission of wireless users, please see the command below. 701 1 1 1 1 1 # Wireless User Permission Settings Command Address: 701~732. -
Page 77: Keypad Alarm Operation Code
Video Security Control Panel User Manual 801 1 1 1 1 # {15} Video Live View Settings Programming Address:801 {2}~{5}Set the value as 1 to enable the live view. Command Command Description Command Command Description Disable Enable End the command. Keypad Alarm Operation Code 3.2.1 Device Initialization... -
Page 78: Stay Arming
Video Security Control Panel User Manual 3.2.3 Stay Arming Operation Method: {User password} + {*} + {4} + {#}.Take the password 1234 as an example, and the operation is shown as follows: {1} + {2} + {3} + {4} + {*} + {4} + {#} After the operation is completed, the partition will change the status of disarming (current status) into arming immediately. -
Page 79: Keypad Cancel Alarm
Video Security Control Panel User Manual 3.2.7 Keypad Cancel Alarm When the alarm is triggered, it can be canceled by the keypad. The alarm can be canceled both under the arming and the disarming status. Alarm Clearing under the Arming Status Operation Method: {User Password} + {*} + {1} + {#} Alarm clearing under the disarming Status Operation Method (1): {*} + {1} + {#}... -
Page 80: Main Operator Password Changing
Video Security Control Panel User Manual Serial Number Meaning Serial Number Meaning Disconnection Tampering Alarm 3G Exception Enabling Telephone line Disconnection 3.2.11 Main Operator Password Changing The user password can be changed by main operator. The operations are divided into following steps: Steps: {Master Code} } + {*} + {0} + {#} {User Number} + {#}... -
Page 81: Alarm Center Test
Video Security Control Panel User Manual 3.2.14 Alarm Center Test Partition keypad operation is used to test the communication between security control panel and the alarm center; see the command below: {Password} + {*} + {6} + {1} + {#} One operation generates one test report. -
Page 82: Deleting All Wireless Devices Connected To The Control Panel
Video Security Control Panel User Manual Deleting All Wireless Devices Connected to the Control 3.2.19 Panel Enter the following code with the keypad to delete the all devices connected to the control panel. [Password] + [*] + [92] + [#] Setting the Schedule 3.2.20 Resetting Intraday Schedule... -
Page 83: Control Panel Soft Recovery
Video Security Control Panel User Manual The function of pacing is only available under the status of disarming and non-fault of the zone. The system will do auto-arming in the pacing mode without reporting any CID log. The siren will start warning after the alarm is triggered and stop warning if the alarm is dismissed. ... -
Page 84: Chapter 4 Accessing By Client Software
Video Security Control Panel User Manual Chapter 4 Accessing by Client Software Check the package contents and make sure that the device in the package is in good condition and all the assembly parts are included. Installing the iVMS-4200 Insert the installation media of iVMS-4200 into the appropriate computer. Perform the following steps to install the iVMS-4200 client software. - Page 85 Video Security Control Panel User Manual If you accept the terms of the license agreement, click I accept the terms of license agreement. Click Next to continue. Otherwise click I do not accept the terms of the license agreement, and then click Cancel to cancel the installation On the next panel, you are prompted to select the function module to install.
- Page 86 Video Security Control Panel User Manual software. Read the pre-install information and click Install to begin the installation. A panel indicating progress of the installation is displayed. A percentage completion bar is updated as the installation progresses. --86--...
- Page 87 Video Security Control Panel User Manual Select the setup type according to your need. You can check the checkbox of Create Desktop for Client to create a shortcut icon on the desktop for the client software. Read the post-install information and click Finish. --87--...
-
Page 88: User Registration And Login
Video Security Control Panel User Manual User Registration and Login For the first time to use iVMS-4200 software, you need to register a super user for login. Steps: Input the super user name and password. Confirm the password. Optionally, check the checkbox of Enable Auto-login to log in the software automatically. Click Register. -
Page 89: Video Security Control Panel Settings
Video Security Control Panel User Manual Steps: Input the user name and password you registered. Optionally, check the checkbox of Enable Auto-login to log in the software automatically. Click Login. Video Security Control Panel Settings Purpose: In this section, you are able to configure or view the basic parameters (such as the system information, alarm information, network data, device status and so on) of the video security control panel, Adding/Editing/Deleting the Device Add a Device:... -
Page 90: Remote Settings
Video Security Control Panel User Manual Enter the required nick name, address, and port number and then enter the admin username and password. Click Modify to save the changes. Delete a Device Select device from the list, click Modify/Delete, and then you can modify/delete the information of the selected device. -
Page 91: System Information Settings
Video Security Control Panel User Manual System Information Settings Purpose: In this section, you can configure the system parameters (such as time, log, user, security, system maintenance and so on) for the device. --91--... - Page 92 Video Security Control Panel User Manual Timing Settings Before You Start: Before you start configuring the security control panel, you need to do timing for the device first. Enter Remote Settings>System->Time to get the configuration page. --92--...
- Page 93 Video Security Control Panel User Manual User Settings Purpose: You can add, edit, or delete the network operator and keypad operator in this section. Network User Add a Network User Steps: Enter the user configuration interface. Remote Settings->System->User --93--...
- Page 94 Video Security Control Panel User Manual Click to enter the interface of adding a network user. Enter the corresponding user information including the user type, user name, password, IP address, and MAC address. Select the permission of the user. Click OK to finish the settings. Edit a User Steps: --94--...
- Page 95 Video Security Control Panel User Manual Click to enter the interface of editing the selected user Edit the corresponding user information including the user type, user name, password, IP address, and MAC address Edit the permission of the user. Click OK to finish the settings. Delete a user Steps: Select a user needs to be deleted.
- Page 96 Video Security Control Panel User Manual Steps: Select the user type. Operator and installer can be selected. Select the index number of the keypad user, up to 16 numbers can be selected. Enter the name of the keypad operator. Enter the password of the operator. Click the dropdown menu to select the user permission.
-
Page 97: Network Settings
Video Security Control Panel User Manual Click Enable to enable the analog camera. Click Add to enter the network camera adding interface. Select the login mode, enter information such as IP address or domain name, port No., name, password and so on. - Page 98 Video Security Control Panel User Manual Configure the NIC settings, including the IPv4(IPv6) Address, IPv4(IPv6) Subnet Mask and IPv4(IPv6) Default Gateway. Click Apply to save the above settings. The valid value range of Maximum Transmission Unit (MTU) is 500 ~ 9676. The default value is 1500. ...
- Page 99 Video Security Control Panel User Manual Check the Enable DDNS checkbox to enable this feature. Select DDNS Type. Four DDNS types are selectable: IPServer, HiDDNS, PeanutHull and DynDNS. DynDNS: Steps: Enter Server Address of DynDNS (e.g. members.dyndns.org). Enter the User Name and Password registered on the DynDNS website. Enter the domain name obtained from the DynDNS website.
- Page 100 Video Security Control Panel User Manual The Server Address should be entered with the static IP address of the computer that runs the IP Server software. For the IP Server, you have to apply a static IP, subnet mask, and gateway and preferred DNS from the ISP.
- Page 101 Video Security Control Panel User Manual Click the drop down menu to select a center group. Check the Enable checkbox to enable the configuration Check the checkbox to select the required Zone for sending the Zone report for the Zones without Zone report.
- Page 102 Video Security Control Panel User Manual Click and select a network center. Two centers are selectable. Click the dropdown menu to select a sever type. Two sever types are available: IP4/IP6 and domain. Enter the IP address which is used to communicate with the network alarm receiving center. Enter the port NO.
- Page 103 Video Security Control Panel User Manual Remote Settings->Dialing Parameters Check the checkbox to enable report uploading. Enter the report uploading period (unit: hour). The report uploading period represents the time interval between uploading the first report and the next report. Enter the first report uploading time interval (unit: minute).
- Page 104 Video Security Control Panel User Manual 10. Enter the receiver ID which is the authentication account while doing the communication with the alarm receiving center. 11. Click Apply to save the settings. This function varies depending on the models of the control panel. Wireless Center Parameter Settings Steps: Enter the wireless center parameter settings page.
- Page 105 Video Security Control Panel User Manual Enter the IP address which is used to communicate with the wireless alarm receiving center. Enter the port NO. for communicating with the alarm receiving center. Click the dropdown menu to select the protocol type. Click Apply to save the settings.
- Page 106 Video Security Control Panel User Manual Steps: Enter the whitelist configuration interface. Remote Settings->Network-> Whitelist Select the index of the whitelist. Check the Enable checkbox to enable the configuration. Enter the phone number of the whitelist into the SIM Card Number text box. Select the identical message time interval which represents the interval of sending message triggered by the same event.
-
Page 107: Alarm Settings
Video Security Control Panel User Manual Alarm Settings Partition Settings Purpose: You can configure the detailed alarm parameters of the zone in the partition in this section. Steps: Enter the partition alarm triggering configuration interface. Remote Settings->Alarm->Partition Click the partition dropdown menu to select a partition. Click the Linkage button to add required Zone, keypad, or keypad user to the partition. - Page 108 Video Security Control Panel User Manual Select an alarm type. Hostage Report: Enable uploading the duress report. Arming/Disarming Report Uploading Sound: Enable the prompt sound when uploading the arming/disarming report. Alarm Sound Uploading Manual Testing: Enable the prompt sound when successfully uploading the manual test report.
- Page 109 Video Security Control Panel User Manual Click the Partition dropdown menu to select a partition. In the Alarm Input list, select an alarm input channel and click the icon to enter Zone configuration page. --109-...
- Page 110 Video Security Control Panel User Manual Edit the general information of the Zone, including name, probe type, arming Zone type, sensitivity, entering delay, existing delay and so on. Probe Type: Select the type of the detector. Arming Zone Type: Select the type of Zone in the partition Sensitivity: Select the response time of the Zone.
- Page 111 Video Security Control Panel User Manual Edit the general information of the zone, including name, output delay and so on. Output Delay (0~5999s): Configure the alarm output time after the alarm being triggered. Click the dropdown menu to enable/disable the event-linked trigger. Select the detailed operation after the alarm being triggered on the sub-system event panel.
- Page 112 Video Security Control Panel User Manual Click the Siren dropdown menu to select a siren needs to be configured. Check the Enable box to enable the configuration. Edit the siren name. Select the detailed operation after the alarm being triggered on the sub-system event panel. Select the global event of alarm triggering.
- Page 113 Video Security Control Panel User Manual In the relay list, select an alarm input channel and click the icon to enter the Zone configuration page. Check the Enable checkbox to enable the configuration. Click the icon , click and drag the mouse on the time bar (the time bar is divided into 24 segments which represent 24 hours) to draw the required schedule.
- Page 114 Video Security Control Panel User Manual Clear Schedule: Click the icon to clear the drawn the schedule. Check the Trigger checkbox to select the trigger. Click Apply to save the settings. Partition Arming/Disarming Schedule Settings Steps: Enter the arming/disarming schedule configuration interface. Remote Settings->Alarm ->Partition Scheduling Arming/Disarming Select a partition needs to be configured.
- Page 115 Video Security Control Panel User Manual Click Edit to enable the schedule configuration. Click and select a template. Click the button to select an arming type. Click and drag the mouse on the time bar to draw the daily schedule. Delete Schedule: Click the drawn color bar and click the icon to delete the color bar.
- Page 116 Video Security Control Panel User Manual Arming/Disarming Preferential Schedule Settings Steps: Enter the arming/disarming preferential schedule configuration interface. Remote Settings->Alarm->Preferential Schedule Arming/Disarming Click the drop down menu to select the time duration. Click the icon to enter the preferential schedule configuration page. The permission level of preferential schedule is higher than the weekly arming/disarming schedule’s.
- Page 117 Video Security Control Panel User Manual Click the button to select an arming type. Click and drag the mouse on the time bar to draw the daily schedule. Click Save to save the settings and click Cancel to exit the page. Click Copy to to copy all these settings to other Zones.
- Page 118 Video Security Control Panel User Manual Click and select the external device from the module type dropdown menu. View the information about the selected device. Alarm Capture Settings Steps: Enter the alarm capture configuration interface. Remote Settings->Alarm->Alarm Capture Parameters --118-...
- Page 119 Video Security Control Panel User Manual Select the camera needs to be configured. Enter the capture interval between the previous picture and the next picture. Default:2s. Select the resolution of the captured picture. Set the number of pictures needs to be captured before/after the alarm being triggered. Click Apply to save the settings.
- Page 120 Video Security Control Panel User Manual Click dropdown menu to select a Zone needs to be configured. Select a tampering type. Check the Upload Alarm Recovery Report checkbox to enable the function of uploading alarm recovery report. Select the linked siren on the Linked Siren panel. Select the linked trigger on the Linked Trigger panel.
- Page 121 Video Security Control Panel User Manual Click the icon to enter the remote control permission configuration page. Check the Enable checkbox to enable the configuration Enter the serial number of the remote control. The number of 000000000 indicates to delete the remote control.
-
Page 122: Storage
Video Security Control Panel User Manual Storage HDD Information Steps: Enter the HDD Settings interface in which you can view the capacity, free space, status, type and property of the disk. Remote Settings > Storage > General, If the status of the HDD is Uninitialized, check the corresponding checkbox to select the disk and click to start initializing the disk. -
Page 123: Image Settings
Video Security Control Panel User Manual File Query Steps: Enter the file query interface. Remote Settings->Storage->File Enter the search criteria including camera name, property, start time and end time. Click Search to get the file list. Image Settings Video& Audio Settings Steps: Enter the video/audio configuration interface. - Page 124 Video Security Control Panel User Manual Select a camera needs to be configured. Edit the general video parameters. Scream Type: The main stream is usually for recording and live viewing with good bandwidth, and the sub-stream can be used for live viewing when the bandwidth is limited. Video Type: Select the stream type to video stream, or video &...
-
Page 125: Event Settings
Video Security Control Panel User Manual OSD Settings Steps: Enter the OSD Settings interface: Remote Settings > Image >Video Display Check the corresponding checkbox to select the display of camera name, date or week if required Edit the camera name in the text field of Camera Name. Select from the drop-down list to set the time format, date format and display mode. - Page 126 Video Security Control Panel User Manual Motion detection is a feature which can trigger alarm actions and actions of recording videos when the motion occurred in the surveillance scene. Steps: Enter the motion detection setting interface: Remote Settings > Event > Motion Detection Select a camera needs to be configured.
- Page 127 Video Security Control Panel User Manual Click Apply to save the settings. Tampering Alarm Settings Purpose: You can configure the camera to trigger the alarm actions when the lens is covered. Steps: Enter the video tampering Settings interface: Remote Settings > Event > Tampering Alarm Select a camera needs to be configured.
- Page 128 Video Security Control Panel User Manual Check Enable Tampering Alarm checkbox to enable the tampering detection. Set the tampering area. Refer to Step 5 in Section5.2.26.1 Motion Detection Settings. Set the arming schedule for tampering. Check the Audible Warning checkbox to enable audible warning for the detection. Click Apply to save the settings.
- Page 129 Video Security Control Panel User Manual Select a camera needs to be configured. Check the Enable Video Loss Detection checkbox to enable the video loss detection. Check the check box to link the camera with alarm output. Set the schedule for the video loss detection. Check the Audible Warning checkbox to enable audible arming for the detection.
- Page 130 Video Security Control Panel User Manual Exception Detection Purpose: The exception type can be HDD full, HDD error, network disconnected, IP address conflicted, record/capture exception and illegal login to the camera. Steps: Enter the Exception Settings interface: Remote Settings > Events > Exception Select a camera needs to be configured.
- Page 131 Video Security Control Panel User Manual Select the camera needs to be configured. Check the checkbox on the Record panel to select the record type. Click the icon to set the record schedule. 6. Click Edit to enter the Templates Management interface. Select the template to be set and you can edit the template name.
-
Page 132: Operation
Video Security Control Panel User Manual When the cursor turns to , you can lengthen or shorten the selected time bar. 8. Optionally, you can select the schedule time bar, And then click the icon to delete the selected time bar, Or click the icon to delete all the time bars, Or click the icon... -
Page 133: Status
Video Security Control Panel User Manual Status You can view status of the partition, zone, trigger, siren ,and storage battery in this section. --133-... - Page 134 Video Security Control Panel User Manual --134-...
-
Page 135: Chapter 5 Trouble Shooting
Video Security Control Panel User Manual Chapter 5 Trouble Shooting Q: What is the function of the Project button of LCD keypad? A: Project button has button switch function besides normal instruction button, such as: When sensor or module is abnormal, press and hold the Project button to switch to other interfaces manually. - Page 136 Video Security Control Panel User Manual Working Status Indicator Status Working Status Indicator Status Enter programming Green, Blink Parameters Initialization Green, Blink System Abnormal Green, Blink System Normal Green, Normally On Q: What are the steps of LED keypad to program the control panel? A:...
- Page 137 Video Security Control Panel User Manual Working Status Indicator Status Working Status Indicator Status Project Red, Normally On Change Password Green. Blink LED alarm keypad Channel indicator: Working Status Indicator Status Working Status Indicator Status Sensor Normal Sensor Error Red, Normally On Sensor Alarm Red, Blink Sensor Bypass...
- Page 138 Video Security Control Panel User Manual Keypad Alert Sound Description Rapid Beep Sensor Alarm, Keypad not logged in 3 Long 2 Short Keypad Tamper-proof On Q: How to remove alarm memory? A: There are two situations of removing alarm memory as shown below: Under disarming mode: Press {*} + {1} + {#} or {Password} + {*} + {1} + {#}.
- Page 139 Video Security Control Panel User Manual Add. Add. Add. Add. Q: What are notes for setting password? A: The password for each operator should be different; otherwise the setting will be failed. For example, if the password of operator 1 is set to be 1234 hen password of operator 2 is also 1234, it will prompt to be error. In addition, the password of each operator should be different from the control panel duress code of other operators;...
- Page 140 Video Security Control Panel User Manual Q: How to solve the problem of two LED keypad address being same? A: When two LED keypad addresses are the same, the situation of two keypads demanding bus communication at the same time will appear and cause conflict. The only solution is to remove one keypad and reset the other keypad to an unused legal address.
- Page 141 Video Security Control Panel User Manual The LED keypad is considered as off-line in the communication. If there is other keypad operates normal, process program command {Main Operator Password} + {*} + {6} + {8} + {#} to restore it or power off the control panel and reboot. Q: How does the control panel detect alternating current, storage battery, control panel tamper-proof and ADSL cable? A: The status of the control panel detection is as follows:...
- Page 142 Video Security Control Panel User Manual uploading mode in Remote Settings-> Uploading Mode Settings Q: How to configure the communication way of video security control panel and alarm center group? Center uploading mode supports at most 6 center groups, each center group divides in main channel and 3 backup channels;...
-
Page 143: Appendix1:Specifications
Video Security Control Panel User Manual Appendix1:Specifications The specification of DS-19S08N-04F/Kx (Gx) video security control panel. Model DS-19S08N-04F/Kx DS-19S08N-04F/KxGx Alarm Input 8-zone Alarm Input Alarm Output 1-ch Local +8-ch expandable, 30VDC/1A Siren Power Supply 12VDC /500mA Keypad K1: LED Keypad; K2: LCD Keypad Supported External Keypads Tamper-proof Switch... - Page 144 Video Security Control Panel User Manual Model DS-19S08N-04F/Kx DS-19S08N-04F/KxGx Audio Output 1-ch, RCA Interface (Linear, 1kΩ) Two-way Audio 1-ch, RCA Interface (Linear, 1kΩ) Loudspeaker 1-ch, Build-in Record Resolution 1080P/720P/VGA/4CIF/DCIF/2CIF/CIF/QCIF Synchronous Playback 4-ch Post-view Delay duration can be configured. Capture for Recheck 10 Captures (5 Captures before/after Alarm) Record Mode Manual Record, Scheduled Record, Motion Detection Record...
- Page 145 Video Security Control Panel User Manual Model DS-19S08N-04F/Kx DS-19S08N-04F/KxGx Working Temperature -10°C~+55°C (14°F~131°F) Working Humidity 10%~90% Mounting Wall-mounted Dimensions 200×247×35mm Weight ≤0.81Kg --145-...
- Page 146 Video Security Control Panel User Manual The specification of DS-19S08-04F/Kx (Gx) video security control panel. Model DS-19S08-04F/Kx DS-19S08-04F/KxGx Alarm Input 8-zone Alarm Input Alarm Output 1-ch Local+8-ch expandable, 30VDC/1A Siren Power Supply 12VDC /500mA Keypad K1: LED Keypad; K2: LCD Keypad Supported External Keypad Tamper-proof Switch...
- Page 147 Video Security Control Panel User Manual Model DS-19S08-04F/Kx DS-19S08-04F/KxGx Video Frame Rate PAL: 1/16~25fps NTSC: 1/16~30fps Video Bitrate 32Kbps~16Mbps Stream Type Video & Audio/Video Dual Stream Support; Sub-stream: CIF/QCIF Synchronous Playback 4-ch Post View Delay duration can be configured Capture for Rechecking 20 Captures (10 Captures before/after Alarm) Record Type Manual Record, Scheduled Record, Motion Detection Record...
- Page 148 Video Security Control Panel User Manual Appendix2:CID Report CID Code Description CID Code Description 1103 Instant Zone Alarm 3103 Real-time Zone Alarm Recovery 1110 Fire Zone Alarm 3110 Fire Zone Alarm Recovery 1122 24-hour Non-voiced Zone 3122 24-hour Non-voiced Zone Alarm Alarm Recovery 1123...
- Page 149 Video Security Control Panel User Manual CID Code Description CID Code Description 1910 Keypad Disconnection 3910 Keypad Disconnection Recovery 1911 Keypad Bus Trigger 3911 Keypad Bus Trigger Disconnection Disconnection Recovery 1921 Wireless Network Exception 3921 Wireless Network Recovery 1931 Wired Network Exception 3931 Wired Network Recovery 1930...
- Page 150 Video Security Control Panel User Manual Appendix3:LED Keypad Prompt Sound Keypad Prompt Sound Description 1 Sound Keypad Prompt, Error Operating Prompt 2 Sound Correctly answered, report uploading succeeded 5 Sound Incorrectly answered, report uploading failed in 60s Last for 2s Error Prompt Intermittent Slow Sound, Enter/Exit Delay...
- Page 151 Video Security Control Panel User Manual Installer Password 1#Password 2#Password User Name: User Name: 3#Password 4#Password User Name: User Name: 6#PasswordPa 5#Password ssword User Name: User Name: 7#Password 8#Password User Name: User Name: 9#Password 10#Password User Name: User Name: 11#Password 12#Password User Name:...
- Page 152 Video Security Control Panel User Manual 51#Password 52#Password User Name: User Name: 53#Password 54#Password User Name: User Name: 55#Password 56#Password User Name: User Name: 57#Password 58#Password User Name: User Name: 59#Password 60#Password User Name: User Name: 61#Password 62#Password User Name: User Name:...
- Page 153 Video Security Control Panel User Manual 101#Password 102#Password User Name: User Name: 103#Password 104#Password User Name: User Name: 105#Password 106#Password User Name: User Name: 107#Password 108#Password User Name: User Name: 109#Password 110#Password User Name: User Name: 111#Password 112#Password User Name: User Name:...
- Page 154 Video Security Control Panel User Manual 151#Password 152#Password User Name: User Name: 153#Password 154#Password User Name: User Name: 155#Password 156#Password User Name: User Name: 157#Password 158#Password User Name: User Name: 159#Password 160#Password User Name: User Name: 161#Password 162#Password User Name: User Name:...
- Page 155 Video Security Control Panel User Manual Region1 Region2 Parameters Parameters Configuration Configuration Region3 Region4 Parameters Parameters Configuration Configuration Region5 Region6 Parameters Parameters Configuration Configuration Region7 Region8 Parameters Parameters Configuration Configuration Region9 Region10 Parameters Parameters Configuration Configuration Region11 Region12 Parameters Parameters Configuration Configuration Region13...
- Page 156 Video Security Control Panel User Manual Region Linked Trigger Configuration Enable Trigger Event Linkage Configuration Disable Trigger Event Linkage Configuration Trigger Time Settings Siren Settings Host Time Settings Host IP Address Settings Host Port Number Settings Subnet Mask Settings Gateway Settings Network Center 1 IP Configuration Programming Address...
- Page 157 Video Security Control Panel User Manual Wireless Center 1 IP Configuration Programming Address Wireless Center 1 Port Configuration Programming Address Wireless Center 1 Protocol and Account Configuration Programming Address Wireless Center 2 IP Configuration Programming Address Wireless Center 2 Port Configuration Programming Address Wireless Center 2 Protocol and...
- Page 158 Video Security Control Panel User Manual Host System Fault Detection Configuration System Fault Display Configuration System Keyboard Fault Prompt Sound Configuration Center Group 1 Enabling Configuration Center Group 1 Uploading Mode Configuration Center Group 1 Region Alarm Report Configuration Center Group 1 Non-region Alarm Report Configuration Center Group 2 Enabling Configuration Center Group 2 Uploading Mode...
- Page 159 Video Security Control Panel User Manual Center Group 4 Enabling Configuration Center Group 4 Uploading Mode Configuration Center Group 4 Region Alarm Report Configuration Center Group 4 Non-region Alarm Report Configuration Center Group 5 Enabling Configuration Center Group 5 Uploading Mode Configuration Center Group 5 Region Alarm Report...
- Page 160 First Choice for Security Professionals...
Need help?
Do you have a question about the DS-19S08N-04F/K Series and is the answer not in the manual?
Questions and answers