Ryobi RBC36X26E Original Instructions Manual
Petrol high pressure cleaner
Hide thumbs
Also See for RBC36X26E:
- Original instructions manual (88 pages) ,
- Original instructions manual (142 pages) ,
- Original instructions manual (29 pages)
Table of Contents
Advertisement
Quick Links
Advertisement
Table of Contents

Related Manuals for Ryobi RBC36X26E


Summary of Contents for Ryobi RBC36X26E
- Page 1 ORIGINAL INSTRUCTIONS Petrol High Pressure Cleaner RBC36X26E RPW3200Y RBC36X26E...
- Page 2 Important! It is essential that you read the instructions in this manual before assembling, operating, and maintaining the product. Subject to technical modification.
-
Page 3: Intended Use
Safety, performance, and dependability have equipment when operating the product, been given top priority in the design of your such as boots, safety gloves, safety petrol high pressure cleaner. helmets with visor, and hearing protection. Use high-impact visors only with liquid splash protection. -
Page 4: Additional Safety Warnings
equipment, or the product itself. products can cause physical injuries to the operator and irreversible damage to the ■ To avoid a risk of explosion, do not spray product. flammable liquids. ■ Always operate the product on a level ■ Do not direct the jet against yourself or surface. -
Page 5: Transportation And Storage
■ If fuel is spilled, do not attempt to start the be controlled with a switch is dangerous engine. Move the product away from the and must be repaired. area of spillage and avoid creating any ■ Keep a minimum distance of 30 cm when source of ignition until fuel vapours have cleaning vehicles. -
Page 6: Maintenance
■ Regularly inspect and maintain the high- pressure cleaner for safe operation. RYOBI WARNING recommends inspecting the product every 3 months. Injuries may be caused, or aggravated, by prolonged use of a tool. -
Page 7: Fuel Valve
NOZZLE KIT ASSEMBLY Soap nozzle, 0 DEG, 25 DEG, and 40 DEG UNPACKING spray nozzle. The product requires assembly. Carefully FUEL TANK remove the product and the accessories from the box. Make sure that all items listed in the This fuel tank has a maximum capacity of 1.2L "What's in the box"... -
Page 8: Operation
ADDING LUBRICANT TO THE ENGINE WARNING See page 17 (step 11). If any part is damaged or missing, do not NOTE: You must add lubricant to the engine operate the product until the part is replaced. before starting it for the first time. Using the product with damaged or missing parts could result in serious personal injury. -
Page 9: Fuel Filter
NOTE: Use unleaded 91 or higher petrol only. INSTALLING/REMOVING NOZZLES Do not mix lubricant with petrol. See page 23 - 30. FUEL FILTER WARNING The fuel supplied to the engine is passed Never change nozzles or spray patterns through a filter to remove any contaminants without locking the lock out on the trigger from entering the engine. -
Page 10: General Maintenance
trigger to release the water pressure. For short range detergent applications RINSING WITH THE HIGH PRESSURE Soap ■ Driveways, walkways, decks CLEANER short and patios, vehicles, fences, range ■ Turn off the high pressure cleaner and shut paint prep, patio furniture, and off the water supply. -
Page 11: Nozzle Maintenance
■ Make sure the air filter is clean. ■ Reinstall spark plug and tighten securely. ■ Check both the engine lubricant level and CHANGING THE ENGINE LUBRICANT the fuel tank level. Refill as needed. See page 36. ■ Inspect the work area for hazards. NOTE: Drain the lubricant while the engine ■... -
Page 12: Symbols In This Manual
Petrol products emit carbon The guaranteed sound 94.5 monoxide, odourless, pressure level is 94.5 dB. The colourless, and poisonous gas. guaranteed sound power level 111 dB Breathing carbon monoxide is 111 dB. can cause nausea, fainting, or Waste electrical products death. -
Page 14: Maintenance Schedule
MAINTENANCE SCHEDULE After first Every 3 Every year Before each month or months or Every 2 or 100 hours 20 hours of 50 hours of years of operation operation operation ■ Check for leakage and loose parts ■ Clean engine and check nuts and bolts ■... -
Page 15: Troubleshooting
TROUBLESHOOTING Problem Possible cause Solution No fuel in the tank. Fill the tank. The spark plug shorted or fouled. Replace the spark plug. The spark plug is broken (cracked Replace the spark plug. porcelain or electrodes broken). The spark plug wire is shorted, broken, Replace the spark plug wire or attach it Engine fails to start. -
Page 16: What's In The Box
WHAT'S IN THE BOX... -
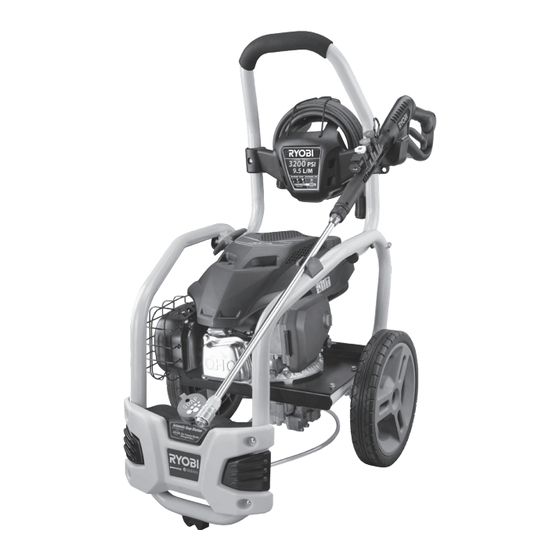
Page 17: Know Your Product
KNOW YOUR PRODUCT Handle Wheel 21. Detergent tank cap High-pressure hose storage 12. High-pressure hose (10.6 m) 22. Muffler Trigger handle holder 13. Spray wand 23. Spark plug boot Fuel cap 14. Trigger lock out 24. Starter grip Spray wand holder 15. -
Page 18: Getting Started
GETTING STARTED Wear full eye and ear protection, substantial footwear, and 1. To raise the handle, pull the handle release knob out . 2. long trousers at all times while operating the product. Do Pull the handle up until the handle release knob snaps into not operate the product when barefoot or wearing open locking position. - Page 19 GETTING STARTED GETTING STARTED GETTING STARTED GETTING STARTED 1/4-20 x 1.85 in 1/4-20 x 1.85 in 1/4-20 x 2.1 in 1. Place hose storage onto handle. 2. Align holes in the hose storage with holes in the handle. Insert screw (1/4-20 x 1.85 1.
- Page 21 OVERVIEW Starting/stopping the engine 0° Nozzle 25° Nozzle p.21 p.23 p.25 40° Nozzle Washing with Detergent Soap Nozzle p.27 p.31 p.29...
- Page 22 OVERVIEW Cleaning the Air Filter Changing the Engine Lubricant Moving the High Pressure Cleaner p.36 p.32 p.33 Replacing the Spark Plug Storing the High Pressure Cleaner p.35 p.37...
-
Page 23: Operation
OPERATION STARTING/STOPPING THE EN- GINE 1. Turn the on/off switch to the ON position. Turn the fuel valve to the ON (horizontal) position. 2. Pull choke into the START position. 3. Grasp the starter grip and pull slowly START until you feel the resistance. Give the starter grip a short, brisk pull to start the engine. - Page 24 OPERATION 5. Push choke into the RUN position. 6. Push up the lock out until it clicks into the slot. Squeeze the trigger to operate the high pressure cleaner. 7. To stop the high pressure cleaner, turn the on/off switch to the OFF position. Turn the fuel valve to the OFF (vertical) position.
- Page 25 OPERATION NOZZLE 1. Engage the lock out on the trigger handle by pushing down on the lock out until it clicks into the slot. 2. Pull back the quick-connect collar. Push the 0 nozzle into the quick-connect collar until it clicks into place and is secured properly.
- Page 26 OPERATION 5. Use the high pressure cleaner with 0 nozzle to clean high, hard-to-reach areas.
- Page 27 OPERATION NOZZLE 1. Engage the lock out on the trigger handle by pushing down on the lock out until it clicks into the slot. 2. Pull back the quick-connect collar. Remove the nozzle from the spray wand. 3. Pull back the quick-connect collar. Push the 25 nozzle into the quick-connect collar until it clicks into place and is...
- Page 28 OPERATION 5. Push up the lock out until it clicks into the slot. Squeeze the trigger to operate the high pressure cleaner.
- Page 29 OPERATION NOZZLE 1. Engage the lock out on the trigger handle by pushing down on the lock out until it clicks into the slot. 2. Pull back the quick-connect collar. Remove the nozzle from the spray wand. 3. Pull back the quick-connect collar. Push the 40 nozzle into the quick-connect collar until it clicks into place and is...
- Page 30 OPERATION 5. Push up the lock out until it clicks into the slot. Squeeze the trigger to operate the high pressure cleaner. 6. Use the high pressure cleaner with 40 nozzle to clean roofs, windows, patios, and driveways.
- Page 31 OPERATION SOAP NOZZLE 1. Engage the lock out on the trigger handle by pushing down on the lock out until it clicks into the slot. 2. Pull back the quick-connect collar. Remove the nozzle from the spray wand. 3. Pull back the quick-connect collar. Push the soap nozzle into the quick-connect collar until it clicks into place and is secured properly.
- Page 32 OPERATION 5. Push up the lock out until it clicks into the slot. Squeeze the trigger to operate the high pressure cleaner.
- Page 33 OPERATION WASHING WITH DETERGENT 1. Stop the high pressure cleaner. Refer to the "Starting/stopping the engine" section. 2. Remove the cap from the detergent container and pour the detergent into the detergent tank. Replace the detergent cap. 3. Install the soap nozzle. Refer to the "Soap nozzle"...
- Page 34 OPERATION MOVING THE HIGH PRESSURE CLEANER 1. Turn off the high pressure cleaner and shut off the water supply. 2. Pull the handle up until the handle release knob snaps into the locking position (if not already up and locked). Ensure the lock is secured in the frame hole before moving.
-
Page 35: Maintenance
MAINTENANCE CLEANING THE AIR FILTER 1. Loosen the air filter cover by turning the knob counterclockwise 2. Remove knob and air filter cover. 3. Lift the edge of the air filter carefully and pull it out. Wash the air filter with warm, soapy water. - Page 36 MAINTENANCE 5. Reinstall the air filter. 6. Reinstall the air filter cover and knob. 7. Secure the air filter cover by turning the knob clockwise.
-
Page 37: Replacing The Spark Plug
MAINTENANCE REPLACING THE SPARK PLUG 1. Disconnect the spark plug boot. 2. Loosen the spark plug by turning it counterclockwise using wrench. Remove the old spark plug. 3. Install the new spark plug. Use spark plug model BPR7HS (NGK) or equivalent. Tighten the spark plug securely using a wrench. - Page 38 MAINTENANCE CHANGING THE ENGINE LU- BRICANT 1. Turn the on/off switch to the OFF position. Turn the fuel valve to the OFF (vertical) position. 2. Turn lubricant cap/dipstick counterclockwise to open. Remove cap/ dipstick. Tilt the high pressure cleaner on its side as shown. Drain all lubricant into an approved container.
- Page 39 STORAGE STORING THE HIGH PRES- SURE CLEANER 1. Turn off the water supply. 2. Turn the on/off switch to the OFF position. Turn the fuel valve to the OFF (vertical) position. 3. Squeeze the trigger. Run water through the hose for 30 seconds to clean any debris from the hose.
- Page 40 STORAGE 5. Turn the collar counterclockwise to loosen the hose from the pump. Detach the collar of the high-pressure hose from the threaded nipple on the pump. 6. Turn the fuel cap counterclockwise to open. Remove the fuel cap. Drain all the fuel from the tank into a container approved for fuel.
- Page 41 STORAGE 9. Lower the handle by pulling the handle release knob out and then lower the handle to the down position. 10. Turn the hose collar counterclockwise to loosen the hose. Detach the high- pressure hose from the trigger handle inlet coupler.
- Page 42 STORAGE 12. Store the product in a cool, dry, and well- ventilated place that is inaccessible to children. STORAGE...
-
Page 43: Product Specifications
PRODUCT SPECIFICATIONS VIBRATION LEVEL Petrol high pressure cleaner WARNING Model RPW3200Y The declared vibration value has been Engine specifications measured with a standard test method and may be used to compare one tool with Engine manufacturer YAMAHA another. Engine model MA19050150 The declared vibration value may be used in Engine type... - Page 44 Imported by: Techtronic Industries Australia Pty Ltd 31 Gilby Road, Mount Waverley, VIC 3149 Melbourne, Australia Techtronic Industries N.Z. Limited 2 Landing Drive, Mangere Auckland, 2022, New Zealand 960478049-03...
Need help?
Do you have a question about the RBC36X26E and is the answer not in the manual?
Questions and answers