Nabco GYRO TECH GT-1175 Installation Manual
Electrical with u30 control
Hide thumbs
Also See for GYRO TECH GT-1175:
- Installation manual (62 pages) ,
- Quick setup manual (53 pages) ,
- Wiring and programming manual (31 pages)
Table of Contents
Advertisement
Quick Links
GT-1175 SLIDING DOOR
ELECTRICAL INSTALLATION MANUAL
TB1
AC115V ± 10%
50 / 60 Hz
BLACK (HOT)
WHITE (COMMON)
GROUNDING WIRE
SCREW TO HEADER
12VDC-COMMON
Auxiliary Output (Open-Collector)
5Amax.(0-20V), 3.2Amax.(20-30V)
30V(42.4Vpeak)max.
Contact Output (Class2 Load only)
Sidelite Presence Sensor
Breakout Detector
Sequential Activation
Exterior Activation
Mode Switch (see Mode SW Usage shown left)
REDUCED OPENING SWITCH
HOLDING BEAM
INTERIOR ACTIVATION
12VDC-(COMMON)
12VDC+
FUNCTION [SLIDING DOOR]
LABEL ON U30 CONTROL
OUTPUT: 0 = ELECTRIC STRIKE OUTPUT
OUTPUT TIMER
0 = (DO NOT USE)
1 = (DO NOT USE)
2 = (DO NOT USE)
3 = ELECTRIC STRIKE FUNCTION
Do not install or service this product unless you have read and understood the Safety Practices,
Warnings, Installation and Operating Instructions contained in this manual.
Failure to do so may result in property damage or bodily injury.
** with U30 Control **
POWER SUPPLY P/N 14-11741
T1
NOISE
FILTER
5
TB2
A
M
P
S1
120 VAC
ON/OFF
POWER
SWITCH
AUXILIARY 120 VAC
POWER WIRES
HARNESS
(THESE WIRES NORMALLY
P/N 14-11872
COILED AND TIED UP)
7
16
16
OUT
15
15
Common
OUT.C
14
14
N/C
OUT.B
13
13
N/O
OUT.A
12
12
SLS
11
11
BA
10
10
SQ
9
9
62
8
8
M1
7
7
M0
6
6
H
5
5
6B
4
4
61
3
3
7
2
2
9DC12V
1
SYMBOL
No.
1
TERMINAL ON U30 CONTROL
P/N 14-11873
U30 ELECTRIC STRIKE OUTPUT SIGNAL
HANDY TERMINAL: AUX OUTPUT = 0, OUTPUT TIMER = 3, ROCKER SWITCH SETTING: ONE WAY OR NIGHT MODE
ON
OFF
ACTIVATION SIGNAL
ON
OFF
3 SEC
OUTPUT SIGNAL
OPENING
OUTPUT TIMER
1.0 SEC
FULLY CLOSED
MOTOR/OPERATOR P/N 24-11327
WIRE NUT
ORANGE
P/N 14-1218
MOV
RECTIFIER
10-1576
11-9929-01
VIOLET
GREEN
WIRE NUT
GRAY (OUT A)
P/N 14-1218
(YEL)
WIRE NUT
P/N 14-1218
FULL OPEN
FULLY CLOSED
CLOSING
WARNING
S82 W18717 Gemini Drive, PO Box 906
Muskego, WI 53150
Phone: (877) 622-2694
Fax: (888) 679-3319
www.nabcoentrances.com
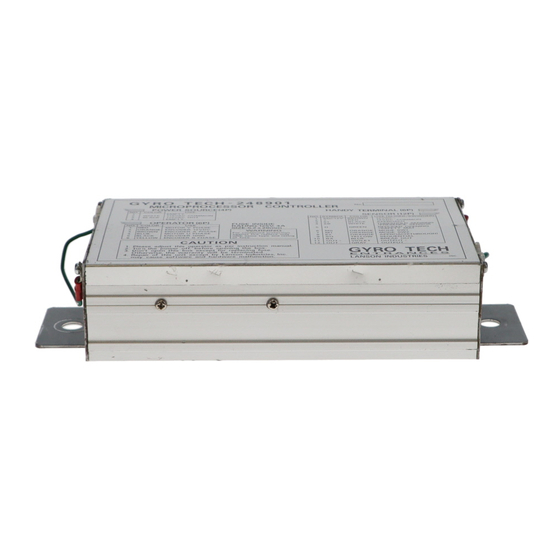
U30 CONTROL P/N 24-8901-30
WARNING
No.
HANDY TERMINAL? 6P
MOTOR? 12P
To protect against risk of fire
or electric shock,use only the
Microprocessor Controller
certified NABCO power supply.
248901-
Mode SW Usage
POWER
M0
M1
MODE
16
Open
Open
TWO WAY
FUNCTION [SLIDING DOOR]
SYMBOL
No.
15
61
Gnd
Open
ONE WAY
12VDC+
9DC12V
1
GYRO TECH
14
Gnd
Gnd
HOLD OPEN
12VDC-(Common)
7
2
6B
Open
13
Gnd
NIGHT
Interior Activation
61
3
H
Holding Beam
6B
4
12
Reduced Opening Switch
H
5
11
62
CAUTION
M0
6
Mode Switch (see Mode SW Usage shown left)
10
M1
7
BA
9
Exterior Activation
62
8
8
ERROR
Sequential Activation
SQ
9
Adjustments to the door can only be made
7
Breakout Detector
BA
10
with the NABCO Handy Terminal.
Sidelite Presence Sensor
SLS
11
6
Contact Output (Class2 Load only)
N/O
OUT.A
12
5
Do not disassemble the control box.
30V(42.4Vpeak)max.
N/C
OUT.B
13
4
There are no user serviceable parts
5Amax.(0-20V), 3.2Amax.(20-30V)
Common
OUT.C
14
3
inside.
Auxiliary Output (Open-Collector)
OUT
15
2
To maintain warranty,repairs must be
12VDC-(Common)
7
16
1
made by authorized NABCO facilities.
POWER SUPPLY HARNESS
P/N 14-11874
ORANGE
TRANSFORMER
P/N 14-2101
24 VAC
WIRE NUT
P/N 14-1218
ELECTRIC LOCK / STRIKE
BLK/WHT
FAIL SECURE
TYPE
BLK/WHT
DN 0291
P/N 15-10596-30
Rev 04-24-08
Advertisement
Table of Contents

Related Manuals for Nabco GYRO TECH GT-1175

Summary of Contents for Nabco GYRO TECH GT-1175
- Page 1 Mode Switch (see Mode SW Usage shown left) Exterior Activation ERROR Sequential Activation Adjustments to the door can only be made Breakout Detector with the NABCO Handy Terminal. Sidelite Presence Sensor Contact Output (Class2 Load only) OUT.A Do not disassemble the control box. 30V(42.4Vpeak)max.
-
Page 2: Table Of Contents
D.4.2 Wiring - U30 configured for remote control - Two Way and Night mode ........19 D.4.3 Wiring - U30 configured for remote control - One Way and Night mode ........20 D.4.4 Wiring - U30 with sidelite sensors ....................21 E. Troubleshooting ............................... 22 F. Nabco Entrances Return Policy........................23 Page 2 www.NabcoEntrances.com 04-24-08... -
Page 3: General Information
Mode Switch (see Mode SW Usage shown left) Exterior Activation ERROR Sequential Activation Adjustments to the door can only be made Breakout Detector with the NABCO Handy Terminal. Sidelite Presence Sensor Contact Output (Class2 Load only) OUT.A Do not disassemble the control box. 30V(42.4Vpeak)max. -
Page 4: U30 Power Output Guidelines
350 mA (0.35 amps) otherwise an auxiliary power supply must be used. The Nabco power supply module P/N 14-11741 can be used as a 20 VAC auxiliary power supply provided the TOTAL power drawn for accessories does not exceed 8 Watts. -
Page 5: Terminal Block Assignments
U30 Electrical Installation Manual B. Terminal Block Assignments 16 Pin Controller Terminal Block Assignments (All wires are identified by color) Symbol Color* Description This output terminal is a sensor power source. The output is 12 VDC with a maximum 9DC12V Brown capacity of 0.35 amps. -
Page 6: Rocker Switch Settings
U30 Electrical Installation Manual C. Rocker Switch Settings Rocker Switch Settings ( w hen wires M0 & M1 are switched to Red 7 the state is indicated by “ON”) Wire Wire Mode Wire H Description Two Way In this mode, both sensors on terminals 3 and 8 will receive signals mode while the door is closed or cycling. -
Page 7: Wiring Diagrams
U30 Electrical Installation Manual D. Wiring Diagrams D.1 Standard Wiring D.1.1 Wiring Diagram with two Acusensors and Holding Beam FULL OPEN TWO WAY Page 7 www.NabcoEntrances.com 04-24-08... -
Page 8: Wiring - Two Acumotions And Holding Beam
U30 Electrical Installation Manual D.1.2 Wiring Diagram with two Acumotions and Holding Beam FULL OPEN TWO WAY Page 8 www.NabcoEntrances.com 04-24-08... -
Page 9: Wiring - Two Acusensors, Holding Beam And Breakout Beam Control
U30 Electrical Installation Manual D.1.3 Wiring Diagram for Surface Applied Sliders with two Acusensors, Holding Beam and Breakout Beam Control FULL OPEN TWO WAY Page 9 www.NabcoEntrances.com 04-24-08... -
Page 10: Wiring - Two Acumotions, Holding Beam And Breakout Beam Control
U30 Electrical Installation Manual D.1.4 Wiring Diagram with two Acumotions, Holding Beam and Breakout Beam Control for Surface Applied Sliders FULL OPEN TWO WAY Page 10 www.NabcoEntrances.com 04-24-08... -
Page 11: Wiring - Connecting Push Plates And/Or Card Readers For Use In Night Mode
U30 Electrical Installation Manual D.1.5 Wiring Diagram for connecting push plates and or card readers for use in Night mode. Attach the normally open contacts across terminals 16 & 6 on controller terminal block. FULL OPEN TWO WAY Page 11 www.NabcoEntrances.com 04-24-08... -
Page 12: Wiring - Connecting Push Plates And/Or Card Readers For Use In One Way Mode
U30 Electrical Installation Manual D.1.6 Wiring Diagram for connecting push plates and or card readers for use in One Way mode. Attach the normally open contacts across terminals 16 & 7 on controller terminal block. FULL OPEN TWO WAY Page 12 www.NabcoEntrances.com 04-24-08... -
Page 13: Infrared Beam Wiring
U30 Electrical Installation Manual D.2 Infrared Beam Wiring Term # & Color D.2.1 Wiring Diagram of Optex OS-12C Module for One Wiring Diagram for One Holding Beam using Optex Connect OS-12C Controller on a GT-1175 with U30 control. Each Terminal the Same Infrared Beam (Activation-Hold Open) The infrared beam assembly is a factory-installed unit... -
Page 14: Wiring Diagram Of Optex Os-12C Module For Two Infrared Beams
U30 Electrical Installation Manual D.2.2 Wiring Diagram of Optex OS-12C Module for Two Infrared Beams Term # & Color Wiring Diagram for Two Holding Beams using Optex OS-12C Connect Each Terminal Controller on a GT-1175 with U30 control. the Same Infrared Beams (Activation-Hold Open) The infrared beam assembly is a factory-installed unit RCVR 1... -
Page 15: Electric Lock Wiring
U30 Electrical Installation Manual D.3 Electric Lock Wiring D.3.1 Wiring diagram for U30 with Fail Secure Electric Lock. Note: lock works only in Night & One Way Modes Page 15 www.NabcoEntrances.com 04-24-08... -
Page 16: Wiring - Fail Safe Electric Lock
U30 Electrical Installation Manual D.3.2 Wiring diagram for U30 with Fail Safe Electric Lock. Note: lock works only in Night & One Way Modes Page 16 www.NabcoEntrances.com 04-24-08... -
Page 17: Wiring - Fail Safe Magnetic Lock
U30 Electrical Installation Manual D.3.3 Wiring diagram for U30 with Fail Safe Magnetic Lock Note. Lock works only in Night & One Way Modes Page 17 www.NabcoEntrances.com 04-24-08... -
Page 18: Custom Wiring
U30 Electrical Installation Manual D.4 Custom Wiring D.4.1 Wiring diagram for U30 configured for remote control - TWO WAY and ONE WAY mode. Internal transistor for signal at fully open or fully closed position. 12VDC-COMMON INTERNAL TRANSISTOR FOR SIGNAL AT THE FULLY Auxiliary Output (Open-Collector) BRN/YEL OPEN OR FULLY CLOSED POSITION. -
Page 19: Wiring - U30 Configured For Remote Control - Two Way And Night Mode
U30 Electrical Installation Manual D.4.2 Wiring diagram for U30 configured for remote control - TWO WAY and NIGHT mode. Internal transistor for signal at fully open or fully closed position. 12VDC-COMMON INTERNAL TRANSISTOR FOR SIGNAL AT THE Auxiliary Output (Open-Collector) BRN/YEL FULLY OPEN OR FULLY CLOSED POSITION. -
Page 20: Wiring - U30 Configured For Remote Control - One Way And Night Mode
U30 Electrical Installation Manual D.4.3 Wiring diagram for U30 configured for remote control - ONE WAY and NIGHT mode. Internal transistor for signal at fully open or fully closed position. 12VDC-COMMON INTERNAL TRANSISTOR FOR SIGNAL AT THE FULLY Auxiliary Output (Open-Collector) OPEN OR FULLY CLOSED POSITION. -
Page 21: Wiring - U30 With Sidelite Sensors
U30 Electrical Installation Manual D.4.4 Wiring diagram for U30 with sidelite sensors. Page 21 www.NabcoEntrances.com 04-24-08... -
Page 22: Troubleshooting
U30 Electrical Installation Manual E. Troubleshooting E.1 When the doors are panicked open, the system does not shut down. E.1.1 Check the wiring of the magnetic power down switches. Blue (BA) circuit must go open for system to shut down. E.2 Doors do not move when power is applied or Handy Terminal screen does not change. -
Page 23: Nabco Entrances Return Policy
The RMT tag is printed in triplicate. Please keep the top copy of the tag for your returns. Send the remaining two copies along with the part to the attention of the Repair and Return Department at NABCO ENTRANCES. Please remember to package the parts properly.
Need help?
Do you have a question about the GYRO TECH GT-1175 and is the answer not in the manual?
Questions and answers