Advertisement
Alle Rechte, auch die der Übersetzung, des Nachdruckes und der
Vervielfältigung dieser Anleitung oder Teilen daraus, vorbehalten.
Reproduktionen jeder Art (Fotokopie, Mikrofilm oder ein anderes Ver-
fahren) nur mit schriftlicher Genehmigung des Herausgebers gestattet.
Letzter Stand bei Drucklegung. Technische Änderungen des Gerätes,
welche dem Fortschritt dienen, vorbehalten.
Hiermit bestätigen wir, dass alle Geräte, die in unseren Unterlagen
genannten Spezifikationen erfüllen und werkseitig kalibriert geliefert
werden. Eine Wiederholung der Kalibrierung nach Ablauf von drei
Jahren wird empfohlen.
®
© PeakTech
03/2007/Th
- 11 -
1. Safety Precautions
This product complies with the requirements of the following European
Community Directives: 89/336/EC (Electromagnetic Compatibility)
amended by 93/68/EC (CE-Marking). Pollution degree 2.
To ensure safe operation of the equipment and eliminate the danger of
serious injury due to short-circuits (arcing), the following safety
precautions must be observed.
Damages resulting from failure to observe these safety precautions are
exempt from any legal claims whatever.
*
use extreme caution when the laser beam is turned ON
*
do not let the beam enter your eye, another person´s eye or the
eye of an animal
*
be careful not to let the beam on a reflective surface strike your
eye
*
do not allow the laser light beam impinge on any gas which can
explode
*
do not let the beam of any body
*
Do not operate the meter before the cabinet has been closed and
screwed safely as terminal can carry voltage.
*
Never touch the tips of the test leads or probe.
*
Comply with the warning labels and other info on the
equipment.
*
Do not subject the equipment to shocks or strong vibrations.
*
Do not operate the equipment near strong magnetic fields (motors,
transformers etc.).
*
Keep hot soldering irons or guns away from the equipment.
*
Allow the equipment to stabilize at room temperature before taking
up measurement (important for exact measurements).
- 12 -
Advertisement
Table of Contents

Related Manuals for PeakTech P 2790


Summary of Contents for PeakTech P 2790
- Page 1 ® © PeakTech 03/2007/Th do not allow the laser light beam impinge on any gas which can explode...
-
Page 2: Austauschen Der Batterien
Schaltkreise des Gerätes zerstören. prevent possible shorts and damage to the equipment. P 2785 :4 x 1,5 V, Typ AA P 2790 : 9 V – Batterie (Neda 1604) 2. Features Batteriefachdeckel wieder auflegen und schließen. This tachometer is used the micro computer (CPU) technique, Bei längerem Nichtgebrauch des Gerätes Batterien aus dem... -
Page 3: Specifications
9 V Battery (P 2790) Dimensions: 75 x 160 x 40 mm (P 2785) (WxHxD) 60 x 160 x 40 mm (P 2790) Weight: 280 g (P 2785) / 150 g (P 2790) - 9 - - 14 -... -
Page 4: Memory Call Button Operation
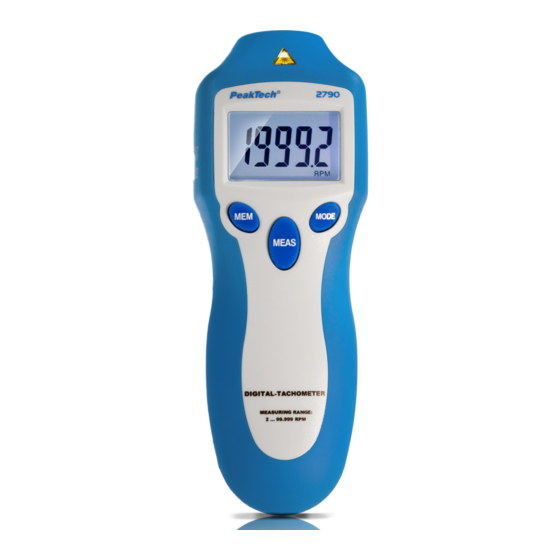
4. Memory Call Button Operation 9. Vorderansicht P 2790 A readout (the Last value, max. value, min. value) obtained immediately before turning off the MEASURING BUTTON is automatically memorised. For example, please ref. following fig.: For P 2785 That Memorised value can be display on the indicator whenever. - Page 5 0,1 RPM (0,5 to 999,9 RPM) Messtaste 4 wieder loslassen 1 RPM (over 1000 RPM) SURFACE SPEED: 0,01 m/min (0,05 to 99,99 m/min) 8. Foto-Tachometer-Daten (P 2790) 0,1 m/min (over 100 m/min) Messbereich: 2... 99999 Upm Auflösung: 0,1 Upm ( 2...999,9 Upm) 1 Upm (über 1000 Upm)
- Page 6 6. Front Panel Descriptions (P 2785) 6. Vorderansicht des Gerätes (P 2785) 1) Contact TACH. Test device 1) Kontakt Tacho Testvorrichtung 2) Surface speed wheel 2) Oberflächengeschwindigkeits-Testvorrichtung 3) Contact measuring device 3) Kontaktmessungsvorrichtung 4) Measure button 4) Messtaste 5) Display window 5) LCD-Anzeige 6) Function Switch 6) Funktionswahltaste...
- Page 7 MEM-Taste erneut drücken: Es erscheint das Symbol „MIN“ und der minimale Messwert wird angezeigt 8. Photo Tachometer (P 2790) MEM-Taste nochmals drücken: Es erscheint das Symbol „LAST“ und der zuletzt gemessene Messwert wird angezeigt Test range: 2…99999 Rpm...
- Page 8 (BxHxT) 60 x 160 x 40 mm (P 2790) Gewicht: 280 g (P 2785) ; 150 g (P 2790) 4. Speicherwertaufruftaste MEM Die gespeicherten minimalen und maximalen Messwerte sowie der letzte Messwert vor dem Ausschalten des Gerätes können mit der MEM-Taste jederzeit wieder abgerufen werden.
-
Page 9: Technische Merkmale
2. Technische Merkmale 10. Measuring Procedure (P 2790) Mikroprozessor-gesteuerter Tachometer, Fotoelektro- 1.) Press the MEAS-key to switch-on the instrument Lasertechnologie zur Messung von UpM und m/min. 2.) Press the function key RPM/Total for choosing the P 2790: nur UpM corresponding function 3.) Apply a reflective mark to the object being measured... -
Page 10: Battery Replacement
Stofftuch und einem milden Reinigungsmittel. Benutzen Sie keine P 2785 : 4 x 1,5 V / type AA ätzenden Scheuermittel. P 2790 : 9 V – battery (Neda 1604) Vermeiden Sie jegliche Nähe zu explosiven und entflammbaren Stoffen. Slide the battery cover away, from the instrument and remove Öffnen des Gerätes und Wartungs –... -
Page 11: Sicherheitshinweise Zum Betrieb Des Gerätes
1 year. Betrieb des Gerätes unbedingt zu beachten. Schäden, die durch Nichtbeachtung dieser Hinweise entstehen, sind von Ansprüchen jeglicher Art ausgeschlossen. ® © PeakTech 03/2007/Th Gerät in eingeschaltetem Zustand (Laserstrahl-Emission) mit äußerster Vorsicht handhaben Laserstrahl niemals auf das Auge richten Laserstrahl nicht auf gasförmige Stoffe oder Gasbehälter... - Page 12 ® PeakTech 2785 / 2790 Bedienungsanleitung/ Operation Manual Digital- Drehzahlmesser/ Digital Tachometers mit /with Laser...
Need help?
Do you have a question about the P 2790 and is the answer not in the manual?
Questions and answers