
Subscribe to Our Youtube Channel
Related Manuals for Polycom VVX Series


Summary of Contents for Polycom VVX Series
- Page 1 USER GUIDE 5.8.0 | May 2018 | 3725-48814-001A ® ® Polycom Business IP Phones with Better Together over Ethernet...
- Page 2 Open Source Software Used in this Product This product may contain open source software. You may receive the open source software from Polycom up to three (3) years after the distribution date of the applicable product or software at a charge not greater than the cost to Polycom of shipping or distributing the software to you.
-
Page 3: Table Of Contents
Contents Before You Begin....................4 Audience, Purpose, and Required Skills................4 Related Documentation.......................4 Getting Help........................4 Polycom Partner and Solution Resources..............5 The Polycom Community..................5 ® ® Getting Started with Polycom Business IP Phones......6 Overview of Phone Hardware and Keys................6 VVX 250 Hardware....................6... - Page 4 Contents Connecting to Skype for Business on Your Phone using Better Together over Ethernet................23 Installing the Polycom Better Together over Ethernet Connector........23 Download and Install the Polycom BToE Connector..........23 Start the Polycom BToE Connector............... 24 Disable Auto-Start for the Polycom BToE Connector..........24 Pairing Your Phone with Your Computer................
- Page 5 Troubleshoot Polycom BToE Connector Installation..........46 Troubleshoot Polycom BToE Connector Start Issues..........46 Troubleshoot Pairing Your Phone with Your Computer......... 47 Troubleshoot Polycom BToE Connector with a USB Audio Device....... 47 Regenerate a Pairing Code for Manual BToE Pairing..........47 Using an Approved Power Source..................48...
-
Page 6: Before You Begin
Audience, Purpose, and Required Skills • Related Documentation ▪ Getting Help This Polycom VVX Business IP Phones with Better Togheter over Ethernet - User Guide contains ® ® overview information for navigating and performing tasks on Polycom Business IP Phones. -
Page 7: Polycom Partner And Solution Resources
To register with the Polycom Community, simply create a Polycom online account. When logged in, you can access Polycom support personnel and participate in developer and support forums to find the latest information on hardware, software, and partner solutions topics. -
Page 8: Getting Started With Polycom ® Vvx ® Business Ip Phones
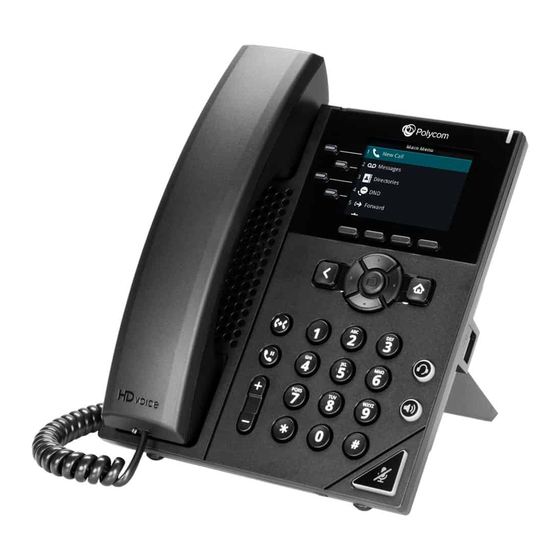
® ® Getting Started with Polycom Business IP Phones Topics: • Overview of Phone Hardware and Keys ▪ Accessing Screens on VVX Business IP Phones ▪ Icons and Status Indicators on VVX Business IP Phones • Entering Information in Data Fields Before you use your phone, take a few moments to familiarize yourself with its features and user interface. - Page 9 ® ® Getting Started with Polycom Business IP Phones VVX 250 hardware features VVX 250 Hardware Features Reference Feature Feature Description Number Line keys Enable you to select a phone line, view calls on a line, or quickly call a favorite contact.
-
Page 10: Vvx 350 Hardware
® ® Getting Started with Polycom Business IP Phones Reference Feature Feature Description Number Speakerphone key Enables you to place and receive calls using the speakerphone. Headset key Enables you to place and receive calls through a headset. USB Port Enables you to attach a USB flash drive or USB headset. - Page 11 ® ® Getting Started with Polycom Business IP Phones VVX 350 hardware features VVX 350 Hardware Feature Descriptions Reference Feature Feature Description Number Line keys Enable you to select a phone line, view calls on a line, or quickly call a favorite contact.
-
Page 12: Vvx 450 Hardware
® ® Getting Started with Polycom Business IP Phones Reference Feature Feature Description Number Dial pad Enables you to enter numbers, letters, and special characters. You can also use the dial pad keys to select menu items that have index numbers. - Page 13 ® ® Getting Started with Polycom Business IP Phones VVX 450 hardware features VVX 450 Hardware Feature Descriptions Reference Feature Feature Description Number Line keys Enable you to select a phone line, view calls on a line, or quickly call a favorite contact.
-
Page 14: Securing Your Phone With The Security Slot
® ® Getting Started with Polycom Business IP Phones Reference Feature Feature Description Number Dial pad Enables you to enter numbers, letters, and special characters. You can also use the dial pad keys to select menu items that have index numbers. -
Page 15: Access The Main Menu
® ® Getting Started with Polycom Business IP Phones ▪ Lines Screen—Displays your phone lines, favorites, and conditional soft keys. Access the Main Menu On VVX business IP phones, you can access phone features and settings from the Main Menu screen. -
Page 16: Access The Lines Screen
® ® Getting Started with Polycom Business IP Phones • From the Lines screen, press the Calls soft key. Access the Lines Screen The Lines screen is the default screen that displays when VVX business IP phones are not in use. -
Page 17: Icons And Status Indicators On Vvx Business Ip Phones
Description Registered line Phone warning Unregistered line Login credentials invalid Outgoing call Shared line Active call using Polycom HD Voice USB flash drive attached Held call Call forwarding enabled Incoming call Presence status (Available) Active conference Presence status (Busy or In a Call) -
Page 18: Entering Information In Data Fields
® ® Getting Started with Polycom Business IP Phones Icon Description Icon Description Do Not Disturb enabled Presence status (Away) Favorite Presence status (Do Not Disturb) Placed call Presence status (Offline) Received call Presence status (Offline) Missed call New message... -
Page 19: Entering Information Using The Dial Pad
® ® Getting Started with Polycom Business IP Phones Mode Options Encoding Options ASCII (for regular text) Latin (to enter accented characters) Katakana (for Japanese characters) Unicode (to store characters as double bytes) Cyrillic (for Russian characters) Entering Information Using the Dial Pad You can use the dial pad keys on VVX business IP phones to edit or update field information. -
Page 20: Entering Chinese Characters With Pinyin
® ® Getting Started with Polycom Business IP Phones Task Action Delete one or more characters Use the arrow keys to position the cursor to the right of the character, or drag your finger across the characters until the cursor is positioned to the right of the character(s) you want to delete. -
Page 21: Logging In To And Locking Your Phone
2. Select Yes to sign out the host user. 3. Select Via PC or Paired with Client. 4. In the Skype for Business client on your computer, enter your login credentials. A confirmation message is displayed when the phone successfully signs into Skype for Business. Polycom, Inc. -
Page 22: Sign Out Of Skype For Business
28 Set a Lock Code When you sign in to your Skype for Business account, you are prompted to set a lock code. After you set a lock code, you can use the code to unlock your phone. Polycom, Inc. -
Page 23: Lock Your Phone
Related Links Adding a Profile Photo to Display on the Lock Screen on page 45 Unlock the Phone You can use your lock code to unlock VVX business IP phones. Procedure 1. Enter your lock code and select Unlock. Polycom, Inc. -
Page 24: Change Your Lock Code
Device Lock is enabled by default. However, if you do not want to lock your phone, you can disable Device Lock. Procedure 1. Navigate to Settings > Basic > Device Lock. 2. Select Device Lock: Enabled, and select Disabled. Polycom, Inc. -
Page 25: Connecting To Skype For Business On Your Phone Using Better Together Over Ethernet
Skype for Business client. You can also use BToE to sign in to your phone using your Skype for Business credentials. In order to use BToE, you need to download and install the Polycom BToE Connector application. Installing the Polycom Better Together over Ethernet Connector ®... -
Page 26: Start The Polycom Btoe Connector
Start the Polycom BToE Connector If you do not choose to open the Polycom BToE Connector Application during the installation process, you must start the application before connecting your phone to your computer. -
Page 27: Pairing Your Phone With Your Computer
BToE feature settings and pair your phone from the menu. Before you can begin using BToE, you must pair your Polycom phone with your computer. By default, your phone is set to pair with your computer automatically when Better Together over Ethernet is enabled and you connect your phone to your computer over Ethernet. -
Page 28: Manually Pair Your Phone With Your Computer Using Btoe
Set Your Phone as Your Primary Audio Device Before you begin using the BToE feature, you need to ensure that your Polycom VVX phone is set as your primary audio device in your Skype for Business client on your computer. -
Page 29: Use Your Phone As Your Primary Audio Device For Your Computer
1. On your computer, click Start > Control Panel. 2. In the Control Panel, click Hardware and Sound > Sound. 3. Click Polycom VVX Phone and click the drop-down arrow for Set Default. 4. Select Default Communication Device and click OK. -
Page 30: Using Btoe To Lock And Unlock Your Phone
With the BToE Connector (version 3.8.0 or later), your phone locks within 10 seconds after you lock your computer or at a designated time set by your administrator, when the phone is not in use. Your phone unlocks immediately after you unlock your computer. Related Links Locking Your Phone on page 20 Polycom, Inc. -
Page 31: Using Btoe To Manage Calls On Your Phone And Skype For Business Client
Note: If you want to route audio from media that uses the computer's speakers, such as web videos or media players, you must manually change the computer's default audio speaker device to use Polycom VVX Phone. Answer BToE Calls When you are signed in to the Skype for Business client and the connected phone with the same account, the way you answer calls is different than if the Skype for Business client and the connected phone were signed in with different accounts. -
Page 32: Place Btoe Calls
2. Click Devices and do one of the following: • Click Handset to move the call audio from your computer to your phone. • Click PC Mic and Speakers to move the call audio from your phone to your computer. Polycom, Inc. -
Page 33: Disabling Btoe And Uninstalling The Btoe Connector Application
• Uninstall the Polycom BToE Connector If you want to temporarily stop using BToE, you can disable BToE on your phone or stop the Polycom BToE Connector application on your computer. You can also uninstall the BToE Connector application if you no longer want to use the feature. - Page 34 Disabling BToE and Uninstalling the BToE Connector Application If you decide to start using the BToE feature again, you must reinstall the Polycom BToE Connector and repeat the steps for enabling and pairing your Polycom phone and computer. Procedure 1. In the Start menu, select All Programs > Polycom > Polycom BToE Connector > Uninstall Polycom BToE Connector.
-
Page 35: Polycom ® Vvx ® Business Ip Phones Settings
Contact your system administrator for assistance enabling or customizing features. Set the Language Polycom phones support several languages that you can choose to display on the phone. Check with your system administrator to find out exactly which languages are supported on your phone. -
Page 36: Time And Date Display
• Backlight On—The brightness of the screen when there is activity. • Backlight Idle—The brightness of the screen when there is no activity. • Maximum Intensity—The brightness scale that applies to both Backlight On and Backlight Idle intensities. Polycom, Inc. -
Page 37: Set The Backlight Intensity
Check with your system administrator to find out if this feature is available on your phone. Change the Background Picture If your system administrator has pre-loaded your phone with background pictures or you have added personal photos onto the phone, you can choose to display a background other than the default. Polycom, Inc. -
Page 38: Adding Personal Photos As Your Background
You can add one or multiple images for your phone background using the Web Configuration Utility. Note: On Polycom phones registered with Skype for Business Server, access to the Web Configuration Utility is disabled by default as a security precaution. Contact your system administrator for help enabling the Web Configuration Utility. -
Page 39: Reset Your Background
Insert an empty line between line keys • Clear a contact from a line key or delete a line key • Reset all custom line keys Check with your system administrator to find out if this feature is available on your phone. Polycom, Inc. -
Page 40: Show Only Your Line Registration
You can clear a contact from a line to make the line blank. Clearing a contact does not change the position of other contacts. Procedure 1. Navigate to Settings > Features > Line Key Customization. 2. Select Phone Line Keys. 3. Select a line and press Clear. Polycom, Inc. -
Page 41: Delete A Line Key
3. Select Wait Time, and enter the number of minutes the phone should wait after no activity before displaying the screen saver. You can enter any time between one minute and of 9999 minutes. The default is 15 minutes. 4. Select Type and select either Default or Idle Browser. 5. Select Save. Polycom, Inc. -
Page 42: Use Personal Photos As Screen Savers
Note: If your phone does not detect the USB device when you insert it into the USB port, the USB port on your phone may be disabled. Contact your system administrator for assistance using the USB port. Polycom, Inc. -
Page 43: Disable The Screen Saver
1. Select Settings > Features > Removable Storage Media > Picture Frame. Your pictures display one-by-one, like a slide show, and navigation icons display beneath your pictures, as shown next. Picture Frame Icons Use the icons in the following table to perform actions in the Picture Frame. Polycom, Inc. -
Page 44: Power-Saving Mode
Set the picture that currently displays as the background picture for your phone. Power-Saving Mode By default, Polycom phones are set to enter power-saving mode and turn off the screen after being idle for a certain period of time to conserve energy. -
Page 45: Change Idle Timeouts For Power-Saving Mode
For example, you can configure your phone to ring on your headset instead of the speaker. By default, you hear all sound effects from the speaker. Procedure 1. Navigate to Settings > Basic > Preferences. 2. Select Audible Ringer and select a location to hear sound effects. Polycom, Inc. -
Page 46: Set A Ringtone For Incoming Calls
Acoustic Fence works with handsets or headsets. However, only headsets connected to the RJ-9 port on the phone support Acoustic Fence. Acoustic Fence is enabled by default on the handset, disabled by default for a connected headset, and not supported with USB or Bluetooth headsets. Polycom, Inc. -
Page 47: Update Your Skype For Business Presence
You can disable the Hot Desking feature that enables you to sign in as a guest on a VVX phone using your Skype for Business credentials. The Hot Desking feature is enabled by default. Procedure 1. Navigate to Settings > Features > Hot Desking. 2. Select Disable. Polycom, Inc. -
Page 48: Troubleshooting
Better Together over Ethernet ▪ Using an Approved Power Source If you are having issues with your Polycom phone, you can try the troubleshooting options and solutions in the following topics to resolve certain issues. Better Together over Ethernet Use the following solutions as a guide to resolve certain issues that might arise while installing the Polycom BToE Connector or pairing your devices. -
Page 49: Troubleshoot Pairing Your Phone With Your Computer
1. Navigate to Start > Control Panel > System and Security > Windows Firewall > Allow a program through Windows Firewall. 2. Click Change Settings. 3. Search for Polycom BToE Connector in the list of applications and click the check boxes for Domain, Home/Work, and Public networks. 4. Click OK. -
Page 50: Using An Approved Power Source
If you connect the wrong power supply to your phone, such as the power supply for a different or older Polycom phone, it could damage the phone, the phone will not function as expected, and it can void your warranty.
Need help?
Do you have a question about the VVX Series and is the answer not in the manual?
Questions and answers