Advertisement
Quick Links
Download this manual
See also:
Instruction Manual
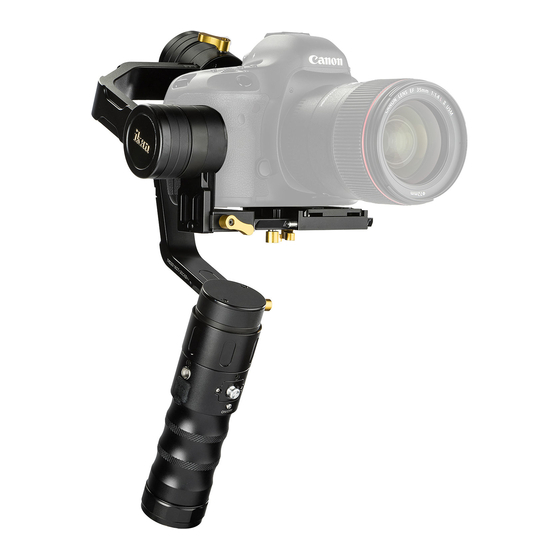
Ikan EC1 Beholder Gimbal Calibration Guide v1
Although all gimbals are calibrated before being shipped, the accelerometer and gyroscope inside the gimbals
are temperature sensitive and may require recalibration to local operating conditions. Should you find that
your gimbal is tilting or drifting, please follow the steps below to recalibrate your gimbal.
The following items are required to properly calibrate your Gimbal:
*Warning: gimbals can be permanently damaged if other settings not covered in this guide are changed. *
1.0 Camera installation and Gimbal Balancing
Items Needed:
-Camera – 4.5 pounds max including lens
-Gimbal – EC1
-Screwdriver – flat head
The gimbal cannot be properly calibrated if it is not balanced with a camera installed. To balance your gimbal, follow the
steps that are outlined below.
Gimbal balancing steps:
Before installing the camera and adjusting the balance, remove the camera lens cover, attach the lens hood, and insert
a memory card and camera batteries, as well as any other accessories. The camera should be fully ready to shoot.
STEP 1: Mount the camera quick release
• Remove the quick release plate from the gimbal.
• Attach the quick release plate to the camera (Fig. 4); be careful not to twist it too tight at this point.
Phone: (713) 272-8822
Fax: (713) 995-4994
11500 S Sam Houston Pkwy W
Houston, TX 77031
a.
Ikan EC1 Gimbal – fully powered
b. Camera – 4.5 pounds max including lens
c.
Screwdriver – flat head
d. Computer – Windows or MacOS
e.
Cable – USB to mini-UBS
Advertisement

Subscribe to Our Youtube Channel
Related Manuals for Ikan EC1


Summary of Contents for Ikan EC1
- Page 1 Ikan EC1 Beholder Gimbal Calibration Guide v1 Although all gimbals are calibrated before being shipped, the accelerometer and gyroscope inside the gimbals are temperature sensitive and may require recalibration to local operating conditions. Should you find that your gimbal is tilting or drifting, please follow the steps below to recalibrate your gimbal. The following items are required to properly calibrate your Gimbal: Ikan EC1 Gimbal – fully powered b. Camera – 4.5 pounds max including lens Screwdriver – flat head d. Computer – Windows or MacOS Cable – USB to mini-UBS *Warning: gimbals can be permanently damaged if other settings not covered in this guide are changed. * 1.0 Camera installation and Gimbal Balancing Items Needed: -Camera – 4.5 pounds max including lens -Gimbal – EC1 -Screwdriver – flat head The gimbal cannot be properly calibrated if it is not balanced with a camera installed. To balance your gimbal, follow the steps that are outlined below. Gimbal balancing steps: Before installing the camera and adjusting the balance, remove the camera lens cover, attach the lens hood, and insert a memory card and camera batteries, as well as any other accessories. The camera should be fully ready to shoot. STEP 1: Mount the camera quick release • Remove the quick release plate from the gimbal. • Attach the quick release plate to the camera (Fig. 4); be careful not to twist it too tight at this point. Phone: (713) 272-8822 Fax: (713) 995-4994 11500 S Sam Houston Pkwy W Houston, TX 77031...
- Page 2 • Make sure the quick release plate direction is facing forward toward the lens. Phone: (713) 272-8822 Fax: (713) 995-4994 11500 S Sam Houston Pkwy W Houston, TX 77031...
- Page 3 STEP 2: Install the camera on gimbal base • Install the camera with quick release mounted into the Beholder EC1 bottom mount base (Fig. 5). • Slightly adjust the position of the camera into the base until you find a horizontal balance. • Shift the camera as close to the pitch motor as possible. Use the base plate positioning if needed. • Tighten the thumb screws. • Use a screwdriver to tighten the 1/4"-20 quick release screw. Phone: (713) 272-8822 Fax: (713) 995-4994 11500 S Sam Houston Pkwy W Houston, TX 77031...
- Page 4 STEP 3: Adjust the gimbal roll – left and right balance • Release the roll thumb M4 screw (Fig. 6). • Slide the roll arm left or right until the camera finds a balance position and doesn’t lean left or right. • In case more space is needed on either side, then go back to step 2. Phone: (713) 272-8822 Fax: (713) 995-4994 11500 S Sam Houston Pkwy W Houston, TX 77031...
- Page 5 STEP 4: Adjust the gimbal pitch - up and down balance • Loosen the camera plate M4 thumb screw to adjust the pitch level (M4 thumb screw – in Fig. 7) • Move the camera plate arm up and down, until the camera stays in place at any lens angle. • Tighten the thumb screws. Phone: (713) 272-8822 Fax: (713) 995-4994 11500 S Sam Houston Pkwy W Houston, TX 77031...
- Page 6 STEP 5: Adjust the gimbal pan – forward and backward balance • Loosen the pan motor left thumb screw (Fig. 8). • Tilt the gimbal handle 45 degrees forward. • Move the pan arm to the left side or to the right side at 90 degrees and observe the direction it tends to move when released. • If the pan arm tends to go up/backward, then the gimbal is front heavy: move the pan arm back slightly and repeat the side test. • If the pan arm tends to move down/forward, it means the gimbal is back heavy: move the pan arm slightly forward and repeat the side test. • When in balance, the pan arm should stay at any position around the handle when the handle is tilted forward. • Tighten the thumb screws. Additional Balance Related Information: In-depth instructions on how to balance your gimbal are available in this video: https://www.youtube.com/watch?v=WJkMEaLFf3A&t=1s Phone: (713) 272-8822 Fax: (713) 995-4994 11500 S Sam Houston Pkwy W Houston, TX 77031...
- Page 7 2.0 Ikan EC1 Gimbal Calibration Basic on-board Calibration: Before attempting advanced recalibrating with the PC software, balance your gimbal using the on-board calibration features. Basic Calibration: Step 1: • Power on gimbal • Place on flat surface • Hold the “MODE” button for 6 seconds This will activate the gimbal’s built-in basic calibration that will fix most tilting problems. Step 2: • Attempt to operate gimbal normally If you are still having problems after the basic calibration please follow the advance calibration steps below. Advanced Calibration: Items Needed: -Camera – 4.5 pounds max including lens -Gimbal – EC1 -PC (Mac or Windows) -Cable – USB to mini-USB Do not plug your gimbal into your computer until you download and install the drivers in step two. Please make sure the gimbal is balanced with a camera before performing the calibration operation. 1. Download and unzip the SimpleBGC software: https://www.basecame lectronics.com/files/SimpleBGC_GUI_2_60b4.zip Do not plug your gimbal into your computer until you download and install the drivers in step two. Phone: (713) 272-8822 Fax: (713) 995-4994 11500 S Sam Houston Pkwy W Houston, TX 77031...
- Page 8 2. Install the driver for your operating system: https://www.silabs.com/products/development-tools/software/usb-to-uart-bridge-vcp-drivers 3. Locate the folder where you unzipped the SimpleBGC software. For Windows use the file SimpleBGC_GUI.exe. For Mac OS use SimpleBGC_GUI.jar. Run the software and plug in your gimbal using the mini-USB port on the gimbal to connect to your computer. (Mini-USB port) Windows - If the drivers were installed successfully in the drop-down box in the Connection section, you should be able to see a COM option. An easy way to figure out which COM is being used for the gimbal is to keep the drop-down box open and unplug the gimbal to see which COM option disappears. Select the COM number for your gimbal and press “Connect”. Mac OS – If the drivers were installed successfully in the drop-down box in the Connection section, you should be able see an option that ends in “tty.SLAB_USBtoUART”. Select that option and press “Connect”. Phone: (713) 272-8822 Fax: (713) 995-4994 11500 S Sam Houston Pkwy W Houston, TX 77031...
- Page 9 4. Once connected on the default Basic tab, locate and select the “IMU Calibration Helper” button in the Sensor section. 5. This will bring up the follow screen: Phone: (713) 272-8822 Fax: (713) 995-4994 11500 S Sam Houston Pkwy W Houston, TX 77031...
- Page 10 6. Under the Accelerometer side press the “Reset” button. Here you will set the camera facing six different directions and press “Calibrate” once the camera is steady in the position. The pictures below show the of the six directions that will need to be calibrated. The red arrow in the pictures indicate the direction the lens should be facing. Calibration for that particular side is finished when the gimbal stops beeping and a check mark appears next to the direction. The power button of the gimbal will be considered the front. The photos below are of the Ikan EC1 with a Sony A6500 with 16-50mm lens a. +X = Left Phone: (713) 272-8822 Fax: (713) 995-4994 11500 S Sam Houston Pkwy W Houston, TX 77031...
- Page 11 b. –X = Right Phone: (713) 272-8822 Fax: (713) 995-4994 11500 S Sam Houston Pkwy W Houston, TX 77031...
- Page 12 c. +Y = Up Phone: (713) 272-8822 Fax: (713) 995-4994 11500 S Sam Houston Pkwy W Houston, TX 77031...
- Page 13 d. –Y = Down Phone: (713) 272-8822 Fax: (713) 995-4994 11500 S Sam Houston Pkwy W Houston, TX 77031...
- Page 14 e. +Z = Front (Screen facing back motors) – Z = Back (Lens facing back motors) Phone: (713) 272-8822 Fax: (713) 995-4994 11500 S Sam Houston Pkwy W Houston, TX 77031...
- Page 15 Phone: (713) 272-8822 Fax: (713) 995-4994 11500 S Sam Houston Pkwy W Houston, TX 77031...
- Page 16 7. After calibrating all 6 angles for the accelerometer, the next step is to calibrate the gyroscope. Make sure the camera is facing the front side. The +Z should be highlighted on the accelerometer side. Under the Gyroscope section press “Calibrate”. After the calibration beeps are finished, exit out of this screen with the “Close” button. 8. Toggle the motors back on by pressing the “Motors on/off” button. The motors are on when the button is highlighted in blue. 9. Turn the gimbal off and then back on. Your gimbal is now calibrated. Phone: (713) 272-8822 Fax: (713) 995-4994 11500 S Sam Houston Pkwy W Houston, TX 77031...
Need help?
Do you have a question about the EC1 and is the answer not in the manual?
Questions and answers