
Related Manuals for Sanus BSF316


Summary of Contents for Sanus BSF316
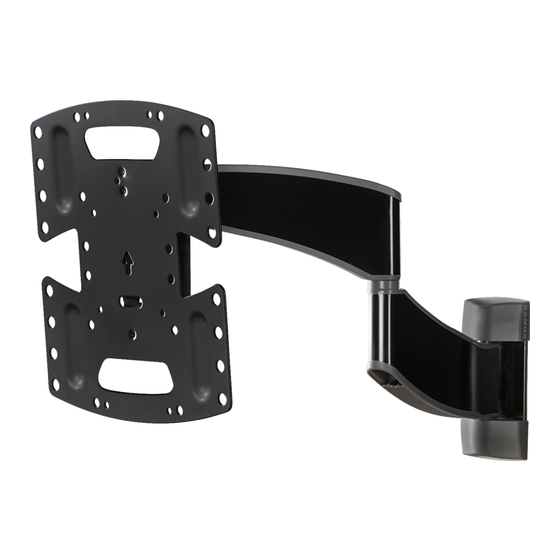
- Page 1 GET IT RIGHT THE FIRST TIME BSF316 Follow this step-by-step INSTRUCTION MANUAL instruction manual to speed up your installation. Para Español ver página 22...
-
Page 2: We're Here To Help
Our US-based install experts shows how easy this DIY HeightFinder™ shows you are standing by to help. project will be? where to drill. Call us at: Watch it now at: Check it out at: 800-359-5520 SANUS.com/2781 SANUS.com/1172 Or, chat at: SANUS.com/chatSP... -
Page 3: Before You Begin
Before you begin Remove the stand Install any accessories Protect the face from your TV of your TV — if attached. you may have purchased — if they when laying it down for installation. require the TV to be removed from the wall for assembly. -
Page 4: Important Safety Instructions
● Manufacturer is not responsible for damage or injury caused by incorrect assembly or use. If your TV (including accessories) exceeds this weight, this mount is NOT compatible. TV Weight Limit Visit SANUS.com or call customer service to 35 lbs. (including accessories) find a compatible mount. -
Page 5: Wall Construction
Wall wood studs Solid concrete or CAUTION: concrete block Construction DO NOT install ONLY install on in drywall alone these acceptable wall types. Drywall alone will hold Unsure the weight of your TV. ACCEPTABLE ACCEPTABLE Call Customer Service 1-800-359-5520 Tools Needed 7/16 in. - Page 6 Attach TV Bracket to TV STEP 1 WARNING: This product contains small items that could be a choking hazard if swallowed. Before starting assembly, verify all parts are included and undamaged. If any parts are missing or damaged, do not return the damaged item to your dealer; contact Customer Service. Never use damaged parts! NOTE: Not all hardware included will be used.
- Page 7 1.1 Select TV Screw Diameter 1.2 Select TV Screw Length and Spacers Only one screw size fits your TV. NO SPACER SPACER NEEDED • Flat Back TV • Flat Back TV • Rounded or with Irregular Back TV Extra Space Needed [TV brackets lay flat on your TV] [for deep inset holes...
- Page 8 1.3 Attach TV Bracket to Your TV POSITION SECURELY TIGHTEN f T V T o p o 200 x 200 200 x 100 100 x 100 75 x 75 NO SPACER SPACER NEEDED Center TV bracket over your TV hole pattern as shown. Install using the screw / washer / spacer...
- Page 9 STEP 2 Attach Wall Plate to Wall WARNING: This product contains small items that could be a choking hazard if swallowed. Before starting assembly, verify all parts are included and undamaged. If any parts are missing or damaged, do not return the damaged item to your dealer; contact Customer Service. Never use damaged parts! NOTE: Not all hardware included will be used.
- Page 10 STEP 2A Attach Wall Plate Wood Stud Installation CAUTION: Avoid potential Min. 3 ½ in. (8.9 cm) personal injury or property damage! Min. 1 ½ in. (3.8 cm) ● Drywall covering the wall must not exceed 5/8 in. (1.5 cm) Max.
- Page 11 /1172 1/8 in. (3 mm) To calculate your precise wall plate location, Be sure you drill into the check out our HeightFinder at sanus.com TIP: CAUTION: CENTER of the stud. [www.sanus.com/1172]. Drill two holes using a 1/8 in. (3 mm) diameter drill bit.
- Page 12 STEP 2A (continued) SECURELY TIGHTEN INSERT COVERS CAUTION: TIP: You can make small Avoid potential personal injury or property damage! level adjustments by loosening Both lag bolts MUST BE firmly tightened to prevent unwanted the bottom lag bolt movement of arm assembly .
- Page 13 Minimum concrete block size: 8 x 8 x 16 in. (20.3 x 20.3 x 40.6 cm) To calculate your precise wall plate location, check out TIP: TIP: our HeightFinder at sanus.com [www.sanus.com/1172]. Position drill template at your desired height. Level and mark the hole locations.
- Page 14 STEP 2B (continued) DRILL INSERT ANCHORS REMOVE COVERS 3 in. (7.5 cm) 3/8 in. (10 mm) Be sure the anchors are seated Never drill into the mortar CAUTION: CAUTION: CAUTION: CAUTION: flush with the concrete surface. between blocks. Drill two pilot holes using a 3/8 in. (10 mm) drill bit. Remove wall plate template Remove wall plate covers IMPORTANT:...
- Page 15 SECURELY TIGHTEN INSERT COVERS CAUTION: TIP: You can make small Avoid potential personal injury or property damage! level adjustments by loosening Both lag bolts MUST BE firmly tightened to prevent unwanted the bottom lag bolt movement of arm assembly . Ensure the wall plate is securely shifting the wall plate until level.
- Page 16 STEP 3 Attach TV to Wall Plate WARNING: Before starting assembly, verify this part is undamaged. If damaged, do not return the damaged item to your dealer; contact Customer Service. Never use damaged parts! Parts and Hardware for STEP 3 Hex Key 5/32 in.
- Page 17 SECURELY TIGHTEN HANG YOUR TV HEAVY! You may need assistance with this step. CAUTION: Avoid potential personal injury or property damage! Always make sure your securement screw is tightened, so the TV is securely fastened to the arm assembly To lock the TV onto arm assembly , install the securement Hang the TV onto the arm assembly by hooking the top support...
- Page 18 Manage Cables ROUTE CABLES ATTACH COVERS IMPORTANT: Pull arm to its full extension, to leave enough slack and prevent stretching the cables when the arms are moved. Remove the cable covers from the arm by sliding to unlock. Reattach cable covers to capture the cables.
-
Page 19: Level Adjustment
Adjustments LEVEL ADJUSTMENT TILT ADJUSTMENT Your TV should adjust easily when moved, then stay in place. Adjust the tilt tension knobs if your TV naturally tilts up or down. NOTE: If you do not intend to adjust the tilt for different viewing locations, you can tighten the tilt tension knobs , to prevent unwanted movement. - Page 20 REMOVE THE TV HEAVY ! You may need assistance with this step.
-
Page 21: Troubleshooting
Troubleshooting If you are uncertain about your hardware selection, contact Customer Service TV SUPPLIED SPACERS Use your TV supplied spacer for: Use your TV supplied spacer and spacer for: • Flat Back TV • Rounded or Irregular Back TV with Extra Space Needed •... - Page 22 ● El fabricante no se responsabiliza de ningún daño o lesión resultante del montaje incorrecto o el uso indebido Peso máximo Si su TV (incluidos los accesorios) pesa MÁS, esta montura NO es compatible. 15,8 kg (incluidos los accesorios) Visite sanus.com o llame al número 1-800-359-5520 para (35 lbs.) NO EXCEDAS encontrar una montura compatible. La construcción PRECAUCIÓN: Montantes de madera Hormigón macizo o...
- Page 23 (7/16 pulg.) ¡ESTAMOS AQUÍ PARA AYUDARLE! ¿Desea ver un video para comprobar lo fácil que es hacerlo usted mismo? Visualícelo ahora en: SANUS.com/2524 Acierte a la primera. HeightFinder™ le indica el lugar donde debe taladrar. Descúbralo en: SANUS.com/1172 Nuestros expertos en instalación de EE. UU. están listos para ayudar.
- Page 24 Español 1.1 Seleccione el diámetro de los tornillos para el televisor PÁGINA 7 Solo un tamaño de tornillo es compatible con su TV. 1.2 Seleccione la longitud de los tornillos y los espaciadores de su TV PÁGINA 7 SIN ESPACIADOR •...
- Page 25 COLOCAR LA PLANTILLA DE LA PLACA MURAL CONSEJO: Para calcular la ubicación concreta de la placa mural, pruebe nuestra herramienta Height Finder disponible en sanus.com [www.san.us/1172]. Coloque la plantilla de la placa mural a la altura que desee y ubique los orificios muescados sobre las líneas centrales del montante. Nivele y marque la ubicación de los orificios.
- Page 26 COLOCAR LA PLANTILLA DE LA PLACA MURAL CONSEJO: Para calcular la ubicación concreta de la placa mural, pruebe nuestra herramienta Height Finder disponible en sanus.com [www.san.us/1172]. Coloque la plantilla de la placa mural en la pared a la altura que desee. Nivele y marque la ubicación de los orificios.
- Page 27 Español PASO 3 Fijar el televisor en la placa mural PÁGINA 16 ADVERTENCIA: Antes de empezar el montaje, compruebe que esta parte no esté dañada. Si lo está, no la devuelva al distribuidor. Póngase en contacto con el servicio de atención al cliente.
-
Page 28: Ajuste De La Inclinación
Español Organizar los cables PÁGINA 18 PASE LOS CABLES IMPORTANTE: xtienda el brazo por completo antes de pasar los cables. Retire la cubierta de los cables . Pase los cables por el brazo VUELVA A COLOCAR LA CUBIERTA Vuelva a colocar la cubierta de los cables por sobre los cables. - Page 29 Español Solución de problemas PÁGINA 21 Si tiene dudas sobre la selección de las piezas, contacte con el servicio de atención al cliente en el 1-800-359-5520 . Use el separador proporcionado para televisores con partes traseras planas (o bien si quiere que su televisor esté más cerca de la pared). Use el separador proporcionado con el televisor y el separador para: televisores con la parte trasera redondeada (irregular) o si necesita espacio adicional para los cables.
- Page 30 Dimensions in. [mm] TV INTERFACE 7.87 200.0 2.95 75.0 7.87 2.95 9.76 200.0 75.0 248.0 8.66 220.0 WALL PLATE TOP VIEW - EXTENDED SIDE VIEW - EXTENDED 0.39 0.34 8.6 THRU 10.0 5° 4.51 5.30 114.5 134.5 195° 60 TO 90 0.39 2.30 16.05...
- Page 31 Register your new mount and tell us how you like it for a chance to win in our monthly sweepstakes. Entering is quick and easy. Visit SANUS.com/1234 and follow three simple steps for your chance to win. "Monthly Prize" sweepstakes rules and restrictions apply. Visit SANUS.com/1234 for details.
- Page 32 800-359-5520 • info@sanus.com • SANUS.com SANUS • 6436 City West Parkway • Eden Prairie, MN 55344 USA ©2019 Milestone AV Technologies. All rights reserved. SANUS is a division of Milestone. 6901-602267 00 All other brand names or marks are used for identification purposes and are trademarks of their respective owners.
Need help?
Do you have a question about the BSF316 and is the answer not in the manual?
Questions and answers