Subscribe to Our Youtube Channel
Summary of Contents for Farmers Friend Pyroweeder
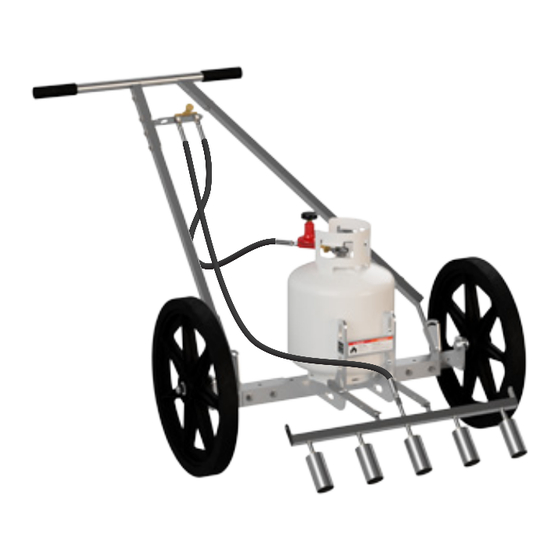
- Page 1 ↑ Pictured: Pyroweeder 30 with optional Flame Blade Watch the video! Scan the code or visit: fflc.us/pyro/s...
-
Page 2: Important Warnings
Carbon monoxide gas is a poison—it can kill. Do not operate indoors or in an enclosed space. Since it is colorless and odorless, it is especially Do not allow a child to operate the Pyroweeder. dangerous. Incomplete propane combustion will produce carbon monoxide; you can recognize Do not operate the Pyroweeder if your incomplete combustion by a yellow flame. -
Page 3: Tools And Parts Needed
I also know how important it is to have the teners can be minimized, but it cannot be completely prevented. right tools for the job. Our goal at Farmers Friend is to make We have included a small pouch of thread lubricant; we encourage you to use thread well-designed, high-quality tools to improve your efficiency, lubricant on all threads as you assemble your Pyroweeder. - Page 4 This kit includes: × Burner Assembly (handle-mounted valve pictured) × Pyroweeder Wrench × Bungee Cords × 3⁄8"-16 Nuts × Handle × 1⁄4"-20 Wing Nuts × Tank Brace × Thread Lubricant × Long Bar × 3⁄8"-16, 3" Carriage Bolts × Short Bar ×...
-
Page 5: Upper Handle Assembly
S T E P 1 S T E P 2 Upper Handle Assembly Handle Assembly PARTS NE E DE D PARTS NE E DE D • • × Handle × Upper Handle Assembly Attach the concave ends of the rectangu- Attach the Straight Lower Handle Tie (from Step 1) •... - Page 6 S T E P 3 S T E P 4 Tool Bar and Handle Assembly Tool Cart PARTS NE E DE D PARTS NE E DE D • • × Handle Assembly (from Step 2) × Tool Bar and Handle Assembly Attach the Tool Bar and Handle Assembly Remove the 5⁄8"...
- Page 7 Burner Assembly 1⁄4"-20, 1" Carriage Bolt 1⁄4"-20 Nut 1⁄4" Washer 1⁄4" Lock Washer 1⁄4"-20, 1" Carriage Bolt 1⁄4"-20 Nut 1⁄4"-20 Locknut Burner Tank Brace ↑ Pictured: Five-burner, Pyroweeder 30 model Well-designed, quality tools and equipment | farmersfriendllc.com (931) 583-0397 | support@farmersfriendllc.com...
- Page 8 You may occasionally need to adjust or tighten nuts • × 1⁄4"-20, 13⁄4" Carriage Bolts • × 3⁄8"-16 Nuts as you work with your Pyroweeder. The Pyroweeder • × 1⁄4" Oversize Washers • Wrench is attached near the handle so that it is ×...
- Page 9 S T E P 9 Attaching Propane Tank and Regulator Adjustments PARTS NE E DE D Burner Angle • × Bungee Cords Strap the 20-lb propane tank (not in- Burner Height • × Regulator (Flame Weeder Implement, cluded) to the tank brace as shown. One from Step 6) bungee is insufficient to securely hold the Handle Angle...
- Page 10 Axle Positions Attaching the Flame Blade Accessory Below is shown the possible axle positions. Axle position adjustment allows for change in height and front-to-back balance of the Pyroweeder. Swap left and right axles for some 7⁄16 Tools Needed: " socket or wrench and a Phillips screwdriver of the illustrated positions.
- Page 11 The Axle the supplied 1⁄ 4 "-20, 1 3⁄ 4 " Carriage Bolts, • • 9⁄16" wrench or Pyroweeder wrench Bars are temporarily detached at this point. 7⁄16" wrench or Pyroweeder wrench connecting the Two-Tank Adapter to the Pyroweeder as shown.
- Page 12 The only visible indication poison ivy, or any other poisonous plant. To light your Pyroweeder, start with both burners could get plugged with some of “kill” is a slight wilting. To test if you...
- Page 13 762 Dry Prong Rd., Williamsport, TN 38487 | support@farmersfriendllc.com | (931) 583-0397...


Need help?
Do you have a question about the Pyroweeder and is the answer not in the manual?
Questions and answers