
Subscribe to Our Youtube Channel
Related Manuals for Enerpac ETW Series


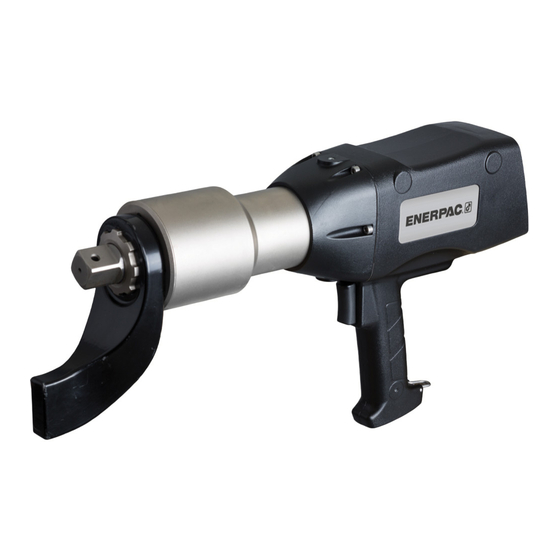
Summary of Contents for Enerpac ETW Series
- Page 1 Electric L4085 Rev. D 6/16 Torque Wrench ETW Series ETW1000 ETW2000 ETW3000 ETW6000 Instruction Sheet English (EN)
- Page 2 Instruction Sheets in Adobe PDF format ® Please find the CD or DVD enclosed in the back of this manual The following languages are included: English (EN) Français (FR) Deutsch (DE) Italiano (IT) Español (ES) Nederlands (NL) Português Brasileiro (PT) Pyccкий...
-
Page 3: Table Of Contents
2.1 Safety Definitions ........5 3.5.9 Edit Torque Angle Screen ..22 2.2 General Safety ........5 3.5.10 Tool Setup Screen....23 2.3 ETW Series Safety .........6 3.5.11 Data Setup Screen ....24 2.4 Electrical Safety ........7 3.5.12 Data View Screen ....25 2.4.1 Use and Care......7 3.5.13 Export Data Screen ....26... -
Page 4: Introduction
ETW Series Electric Torque Wrench 1.0 INTRODUCTION 1.1 Overview The Enerpac ETW Series torque wrench is designed for controlled tightening and loosening of fasteners in industrial bolting applications. The ETW Series is available as a package with the following items: •... -
Page 5: Safety
Please note that the Safety Alert Symbol will not be used with this signal word. 2.2 General Safety Be aware that the operator is fully responsible for the correct operation of this tool. Enerpac is not responsible for damage or injury caused by misuse of this tool. Under some circumstances, additional safety precautions beyond those described in this manual may be required. -
Page 6: Etw Series Safety
Do not drop heavy objects on the cords. A sharp impact may cause internal damage to the cord. • Always carry the wrench by its housing or with an Enerpac-approved eyebolt and carrying strap. Never use the electrical cords to carry or move the tool or the touchscreen control box. -
Page 7: Electrical Safety
ETW Series Electric Torque Wrench ELECTROSTATIC DISCHARGE SAFETY PRECAUTIONS • In case of any heavy static build-up, the tool will stop running. The microprocessor inside the tool will revert to a safe mode and the LED on the tool will display 200 Ft.Lbs. Such a heavy build-up of static will have no impact on the control box. -
Page 8: Grounding Instructions
The ETW Series electric torque wrench is equipped with a Ground Fault Monitoring System. In case of an improper grounding, the circuit will deactivate the wrench motor and the ground fault/low voltage light on the control box panel will shine red. - Page 9 ETW Series Electric Torque Wrench 1 - Touchscreen Control Box Serial Number GROUND FAULT LOW VOLTAGE Location POWER ON/OFF 2 - Torque Wrench Serial Number Location SERIAL NO: VOLTAGE: Serial numbers on control box (1) and wrench (2) must match Fig.
-
Page 10: Electrical Power Requirements
ETW Series Electric Torque Wrench 3. Connect the main power cord by aligning the bosses with the notches and push the male connector into the female connector. With the connector fully inserted, turn the locking ring to thread it onto the female connector. -
Page 11: Shoulder Strap
ETW Series Electric Torque Wrench 3.4 Shoulder Strap The ETW tools are equipped to accommodate shoulder straps, which are supplied with select models, or as an accessory. The use of shoulder straps is associated with certain risks, which increase when the straps are used with the larger and heavier ETW models. -
Page 12: Shoulder Strap Installation
ETW Series Electric Torque Wrench 3.4.2 Shoulder Strap Installation Instructions: 1. Fully install the eyebolt into the threaded hole at the top of the housing. 2. Attach one end of the shoulder strap to the eyebolt. Attach the other end of the shoulder strap to the metal loop at the base of the wrench grip. -
Page 13: Control Box Touchscreen Use
ETW Series Electric Torque Wrench 3.5 Control Box Touchscreen Use • Press the touchscreen on/off switch (I) to turn on the control box power. • An indicator light is located on the upper left hand corner of the control box panel. On 230V models, this light is the “ground fault indicator light”. -
Page 14: Home Screen
ETW Series Electric Torque Wrench 3.5.1 Home Screen • After the initial boot up, the “Home” screen will be displayed. MANUAL AUTOMATIC TOOL SETUP DATA SETUP back home 1 - Manual – Select to put the tool in manual mode. -
Page 15: Manual Mode Screen
ETW Series Electric Torque Wrench 3.5.2 Manual Mode Screen • To activate manual mode, select Manual from the “Home” screen. In manual mode the torque value can be adjusted manually on the touchscreen control box or on the back of the tool. See Figure 24. -
Page 16: Automatic Mode Screen
ETW Series Electric Torque Wrench 3.5.3 Automatic Mode Screen • Selecting Automatic from the “Home” screen will put the tool in automatic mode. SELECT AUTOMATIC PRESET Preset No. Description Flywheel - 3 x 500 lbf 5 x 650 back home 1 - Pencil Icon –... -
Page 17: Automatic Preset
ETW Series Electric Torque Wrench 3.5.4 Automatic Preset Mode Screen • This screen displays the preset values after the desired preset has been selected. The automatic preset can be run from this screen. Automatic Preset Mode Flywheel 3 x 500 lbf... -
Page 18: Edit Automatic
ETW Series Electric Torque Wrench 3.5.5 Edit Automatic Preset Screen • While in the “Select Automatic Preset” screen, select the automatic preset for editing, and touch the pencil icon. The “Edit Automatic Preset” screen will then appear. Each setting may now be edited by touching the desired setting, and then making the desired edits. -
Page 19: Edit Preset Description Screen
ETW Series Electric Torque Wrench 3.5.6 Edit Preset Description Screen • To change the description name of a preset, touch the preset name at the top of the “Edit Automatic Preset” screen. The keyboard screen will pop up to allow you to edit the name. -
Page 20: Edit Preset Number Screen
ETW Series Electric Torque Wrench 3.5.7 Edit Preset Number Screen • To change the current preset number, touch the preset number on the “Edit Automatic Preset” screen. • The current preset number will be displayed in the box. • Use the touch screen to edit the preset number and press OK to save the changes or the X icon to exit the screen without saving the changes. -
Page 21: Edit Torque Value Screen
ETW Series Electric Torque Wrench 3.5.8 Edit Torque Value Screen • To change the torque value number, touch the torque value number on the “Edit Automatic Preset” screen. The tool will not accept inputs outside of the range of the particular tool in use. -
Page 22: Edit Torque Angle Screen
ETW Series Electric Torque Wrench 3.5.9 Edit Torque Angle Screen • The torque angle is adjustable from 1 to 259 degrees. • To change the torque angle degree number, touch the torque angle degree number on the “Edit Automatic Preset” screen. -
Page 23: Tool Setup Screen
ETW Series Electric Torque Wrench 3.5.10 Tool Setup Screen • From the “Home” screen, select “Tool Setup.” • The “Tool Setup” screen allows you to change the torque units and the time and date. TOOL SETUP Serial number 2da3714d09000081 Torque Units... -
Page 24: Data Setup Screen
ETW Series Electric Torque Wrench 3.5.11 Data Setup Screen • From the “Home” screen, select “Data Setup.” • The “Data Setup” screen allows you to record, view and export data to a USB device. DATA SETUP Operator User Start Recording... -
Page 25: Data View Screen
ETW Series Electric Torque Wrench 3.5.12 Data View Screen • The “Data View” screen will display the information that was recorded. DATA VIEW Bolt Torque Angle Pass/Fail Wrench Operator Date/Time Automatic Preset Number 4: Flywheel - 3 x 500 lbf... -
Page 26: Export Data Screen
ETW Series Electric Torque Wrench 3.5.13 Export Data Screen • From the “Data Setup” screen, select “Export Data.” EXPORT DATA Log Filename newlogfile.csv 2014 Feb 20 2015 Mar 12 Write to USB Please Insert USB back home 1 - Filename – Touch screen next to filename to display the name of the file to be exported. The file name may be edited by touching the file name, and accessing the popup keyboard. - Page 27 ETW Series Electric Torque Wrench • If the file name was not changed, it will default to newerlogfile as the file name. You will be asked to if you would like to overwrite the existing file. Overwrite existing file? newerlogfile.csv 1 - OK Icon –...
-
Page 28: Viewing The Exported Data On A Computer
The procedure described in steps 1 through 6 may vary slightly, depending on the version of Microsoft Excel being used. Contact Enerpac if you have any difficulty viewing the fastening data. ® The USB memory stick, computer, and Microsoft software are NOT included with the ETW Series ®... -
Page 29: Display Functions
ETW Series Electric Torque Wrench 3.5.15 Torque Wrench Display Functions The angle of turn will not be displayed when working in manual mode. 1 - Pass LED Light – The green LED light will illuminate when the tightening procedure is completed properly. -
Page 30: Operation
Immediately replace any worn or damaged parts with genuine Enerpac parts before using the tool. Failure to comply may result in death or serious injury. Prior to using the tool, verify that the tool assembly is complete as described in Section 3, and choose either Manual or Automatic mode. -
Page 31: To Tighten A Fastener
ETW Series Electric Torque Wrench 3. When in manual mode, set the desired torque by using the UP and DOWN arrows on the back of the tool or by using the touchscreen control box (see Figure 7). When working in automatic mode, input the desired settings as described in Section 3.5. - Page 32 ETW Series Electric Torque Wrench 2. Install the socket onto the fastener and rotate the reaction arm so that it is positioned against the reaction point as shown in Figure 26. Fig. 26 © 2016 Enerpac, All Rights Reserved...
- Page 33 ETW Series Electric Torque Wrench 3. Be sure the reaction arm is positioned as shown in Figure 26. Then, fully depress the trigger, and keep it depressed until the wrench stalls and the green LED pass light indicates that the fastening was properly made.
-
Page 34: To Loosen A Fastener
ETW Series Electric Torque Wrench 4.2 To Loosen a Fastener 1. Press the counterclockwise button. The counterclockwise indicator LED will illuminate. 2. Install the reaction arm and socket, as previously described. 3. Position the tool onto the fastener. Be sure to follow the safety precautions indicated in the previous section. -
Page 35: Shutdown And Storage
ETW Series Electric Torque Wrench Firmly support the tool during the entire loosening process to maintain control and to WARNING prevent the tool from dropping. When the trigger is first depressed, the reaction arm of the tool may “lock on” to the fastener, temporarily holding the tool in place. However, after the fastener is loosened, the reaction arm force will be released, and the weight of the tool may shift toward the operator. -
Page 36: Maintenance
ETW Series Electric Torque Wrench 5.0 MAINTENANCE Typical calibration intervals occur at least once a year. Frequent use requires more frequent calibration. It is the user’s responsibility to ensure that calibration is checked at the appropriate time intervals as required by applicable local standards and regulations. -
Page 37: Technical Specifications
ETW Series Electric Torque Wrench 7.0 TECHNICAL SPECIFICATIONS 7.1 Imperial System 17.2 inch 13.7 inch Cord length Item Feet Main Power Cord Servo Motor Cords Voltage (Model No. ending with suffix): B = 115V, 60 Hz I = 230V, 60 Hz (with NEMA 6-15 plug) -
Page 38: Metric System
ETW Series Electric Torque Wrench 7.2 Metric System 437 mm 347 mm Cord length Item Meters Main Power Cord Servo Motor Cords Voltage (Model No. ending with suffix): B = 115V, 60 Hz I = 230V, 60 Hz (with NEMA 6-15 plug) -
Page 39: Instruction Sheet
Please contact Enerpac if the disc is not included, or visit www.enerpac.com for a download of the manual. Instruction Sheets ETW Series Electric Torque Wrenches ETW1000, ETW2000, ETW3000, ETW6000... - Page 40 Willstätterstrasse 13 D-40549 Düsseldorf, Germany For the location of your nearest T +49 211 471 490 authorized Enerpac Service Center, F +49 211 471 49 28 visit us at www.enerpac.com sales-de@enerpac.com 053116 © 2016 Enerpac, All Rights Reserved...
Need help?
Do you have a question about the ETW Series and is the answer not in the manual?
Questions and answers