Table of Contents
Advertisement
Advertisement
Table of Contents

Related Manuals for Aivia 210


Summary of Contents for Aivia 210
- Page 1 A-MIP 210 Setup and user guide A-MIP 210 V1.06...
- Page 2 • To avoid risk of fire or electric shock, the AIVIA should not be placed near any naked flame. • Leave a space of at least 13 cm around the AIVIA to assure proper ventilation. • Keep the AIVIA away from radiators or any other heat source.
-
Page 3: Table Of Contents
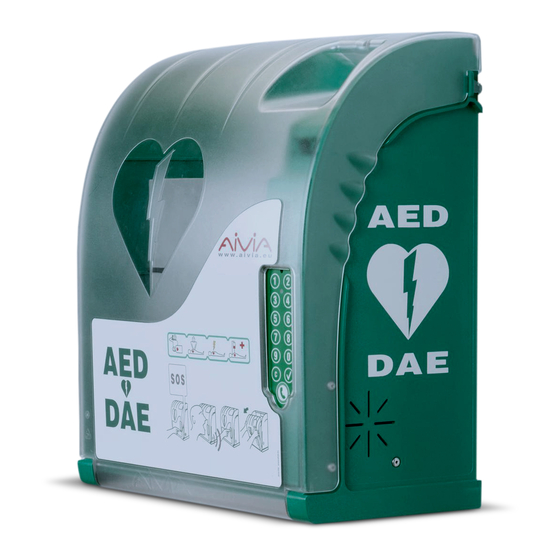
Summary Installation Important Aivia presentation Identification plate First opening Aivia fixing Connecting the power supply to the Aivia Installing the AED Setting up the Aivia Door opening codes Alert temperatures Heating/Fan activation temperatures Close the AIVIA door Pictograms Night mode operation... -
Page 4: Installation
Aivia reference and serial number. First opening • To open the Aivia door before it is fixed on the wall, use a small screwdriver. • Slip the screwdriver between the door and the chassis Electronic compartment. -
Page 5: Aivia Fixing
• Aivia installation must be done by qualified personnel only and member of the Bornavie charter. • If the Aivia is installed in the street or any unrestricted passage way, select a ground surface (abutment) or a column. • Fixing must be adapted to the type of support the Aivia is being fixed on. -
Page 6: Connecting The Power Supply To The Aivia
• Fixing must be adapted to the type of support the Aivia is being fixed on. • The Aivia must be powered using 24V DC, see the • Aivia fixing must be able to carry a minimal load of 20 « Power supply » section • Fixing example: •... -
Page 7: Installing The Aed
( e.g. 3333) : Alert temperatures • Low temperature alert entry (Heating option) : If this thresold is matched, The aivia will blink 4 times to AED to insert vertically. indicate a temperature alert. AED holding sandow. • The sandow allow for a simple extraction of the AED Type the menu code 101, then validate : while ensuring the holding of the AED. -
Page 8: Heating/Fan Activation Temperatures
Heating/Fan activation temperatures Pictograms • Entering the heating temperature (Heating option) • The signs on the door of AIVIA inform you of what to Heating will be triggered once this thresold is matched. do in case of emergency. It will stay activated as long as the temperature has not •... - Page 9 Notes A-MIP 210 V1.06...
-
Page 10: Use
• The fan allows the heat to be drawed out of the Aivia. • Take the AED Off. In hot weather, it is appropriate to check that the alert... -
Page 11: In Case Of Breakdown
Check AED operates correctly, and presence of all the accesso- ries, if needed, contact your partner. Aivia motorization doesn’t work. • Withdraw the cap off the aivia door, and push back the door blocking axle with a stem . A-MIP 210 V1.06... - Page 12 Notes A-MIP 210 V1.06...
-
Page 13: Electrical Installation
Power supply unit SELV Wiring : • U1000R2V Type. 2 Isolated and gained conductors, It must be outside the Aivia, never install it into the 1,5mm² gauge, 10 meters maximum length. Aivia. • For the 24V wiring use a red or brown cable. -
Page 14: Specifications
• Door: Polycarbonate. • Chassis: ABS. • Square: ABS. Electrical characteristics • Power supply: 24 VDC 75 Watts, limited power source. • Aivia operating temperatures: Minimum: -20°C. Maximum: 55°C. • Temperature alerts: Low temperature alert: defined by user. (5°C by default). - Page 15 Notes A-MIP 210 V1.06...
- Page 16 A-MIP 210 V1.06...
Need help?
Do you have a question about the 210 and is the answer not in the manual?
Questions and answers