Table of Contents
Advertisement
Quick Links
Download this manual
See also:
User Manual
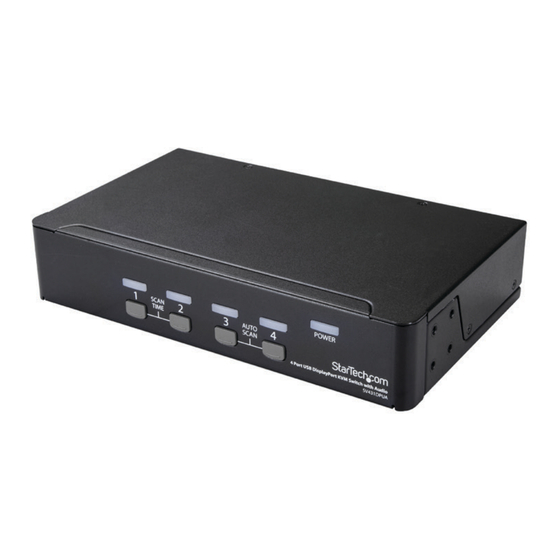
4-Port USB KVM Switch - DisplayPort
- 4K 60Hz
SV431DPUA2
FR: Guide de l'utilisateur - fr.startech.com
DE: Bedienungsanleitung - de.startech.com
ES: Guía del usuario - es.startech.com
NL: Gebruiksaanwijzing - nl.startech.com
PT: Guia do usuário - pt.startech.com
IT: Guida per l'uso - it.startech.com
For the latest information, technical specifications, and support for
this product, please visit www.StarTech.com/SV431DPUA2.
Manual Revision: 02/15/2018
*actual product may vary from photos
Advertisement
Table of Contents

Related Manuals for StarTech.com SV431DPUA2


Summary of Contents for StarTech.com SV431DPUA2
- Page 1 4-Port USB KVM Switch - DisplayPort - 4K 60Hz SV431DPUA2 *actual product may vary from photos FR: Guide de l’utilisateur - fr.startech.com DE: Bedienungsanleitung - de.startech.com ES: Guía del usuario - es.startech.com NL: Gebruiksaanwijzing - nl.startech.com PT: Guia do usuário - pt.startech.com IT: Guida per l’uso - it.startech.com...
- Page 2 StarTech.com. Where they occur these references are for illustrative purposes only and do not represent an endorsement of a product or service by StarTech.com, or an endorsement of the product(s) to which this manual applies by the third-party company in question. Regardless of any direct acknowledgement elsewhere in the body of this document, StarTech.com hereby...
-
Page 3: Table Of Contents
Table of Contents Product diagram ..................1 Front view ..............................1 Rear view ..............................1 Package contents ...................2 Requirements ............................. 2 About the LED indicators ..............3 Installation ....................3 Set up your PC ............................3 Connect the console to the KVM switch ................... 3 Connect a computer to the KVM switch ................... - Page 4 Troubleshooting ..................9 I can’t get my wireless mouse and keyboard to work ..............9 I can’t get my gaming or combination mouse and keyboard to work ........10 My display or video destination uses a different type of video connector than DisplayPort ..............................
-
Page 5: Product Diagram
Product diagram Front view Port selection/link LEDs Power LED Port selection buttons Rear view Console DisplayPort port USB keyboard and mouse ports Console USB ports Console audio speaker and mic ports PC 3 ports PC 1 ports PC 2 ports Power adapter port PC 4 ports Instruction manual... -
Page 6: Package Contents
• Display device (for example, monitor, projector, TV, and so on) enabled with DisplayPort • Standard wired or wireless USB keyboard • Standard wired or wireless USB mouse Requirements are subject to change. For the latest requirements, please visit www.StarTech.com/SV431DPUA2. Instruction manual... -
Page 7: About The Led Indicators
About the LED indicators The KVM switch comes with a port selection/link LED for each port, as well as a power LED. For more information about the LEDs, consult the table below. Behavior Scenario Power LED Illuminated KVM switch is receiving power Illuminated green Connected computer is turned on Port selection/link... -
Page 8: Connect A Computer To The Kvm Switch
3. Do one of the following: • Connect a keyboard and a mouse to the USB keyboard and mouse ports. • If you’re using a combination wireless keyboard and mouse, connect the wireless receiver to the keyboard port. 4. If necessary, do any of the following: •... -
Page 9: About Drivers
About drivers You don’t need to install any drivers to use this KVM switch because the keyboard and mouse use generic USB drivers that are already installed on any operating system that supports USB technology. Select a computer To select a computer, do one of the following: •... -
Page 10: Set The Duration Of The Scan Time
Set the duration of the scan time You can set the duration of the scan time to 3, 8, 15, or 30 seconds. To change the scan time, do one of the following: • Press port selection buttons 1 and 2 simultaneously. The KVM switch beeps to indicate the duration of the scan time. -
Page 11: Select A Computer
Select a computer • To select a computer, press the Left Ctrl key twice and the number of the PC port that you want to select. For example, if you want to select computer 2, you would press Left Ctrl, Left Ctrl, 2. Caution! Don’t use the numeric keyboard on the right side of your keyboard when you complete the hotkey command above. -
Page 12: Disable The Audio Stick Feature
To stop the manual scan, press any key. Disable the Audio Stick feature By default, the Audio Stick feature is enabled on the KVM switch, which means that the audio selection is determined by the computer that is currently selected. For example, if you switch to computer 2, the audio selection changes to computer 2. -
Page 13: Use An Alternative Hotkey Command
Use an alternative hotkey command In addition to the Left Ctrl hotkey commands, there are two alternative commands that you can use to select a computer: • Press Scroll Lock, Scroll Lock, <the number of the port that you want to select>. •... -
Page 14: I Can't Get My Gaming Or Combination Mouse And Keyboard To Work
KVM switch. As such, StarTech.com recommends that you might use a standard 3-button wired mouse and a 104-key wired keyboard in your setup. - Page 15 1. In the Control Panel, navigate to the display settings. 2. To see how the operating system has ordered the monitors, click Identify. 3. Click and drag the monitor icons until the order in the operating system matches the physical setup of the monitors. 4.
-
Page 16: Technical Support
Limitation of Liability In no event shall the liability of StarTech.com Ltd. and StarTech.com USA LLP (or their officers, directors, employees or agents) for any damages (whether direct or indirect, special, punitive, incidental, consequential, or otherwise), loss of profits, loss of business, or any pecuniary loss, arising out of or related to the use of the product exceed the actual price paid for the product. - Page 17 StarTech.com is an ISO 9001 Registered manufacturer of connectivity and technology parts. StarTech.com was founded in 1985 and has operations in the United States, Canada, the United Kingdom and Taiwan servicing a worldwide market.
Need help?
Do you have a question about the SV431DPUA2 and is the answer not in the manual?
Questions and answers