
Related Manuals for TIS TIS700 SAFETY PAT ELITE


Summary of Contents for TIS TIS700 SAFETY PAT ELITE
- Page 1 TIS700 SAFETY PAT ELITE INSTRUCTION MANUAL VERSION 1.00 NOTE THE INSTRUMENT MUST ONLY BE USED BY SUITABLY TRAINED AND COMPETENT PERSON(S).
-
Page 2: Table Of Contents
CONTENTS: Introduction Accessories Safety Instructions Safety Symbols Warranty Instrument Layout, display information & symbols Operation of Instrument Power On / Off Lead(s) Calibration Insulation Resistance Test Voltage / Appliance Voltage Settings. Class I Testing Class II Testing Cord / Extension Lead Testing Socket Test Memory Function Memory Settings... -
Page 3: 1.0- Introduction
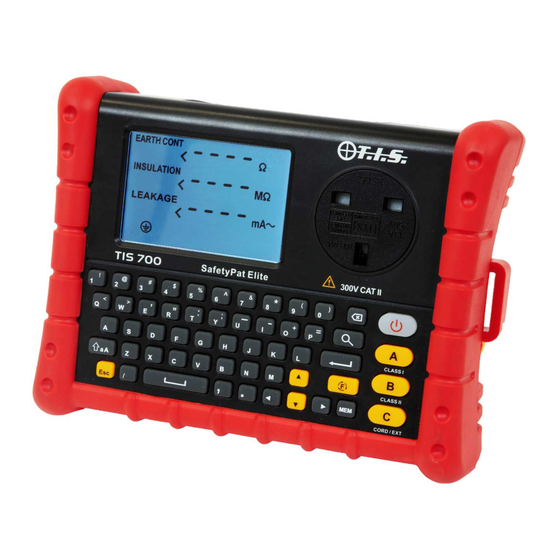
1.0- INTRODUCTION Thank you for purchasing the TIS700 Safety Pat Elite. The TIS700 Safety Pat Elite is a handheld portable appliance tester featuring the following: Class I Safety Test: >200mA Earth Bond / Continuity Measurement. 250V / 500V Insulation Resistance Measurement. - Page 4 2.0 - ACCESSORIES AC / DC Mains Adaptor ….……………………………………………………………………...1pcs IEC Test Lead ……………..……………………………………………………………………...1pcs Earth Continuity / Bond Lead ……………………………………………………………………1pcs Probe & Crocodile Clip …………………………………………………………………………...1pcs AA (LR6) 1.5V Battery …………………………………………………………………………..8pcs Instruction Manual …………………………………………………………………………………1pcs 8GB SD Card …………………….………………………………………………………………...1pcs ...
-
Page 5: 3.0 - Safety Instructions
3.0 - SAFETY INSTRUCTIONS Warnings – Please read and follow the following: Before using the instrument, test leads and / or the adaptors please ensure there are no signs of damage as this could result in electrical shock and / or inaccurate results. ... -
Page 6: Safety Symbols
SAFETY SYMBOLS... -
Page 7: Warranty
WARRANTY NEW INSTRUMENTS HAVE A WARRANTY PERIOD OF: 1 YEAR FROM THE DATE OF PURCHASE BY THE USER, however the warranty period can be extended by a further year by having the instrument calibrated by: Test Instrument Solutions / Calibrations. (A copy of the original purchase invoice may be requested to validate the purchase date). -
Page 8: Instrument Layout, Display Information & Symbols
INSTRUMENT LAYOUT, DISPLAY INFORMATION & SYMBOLS... - Page 9 Button Description Display Information & Symbols...
-
Page 11: Operation Of Instrument
OPERATION OF INSTRUMENT POWER ON / OFF Press the power button to switch the instrument on, the instrument will then load internal configuration data “Start” will be displayed on the bottom right corner. The process will take 30-60 seconds, a notification tone will indicate when the configuration is completed. CALIBRATION The test leads / cables will require calibrating, either when using the test leads / cables for the 1 time or... -
Page 12: Insulation Resistance Test Voltage / Appliance Voltage Settings
Calibrating the IEC / Cord Earth Lead Resistance Insert the plug of the IEC lead supplied into the output socket and the IEC socket into the input socket as shown. Whilst the instrument is switched on Press and hold the keys together unit the calibration interface is displayed, then press the key to calibrate the IEC lead’s resistance , press the ESC button once the process has been completed. - Page 13 CLASS I TEST Connect the appliance to be tested to the TIS700, using the cord / lead supplied. Insert the Earth Bond lead into the input terminal (2) then connect the lead to a conductive part of the Class I appliance. Once ensuring a good connection press the test button to start the measurement process:...
-
Page 14: Class Ii Testing
Once the test sequence has been completed the appliance details and results can be stored. Use the “MEM” to confirm and save the information or use the “ESC” button to discard the results. CLASS II TEST Connect the appliance to be tested using lead / cord supplied. Press the test button to start the measurement process. -
Page 15: Cord / Extension Lead Testing
CORD / EXTENSION LEAD TEST Testing Cord / IEC leads – Connect the plug to the output socket and the other end into the IEC input socket. (Additional lead accessories / adaptors may be needed to connect to the IEC input socket). Testing extension leads –... -
Page 16: Socket Test
SOCKET / POLARITY TEST Connect the IEC lead supplied to the TIS700 by the IEC input socket, then connect the plug to the socket to be tested. Switch the socket under test on, the TIS700 will then automatically perform the test. Test Indications: Correct Polarity Indication - LN, LE, NE... -
Page 17: Memory Function
MEMORY FUNCTION Once testing has been completed, the results can be reviewed by pressing the “MEM” button. The Memory function interfaces example are as follows: Customer Name : XXXXXXXXXXXXXXXX... - Page 18 Customer Name : XXXXXXXXXXXXXXXX...
-
Page 19: Memory Settings
MEMORY SETTINGS The following information / appliance details & lists can be stored on the TIS700: Data Maximum Characters Maximum list capacity Appliance Appliance ID Visual Location Building User Report Number Customer Name Site Address The internal preset data lists can be edited by either the TIS700 Interface or via the SD card by: Open the SD card using a laptop or desktop computer Open the folder System files Select the .TXT list that you require editing i.e. -
Page 20: Importing Preset Lists / Custom Data
5.10 IMPORTING PRESET LISTS / CUSTOM DATA: Whilst the TIS700 is switched on, press and hold the key to enter the function / settings menu. Using the up and down arrow keys select Import custom data function Press the enter key ( ) to import the data. - Page 21 Search by: User Input the User details (this field is case sensitive, so please ensure that the user name is identical) and press the enter key ( The TIS700 will then search the internal memory for all the results stored by the requested user. Once the search has finished the user will then be asked if they would like to export the result(s) Y/N.
-
Page 22: Delete Test Data
5.12 DELETE TEST DATA Delete individual test results / data: Press the “MEM” key to access the memory function Select the result to be deleted using the up and down arrow keys Press the backspace / delete key ( ) (A password may be required, if the password functionality has been enabled). -
Page 23: Enable / Change Password
5.13 ENABLE / DISABLE, CHANGE PASSWORD Whilst the TIS700 is switched on, press and hold the key to enter the function / settings menu. Using the up and down arrow keys select Password Config: and press enter key ( To enable / disable the password input the default password: 000000 and press enter key ( To change the password Use the right hand arrow key to select “Change”... -
Page 24: Edit Date / Time
5.14 EDIT TIME & DATE Whilst the TIS700 is switched on, press and hold the key to enter the function / settings menu. Using the up and down arrow keys select Edit Date / Time: and press enter key ( Enter the date (YYY/MM/DD) and time (hh:mm:ss) Press the enter key ( ) to confirm. -
Page 25: Technical Specifications
TECHNICAL SPECIFICATIONS... - Page 26 Environmental Ratings: Operating Temperature Range: 0°C – 40°C Storage Temperature Range: -25°C – 65°C Operating / Storage Altitude: <2000m IP Rating: IP20...
-
Page 27: Maintenance & Service
MAINTENANCE & SERVICE The instrument must be calibrated periodically by an authorized service center (see section 3.2), to ensure the accuracy of the instrument. REPLACING BATTERIES When the battery warning symbol ( ) appears either replace the batteries or plug the mains adaptor in. ...
Need help?
Do you have a question about the TIS700 SAFETY PAT ELITE and is the answer not in the manual?
Questions and answers