Table of Contents
Advertisement
Available languages
Available languages
Quick Links
Advertisement
Chapters
Table of Contents

Related Manuals for KitchenAid KSB1585


Summary of Contents for KitchenAid KSB1585
- Page 1 KSB1585 Manual de Usuario...
-
Page 2: Table Of Contents
BLENDER INSTRUCTIONS TABLE OF CONTENTS BLENDER SAFETY Important safeguards ������������������������������������������������������������������������������������������� 2 Electrical requirements ��������������������������������������������������������������������������������������� 4 PARTS AND FEATURES ����������������������������������������������������������������������������������������� 5 ASSEMBLING THE BLENDER Preparing the Blender for use ����������������������������������������������������������������������������� 6 OPERATING THE BLENDER Using the Blender ������������������������������������������������������������������������������������������������ 8 Using the Hot Foods function ����������������������������������������������������������������������������� 9 Using the Crush Ice function �����������������������������������������������������������������������������... -
Page 3: Important Safeguards
11. Blades are sharp. Care should be taken when handling the sharp cutting blades, emptying the pitcher, and during cleaning. 12. Always operate Blender with cover in place. 13. The use of attachments not recommended by KitchenAid may cause a risk of injury to persons. -
Page 4: Electrical Requirements
BLENDER SAFETY 14. Always operate Blender with cover securely in place and be sure to use only the Hot Foods function when blending hot foods. Be careful if hot liquid is poured into the Blender as it can be ejected out of the appliance due to a sudden steaming. -
Page 5: Parts And Features
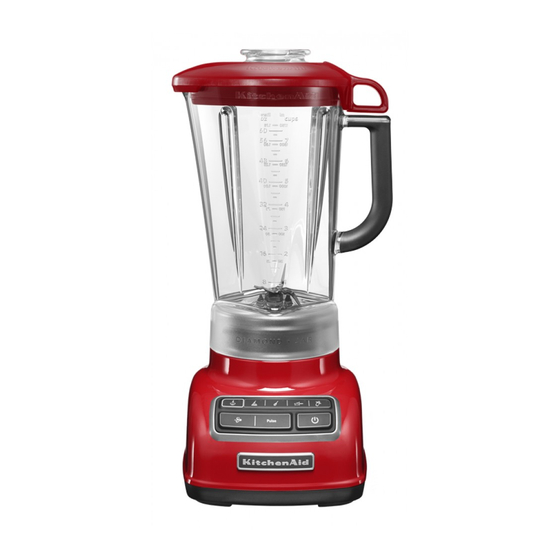
PARTS AND FEATURES Lid with ingredient cup BPA-free pitcher Stainless steel blade Speed selection buttons Clean Touch control pad Die-cast metal base... -
Page 6: Assembling The Blender
ASSEMBLING THE BLENDER Preparing the Blender for use Before first use Before using your blender for the first time, wipe blender base with a warm damp cloth, then wipe clean with a damp cloth� Dry with a soft cloth� Wash pitcher, lid, and ingredient cup in warm, sudsy water (see “Care and Cleaning”... - Page 7 ASSEMBLING THE BLENDER Before using the Blender, plug into a Before removing the pitcher from the grounded outlet, and press POWER base, always press POWER to stop � The Power indicator light will the flashing lights and unplug the power flash when ready�...
-
Page 8: Operating The Blender
OPERATING THE BLENDER Using the Blender Before use While the blender power indicator light or the PULSE mode indicator light is on: - Do not interfere with blade movement� - Do not remove pitcher lid� Before operating the Blender, make sure the pitcher is properly locked onto the blender base�... -
Page 9: Using The Hot Foods Function
CMD + SHIFT CLICK TO CHANGE COPY OPERATING THE BLENDER To remove the lid, first use the loop Then lift the lid from the side to remove on the back of the lid to lift the lid and completely from the pitcher� break the seal�... -
Page 10: Using The Crush Ice Function
CMD + SHIFT CLICK TO CHANGE COPY OPERATING THE BLENDER Using the Crush Ice function Your Blender offers a CRUSH ICE ( ) function� When selected, the Blender will automatically pulse for 30 seconds at staggered intervals at the optimal speed for crushing ice or other ingredients� Before operating the Blender, make sure Put ingredients into the pitcher and the pitcher is properly positioned on... -
Page 11: Using The Pulse Function
CMD + SHIFT CLICK TO CHANGE COPY OPERATING THE BLENDER Using the Pulse function Your Blender offers a PULSE ( ) function, which allows a “Pulse-at-any-speed” feature� Before operating the Blender, make sure Put ingredients into the pitcher and the pitcher is properly positioned on firmly place lid�... -
Page 12: Using The Blender Pitcher Ingredient Cup And Soft Start Blending Feature
OPERATING THE BLENDER Using the blender pitcher, ingredient cup, and Soft Start blending feature • The blender pitcher ingredient cup can • The Soft Start blending feature be used to measure and add ingredients� automatically starts the Blender at a Remove cup and add ingredients at CHOP lower speed to draw ingredients into or MIX speeds�... -
Page 13: Tips For Great Results
CMD + SHIFT CLICK TO CHANGE COPY TIPS FOR GREAT RESULTS Quick tips • If you’re making beverages using ice, • If desired, remove centre ingredient cup start with CRUSH ICE ( ), then finish of pitcher lid to add liquids or ice cubes with LIQUIFY ( ) in order to produce while the Blender is operating at... -
Page 14: Care And Cleaning
TIPS FOR GREAT RESULTS Prepare pancake or waffle batter from Grate cheese: Cut very cold cheese into mix: Place mix and other ingredients in 1�5 cm cubes� Place up to 1/2 cup (120 mL) pitcher� Cover and blend at MIX ( ) until cheese in the pitcher�... -
Page 15: Troubleshooting
CMD + SHIFT CLICK TO CHANGE COPY TROUBLESHOOTING IMPORTANT: The Blender will not operate at any speed unless the POWER ( ) button is pressed first� Blender does not operate when a setting is selected Check to see if the Blender is plugged into a grounded outlet�... -
Page 16: Medidas De Seguridad Para El Uso De La Licuadora
CMD + SHIFT CLICK TO CHANGE COPY INSTRUCCIONES DE LA LICUADORA ÍNDICE MEDIDAS DE SEGURIDAD PARA EL USO DE LA LICUADORA Medidas de seguridad importantes ..............16 Requisitos eléctricos ..................19 COMPONENTES Y FUNCIONES ..............20 MONTAJE DE LA LICUADORA Preparación para usar la licuadora .............. - Page 17 MEDIDAS DE SEGURIDAD PARA EL USO DE LA LICUADORA CMD + SHIFT CLICK TO CHANGE COPY MEDIDAS DE SEGURIDAD IMPORTANTES Para la utilización de aparatos eléctricos como su licuadora es importante seguir en todo momento y observar las precauciones e instrucciones de seguridad que siguen: 1.
- Page 18 11. Ponga en funcionamiento la licuadora solamente con la tapa puesta. 12. El empleo de accesorios que no estén recomendados por KitchenAid puede aumentar el riesgo de daños personales. 13. Ponga en funcionamiento la licuadora solamente con la tapa puesta y utilice la función Alimentos calientes exclusivamente cuando licúe alimentos calientes.
-
Page 19: Requisitos Eléctricos
MEDIDAS DE SEGURIDAD PARA EL USO DE LA LICUADORA CMD + SHIFT CLICK TO CHANGE COPY Requisitos eléctricos - El producto será enchufado en un ADVERTENCIA tomacorriente exclusivo en perfecto estado y con el voltaje correspondiente al producto. - El tomacorriente está de acuerdo a la regulación y legislación local. -
Page 20: Componentes Y Funciones
CMD + SHIFT CLICK TO CHANGE COPY COMPONENTES Y FUNCIONES Tapa fija con tapón para ingredientes Jarra libre de BPA (bisfenol-A) Cuchillas de acero inoxidable Botones de selección de velocidad Panel de control Clean Touch (de limpieza fácil) Base de metal de Hierro Fundido... -
Page 21: Montaje De La Licuadora
MONTAJE DE LA LICUADORA CMD + SHIFT CLICK TO CHANGE COPY Preparación para usar la licuadora Antes de utilizarla por primera vez Antes de utilizar la licuadora por primera vez, limpie la base con un paño tibio enjabonado y aclárela con un paño húmedo. Séquelo con un paño suave. - Page 22 MONTAJE DE LA LICUADORA ADVERTENCIA Peligro de descarga eléctrica Enchufe el producto en un toma corrientes con conexión efeciva a tierra de 3 terminales. No quite la terminal de conexión a tierra. No utilice adaptadores de ningún tipo. No utilice un cable alargado o cable eléctrico de extensión o de contactos múltiples.
-
Page 23: Funcionamiento De La Licuadora
FUNCIONAMIENTO DE LA LICUADORA CMD + SHIFT CLICK TO CHANGE COPY Uso de la licuadora Antes del uso Mientras el indicador luminoso de encendido/ apagado de la licuadora o del modo modo INTERMITENTE están encendidos: - No interfiera en el movimiento de la cuchilla. - No retire la tapa de la jarra. -
Page 24: Uso De La Función Alimentos Calientes
CMD + SHIFT CLICK TO CHANGE COPY FUNCIONAMIENTO DE LA LICUADORA Para retirar la tapa, agárrela en primer A continuación levante la tapa desde lugar del saliente de la parte posterior el lateral para retirarla completamente de la misma y tire hacia arriba de la jarra. -
Page 25: Uso De La Función Picar Hielo
CMD + SHIFT CLICK TO CHANGE COPY FUNCIONAMIENTO DE LA LICUADORA Uso de la función Picar hielo Su licuadora incluye una función TRITURAR HIELO ( ). Cuando está seleccionada esta función, la licuadora funciona a intervalos durante 30 segundos a la velocidad óptima para picar hielo u otros ingredientes. Antes de utilizar la licuadora, compruebe Deposite los ingredientes en la jarra que la jarra está... -
Page 26: Uso De La Función Intermitente
CMD + SHIFT CLICK TO CHANGE COPY FUNCIONAMIENTO DE LA LICUADORA Uso de la función Intermitente La función INTERMITENTE de la licuadora ( ) ofrece la función “Intermitente a cualquier velocidad”. Antes de utilizar la licuadora, compruebe Deposite los ingredientes en la jarra que la jarra está... -
Page 27: Uso Del Tapón Para Ingredientes De La Jarra Y De La Función Soft Start
CMD + SHIFT CLICK TO CHANGE COPY FUNCIONAMIENTO DE LA LICUADORA Uso del tapón para ingredientes de la jarra y de la función Soft Start • El tapón para ingredientes de la jarra • La función Soft Start pone en marcha de la batidora permite medir y agregar automáticamente la licuadora a una ingredientes. -
Page 28: Consejos Rápidos
CMD + SHIFT CLICK TO CHANGE COPY CONSEJOS PARA OBTENER EXCELENTES RESULTADOS Consejos rápidos • Cuando utilice hielo para preparar bebidas, • Si lo desea, puede retirar el tapón de para obtener una textura más suave, utilice ingredientes central de la tapa de la jarra la función PICAR HIELO ( ) y termine para añadir líquidos o cubitos cuando la... -
Page 29: Cuidado Y Limpieza
CMD + SHIFT CLICK TO CHANGE COPY CONSEJOS PARA OBTENER EXCELENTES RESULTADOS Preparar masa de panqueque o gofre Rallar queso: Cortar el queso muy frío en de sobre: Poner en la jarra el contenido cuadraditos de 1,5 cm. Poner un máximo del sobre y los demás ingredientes. -
Page 30: Solución De Problemas
CMD + SHIFT CLICK TO CHANGE COPY SOLUCIÓN DE PROBLEMAS IMPORTANTE: La licuadora no funcionará a ninguna velocidad a menos que se haya presionado primero el botón de encendido/apagado ( Hay una opción seleccionada y la licuadora no funciona Compruebe si la licuadora está enchufada a una toma de corriente con conexión a tierra. - Page 32 © 2016. All rights reserved. Specifications subject to change without notice. W10861809A 02/16...
Need help?
Do you have a question about the KSB1585 and is the answer not in the manual?
Questions and answers