Table of Contents
Advertisement
Quick Links
Advertisement
Table of Contents

Related Manuals for EdgeStar CWB8420FD


Summary of Contents for EdgeStar CWB8420FD
- Page 1 Built-In Wine and Beverage Refrigerator CWB8420FD Owner’s Manual For more information on other great EdgeStar products on the web, go to http://www.edgestar.com To use the EdgeStar self-diagnostic tool, go to https://support.edgestar.com V2.0-05292019...
- Page 2 Important Safety Information Improper handling can cause serious damage to the EdgeStar wine refrigerator and / or injury to the user. This wine refrigerator is designed for domestic indoor use only. Do not use the unit for industrial or commercial use. Any other use may invalidate the warranty. Please review the ratings label located on the rear panel of the unit for electrical and other technical data related to this unit.
- Page 3 General Safety • To prevent back and other types of injuries, use at least two people to move and install the wine refrigerator. • This appliance is not intended for use by persons, including children, with reduced physical, sensory or mental capabilities, unless they have been given supervision or instruction concerning the use of the appliance by the person(s) responsible for their safety.
-
Page 4: Table Of Contents
ORMAL OUNDS Temperature Alarm ..............................14 ................................15 EFROSTING ....................15 REPARING THE EFRIGERATOR FOR TORAGE CLEANING AND MAINTENANCE ......................... 16 ..............................16 XTERIOR LEANING ..............................16 NTERIOR LEANING TROUBLESHOOTING ............................17 SPECIFICATIONS ..............................19 EDGESTAR LIMITED WARRANTY ........................20... -
Page 5: First Time Operating Instructions
The instruction manual should be read before use. Introduction Thank you for purchasing this EdgeStar wine refrigerator. We hope that this purchase will be the beginning of a lasting and rewarding relationship between you and EdgeStar. We will provide the customer support and exemplary products necessary to nurture that relationship. -
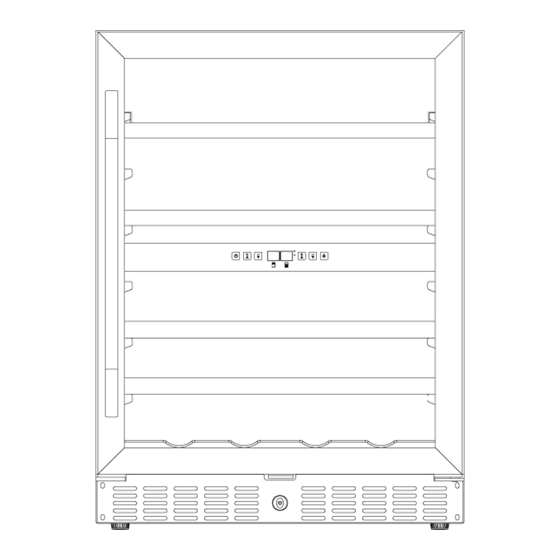
Page 6: Parts Identification
Parts Identification Front View Tip: Gather the model and serial number from the product label and write them down before installing the wine refrigerator. -
Page 7: Installing The Wine Refrigerator
Installing the Wine Refrigerator The wine refrigerator should be installed in accordance with local electrical code requirements. The wine refrigerator should also be placed in a location that is strong enough to support its total weight, keeping in mind that it will weigh substantially more when fully loaded than when empty. -
Page 8: Installation Clearance Requirements
Installation Clearance Requirements Important Notes • Choose a location that has ambient temperatures above 50° F and below 95° F. Operation outside these temperatures may result in lowered efficiency or cause other adverse effects. • This unit MUST be installed in an area protected from the elements, e.g. wind, rain, water spray or drips. -
Page 9: Electrical Requirements
Electrical Requirements ELECTRIC SHOCK HAZARD! • Plug into a grounded 3-prong outlet. • Never remove the grounding prong from the plug. • Never use an adapter to bypass the grounding prong. • DO NOT use an extension cord. • Failure to follow these instructions can result in fire, electrical shock, or death. Before you move your wine refrigerator into its final location, it is important to make sure you have the proper electrical connection: A standard electrical supply (115 V, 60Hz), properly grounded in accordance with the National... -
Page 10: Installing The Door Handle
Installing the Door Handle To install the door handle: Remove the door gasket (1). You can see two designated holes for handle installation. Install the handle (4) tightly as shown above with two screws (3) and flat washers (2) provided. Replace the door gasket. -
Page 11: To Remove The Shelves
To Remove the Shelves Open the right door completely. If necessary, make sure you remove all the contents sitting on the shelf. Pull the shelf forward until the notch aligns with the plastic posts on each side of the shelf track. Lift the shelf until both notches pass through the posts. - Page 12 2. Remove the bottom hinge plate (5) by unscrewing the four lock screws (6). Be careful to hold the glass door firmly after removing the screws. 3. Gently pull down to remove the glass door (12) from the right top hinge and place it on a padded surface to avoid the risk of damage.
-
Page 13: Installation Check List Before Operation
5. Pop out the cover caps on the left side of cabinet and use them to cover the screw holes on the right hand side. 6. Screw the alternate left top hinge (9), included in the fittings, on the left hand side of cabinet. 7. -
Page 14: Using The Temperature Control Panel
Using the Temperature Control Panel Lower Zone Upper Zone Each zone is independently controlled by the touchpad controls located on the center divider (pictured above). The temperature display can be in Fahrenheit or Celsius. The top (beverage) zone has a temperature range from 41°F to 68°F. The bottom (wine) zone has a temperature range from 36°F to 43°F. -
Page 15: Advanced Functions
Advanced Functions Sabbath Mode This unit is equipped with Sabbath mode for the observance of religious holidays. This mode turns off the display, interior light and the alarm. To enable Sabbath mode, press and hold the buttons for five (5) seconds. -
Page 16: Defrosting
Defrosting The wine refrigerator will automatically defrost under most temperature settings and ambient conditions. However, on colder settings, some frost may build up. Additionally, under more humid ambient conditions, more frost may build up. Keep the door closed as much as possible and avoid opening the door unnecessarily to minimize frost build-up. -
Page 17: Cleaning And Maintenance
Cleaning and Maintenance Periodic cleaning and proper maintenance will ensure efficiency, top performance, and long life. Exterior Cleaning The door and cabinet may be cleaned with a mild detergent and lukewarm water solution. Do not use solvent based or abrasive cleaners. Use a soft sponge and rinse with clean water. Wipe with a soft clean towel to prevent water spotting. -
Page 18: Troubleshooting
Troubleshooting Before Calling for Help If the unit appears to be malfunctioning, read through the “Operation” section of this manual first. If the problem persists, check the Troubleshooting Guide below and on the following page. The problem may be something that can easily be solved or explained. Symptoms Possible Causes Solutions... - Page 19 Symptoms Possible Causes Solutions The body of the wine The unit is not grounded Contact your local electrician refrigerator is electrified. properly. to test your electrical grounding system. Frost is forming in the wine The environment is humid. Though the unit uses an “auto-defrost”...
-
Page 20: Specifications
Specifications Note: Technical data and performance information are provided for reference only. Specifications are subject to change. Check the rating label on the wine refrigerator for the most accurate information. Description of product Built-in Wine and Beverage Cooler Model CWB8420DZ Voltage / Frequency AC 115V~60Hz Amperage... -
Page 21: Edgestar Limited Warranty
WHAT IS COVERED: For a period of ONE (1) YEAR from the date of original retail purchase, EdgeStar will repair or replace any part free of charge including labor that fails due to a defect in materials or workmanship. Labor will be performed free of charge at an authorized EdgeStar repair facility and EdgeStar will supply new, rebuilt, or refurbished parts free of charge.
Need help?
Do you have a question about the CWB8420FD and is the answer not in the manual?
Questions and answers