Table of Contents
Advertisement
Available languages
Available languages
Quick Links
IB517029ML
Wiring Diagrams and Instructions – HCC4, HCC6, HCC8 &
Commercial LED Rough-In
Schéma et instructions de câblage – Luminaire DEL à montage sur
gobetis HCC4, HCC6, HCC8 et commercial
Diagramas de cableado e instrucciones: HCC4, HCC6, HCC8 y
Rough-In para LED de uso comercial
Risk of Fire, Electrical Shock, Cuts or other Casualty Hazards- Installation and maintenance of this
product must be performed by a qualified electrician. This product must be installed in accordance
with the applicable installation code by a person familiar with the construction and operation of
the product and hazards involved.
Risk of Fire and Electric Shock- Make certain power is OFF before starting installation or
attempting any maintenance. Disconnect power at fuse or circuit breaker.
Risk of Fire- Minimum 90°C supply conductors.
Risk of Burn- Disconnect power and allow fixture to cool before handling or servicing.
Risk of Personal Injury- Due to sharp edges, handle with care.
Failure to comply with these instructions may result in death, serious bodily injury and property
damage.
DISCLAIMER OF LIABILITY: Eaton assumes no liability for damages or losses of any kind that may arise from the
improper, careless, or negligent installation, handling or use of this product.
IMPORTANT: Read carefully before installing fixture. Retain for future reference.
NOTICE: Fixture may become damaged and/or unstable if not installed properly.
Note: Specifications and dimensions subject to change without notice.
Note: This fixture should be supported by main runners or other structure that is capable of supporting fixture
weight of 40 Ibs.
ATTENTION Receiving Department: Note actual fixture description of any shortage or noticeable damage on
delivery receipt. File claim for common carrier (LTL) directly with carrier. Claims for concealed damage must be
filed within 15 days of delivery. All damaged material, complete with original packing must be retained.
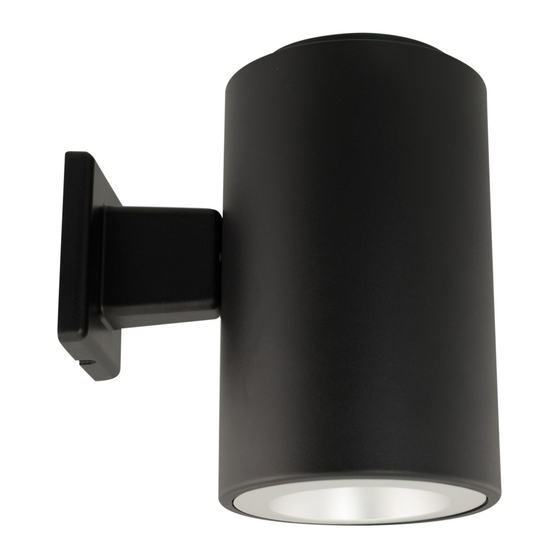
Surface Mounts
HCC8S
HCC6S
WARNING
HCC4S
HCC4W
Brand Logo
reversed out of
black
HALO Commercial
INS #
INS #
Wall Mounts
HCC6W
Outer Diameter
HCC4
6-7/8"
HCC6
8-3/16"
HCC8
10-1/4"
HCC8W
Height
10-3/4"
12-1/8"
16"
Advertisement
Table of Contents

Related Manuals for Eaton HALO Commercial HCC6


Summary of Contents for Eaton HALO Commercial HCC6
- Page 1 Failure to comply with these instructions may result in death, serious bodily injury and property damage. DISCLAIMER OF LIABILITY: Eaton assumes no liability for damages or losses of any kind that may arise from the improper, careless, or negligent installation, handling or use of this product.
-
Page 2: Installation
17 IN/LBS torque to engage mounting plate. Installer must apply silicone compound around entire perimeter of the mounting arm where it mates to the Figure 3. mounting surface. Figure 4. Figure 1. EATON IB517029ML Installation instructions... - Page 3 Install the LED Engine and trim assembly by inserting the torsion springs into the spring receivers located inside the housing (Figure 11.). Figure 8. Thumb Screw Tether Figure 5. Figure 9. Mating Bracket Tether Figure 6. Figure 10. EATON IB517029ML Installation instructions...
-
Page 4: Electrical Connection
For the latest information regarding dimmers for use with this LED luminaire, please see the Halo Commercial HCC4/HCC6/HCC8 LED Dimming Reference Sheet at www.eaton.com. In addition, you may wish to consult the dimmer manufacturer for their latest dimmer configurations and product information. - Page 5 La désobéissance aux instructions suivantes représente un risque de blessures graves ou mortelles et de dommages matériels. EXONÉRATION DE RESPONSABILITÉ : Eaton n’assume aucune responsabilité pour les dommages ou pertes de toute nature pouvant découler d’une installation inappropriée, imprudente ou négligente et d’une mauvaise manipulation ou utilisation de ce produit.
- Page 6 Raccordez l’appareil selon le schéma de câblage (voir le Ressorts de torsion chapitre d’électricité). Fixez le câble d’attache arrière du montage mural à la vis de la boite de branchement comme montré à la Figure 4. Figure 3. Figure 1. Figure 4. EATON IB517029ML Instructions d’installation...
- Page 7 à DEL (Figure 7). Branchez la fiche à débranchement rapide du luminaire sur le module (Figure 8). Figure 8. Vis à serrage à main Câble d’attache Figure 5. Figure 9. Support homologue Câble d’attache Figure 6. Figure 10. EATON IB517029ML Instructions d’installation...
- Page 8 Halo HCC4, HCC6 et HCC8 en visitant le site www.eaton.com. De plus, il est préférable de communiquer avec le fabricant du gradateur pour obtenir les informations concernant le produit et les configurations récentes de gradateurs.
- Page 9 El incumplimiento de estas instrucciones puede ocasionar la muerte, lesiones corporales graves y daños a la propiedad. RENUNCIA DE RESPONSABILIDAD: Eaton no asume ninguna responsabilidad por daños o pérdidas de ningún tipo que puedan surgir por la instalación, manipulación o uso inadecuado, descuidado o negligente de este producto.
-
Page 10: Instalación
Muelles de torsión (consulte la sección eléctrica). Fije la correa trasera de montaje de pared al tornillo de montaje de la caja de empalme, como se muestra en la Figura 4. Figura 3. Figura 1. Figura 4. EATON IB517029ML Instrucciones de instalación... - Page 11 LED (Figura 7 .). Enchufe la luminaria de desconexión rápida en el módulo (Figura 8.). Figura 8. Tornillo de ajuste manual Correa Figura 5. Figura 9. Soporte de acoplamiento Correa Figura 6. Figura 10. EATON IB517029ML Instrucciones de instalación...
-
Page 12: Conexión Eléctrica
Enjuague con agua limpia y seque con un paño suave, referencia de atenuación de LED de Halo Commercial limpio y seco que no suelte pelusa. HCC4/HCC6/HCC8 en www.eaton.com. Además, es posible que desee consultar al fabricante del atenuador para conocer sus últimas configuraciones de atenuadores y la información del producto. - Page 13 Warranties and Limitation of Liability Please refer to www.eaton.com/LightingWarrantyTerms for our terms and conditions. Garanties et limitation de responsabilité Veuillez consulter le site www.eaton.com/LightingWarrantyTerms pour obtenir les conditions générales. Garantías y Limitación de Responsabilidad Visite www.eaton.com/LightingWarrantyTerms para conocer nuestros términos y condiciones.
Need help?
Do you have a question about the HALO Commercial HCC6 and is the answer not in the manual?
Questions and answers