Subscribe to Our Youtube Channel
Summary of Contents for protech Helixx T0508
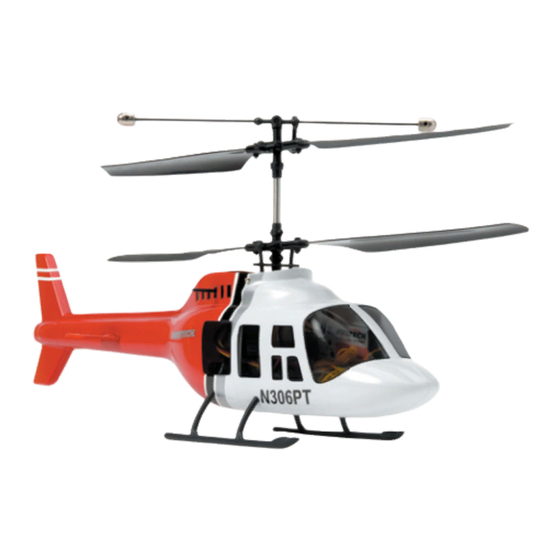
- Page 1 Micro helicopter Instruction manual • T0508 T0512 T0507 WARNING ! This radio controlled helicopter is not a toy. Adult supervision recommanded © 2008, HobbyCenter.Ru version: FV 17/07/07...
- Page 2 LIABILITY EXCLUSION / COMPENSATION As manufacturers, we at PROTECH are not in a position to in uence the way you build and set up the model, nor how you install, operate and maintain the radio control system components. For this reason we are obliged to deny all liability for loss, damage or costs which are incurred due to the incompetent or incorrect use and operation of our products, or which are connected with such operation in any way.
-
Page 3: Kit Content
Kit content / 1. 100% Prebuilt chassis 1. 100% 2. Transmitter Li-Po 3. Battery pack 4. Li-po charger 5. Power supply 6. Instructions - Accessories - Transmitter - Helicopter - Charger - Li-Po Battery - Li-Po Transmitter / Place 8 pcs dry cells LR-6 in the battery box of the transmit- ter. -
Page 4: Receiver Antenna
Disassembling the canopy / To remove the fuselage:Remove Отсоединить кабину, сняв ее с the 2 screws of the cabin. Push крепежных стержней. Выньте out the small carbon rod and два крепежных стержня и remove the landing skids to шасси, отсоедините хвост... -
Page 5: Electronic Components
Electronic components / Elevator servo Aileron servo 4 in 1controller 2 x 180 type motors Electronics equipment is installed at the factory. Please check these components to ensure that they are installed snugly as some shifting may have occured in shipping. Transmitter / MODE - Transmitter antenna... -
Page 6: Charging And Installing The Battery
Charging and installing the battery / WARNING: Do not leave battery unattented while charging! • Install the battery as shown. • Connect the 230V power supply to the Li-Po charger. Connect the Li-Po power supply to a mains socket. The RED led of the charger will turn on. -
Page 7: Operating For The First Time
Operating for the first time / Test the electronics to be sure operate properly. The helicopter must now be “trimmed” or fine tuned for optimal performance. ALWAYS turn the transmitter “ON” before plugging the battery into the Helixx. MODE 2 Extend the antenna Set the throttle stick to the lowest position. -
Page 8: Elevator Servo
Adjusting aileron and elevator control / The two mounted servos on the Helixx control the response. An aileron input from the transmitter will cause the Helixx to tilt either left or right. The elevator control causes the Helixx to tilt forward or back. - Page 9 Control the Helixx / MODE 1 / MODE 2 MODE 2 MODE 1 • Aileron controls the helicopter’s left and right tilt. Be careful! Too much aileron can cause the Helixx to tip too far. • Right stick MODE 2 Left stick MODE 1 •...
- Page 10 Learn to fly / Руководство по пилотированию MODE 1 / MODE 2 MODE 1 / MODE 2 Left stick MODE 2 Левая ручка Right stick MODE 1 Правая ручка 2 meters 2 метра Place the Helixx on the ground Положите вертолет на землю и and stand behind the model.
- Page 11 Learn to fly / Руководство по пилотированию Move slowly downward Медленно уменьшайте газ Потренируйте посадку. Будьте Practice landing the helicopter. Note that внимательны, вертолет упадет the helicopter will drop rapidly if the слишком быстро если резко throttle stick is moved too fast so do so уменьшить...
- Page 12 Learn to fly / MODE 2 MODE 1 While in mid-air try using the aileron and elevator controls to move the helicopter forwards, backwards and side to side while maintaining the same elevation. Only slight inputs are needed to move the helicopter. circle flying Turning the helicopter and flying a circle is important because in...
-
Page 13: Spare Parts
SPARE PARTS SPARE PARTS T0508.001 Main frame T0508.003 Main blade T0508.004 Flybar set T0508.002 Battery support Держатель батреи Лопасти Вал-стабилизатор Главная рама T0508.005 Landing skid T0508.007 Inner shaft T0508.006 Out shaft & gear set T0508.008 Gear & shaft set Шасси Внешний... - Page 14 SPARE PARTS SPARE PARTS T0508.025 Lipo matic charger T0508.026 Power supply T0508.020B Front body Blue/white T0508.020Y Front body Yellow Lipo Капот желтый Капот бело-голубой T0508.021B Rear body Blue/white T0511.020 Front body MD900 T0511.021 Rear body MD900 T0508.021Y Rear body Yellow Капот...
- Page 15 • Only use the battery for the ZOOM 400 (see required battery) WHEN USING LITHIUM POLYMER BATTERIES: Because of the high energy density of these cells, they must be used with extreme precautions PROTECH denies any responsability claims or damages caused by use or misuse of these batteries. • •...
- Page 16 Other models available / T0508 Helixx T0508 Helixx Heli services T0509 Helixx Bell 47G T0507 Helixx MD-900 T0512 Helixx Long Ranger T0513 Helixx MD 500 © 2008, HobbyCenter.Ru...


Need help?
Do you have a question about the Helixx T0508 and is the answer not in the manual?
Questions and answers