Panasonic FZ-G1 Series Operating Instructions - Reference Manual
Tablet computer
Hide thumbs
Also See for FZ-G1 Series:
- Operating instructions manual (104 pages) ,
- Supplementary instructions manual (60 pages) ,
- Operating instructions - basic manual (41 pages)
Table of Contents
Advertisement
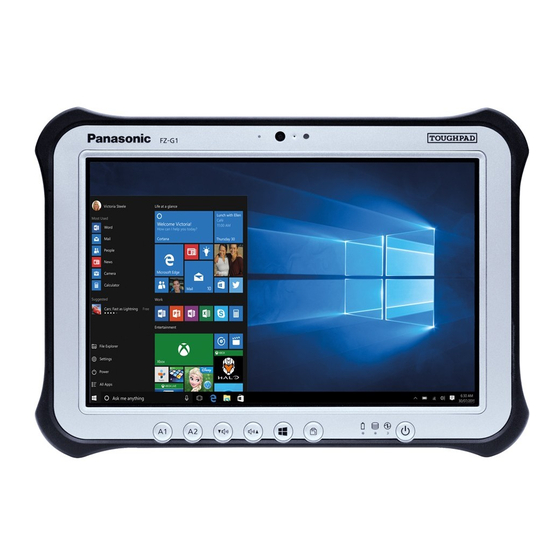
Tablet Computer
Model No. FZ-G1 Series
Operating Instructions - Reference Manual
We recommend that this Reference Manual be printed.
Disclaimer
Computer specifications and manuals are subject to change without notice. Panasonic Corporation assumes no liability for damage incurred directly or
indirectly from errors, omissions or discrepancies between the computer and the manuals. Refer for the latest information about optional products to the
catalogs, etc.
Trademarks
Microsoft, Windows, and the Windows logo are registered trademarks or trademarks of Microsoft Corporation of the United States and/or other
countries.
Intel, Core, and PROSet are either registered trademarks or trademarks of Intel Corporation.
microSDXC Logo is a trademark of SD-3C, LLC.
®
MobileMark
is a U.S. Registered Trademark of the Business Applications Performance Corporation.
The terms HDMI and HDMI High-Definition Multimedia Interface, and the HDMI Logo are trademarks or registered trademarks of HDMI Licens-
ing Administrator, Inc. in the United States and other countries.
®
Bluetooth
is a registered trademark owned by Bluetooth SIG, Inc., U.S.A. and licensed to Panasonic Corporation.
Names of products, brands, etc., appearing in this manual are trademarks or registered trademarks of their respective own companies.
About the Software License
This product incorporates the following software:
-
1
-
Advertisement
Table of Contents

Related Manuals for Panasonic FZ-G1 Series


Summary of Contents for Panasonic FZ-G1 Series
- Page 1 Disclaimer Computer specifications and manuals are subject to change without notice. Panasonic Corporation assumes no liability for damage incurred directly or indirectly from errors, omissions or discrepancies between the computer and the manuals. Refer for the latest information about optional products to the catalogs, etc.
- Page 2 (1) the software developed independently by or for Panasonic Corporation, (2) the software owned by third party and licensed to Panasonic Corporation, and/or (3) open source software The software categorized as (3) is distributed in the hope that it will be useful, but WITHOUT ANY WARRANTY, without even the implied warranty of MERCHANTABILITY or FITNESS FOR A PARTICULAR PURPOSE.
- Page 3 Use of the Software by the government constitutes acknowledgement of Intel’s proprietary rights therein. Contractor or Manufacturer is Intel Corporation, 2200 Mission College Blvd., Santa Clara, CA 95052. Panasonic Corporation Osaka, Japan Web Site : https://panasonic.net/cns/pc/ © Panasonic Corporation 2018 PS0918-0 20180042ZAD...
- Page 4 Introduction Illustrations and Terminology in this Manual This manual explains using the default setting. Some illustrations and display examples may look different from the actual product. Some types of software are automatically updated, and differences may occur from descriptions in this manual. If you do not sign in as an administrator, you cannot use some functions or cannot display some screens.
- Page 5 1. Touch (Start) - (Panasonic PC Settings Utility). Alternatively, touch (Panasonic PC Settings Utility) in the tablet mode. Notification area The notification area is on the right side of the screen. To display the notification, touch (Notification) on the task tray.
-
Page 6: Windows Update
About the Ambient Light Sensor The ambient light sensor is used to adjust the display screen brightness automatically. To configure the automatic adjustment function, proceed as follows. 1. Touch (Start) - (Settings) - [System] - [Display]. Alternatively, touch (Settings) - [System] - [Display] in the tablet mode. 2. - Page 7 1. Connect the USB storage device to the USB port. 3. Touch (Start) - (Panasonic PC Recovery Disc Creation Utility). If the “User Account Control” screen appears, touch [Yes]. 4. Touch [Next]. 5. Confirm on-screen information ([Select OS Image] and [Number of discs required]), and then touch [Next].
- Page 8 If you fail to create a recovery disc or an error message appears, try either of the following procedures. Insert the disc or USB storage device correctly. Check the disc or USB storage device condition. Restart the computer and try to create a recovery disc again. Contact Panasonic Technical Support.
- Page 9 About the Partition Structure C AU TI O N Do not add or delete partitions in Windows 10, as the Windows area and recovery partition must be adjacent to each other in Windows...
- Page 10 Flash Memory Backup/Restore Function Panasonic Corporation will bear no responsibility for any damage suffered (including loss of data) as a result of the use of this function. Creating a Backup of the Flash Memory Data You can create a backup of the flash memory data, which can be used to recover from hardware failure.
-
Page 11: Description Of Parts
Description of Parts Front side A. Front Camera <Only for model with Front Camera> Camera) a. Camera Lens b. Camera Indicator c. Microphone d. Ambient Light Sensor The ambient light sensor is equipped with an automatic brightness adjustment function that adjusts the display screen. ( Automatic brightness adjustment) - Page 12 Off: Power off/Hibernation Green: Power on Blinking green: Sleep Blinking green and orange: Cannot power on or resume due to low temperature. : Drive Indicator (Drive status) : Battery Indicator (Battery status) When the battery indicator does not light Battery Power) F.
- Page 13 Card) <Only for model with dedicated GPS / GPS on wireless WAN> GPS) <Only for model with Thermography Camera> For more information, refer to “Using the Panasonic PC Thermal Viewer”. E. Rear Camera <Only for model with Rear Camera> Camera) a.
- Page 14 P. Digitizer pen / Pen Holder Bottom Side A. Expansion Bus Connector B. External Antenna Connector (EXT_ANT1) C. External Antenna Connector (EXT_ANT2) N O T E The following factory preset combinations are available for the external antenna output. EXT_ANT1 EXT_ANT2 WWAN main Dedicated GPS WWAN-GPS...
-
Page 15: Turning On / Turning Off
Turning On / Turning Off Turning On Press and hold the power switch until the power indicator lights. ( Description of Parts) N O T E Do not press the power switch repeatedly. The computer will forcibly be turned off if you press and hold the power switch for four seconds or longer. - Page 16 To conserve power, the following power saving methods are set at the time of purchase. The screen automatically turns off after : 10 minutes (when AC adaptor is connected) of inactivity 5 minutes (when operating on battery power) of inactivity The computer automatically enters sleep after : 20 minutes (when AC adaptor is connected) of inactivity...
-
Page 17: Screen Input Operation
Screen Input Operation The screen of your computer allows you to perform the same operations as a mouse by touching its surface. The computer supports, using your fingers and the digitizer pen (included). N O T E Note that the touch screen may respond to the following: Putting the digitizer pen (included) or finger close to the screen. - Page 18 To operate “eraser” with the pen (included) Press and hold the button (B) of the pen (included), and then touch the object. Operation by touching the screen Instead of operating the screen with the pointer, you can use your fingers. This computer supports multi touch of ten points or less at the same time.
-
Page 19: Touch Screen Mode
Touch with a quick sweeping motion. Touch Screen Mode You can select the suitable operation mode in Touch Screen Mode. 1. Touch (Start) - (Panasonic PC Settings Utility) - (Settings) - (Touch Screen). 2. Select the operation mode under “Touch Screen Mode”. [Touch] mode Suitable for finger operation and the digitizer pen (included) operation. - Page 20 Change the display mode to the landscape before starting screen calibration. If calibration is performed other than the landscape, it may not be possible to touch the target marks correctly. N O T E At first, sign in to Windows as an administrator, and perform this calibration. 1.
- Page 21 About Touch Operation Support Touch Operation Support is an application that allows you to perform screen operations more easily. When you use a two-finger tap gesture to specify the area in which you want to perform touch operations, the area is displayed in a zoom window, allowing you to perform touch operations in an expanded dis- play.
- Page 22 Drag after Press and Hold (Drag by Right Button) Drag from inside to inside of the zoom window Drag from inside to outside of the zoom window Drag from outside to inside of the zoom window Drag from outside to outside of the zoom window Operation guides may appear when using the zoom window for the first time.
- Page 23 (2) Dotted line appears. (3) Expanded view appears when you slow your drag speed. Changing settings 1. Touch (Start) - (Panasonic PC Settings Utility) - (Settings) - (Touch Screen). 2. Touch [Advanced Settings] under “Touch Operation Support”. 3. Adjust each setting.
- Page 24 When the setting window is displayed, the zoom window will not be displayed. Disabling Touch Operation Support 1. Touch (Start) - (Panasonic PC Settings Utility) - (Settings) - (Touch Screen). 2. To disable “Touch Operation Support”, remove a checkmark to “Support touch operation”.
- Page 25 You can set the key to either Volume Up/Down or Brightness Up/Down with Setup Utility. Rotation Lock ( Display Rotation) Automatic display rotation ON/OFF. Panasonic PC Settings Utility ON/OFF. <Only when [Concealed Mode] is set to [Enabled]> Concealed Mode ON/OFF. (...
- Page 26 To change the button functions You can change the functions of buttons. 1. Touch (Start) - (Panasonic PC Settings Utility) - (Settings) - (Button / Key). 2. Touch [Settings] under “Tablet Buttons”. 3. Select the “Tablet button” and touch [Change].
- Page 27 Touch (Start) - [Windows System] - [Control Panel] - [Hardware and Sound] - [Set tablet buttons to perform certain tasks] under “Tablet PC Settings”.
-
Page 28: Important Tips
Important Tips Important Battery Tips N O T E <Only for model with Built-in Bridge Battery> The computer is equipped with a built-in bridge battery (not replaceable) and a battery pack (replaceable). How to use the battery with minimal deterioration The battery is a consumable and, as such, its performance will gradually deteriorate. - Page 29 We recommend against using applications or screen saver that place a significant load on the CPU Some screen savers place a large load on the CPU. When using these screen savers, a significant load is placed on the CPU even when the computer is not being used.
-
Page 30: Battery Power
Battery Power Battery Indicator Battery indicator (A): Battery indicator Battery status The battery pack is not inserted or not being charged. Not lit Concealed Mode is set to ON. Orange Charging is in progress. Battery Charging Indicator in the [Main] menu of the Setup Utility is set to [Flashing], the indicator will altern- ately become lighter and darker (Flashing). -
Page 31: Checking The Remaining Battery Power
The battery pack cannot be replaced. (When the battery latch (C) is slid with the AC adaptor disconnected) Blinking red The built-in bridge battery has deteriorated. Contact Panasonic Technical Support. Not lit The battery pack can be replaced (While the AC adaptor connected, shutdown, hibernation) - Page 32 Battery indicator Remaining battery power 0 % - 4 % Blinking orange 5 % - 19 % Orange 20 % - 49 % Blinking green 50 % - 94 % Green 95 % - 100 % N O T E The battery display may not correspond to the actual remaining battery charge in the cases as below.
-
Page 33: Replacing The Battery Pack
The battery display may not be correct when the battery pack deteriorates after a long time use. In this case, perform the procedure again. 1. Connect the AC adaptor. 2. Touch (Start) - (Panasonic PC Settings Utility) - (Support) - (Battery) - [Perform battery recalibration]. 3. At the confirmation message, touch [OK]. - Page 34 <Only for model with Built-in Bridge Battery> When 5 minutes elapse after removing the battery pack in sleep, the sleep mode will be released. N O T E <Only for model with Built-in Bridge Battery> If the built-in bridge battery has enough remaining power, you can replace the battery pack without turning off the computer (Hot swap) and during sleeping the computer (Warm swap).
- Page 35 Close the battery pack until it touch to the secured position. Be careful about the battery pack direction. In case that the projection does not match the dents of the computer, detach the battery pack once, then slide it while pushing it lightly to avoid floating. C AU TI O N Make sure the latch is securely locked, otherwise the battery pack may fall when you carry the computer.
- Page 36 Sleep/Hibernation Functions Starting Up Your Computer Quickly The sleep or hibernation functions allow you to shut off the computer without closing programs and documents. You can quickly return to the programs and documents that you were working on before sleep or hibernation. Function Data is saved to Recovery time...
- Page 37 The password you set in the Setup Utility will be requested upon resuming from hibernation (but not from sleep) or fast startup, if [Pass- word On Resume] is set to [Enabled] in the [Security] menu of the Setup Utility. To disable it, set [Password On Resume] to [Disabled]. The [Password On Resume] setting is valid when you shut down the computer by touching (Start) - (Power) - [Shut...
- Page 38 Hibernation from the Windows system menu is not available as the factory default. To enter hibernation from the Windows system menu, the following setting is necessary. 1. Touch and hold on the task tray, and then touch [Power Options]. 2. Touch [Choose what the power button does] - [Change settings that are currently unavailable]. 3.
- Page 39 Connect or disconnect the AC adaptor. Attach or remove the battery pack. Shut down or restart Windows. Enter sleep or hibernation. If the computer enters the sleep mode while an external keyboard or mouse is connected, touching the external keyboard keys or mouse may resume the computer.
- Page 40 Panasonic PC Settings Utility You can perform the following operations easily by using the Panasonic PC Settings Utility. When starting up this application for the first time, connect to the Internet for initial setup. If it is first started up without Internet connection, the initial setup may take time, and several minutes may be required for startup.
- Page 41 Enable or Disable the built-in camera. To switch the option, the administrator right is required. If the camera is disabled by the Setup Utility, you cannot enable the camera by touching [Enabled]. Camera) Utilities You can use Panasonic applications that display icons. To use these applications, touch an icon. Support Manual [Launch Manual Selector] For further information about the computer, you can refer to the on-screen manual.
- Page 42 Display the version information. To add or delete functions To add or delete functions, follow the procedure below. 1. Touch and hold (Start) at the bottom left corner, and then touch [Apps and Features]. 2. Select [Panasonic PC Settings Utility], touch [Change].
- Page 43 3. Touch [Add or Remove Features], and then touch [Next]. 4. Add or delete checkmarks, and then touch [Next]. N O T E If “This program might not have uninstalled correctly” is displayed, follow the on-screen instructions.
-
Page 44: Connecting Lan
<Only for model with LAN> Connecting LAN C AU TI O N Do not connect the telephone cable to the LAN port. 1. Turn off the computer. Do not use sleep or hibernation. 2. Connect the cable. Open the cover (A) and connect the LAN port (B) and the network system (e.g., server, HUB) using a LAN cable. 3. -
Page 45: Using Airplane Mode
Disabling/Enabling Wireless Communication <Only for model with wireless LAN, Bluetooth, wireless WAN, GPS on wireless WAN, and/or dedicated GPS> There are several ways of disabling and enabling wireless communication. Using airplane mode Turning wireless communication on/off quickly Using Network & Internet settings Setting [Wireless Configuration] in the [Advanced] menu of the Setup Utility... - Page 46 Turning on/off the airplane mode 1. Touch on the task tray. 2. To turn on the airplane mode, touch (Airplane mode). The icon changes to , and then the icon on the task tray changes to To turn off the airplane mode, touch .
-
Page 47: Using The Wireless Lan Function
Wireless LAN <Only for model with wireless LAN> C AU TI O N Do not use wireless LAN on airplanes, in hospitals, or in other locations where wireless LAN signals may affect devices. Follow the instructions of airline companies and hospitals. If you use the computer in these locations, turn off the wireless LAN. To avoid unauthorized access to the computer through wireless LAN We recommend you to make security settings such as encryption before using wireless LAN. - Page 48 For further information, ask the system administrator or the person in charge of the network. Enabling/Disabling the Wireless LAN Standard IEEE802.11a (802.11a) 1. Touch (Start) - (Panasonic PC Settings Utility) - (Settings) - (Network). 2. Touch [Enabled] or [Disabled] for the wireless LAN IEEE802.11a.
-
Page 49: Using The Bluetooth Function
Bluetooth <Only for model with Bluetooth> You can access internet and other Bluetooth devices without connecting cables. N O T E Communication is established through the Bluetooth antenna (A). Do not block the antenna area with your hand or body. To use Bluetooth, set [Bluetooth] of [Wireless Configuration] to [Enabled] (default) in the [Advanced] menu of the Setup Utility. -
Page 50: Wireless Wan
Wireless WAN <Only for model with wireless WAN> N O T E Communication is established through the Wireless WAN antenna (A). Do not block the antenna area with your hand or body. To use wireless WAN, set [Wireless WAN] of [Wireless Configuration] to [Enabled] (default) in the [Advanced] menu of the Setup Utility. If “Device driver software was not installed correctly.”... - Page 51 5. Remove the screws (A) and the nanoSIM card slot cover (B). 6. Insert the nanoSIM card (C) into the nanoSIM card slot with the contact side (D) facing downward and with the cut corner oriented as shown in the illustration. C AU TI O N Do not insert the nanoSIM card upside down.
- Page 52 7. Pull the card all the way out. 8. Close the nanoSIM card slot cover(F), attach it and tighten the screw (E) firmly. 9. Insert the battery pack and connect the AC adaptor. Connect/Disconnect to a network Connecting to a network If the APN setting is completed automatically after inserting the nanoSIM card, Internet connection will be possible.
- Page 53 3. Touch [Advanced options]. 4. Touch [Add an APN]. 5. Input detailed information such as APN, and then touch [Save]. 6. Touch [OK]. Internet connection will be possible. 7. If you are not connected to the Internet, select created APN profile, and then touch [Apply].
- Page 54 N O T E When “Use cellular instead of Wi-Fi” is set to [When Wi-Fi is poor] (default), wireless WAN connections will be established only when there is no Internet connection via Wi-Fi. When using wireless WAN, perform the following to disable Airplane mode 1.
- Page 55 To use the “Panasonic PC GPS Viewer”, proceed the following operation. 1. Touch (Start) - [GPS Viewer]. You can start up “Panasonic PC GPS Viewer” from Panasonic PC Settings Utility. Launch Panasonic PC Settings Utility, and then touch (Utilities) - (GPS Viewer).
- Page 56 When the u-blox Virtual COM Port is included in Ports (COM & LPT) under Device Manager, the following ports cannot be used. For EM7430/EM7455: Sierra Wireless SnapdragonTM X7 LTE-A NMEA Port For EM7305: Sierra Wireless NMEA Port...
-
Page 57: Saving Power
Saving Power You can extend battery life and save power also during battery pack usage. Reducing Power Consumption Use the methods below to reduce power consumption. Change the Power mode to “Best battery life”. 1. Touch on the task tray. 2. - Page 58 Customizing the Power Setting You can choose the optimum power setting for your operating condition by selecting a power plan. You can also create your own power plan. Changing the Power Plan Setting 1. Touch and hold on the task tray, and then touch [Power Options]. 2.
-
Page 59: Security Measures
When using the on-screen keyboard ≪ F10≫ key, touch [SYM] - [F10]. C AU TI O N Do not forget your password. If you forget your Supervisor Password, you will not be able to use your computer. Contact Panasonic Technical Support. - Page 60 Setting the Supervisor Password/User Password). When you have your flash memory drive repaired. Contact Panasonic Technical Support. Before sending back the flash memory drive, be sure to set the [Hard Disk Lock] to [Disabled]. N O T E The flash memory lock function works with the built-in flash memory. It does not work with the external hard disk.
-
Page 61: Device Encryption
<Only for model that supports TPM> Device encryption Using device encryption can protect folders or files from illegal accesses in the case the computer is lost or stolen. This computer supports the “Device encryption” function. This function is set to on as factory default, however, the encryption is not completed yet. To complete the encryption, you need to sign in with your “Microsoft account”. - Page 62 1. Touch (Start) - (Settings). 2. Touch [Accounts] - [Sign-in options]. 3. Touch [Set up] under the “Windows Hello”. 4. Follow the on-screen instructions. N O T E To use Windows Hellos, you need to set the password and PIN for sign-in options. During face recognition, the IR sensor camera light turns on, and becomes hot.
-
Page 63: Display Rotation
Display Rotation The built-in acceleration sensor detects the computer's inclination, and the screen display rotates automatically. Definition of rotation angles are shown below. Primary Landscape Secondary Landscape Primary Portrait Secondary Portrait Rotation Lock The Rotation Lock button allows you to lock the screen display. 1. - Page 64 When an external display is connected to the computer and the computer is rotated while in the “Duplicate” mode or “Extend” mode: The screen display on the external display does not rotate. The screen display on the internal LCD remains landscape, and does not rotate. To change the angle of the screen rotation manually, perform the following steps.
-
Page 65: Change The Settings
Concealed Mode You can make your computer inconspicuously using the Concealed Mode. You can select on/off of LCD backlight, LED, Sound, Wireless Radio, Fan, Camera light , Camera Flash and Barcode Reader light *1 : Only for model with Rear Camera. *2 : Only for model with Barcode Reader. -
Page 66: Starting The Setup Utility
Setup Utility You can make the settings of the computer's operating environment (password settings, startup drive selection, etc.) Starting the Setup Utility 1. Touch (Start) - (Settings) - [Update & Security] - [Recovery]. 2. Touch [Restart now] under “Advanced startup” *1 : Screen messages are explained in [English (United States)]. -
Page 67: Information Menu
: Enter (select) : Move to the [Exit] menu. N O T E Setup Utility screen is displayed on the internal LCD even when an external display is connected to the computer as the factory default. Information Menu Underlined items are the factory presets. Language English French... - Page 68 Main Configuration Tablet Button Configuration Enter the sub-menu. Sub-menu displayed when “Tablet Buttons Configuration” is selected A1 Button Disabled Application1 Ctrl+Alt+Del Concealed Mode Trigger Preboot Key Binding Not Assigned Key assignment during startup. A2 Button Disabled Application2 (Only for model without Barcode Reader) Ctrl+Alt+Del Wireless Switch Barcode Reader Trigger (Only for model with Barcode...
- Page 69 Preboot Key Binding Not Assigned Key assignment during startup. *2 : When [Concealed Mode] is set to [Enabled], it becomes Concealed Mode Trigger. Table of Preboot Key Bindings A1 Button Display the currently assigned button. A2 Button Display the currently assigned button. Down Button Display the currently assigned button.
-
Page 70: Advanced Menu
Camera Light <Only for model with Barcode Reader> Barcode Reader *3 : Can only be configured when [Concealed Mode Configuration] is set to Enabled. Enter the sub-menu. Fan Diagnostics Start Fan Test Start fan test. Enter the sub-menu. Optional Kit Configuration A separately provided password is required to enter the Normally do not change this setting. - Page 71 Peripheral Configuration Enter the sub-menu Serial Port Settings The submenu appears when this item is selected. Used to configure the Barcode Reader. Sub-menu (Serial Port Settings) Serial Port Disabled Enabled Only for model with Serial Port. Auto I/O IRQ 3F8/IRQ4 2F8/IRQ3 Can be changed only when [Serial Port] is set to [Enabled].
- Page 72 Contactless Smart Card Reader Disabled Enabled Only for model with Contactless Smart Card Reader UHF-RFID Disabled Enabled Only for model with UHF-RFID Magnetic Stripe Card Reader Disabled Enabled Only for model with Magnetic Stripe Card Reader USB Port Disabled Enabled SuperSpeed USB Disabled Enabled...
-
Page 73: Security Menu
You can select the boot device during start-up of the computer, too. Press (Rotation Lock) soon after “Panasonic” boot screen is dis- played. [Boot Menu] appears and you can select the device. To use this function, set [Boot Popup Menu] to [Enabled]. - Page 74 Set User Password Enter the sub-menu. Can be changed only when [Set Supervisor Password] is set. SW KB Support for Encryption Disabled Enabled SW KB Support for BitLocker Disabled Enabled Enter the sub-menu. Embedded Security (TPM) Only for model that supports TPM. Can be changed only when [Set Supervisor Password] is set.
- Page 75 Execute Diagnostic Utility. Diagnostic Utility...
-
Page 76: Handling And Maintenance
Handling and Maintenance Operation environment Place the computer on a flat stable surface not subject to shock, vibration, and danger of dropping. Do not place the computer upright or turn it over. If the computer is exposed to an extremely strong impact, it may become damaged. Operating environment Temperature: Operation : -10 °C to 50 °C {14 °F to 122 °F} (IEC60068-2-1, 2) - Page 77 Handling the screen Do not apply strong pressure to the screen outside of the LCD display. Applying strong pressure to the screen outside of the display area may result in malfunctions or damage to the LCD screen. Do not apply excessive force to the screen. Do not place any objects on the LCD screen.
- Page 78 <When performing “Battery Recalibration” after shutting down Windows> Full charge: Approximately 3.5 hours (with FZ-VZSU84A series) / Approximately 3.5 hours (with FZ-VZSU88U) Complete discharge: Approximately 3.0 hours (with FZ-VZSU84A series) / Approximately 7.0 hours (with FZ-VZSU88U) When performing “Battery Recalibration” without shutting down Windows, it may take more time to charge / discharge. Battery duration Note that the computer consumes electricity even when the computer power is off.
-
Page 79: Maintenance
When the AC adaptor or other peripheral devices are brought closer to the computer Near magnets, speakers, or other objects with strong magnetic fields The magnetic directions indicated by the magnetic sensor may not be accurate immediately after purchase or in environments with poor magnetic fields. In such cases, turn on the computer and move it as follows. - Page 80 Are you using the digitizer pen (include) with the tip extended? Is the tip of the digitizer pen (include) clean? Cleaning areas other than the LCD panel Wipe with a soft dry cloth such as gauze. When using detergent, dip a soft cloth in water-diluted detergent and wring it thoroughly. C AU TI O N Do not use benzene, thinner, or rubbing alcohol since it may adversely affect the surface causing discoloration, etc.
-
Page 81: Inserting/Removing Microsd Memory Card
Note that Panasonic assumes absolutely no liability for any loss of data recorded by the user, or any other damages, direct or indirect. - Page 82 3. Remove the card. 1. Press the card so it comes out of the slot. 2. Draw it straight out. If you turn the computer over, make sure there are no foreign objects under the computer. 4. Close the cover (A). C AU TI O N After pressing the microSD memory card, do not release your finger suddenly.
-
Page 83: Smart Card
N O T E <Only for model with dual lock Smart Card Reader> It is necessary to equip the computer with the hand strap and the large corner guards. About the equipment, contact Panasonic Tech- nical Support. Inserting/Removing the Smart Card To insert the card 1. - Page 84 The card stops halfway. Do not push the card forcibly furthermore. <Only for model with dual lock Smart Card Reader> 1. Open the cover while pushing the projection parts (G) inward. If turn your computer over, make sure no foreign objects are under the computer. 2.
- Page 85 2. Draw the card straight out. 3. Close the cover.
-
Page 86: Magnetic Stripe Card Reader
Magnetic Stripe Card Reader <Only for model with Magnetic Stripe Card Reader> You need software to use a Magnetic Stripe Card Reader. C AU TI O N Do not: Hit, bend, or drop the card. Touch the contact part with fingers or metal object. Place the card in very hot location for a long time. -
Page 87: Barcode Reader
2 bytes code. 1. Touch (Start) - (Panasonic PC Settings Utility) - (Utilities) - [2D Barcode Key Emulator]. 2. Touch [Connection to Barcode (Always-On)]. 3. Open the software for reading a barcode, and put the cursor on it. - Page 88 C AU TI O N COM Port of Barcode Module is occupied during reading barcode by Barcode Key Emulator. When reading barcode by Barcode Key Emulator is not necessary, touch [Connection to Barcode (Always-On)] in [2D Barcode Key Emulator]. N O T E When the barcode read operation is finished, please wait about three seconds to start the next reading.
-
Page 89: Cleaning The Reading Window
1. Sign in to Windows as an administrator. 2. Touch (Start) - (Panasonic PC Settings Utility) - (Utilities) - [Barcode Configuration]. If the “User Account Control” screen appears, touch [Yes]. If you want to reflect/create a barcode configuration file, touch [Barcode Configuration Utility]. - Page 90 2. Barcode configuration file that you created by dragging and dropping the Barcode Configuration Utility (.exe), can be reflected in the barcode reader module. The execution file is stored below: <For 32-bit OS> C:\Program files\Panasonic\BCR2D_A_Set\BCR2D_A_Set.exe <For 64-bit OS> C:\Program Files (x86)\Panasonic\BCR2D_A_Set\BCR2D_A_Set.exe With this method, you can reuse the INI file or make settings for another PC.
-
Page 91: External Display
External Display You can switch the output destination to an external HDMI display. 1. Slide the cover (A). 2. Open the cover (A) and connect the HDMI display to the HDMI display port (B). <Only when connected to Cradle> You can also switch the output destination to an analog display. Connect the external display to the VGA port of the cradle. - Page 92 Do not connect or remove the external display during sleep or hibernation. It may take some time to switch between displays depending on the displays used. When you use the external display only, set the suitable number of colors, resolution, or refresh rate separately from when you use the internal LCD only or when you use the simultaneous display.
-
Page 93: Usb Devices
USB Devices Connecting/Removing USB Devices To connect the USB device 1. Slide the cover (A). 2. Open the cover (A) and connect the USB device to the USB 3.0 port (B). <Only for model with 2nd USB port> Open the cover (C) and connect the USB device to the USB 2.0 port (D). If you turn the computer over, make sure there are no foreign objects under the computer. - Page 94 For further information, refer to the instruction manual of the USB device. To remove the USB device 1. Disable the USB device. 1. Touch on the task tray at the bottom right corner of the screen and touch 2. Select the USB device. These steps are not necessary when;...
-
Page 95: Serial Port
Serial Port <Only for model with serial port> Connecting Serial device 1. Connect the cable. Open the cover (A) and connect the serial port (B) and the serial conversion cable. 2. Connect the serial device to the connector of the serial conversion cable. N O T E When connecting a cable, be sure to secure it with screws (C). -
Page 96: Using The Camera
When the computer has resumed from sleep and hibernation, an error may appear and the connection with the camera device may be lost. If this occurs, restart this utility. Panasonic PC Camera Utility only with the built-in camera. It does not support a camera connected to the computer. Starting up 1. - Page 97 C. Display the folder where recorded data is saved D. Shoot photos E. Start/Stop shooting videos F. Hide the mode menu G. Night Mode switching H. OCR <Only for model with rear camera> I. Barcode reader <Only for model with rear camera> J.
- Page 98 Display the recorded image or video files 1. Touch The recorded data will be saved in the displayed folder named the recording date. <Only for model with rear camera>...
-
Page 99: Other Functions
Other Functions... - Page 100 OCR Scanning 1. Touch . The icon is shown as 2. Point the window at the target text you want to scan, and touch on the right side of the screen. You can turn on the light. Touch When the target text has been scanned, the scanned OCR text is displayed above the preview window.
- Page 101 Barcode Reader 1. Touch . The icon is shown as 2. Point the on-screen guide at the barcode. You can turn on the light. Touch When the barcode has been scanned, the scanned barcode text is displayed on the right side of the preview window.
-
Page 102: Changing The Settings
Changing the Settings 1. Touch The “Settings” menu is displayed. A. Mirror setting <Only for front camera> Make the preview screen mirror-reversed (flip horizontal). (Recorded images will not be reversed) B. Camera shake correction <Only for front camera> Enable the image stabilizer when shooting photos. C. - Page 103 L. Photo storage folder Specify the destination of recorded photo data to save. The default value is the “Pictures” folder. M. Video storage folder Specify the destination of recorded video data to save. The default value is the “Videos” folder. If you specify the FAT32 formatted storage as destination to save, video files cannot be correctly created when the storage data capacity exceeds 4 GB.
- Page 104 N O T E This sensor is typically used with specialized applications. For further information, ask the system administrator. It is necessary to equip the computer with the hand strap and the large corner guards. About the equipment, contact Panasonic Tech- nical Support.
- Page 105 Cradle You can use an optional cradle. This device frees you from being bothered by a lot of cable connections when you carry the computer. It also allows you to connect various peripherals. Connect the cradle to the expansion bus connector (A) on the bottom side of the computer. For further information, refer to the instruction manual of the cradle.
-
Page 106: Using The Hand Strap
Hand Strap <Only for model with hand strap> Hand Strap Attaching the hand strap helps you stably hold the computer. C AU TI O N If the hand strap loosens, the computer may fall down. Do not use the strap if it becomes worn or damaged. Before using, check if the mounting clips and the screws have been firmly fixed. - Page 107 2. Adjust the position (C). Attach (D), then (E) to the joint. Attach the hand strap firmly so that the strap does not come off. When Inserting the Battery Pack / Cleaning inside of the dust cover C AU TI O N Place the computer on a soft cloth with the panel side down.
- Page 108 3. Open up the whole hand strap.
-
Page 109: Troubleshooting
Troubleshooting Refer to the following instructions when a problem occurs. If the remedies indicated in the chart do not solve the problem, contact Panasonic Technical Support. For a software problem, refer to the instruction manual of the software. Refer to Checking the Computer's Usage Status. - Page 110 (Settings) - [Time & Language] - [Date & time], and check [Off] in “Set time automatically”. 2. Touch [Change], and then set the day and time. If the problem persists, the internal clock battery may need to be replaced. Contact Panasonic Technical Support. <Only for model with LAN>...
- Page 111 Sleep / Hibernation / Resume Remove USB devices temporarily. If the problem persists, restart the computer. Cannot enter sleep or hibernation. It may take 1 or 2 minutes to enter sleep or hibernation. The computer does not enter sleep or hibernation immediately after resuming. Wait approx- imately 1 minute.
- Page 112 [Power Options]. 2. Touch [Show additional plans]. When more than one [Copy of Panasonic Power Management] is displayed, touch [Change plan settings] in the power plan to be deleted and touch [Delete this plan] to delete.
- Page 113 Sound No sound. Press to cancel mute. Turn off the concealed mode. ( Concealed Mode) Restart the computer. Beeping sounds are not emitted by this device. Stop and restart playback. Distorted sound. Use a monaural condenser microphone. Cannot record with microphone Activate the Windows sound function.
- Page 114 Follow the steps below. Cannot check the computer's MAC address. 1. Touch (Start) - (Settings). 2. Touch [Network & Internet] - [Status] - [View your network properties]. Properties of each device appears. Write down the 12-digit address (alphanumeric) that appears for “Physical address (MAC):”...
- Page 115 Confirm the following settings: <Only for model with wireless WAN> Cannot communicate. [Wireless WAN] in the [Advanced] menu of the Setup Utility Confirm that [Wireless WAN] of [Wireless Configuration] is set to [Enabled]. Airplane mode Confirm that Wireless WAN (Cellular) is [On]. Confirm that the nanoSIM card is inserted correctly.
- Page 116 You can check with the following procedure. You do not know the address map for IRQ, I/O port address, etc. 1. Touch and hold (Start) at the bottom left corner, and then touch [Device Man- ager]. 2. Touch [View] - [Resources by type]. Check the connection.
- Page 117 Connect the AC adaptor for a while. Checking the Computer's Usage Status You can check the computer's usage status in the PC Information Viewer. You may need this information when calling Panasonic Technical Support for advice. N O T E...
- Page 118 Depending on your network environment, it may take 1 minute to start up the PC Information Viewer . Launching PC Information Viewer 1. Touch (Start) - (Panasonic PC Settings Utility) - (Support) - (System) - [Launch PC Information Viewer]. 2. Select the item to display the detailed information.
-
Page 119: Hardware Diagnostics
If it appears that the hardware installed in this computer is not operating properly, you can use the PC-Diagnostic Utility to determine whether or not there is a problem. If the utility discovers a problem in the hardware, contact Panasonic Technical Support. Software cannot be checked using this utility. - Page 120 Running the Diagnostic Check Run this utility using the default settings in the Setup Utility. If the Setup Utility or other settings will not allow hardware to be executed, the hardware icon will be displayed in gray. 1. Connect the AC adaptor, and then connect external keyboard or mouse. During the diagnostic check, do not remove the AC adaptor, or attach any peripheral devices.
- Page 121 If the display is red and the message “TEST FAILED” is displayed, you can assume that there is a problem with the computer's hardware. Con- firm which hardware component is displayed as red, and contact Panasonic Technical Support. If the display is green and the message “TEST PASSED” is displayed, the computer's hardware is operating normally. Continue using the com- puter as it is.
-
Page 122: Reset Your Computer
Reset your computer If operations on the unit become unstable, we recommend refreshing Windows. This involves reinstalling the operating system while retaining personal files and settings (Personalization). Preparation Remove all peripherals and microSD memory card, etc. Connect the AC adaptor and do not remove it until installation is complete. 1. -
Page 123: Installing Software
At the confirmation message, touch [Yes]. Computer will restart. 5. Touch the top left corner of the screen several times while “Panasonic” boot screen is displayed. The Setup Utility starts up. If the password is requested, enter the Supervisor Password. -
Page 124: Using Recovery Disc
5. Touch [Exit] menu, and then double-touch [Save Values and Reboot]. At the confirmation message, touch [Yes]. Computer will restart. 6. Touch the top left corner of the screen several times while “Panasonic” boot screen is displayed. The Setup Utility starts up. - Page 125 The computer will restart. 8. Touch [Recovery]. 9. At the confirmation message, touch [Accept.]. 10. Confirm the contents of “EULA”, and touch [Accept] if you continue. 11. Touch [Disk 0]. 12. Touch [Recovery ALL Partitions.]. 13. Touch [Remain Recovery Partition.]. Follow the on-screen instructions.
-
Page 126: Error Message
Error Message Follow the instructions below when an error message appears. If the problem persists or if the error message is not shown here, contact Panasonic Tech- nical Support. Error Message Solution Bad System CMOS An error has occurred in the memory of system settings. This occurs when the memory content is changed by an unexpected program operation, etc. -
Page 127: Technical Information
Technical Information Network Connections and Communications Software Close the communications software before using the power saving function. If the power saving function (sleep or hibernation) is activated while communications software is used, the network connection may be inter- rupted, or the performance may be adversely affected. In this case, restart the computer. In a network environment, set [Never] for [Sleep after] and [Hibernate after] ( Setting Sleep or Hibernation). - Page 128 There are also specialized devices that may be able to read data that has been erased using this method. If you need to erase highly confidential data, we recommend that you contact a company that specializes in this process. Panasonic Cor- poration will bear no responsibility for losses or damages suffered as a result of the use of this function.
- Page 129 If the password is requested, enter the Supervisor Password. 7. Touch [Exit] menu, and then double-touch the commercially available optical drive or USB storage device in “Boot Override” . The computer will restart. 8. Touch [Erase]. 9. Touch [Erase the all data on the whole Disk.]. 10.
- Page 130 Dispose of Computer <Only for model with Built-in Bridge Battery> <For Europe and U.S.A./Canada> Attention Customers Don't remove the battery by yourself. The battery must be removed by qualified professionals. When disposing of this product, be sure to contact qualified professionals to remove the battery. Attention Qualified professionals to remove the battery Dispose of this product correctly in accordance with the local regulations after removing the battery as shown in the following procedure.
- Page 131 3. Open up the whole hand strap. 4. Remove the screws (4) and turn over the cover (C). 5. Pull back the sheets (D) in the cover, and then remove the black screws (4).
- Page 132 6. Remove the connector of the built-in bridge battery (E), and remove the built-in bridge battery with the metal plate (F). Insulate the connector of the built-in bridge battery by covering them with plastic tape, for example.
-
Page 133: Main Specifications
Specifications This page provides the specifications for the basic model. The model number is different according to the unit configuration. To check CPU speed, memory size and the flash memory drive (SSD) size: Run the Setup Utility ( Setup Utility) and select “Information” menu. [Processor Speed]: CPU speed, [Memory Size]: Memory size, [Hard Disk]: SSD size To check the model number: The model number is described on the... - Page 134 Storage Humidity 30 % to 90 % RH (No condensation) Software Operating System Windows 10 Pro 64-bit PC Information Viewer Pre-installed Software Panasonic PC Recovery Disc Creation Utility ® Intel PROSet/Wireless Software Microsoft Office Trial *21*22 Wireless Manager Mobile Edition...
-
Page 135: Optional Devices
Wireless LAN Data Transfer Rates IEEE802.11a : 54 Mbps IEEE802.11b : 11 Mbps IEEE802.11g : 54 Mbps IEEE802.11n HT20 = 144.4 Mbps HT40 = 300 Mbps IEEE802.11ac : VHT20 : 173.3 Mbps VHT40 : 400 Mbps VHT80 : 866.7 Mbps Standard Supported IEEE802.11a / IEEE802.11b / IEEE802.11g / IEEE802.11n / IEEE802.11ac Transmission Method... - Page 136 *23: Only for model with barcode reader. *24: Only for model with GPS or wireless WAN. *25: Panasonic PC Settings Utility includes the following functions: Touch Screen Mode / Touch Operation Support / etc. *26: Only for model with Thermography Camera.
- Page 137 A nanoSIM card (8.8 mm {0.35”} × 12.3 mm {0.48”}) must be inserted in the nanoSIM card slot. *31: Operation has been tested and confirmed using Panasonic microSD/microSDHC/microSDXC Memory Cards with a capacity of up to 64 GB. Operation on other microSD equipment is not guaranteed.
-
Page 138: Warranty
Section 1: Limited Warranty - Hardware PSSNA, referred to hereinafter as "Panasonic", will repair the computer products listed below (“Product(s)”) with new or rebuilt parts, free of charge in a Global Panasonic designated service location or Panasonic Authorized Service Center for the period specified below from the date of original purchase in the event of a defect in materials or workmanship. - Page 139 All modems must be approved by the wireless carrier prior to use. Any use or attempted use of a wireless modem not approved and activated by the car- rier for use on their network is strictly prohibited and is not sanctioned or warranted by Panasonic and may result in legal action. In addition, all modems must be approved by Panasonic as compatible with the device hardware before installation or use.
-
Page 140: For Canada
This limited warranty only covers failures due to defects in materials or workmanship which occur during normal use. If a unit is sent to a Panasonic Author- ized Service Center and no hardware failure is found, the customer will be billed for labor to correct a software issue or reimage the applicable Hard Disk, or Solid State Drive plus shipping and applicable administrative fees at the current rates set by the service provider. -
Page 141: Pour Le Canada
No Coverage - This limited warranty does not apply if the disk(s) or other media has been used in other than a Panasonic product, or in environmental conditions other than those specified by PCI or the manufacturer, or if subjected to misuse, neglect, mishandling, modification or attempted modification of the program, or if damaged by accident or act of God. - Page 142 GARANTIE LIMITÉE - SUPPORTS DES LOGICIELS Couverture - Panasonic Canada Inc. (« PCI ») garantit à l’acheteur original que la ou les disquettes ou tout autre support sur lequel le ou les programmes sont fournis sont exempts de défauts de pièces et de fabrication dans des conditions normales d’utilisation au Canada, et ce, pour une période de soix- ante (60) jours suivant la date de réception indiquée sur la preuve d’achat.
-
Page 143: For Europe
This warranty only covers failures due to defects in materials or workmanship which occur during normal use for the applicable Service Agreement Period listed below. In the event that any product (or part thereof) is replaced, Panasonic shall transfer ownership of the replacement product (or part) to the cus- tomer and the customer shall transfer ownership of the replaced product (or part) to Panasonic. - Page 144 We strongly recommend that customers backup their data before sending back their unit to an Authorised Service Provider. Panasonic shall not be liable for loss of data or other incidental or consequential damages resulting from the use of this product, or arising out of any breach of this warranty.
- Page 145 +43 (0) 800 006493 Switzerland (German) +41 (0) 800 002429 Switzerland (French) +41 (0) 800 588017 E-mail address toughbooksupport@eu.panasonic.com Czech speaking service +420 (0) 800 143234 Hungarian speaking service +36 (0) 6800 163 67 Polish speaking service +48 (0) 800 4911558...
Need help?
Do you have a question about the FZ-G1 Series and is the answer not in the manual?
Questions and answers
how to make a phone call directly from the tablet?