Panasonic FZ-G1 Series Operating Instructions - Basic Manual
Tablet computer
Hide thumbs
Also See for FZ-G1 Series:
- Operating instructions - reference manual (146 pages) ,
- Operating instructions manual (104 pages) ,
- Supplementary instructions manual (60 pages)
Table of Contents
Advertisement
Operating Instructions - Basic Guide
Please read these instructions carefully before using this product, and save this manual for future use.
Getting Started
Introduction .....................................................
Description of Parts ........................................
First-time Operation ........................................
Turning On / Turning Off ..............................
Useful Information
Handling and Maintenance ..........................
Installing Software .......................................
Troubleshooting
Troubleshooting (Basic) ...............................
Appendix
Specifications ..............................................
Standard Limited Warranty ..........................
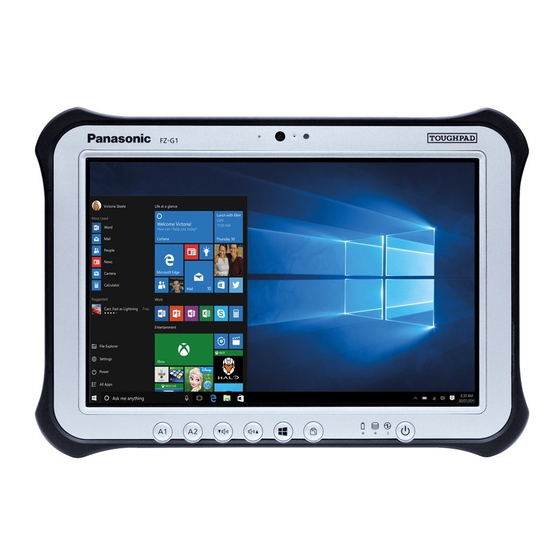
Tablet Computer
FZ-G1
Model No.
series
2
4
6
12
13
19
25
31
33
38
Advertisement
Table of Contents

Related Manuals for Panasonic FZ-G1 Series


Summary of Contents for Panasonic FZ-G1 Series
-
Page 1: Table Of Contents
Tablet Computer FZ-G1 series Model No. Operating Instructions - Basic Guide Getting Started Introduction ............. Description of Parts ........First-time Operation ........Turning On / Turning Off ......Useful Information Handling and Maintenance ......Installing Software ........Troubleshooting Troubleshooting (Basic) ....... Appendix LIMITED USE LICENSE AGREEMENT .. -
Page 2: Introduction
Introduction Thank you for purchasing this Panasonic product. For optimum performance and safety, please read these instructions carefully. In these instructions, the names are referred as follows. ® indicates Windows 8.1 Operating System. ® indicates Windows 7 Operating System. n Terms and illustrations in these instructions Conditions that may result in minor or moderate injury. - Page 3 ® Bluetooth is a registered trademark owned by Bluetooth SIG, Inc., U.S.A. and licensed to Panasonic Corporation. HDMI, the HDMI Logo and High-Definition Multimedia Interface are trademarks or registered trademarks of HDMI Licensing LLC in the United States and other countries. Names of products, brands, etc., appearing in this manual are trademarks or registered trade- marks of their respective own companies.
-
Page 4: Description Of Parts
Description of Parts Front side Right side Front Camera J: USB3.0 Port Reference Manual “Camera” Reference Manual “USB Devices” è è K: HDMI Port A: Camera Indicator Reference Manual “External Dis- è B: Camera Lens play” C: Microphone L: Headset Jack D: Ambient Light Sensor A headset or headphone can be connect- The ambient light sensor is equipped with... - Page 5 è <Only for model with wireless LAN> “Bluetooth” Reference Manual “Wireless LAN” è R: Speaker K: Wireless WAN Antenna Reference Manual “Dashboard for è <Only for model with wireless WAN> Panasonic PC” Reference Manual “Wireless WAN” è S: Pen Holder...
-
Page 6: First-Time Operation
First-time Operation n Preparation A Check and identify the supplied accessories. If you do not find the described accessories, contact Panasonic Technical Support. • AC Adaptor . . 1 • AC Cord ..1 • Battery Pack ..1 • Digitizer pen ..1... - Page 7 Attaching the pen (included) to the computer. The tether prevents the pen (included) from falling accidentally. A Pass one of the loops B Pass one of the loops through the hole. through another loop. C Thread the second loop on D Pass the pen and tether the tether through the hole through the second loop.
- Page 8 First-time Operation <For MUI OS model> Select language and OS (32-bit or 64-bit). CAUTION l Carefully choose your language because you cannot change it later. If you set a wrong language, you need to reinstall Windows. NOTE l You can operate with the Tablet Buttons. Follow the instructions.
- Page 9 l You can set the Wireless Network after the setup of Windows is complete. If “Get online” is displayed, select “Skip this step”. “Join a wireless network” screen may not ap- pear. Verify the time zone, date and time. CAUTION l You can change the user name, password, image and security setting after setup of Windows.
- Page 10 First-time Operation NOTE l PC Information Viewer This computer periodically records the management information of the fl ash memory, etc. The maximum data volume for each record is 1024 bytes. This information is only used for estimating the cause when the fl ash memory goes down by any possibility. They are never sent to outside via network nor used for any other purpose except for the purpose described the above. To disable the function, add the check mark for [Disable the automatic save function for man- agement information history] in [Hard Disk Status] of PC Information Viewer, and touch [OK].
- Page 11 NOTE l You can create an additional partition using remaining unallocated space or newly creating unallocated space. l To delete a partition, touch and hold the partition and touch [Delete Volume] in the step C. <For MUI OS model>To select language To select a language other than the one you have selected during the fi rst-time operation, follow the steps below.
-
Page 12: Turning On / Turning Off
Turning On / Turning Off Turning On Press and hold the power switch (è page 4) until the power indicator (è page 4) lights. NOTE l Do not press the power switch repeatedly. l The computer will forcibly be turned off if you press and hold the power switch for four sec- onds or longer. -
Page 13: Handling And Maintenance
Handling and Maintenance Operation environment l Place the computer on a flat stable surface not subject to shock, vibration, and danger of dropping. Do not place the computer upright or turn it over. If the computer is exposed to an extremely strong impact, it may become damaged. l Operating environment °C °C Temperature: Operation : -10 to 50 (IEC60068-2-1, 2) °C... - Page 14 Handling and Maintenance n When the battery indicator does not light on The battery indicator may not light on even if the AC adaptor and the battery pack are correctly connected to the computer, due to the following reasons. l The AC adaptor’s protection function may be working. In this case, pull out the AC cord and wait for more than 1 minute before reconnecting the AC cord.
- Page 15 l Automatic brightness adjustment The computer is equipped with an automatic brightness adjustment function that adjusts the display screen based on the ambient light sensor. You can configure the automatic adjustment function as follows. A Display “Charm” and touch - [Change PC Settings] - [PC and devices] - [Power and sleep], then set [Adjust my screen brightness automatically] to [On]. A Touch (Start) - [Control Panel] - [Hardware and Sound] - [Power Option].
- Page 16 Handling and Maintenance Maintenance If drops of water or other stains get on the surface of the LCD panel, wipe them off immediately. Failure to do so may result in staining. To clean the LCD panel Use the soft cloth included with the computer. (For further information, refer to “Suggestions About Cleaning the LCD Surface”...
- Page 17 Attention Qualified professionals to remove the battery Dispose of this product correctly in accordance with the local regulations after removing the battery as shown in the following procedure. CAUTION l Never disassemble the computer except before disposal. l Refer to the precautions when disposing of the computer. (è...
- Page 18 Handling and Maintenance 5. Pull back the sheet (D) in the cover, and then remove the black screws (4). 6. Remove the connectors of the built-in bridge battery and remove the built-in bridge battery (E). Insulate the connectors on the built-in battery by covering them with plastic tape, for example.
-
Page 19: Installing Software
Installing Software Installing software will return the computer to the default condition. When you install the soft- ware, the fl ash memory data will be erased. Back up important data to other media or an external hard disk before installation. CAUTION l Do not delete the Recovery Partition on the fl ash memory. The disk space in the partition is not available to store data. To check the Recovery Partition, perform the following methods. - Page 20 B Touch [Restart now] under “Advanced startup”. C Touch [Troubleshoot] - [Advanced options] - [UEFI Firmware Settings] - [Restart]. Turn on the computer, and touch top left of the screen while [Panasonic] boot screen is displayed. l If the [Panasonic] boot screen is not displayed, turn on the computer while touching top left of the screen.
- Page 21 Touch [Next] and touch [YES]. Touch [Reinstall Windows] and touch [Next]. At the License Agreement screen, touch [Yes, I agree to the provisions above and wish to continue!] and touch [Next]. Touch [Next]. If the option is displayed, select the setting and touch [Next]. l [Reinstall Windows to the whole Disk to factory default.] Select this option when you want to install Windows to the factory default.
- Page 22 B Touch [Restart now] under “Advanced startup”. C Touch [Troubleshoot] - [Advanced options] - [UEFI Firmware Settings] - [Restart]. Turn on the computer, and touch top left of the screen while [Panasonic] boot screen is displayed. l If the [Panasonic] boot screen is not displayed, turn on the computer while touching top left of the screen.
- Page 23 Touch [Exit] and double-touch [Save Values and Reboot]. At the confirmation message, touch [Yes]. Computer will restart. Touch top left of the screen while [Panasonic] boot screen is dis- played. The Setup Utility starts up. l If the password is requested, enter the Supervisor Password.
- Page 24 Installing Software <For MUI OS model> Select language and system type (32-bit or 64-bit) and touch [OK]. At the confirmation message, touch [OK]. To cancel the recovery procedure, touch [CANCEL], and touch the mark that ap- pears at the top right corner of the screen. Installation starts according to the instructions on the screen.
-
Page 25: Troubleshooting (Basic)
Follow the instructions below when a problem has occurred. There is also an advanced trouble- shooting guide in the “Reference Manual”. For a software problem, refer to the software’s instruc- tion manual. If the problem persists, contact Panasonic Technical Support. You can also check the computer’s status in the PC Information Viewer (è... - Page 26 B Touch [Clock, Language, and Region] - [Date and Time]. l If the problem persists, the internal clock battery may need to be replaced. Contact Panasonic Technical Support. l When the computer is connected to LAN, check the date and time of the server.
- Page 27 Ÿ A standard user needs to enter an administrator password. E Follow the on-screen instructions. Connect the external keyboard and start the computer in Safe Mode, then check the error details. When the [Panasonic] boot at startup, press and hold F8 until the Win- screen disappears dows Advanced Options Menu is displayed.
- Page 28 The screen is dark. l The screen is darker when the AC adaptor is not connected. Open the Dashboard for Panasonic PC and adjust the brightness. As you increase the brightness, battery consumption increases. You can separately set the brightness for when the AC adaptor is connected and when not connected.
- Page 29 Use the external keyboard or the external mouse to log on. Cannot display “Charm” l Delete the calibration data. or difficult to display A Start Dashboard for Panasonic PC and touch [Basic] - [Touch “Charm”. Calibration]. B Touch [Reset…] and follow the on-screen instructions.
- Page 30 Troubleshooting (Basic) n On-screen Document l Install Adobe Reader. The document of PDF A Log on to Windows as an administrator. format is not displayed. B Touch (Start) and input “c:\util\reader\en\Pinstall.bat” in [Search Programs and fi les] then press Enter . C Update Adobe Reader to its latest version. If your computer is connected to the internet, start up Adobe Reader and touch [Help] - [Check for Updates...].
-
Page 31: Limited Use License Agreement
Programs and related documentation nor in or to the algorithms, con- cepts, designs and ideas represented by or incorporated in the Programs and related docu- mentation, all of which title, ownership and rights shall remain with Panasonic Corporation or its suppliers. - Page 32 LIMITED USE LICENSE AGREEMENT TERM This license is effective only for so long as you own or lease the Product, unless earlier terminat- ed. You may terminate this license at any time by destroying, at your expense, the Programs and related documentation together with all copies thereof in any form.
-
Page 33: Specifications
Specifications This page provides the specifications for the basic model. The model number is different according to the unit configuration. l To check the model number: Check the bottom of the computer or the box the computer came in at the time of purchase. l To check CPU speed, memory size and the flash memory drive size: Run the Setup Utility (è Reference Manual “Setup Utility”) and select [Information] menu. [Processor Speed]: CPU speed, [Memory Size]: Memory size, [Hard Disk]: Flash Memory drive size n Main Specifications... - Page 34 Specifications n Main Specifications Sensor Ambient light sensor Magnetic sensor Equipped Gyro sensor Acceleration sensor Card Slot Smart Card Slot microSD microSDXC compatible Memory Card Slot SIM Card × 1 Slot Magnetic Stripe Card Reader (Optional) × 1 RFID Reader (Optional) ×...
- Page 35 Adobe Reader, PC Information Viewer, Battery Recalibration Utility, Hand *11 *27 Writing Utility, Infineon TPM Professional Package , Dashboard for Panasonic PC, Recovery Disc Creation Utility, Power Plan Extension *12*27 ® Utility, Camera Utility, Camera Light Switch Utility , Intel PROSet/ ®...
- Page 36 Only for model with microSD memory card slot. Operation has been tested and confirmed using Panasonic microSD Memory Card with a capacity of up to 2 and Panasonic microSDHC Memory Card with a capacity of up to 32 Operation on other microSD equipment is not guaranteed. Does not guarantee operation of all USB-compatible peripherals. USB 2.0 port : Only for model with USB 2.0 port Only for model with serial port.
- Page 37 Do not expose the skin to this product when using the product in a hot or cold environment. (è OPERATING INSTRUCTIONS - Read Me First) When using in hot or cold environment, some peripherals and battery pack may fail to work properly. Check the operation environment of the peripherals.
-
Page 38: Standard Limited Warranty
Service Agreement Period listed below. In the event that any prod- uct (or part thereof) is replaced, Panasonic shall transfer ownership of the replacement product (or part) to the customer and the customer shall transfer ownership of the replaced product (or part) to Panasonic. - Page 39 Service Centre, together with a copy of the purchase receipt, within the aforesaid warranty period. Panasonic shall have no obligation for any defects in the disk(s) or other media on which the Pro- grams are furnished resulting from your storage thereof, or for defects that have been caused by...
- Page 40 Product and licensed to Purchaser, its quality, performance, mer- chantability, or fitness for a particular purpose. Panasonic does not warrant that the functions contained in the software will be uninterrupted or error free. Panasonic assumes no risk of and shall not in any case be liable for any damages, including, without limitation, any special, inciden-...
- Page 41 Panasonic Corporation Osaka, Japan Importer’s name & address pursuant to the EU legislation Panasonic System Communications Company Europe, Panasonic Marketing Europe GmbH Hagenauer Straße 43 65203 Wiesbaden Germany © Panasonic Corporation 2014 HS0614-0 P-2014-0297...
Need help?
Do you have a question about the FZ-G1 Series and is the answer not in the manual?
Questions and answers