Advertisement
FOR CARAVAN ROOF MOUNT AIR CONDITIONERS
KLlMAGERiiTE ZUR DACHMONTAGE AN WOHNWAGEN
INSTRUCTIONS D'INSTALLATION ET DE FONCTIONNEMENT
TAKMONTERAD LUFTKONDITIONERING FijR HUSVAGNAR
DEL CONDIZIONATORE D'ARIA DA TETTO DI CARAVAN
MOD. CAL61.206
OPERATING INSTRUCTIONS ON PAGES
INSTRUCTIONS DE FONCTIONNEMENT AUX PAGES
IMPORTANT INSTRUCTIONS MUST STAY WITH UNIT OWNER - READ CAREFULLY.
THIS UNIT MUST BE SERVICED BY AN AUTHORIZED SERVICEMAN. MODIFICATION OF THE APPLIANCE CAN
BE EXTREMELY HAZARDOUS AND COULD LEAD TO SERIOUS INJURY OR DEATH.
WICHTIGE HINWEISE, DIE SIGH IM BESITZ DES WOHNWAGENINHABERS BEFINDEN MiiSSEN - BITTE
SORGFliLTlG DURCHLESEN.
DER SERVICE AN DIESER EINHEIT MUSS VON EINEM HIERZU BEFUGTEN SERVICE-TECHNIKER AUSGEFijHRT
W E R D E N . EINE ABliNDERUNG DES GERiiTS KANN AUSSERORDENTLICH
ERNSTHAFTEN VERLETZUNGEN ODER SOGAR ZUM TODE FijHREN.
LE CONTENU DE CETTE NOTICE EST TRkS IMPORTANT, AUSSI L'UTILISATEUR DE L'APPAREIL DOIT-IL EN
POSSkDER UN EXEMPLAIRE ET LE LIRE ATTENTIVEMENT.
LES INTERVENTIONS SUR L'APPAREIL DOIVENT ETRE UNIQUEMENT EFFECT&ES PAR UN TECHNICIEN
AGREg. L'kQUIPEMENT DE DOIT FAIRE L'OBJET D'AUCUNE MODIFICATION, CE QUI POURRAIT EN EFFET SE
Rl%LER EXTREMEMENT DANGEREUX, SINON MEME PROVOQUER UN ACCIDENT GRAVE OU MORTEL.
VIKTIGA ANVISNINGAR: SKALL ALLTID MEDFijLJA AGGREGATET OCH NOGGRANT LliSAS AV jiGAREN.
SERVICE PA DETTA
UTRUSTNINGEN KAN VARA YTTERST FARLIGA OCH LEDA TILL ALLVARLIGA OLYCKOR ELLER DCjDSFALL.
QUESTE ISTRUZIONI IMPORTANT1 DEVON0 ESSERE CONSEGNATE AL PROPRIETARIO DELL'UNITk
QUESTA UNITA DEVE ESSERE RIPARATA DA UN TECNICO QUALIFICATO. LE MODIFICHE POSSONO ESSERE
ESTREMAMENTE PERICOLOSE E POSSONO CAUSARE LESIONI GRAVE 0 MORTE.
Form No. 3104776.013 2/93
1992 1993 The Dometic Corp.
LaGrange, IN 46761
INSTALLATION & OPERATING INSTRUCTIONS
EINBAU-UND BETRIEBSANWEISUNGEN FiiR
POUR CLIMATISEURS POUR CARAVANE
MONTERINGS- OCH BRUKSANVISNING
ISTRUZIONI PER L'INSTALLAZIONE E L'USO
. . . . . . . . . . . . . . . . . 2-15
... .
ISTRUZIONI PER L'USO NELLE PAGINE . . . . . . . . . . . . . . . . . 58-71
AGGREGAT F AR ENDAST UTFORAS AV AUKTORISAD MONTGR. ANDR~NGAR AV
MOD. CAL136.206
PRE-WIRED FOR OPTIONAL ELECTRIC HEAT PACKAGE
DIESES GEAliT IST FiiR DAS WAHLWEISE LIEFERBARE
KLiiR F6R ANSLUTNING AV ELVARMEUTRUSTNING
CABLATO PER ILGRUPPO RISCALDATOREOPZIONALE
BETRIEBSANWEISUNGEN AUF DEN SEITEN . . . . . . . . . . . . 16-29
30-43
BRUKSANVISNING PA SID
WARNING
ACHTUNG
ATTENTION
VARNING
ATTENZIONE
ELEKTROHElZGERliT
VORVERDRAHTET
PRk-CABLk POUR ENSEMBLE
D'kLkMENT CHAUFFANT EN OPTION
............................. .
GEFUHRLICH SEIN UND ZU
44-57
Advertisement
Table of Contents

Related Manuals for Electrolux CAL61.206


Summary of Contents for Electrolux CAL61.206
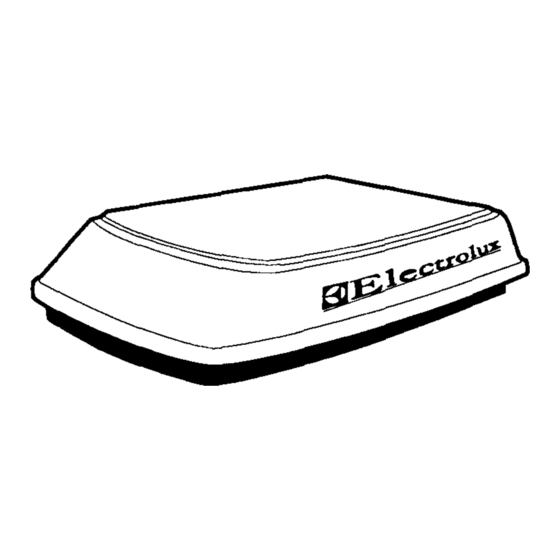
- Page 1 MONTERINGS- OCH BRUKSANVISNING TAKMONTERAD LUFTKONDITIONERING FijR HUSVAGNAR ISTRUZIONI PER L’INSTALLAZIONE E L’USO DEL CONDIZIONATORE D’ARIA DA TETTO DI CARAVAN MOD. CAL136.206 MOD. CAL61.206 PRE-WIRED FOR OPTIONAL ELECTRIC HEAT PACKAGE DIESES GEAliT IST FiiR DAS WAHLWEISE LIEFERBARE ELEKTROHElZGERliT VORVERDRAHTET PRk-CABLk POUR ENSEMBLE D’kLkMENT CHAUFFANT EN OPTION...
-
Page 2: General Information
1. GENERAL INFORMATION A. THREE SPECIFIC NEEDS: 1. Installation opening. 2. Additional wiring. Cut through roof and ceiling. 220-240V, 50 Hz, 10 Amp. 3. Power must be above 209 V and frequency must be 50 Hz at all times. 204 V - W R O N G WIRING VOLT LOSSES WRONG FREQUENCY LOW GENERATOR... - Page 3 The Manufacturer will not be liable for any damages or B. SPECIFICATIONS (FIG. l.B) injury due to failure to follow these installation and ELECTRIC operating instructions. HEATER 136.206 61.206 MODEL NO."s Nominal Capacity (KW) Installation must comply with all applicable codes and/ 220-240V, 50 Hz., Ph.
- Page 4 B. Many air conditioners can be installed at existing roof Be sure your roof structure is capable of support- vent openings. These openings may be larger or ing a weight of 65 Kg when the van is in motion. (Normally if the roof can support a static load of smaller than 355 x 355 mm and will need modification.
- Page 5 A. Roof Vent Locations (FIG. 4.A) Remove all screws that secure the vent to the roof There may be electrical wiring located be- and remove the vent from the opening. Remove all sealing compound from around the tween roof and ceiling. Disconnect all elec- vent opening.
- Page 6 Roof Opening Preparations 4. Framing is required around the roof opening to insure adequate support, provide a smooth surface for seal- 1. If the opening exceeds 360 x 360 mm, make it ing and prevent hot or cold air from being drawn into smaller by installing spacers or close-off plates.
- Page 7 C. Center the rubber gasket as near as possible over the LIFT AND PLACE unit over the prepared roof opening. opening. The blunt end of the air conditioner goes toward the rear of the van. (FIG. 5.B.1) This completes the outside work. Minor adjustments to the air conditioner position may be done from inside the van.
- Page 8 CEILING TEMPLATE Take the ceiling template and slide the lowerdischarge air duct over the outside of the upper discharge air INSTALLATION duct. Reach through the roof opening and adjust the air Holding the ceiling template in place with one hand, conditioner until the gasket is centered on the opening.
-
Page 9: Connection Of Power Supply
C. Tighten the strain relief onto the power supply line, to CONNECTION OF POWER SUPPLY hold it firmly in place. TO AIR CONDITIONER (FIG. 8) NOTE: If optional Electric Heater is part of this installa- WARNING tion, now is the time to install it. Installation Instructions are provided with the Electric Heater Be sure power supply is OFF before connecting Kit. -
Page 10: Air Box Installation
9. AIR BOX INSTALLATION G. Your air conditioner is now installed and ready for operation. Please read the following instructions be- fore attempting to run the unit. A. Remove the two return air grills and filters which are shipped loose in the air box. (FIG. 9.A) 10. - Page 11 B. COOLING OPERATION FIG. 1 O.B.l Set the thermostat to the position which will give your desired comfort level. 2. The selector switch is to be set as follows: a. HIGH COOL: (30 ): Selected when maximum cooling and dehumidifying is required.
- Page 12 D. HEATING OPERATION (If so equipped) FIG. 1 O.D.l NOTE: This electric heater will not replace a furnace for heating your van in cold weather. It is intended to remove the chill from the air on cool days or mornings only.
-
Page 13: Maintenance
11. MAINTENANCE FROST FORMATION on Cooling Unit: Under certain conditions, frost may form on the evaporator coil. If this should occur, inspect the filter and clean if dirty. Make sure AIR FILTERS: Periodically remove the return air filters air louvers are not obstructed. Air conditioners have a located above the removable panels in the air box. - Page 14 AIR CONDITIONER ASSEMBLY CONDITIONER DISCHARGE AIR RATING PLATE &SERIAL NO. NEOPRENE RUBBER GASKET UPPER DISCHARGE AIR DUCT ROOF LINE ROOF REINFORCEMENT MEMBER POWER SUPPLY LINE PREPARED INSTALLATION OPENING 25 X 380mm FRAMING LOWER DISCHARGE AIR DUCT (Attached to ceiling template) UNIT MOUNTING BOLTS (150MM) CEILING TEMPLATE UNIT MOUNTING...
-
Page 15: Wiring Diagram
WIRING DIAGRAM COMPRESSOR RUN CAP. TERMINAL4 ( @ 1 IS USED FOR WIRE CONNECTION ONLY AND NOT A FACTORY WIRING - F I E L D W I R I N G - - - - LINE SPLICE COMPRESSOR START relay 50 Hz...
Need help?
Do you have a question about the CAL61.206 and is the answer not in the manual?
Questions and answers