Table of Contents
Advertisement
Available languages
Available languages
Quick Links
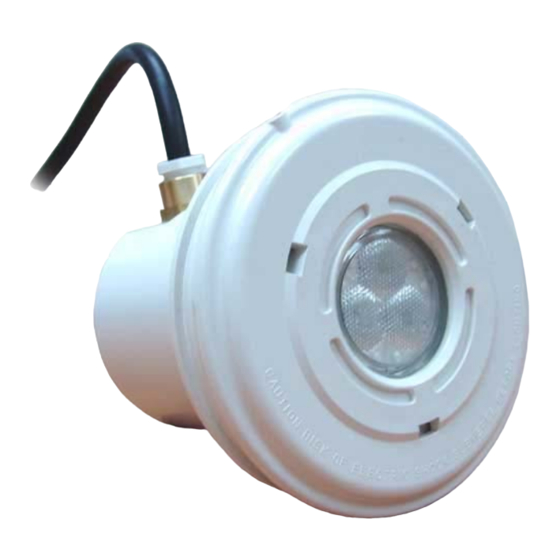
"MINI" RGB LED LIGHT FOR SWIMMING POOL
PROJECTEUR "MINI" À LEDS RGB POUR PISCINE
PROYECTOR "MINI" DE LED'S RGB PARA PISCINA
PROIETTORI "MINI" A LED RGB PER PISCINA
MINI-SCHEINWERFER MIT LEDS RGB FÜR SWIMMINGPOOLS
PROJETOR "MINI" DE LEDS RGB PARA PISCINA
INSTALLATION AND MAINTENANCE MANUAL
MANUEL D'INSTALLATION ET D'ENTRETIEN
MANUAL DE INSTALACIÓN Y MANTENIMIENTO
MANUALE DI INSTALAZIONE E MANUTENZIONE
EINBAU-UND BETRIEBSANLEITUNG
INSTRUÇÕES E MANUTENÇÃO
-1-
Advertisement
Table of Contents

Subscribe to Our Youtube Channel
Related Manuals for Astralpool MINI 32382


Summary of Contents for Astralpool MINI 32382
- Page 1 “MINI” RGB LED LIGHT FOR SWIMMING POOL PROJECTEUR “MINI” À LEDS RGB POUR PISCINE PROYECTOR “MINI” DE LED’S RGB PARA PISCINA PROIETTORI “MINI” A LED RGB PER PISCINA MINI-SCHEINWERFER MIT LEDS RGB FÜR SWIMMINGPOOLS PROJETOR “MINI” DE LEDS RGB PARA PISCINA INSTALLATION AND MAINTENANCE MANUAL MANUEL D’INSTALLATION ET D’ENTRETIEN MANUAL DE INSTALACIÓN Y MANTENIMIENTO...
-
Page 2: General Characteristics
ENGLISH IMPORTANT: The instruction manual you are holding includes essential information on the safety measures to be implemented for installation and start-up. Therefore, the installer as well as the user must read the instructions before beginning installation and start-up. Keep this manual for future reference. To achieve optimum performance of the Mini light for swimming pool, follow the instructions provided below: 1. - Page 3 Panelled swimming pool with Liner (Model 34185 / 36659) The projector can be installed in a metal sheet or plastic panelled swimming pool, using the template, and making a circular hole of 147 mm. diameter and 4 holes 4 mm (Fig. 2). Place the recess (no.
- Page 4 Length (m) Cable section 0-20 1.5 mm 20-30 2.5 mm 30-50 4 mm The spotlight cable should never be changed. The supplied cable guarantees a sealing degree of IPX8. The use of a different cable could cause a loss in sealing leading to the breakdown of the spotlight. ·...
- Page 5 In installations with more than four mini LED spotlights, which must be controlled jointly, a single pushbutton should be installed connected in parallel to the connection terminals. 6.1.2. Function modes The pushbutton control enables you to create different lighting scenarios inside the pool with two function modes: Fixed colour: Selection of a fixed colour from seven possibilities.
- Page 6 Fixed colour: Selection of a fixed colour from twelve possibilities. COLOUR Nº % RED % BLUE % GREEN COLOUR Blue Green Magenta Faint yellow Bluish cyan Greenish cyan Purple Cyan Yellow Bluish white Greenish white Automatic colour sequence:: Selection from among nine programmes of colour sequences. Each programme is defined by the duration of each colour and of the transition from one colour to another, according to the following table: SEQUENCE COLOUR TIMING (SEG.)
-
Page 7: Maintenance
7. MAINTENANCE: This projector does not require any type of maintenance. If the projector is not working properly, please contact our customer attention department. The inside of the projector should not be handled under any circumstances, as this would lead to losing the guarantee. Attention: Before any handling ensure that there is NO voltage supplied to the floodlamp. -
Page 8: Caractéristiques Générales
FRANÇAIS IMPORTANT: le manuel d’instructions que vous avez entre les mains contient des informations de première importance sur les mesures de sécurité à adopter au moment de l’installation et de la mise en service. Il est par conséquent indispensable que l’installateur et l’utilisateur lisent attentivement les instructions avant de commencer le montage et la mise en marche. -
Page 9: Montage
Pour procéder à la mise en place de la bride de la niche (nº 2) sur le côté intérieur de la piscine, s’assurer que les têtes cylindriques des vis (nº 21) qui ont été placées auparavant, coincident bien avec l’orifice leur correspondant dans la partie arrière de la bride (fig. - Page 10 Pour éviter des pertes de tension sur les câbles électriques, il faudra utiliser des câbles à sections appropriées en fonction de leur longueur. Longueur (m) Section câble 0-20 1.5 mm 20-30 2.5 mm 30-50 4 mm Il est formellement interdit de changer le câble du projecteur. Le câble qui est fourni avec l’appareil garantit un taux d’étanchéité...
- Page 11 6. SYSTÈMES DE CONTRÔLE DES PROJECTEURS À LEDS : Pour les installations n’ayant que des projecteurs Mini à LEDS, le contrôle peut se réaliser à partir de l’alimentateur. Si l’installation est également dotée de projecteurs Colorplus, l’alimentateur permet la synchronisation desdits projecteurs avec les projecteurs Mini à...
- Page 12 Séquence automatique de couleurs : Choix entre sept programmes de la séquence de couleurs. Chaque programme est défini par le temps de présence de chaque couleur et la durée de la transition d’une couleur à une autre, selon le tableau suivant : TEMPORISATION DE TEMPORISATION DE...
-
Page 13: Entretien
6.2.3. Diagramme des connexions électriques Qu’il s’agisse d’une configuration TOP ou ECO, il faut les connecter aux deux bornes 12VCA de l’alimentateur, deux câbles en parallèle à n’importe quel projecteur (réseau 12V), comme s’il s’agissait d’un projecteur Colorplus quelconque. De cette façon, l’alimentateur interprétera le signal reçu et réalisera les mêmes fonctions que les projecteurs Colorplus. Pour contrôler les projecteurs avec un récepteur modulateur et/ou contrôle à... -
Page 14: Características Generales
ESPAÑOL IMPORTANTE: El manual de instrucciones que usted tiene en sus manos, contiene información fundamental acerca de las medidas de seguridad a adoptar a la hora de la instalación y la puesta en servicio. Por ello, es imprescindible que tanto el instalador como el usuario lean las instrucciones antes de pasar al montaje y la puesta en marcha. -
Page 15: Montaje
Fijar la brida a la pared de la piscina con los 8 tornillos M-6x24 (nº 21) (Fig. 5). Asegurarse que la palabra TOP quede situada en la parte superior. Piscina de paneles con Liner (Modelo 34185 / 36659) Para colocar un proyector en la piscina de paneles, ésta puede ser de chapa o de plástico, debe realizarse, con la ayuda de la etiqueta plantilla, un agujero circular de 147 mm de diámetro y 4 agujeros de Ø... - Page 16 Para evitar perdidas de tensión en los cables eléctricos, se deberán utilizar cables con secciones apropiadas según la longitud. Longitud (m) Sección cable 0-20 1.5 mm 20-30 2.5 mm 30-50 4 mm Bajo ningún concepto se permite cambiar el cable del foco. El cable suministrado garantiza un grado de estanqueidad IPX8.
- Page 17 6.1. Control mediante el alimentador El alimentador se suministra con un pulsador instalado y supone la forma más simple de controlar los focos. En cada pulsación obtendremos un cambio de color o secuencia. El pulsador es de cámara normalmente cerrada (NC). Se conecta en los bornes indicados como “entrada pulsador” de la figura 9.
- Page 18 TEMPORIZACIÓN TEMPORIZACIÓN DE SECUENCIA ORDEN DE LOS COLORES DE COLOR MEZCLA (SEG.) (SEG.) Rojo Azul Verde Púrpura Cian Amarillo Rojo Verde Cian Azul Púrpura Amarillo Púrpura Cian Amarillo Rojo Azul Verde Púrpura Cian Amarillo Amarillo Púrpura Cian Verde Rojo Azul Mediante cada pulsación efectuamos un cambio de color o secuencia.
-
Page 19: Mantenimiento
6.2.3. Diagrama de conexionado eléctrico Tanto si se trata de una configuración TOP como ECO, se deben conectar en los dos bornes 12VCA del alimentador, dos cables en paralelo con cualquier foco (red 12V), como si de un foco Colorplus más se tratara. De esta forma el alimentador interpretará... -
Page 20: Caratteristiche Generali
ITALIANO IMPORTANTE: Il manuale d’istruzioni in suo possesso contiene informazioni fondamentali sulle misure di sicurezza da adottare per l'installazione e la messa in servizio. Per ciò è imprescindibile che sia l’installatore che l’utente leggano le istruzioni prima di iniziare il montaggio e la messa in servizio. Conservi questo manuale per poter consultare in futuro in merito al funzionamento di questo apparecchio. - Page 21 Per collocare la flangia della nicchia (nº 2) nel lato interno della piscina, assicurarsi che le teste cilindriche delle viti (nº 21), previamente collocate, coincidano con lo spazio riservato ad esse nella parte posteriore della flangia (Fig. 4). Fissare la flangia alla parete della piscina con 8 viti 6x24 (nº 23) (Fig. 5). Assicurarsi che la parola “TOP” rimanga situata nella parte superiore.
- Page 22 Per evitare perdite di tensione nei cavi elettrici, si renderà necessario utilizzare dei cavi con sezioni appropriate in funzione della lunghezza. Lunghezza (m) Sezione cavo 0-20 1,5 mm 20-30 2,5 mm 30-50 4 mm Non è permesso, per nessun concetto, cambiare il cavo del faretto. Il cavo appositamente fornito garantisce un grado di tenuta stagna IPX8.
- Page 23 6. SISTEMI DI CONTROLLO DEI PROIETTORI A LED: In installazioni dotate unicamente di faretti Mini a led, il controllo può essere realizzato dallo stesso alimentatore. Se nell’installazione vi sono anche dei faretti Colorplus, l’alimentatore consente la sincronizzazione dei suddetti faretti con quelli Mini a led.
- Page 24 Sequenza automatica di colori: selezione tra sette programmi della sequenza di colori. Ciascun programma viene definito dal tempo di presenza di ciascun colore e dalla durata della transizione da un colore all’altro in base alla tabella indicata di seguito: TEMPORIZZACIONE TEMPORIZZACIONE DI SEQUENZA ORDINE DEI COLORI...
-
Page 25: Manutenzione
6.2.3. Diagramma delle connessioni elettriche Sia che si tratti di una configurazione TOP sia di una ECO, si renderà necessario connettere nei due morsetti 12 V CA dell’alimentatore due cavi in parallelo con qualsiasi faretto (rete 12 V), come se si trattasse di un altro faretto Colorplus. In questa maniera, l’alimentatore interpreterà... - Page 26 DEUTSCH WICHTIG: Das Handbuch mit den Betriebsanleitungen, das Sie in Händen halten, enthält wichtige Information über die anzuwendenden Sicherheitsmaßnahmen für die Installation und Inbetriebnahme. Es ist daher unerläßlich, daß die Anweisungen vom Installateur und vom Benutzer vor der Montage und Inbetriebnahme aufmerksam durchgelesen werden.
- Page 27 Die Nische und eine der Dichtungen werden an der Außenseite des Pools angelegt. Die andere Dichtung (Nr. 3) wird an die Innenseite des Pools angelegt. Diese drei Elemente werden nun mit den beiden Schrauben mit zylinderförmigem Kopf (Nr. 21) (Abb. 3) befestigt. Vergewissern Sie sich, daß sich der Austritt für das Kabel im oberen Teil befindet. Um die Klammer der Nische (Nr.
- Page 28 Wenn der Abstand zwischen den Scheinwerfern und dem Einspeisern mehr als 2,5 m beträgt, müssen die Kabel verlängert werden, indem das Kabel, das mit dem Scheinwerfer geliefert wurde, bis zum Einspeiser verlängert wird. Um einen Spannungsabfall in den elektrischen Kabeln zu vermeiden, sollten Kabel mit einem ihrer Länge entsprechenden Kabelquerschnitt benutzt werden.
- Page 29 6. STEUERSYSTEME FÜR PROJEKTOREN MIT LEDS: In Anlagen, in denen ausschließlich Scheinwerfer Mini mit Leds vorhanden sind, kann die Steuerung über den Einspeiser selbst erfolgen. Wenn es in der Anlage ebenfalls Scheinwerfer Colorplus gibt, ermöglicht der Einspeiser die Gleichschaltung der Scheinwerfer mit den Mini mit Leds. 6.1.
- Page 30 Automatische Farbfolge: Auswahl unter sieben Programmen für Farbfolgen. Jedes Programm ist durch die Zeit, in der die jeweilige Farbe leuchtet, definiert, und auch durch die Dauer des Übergangs von einer Farbe in die andere. Im folgenden finden Sie eine entsprechende Tabelle: ZEIT DER FARBE SEQUENZ REIHENFOLGE DER FARBEN...
- Page 31 6.2.3. Elektrischer Schaltplan Für die Konfigurationen TOP oder ECO werden an den beiden Klemmen 12 VCA des Einspeisers zwei Kabel eines beliebigen Scheinwerfers (Netz 12V) parallel angeschlossen, so als ob es sich um einen weiteren Scheinwerfer Colorplus handelt. So interpretiert der Einspeiser das erhaltenen Signal und führt die gleichen Funktionen wie bei einem Scheinwerfer Colorplus aus.
-
Page 32: Características Gerais
PORTUGUÊS IMPORTANTE: O manual de instruções que você tem nas mãos contém informação fundamental sobre as medidas de segurança a tomar ao realizar a instalação e a colocação em funcionamento. Por isso, é imprescindível que tanto o instalador como o utilizador leiam as instruções antes de realizar a montagem e a colocação em funcionamento. Guarde este manual para futuras consultas sobre o funcionamento deste aparelho. - Page 33 Para proceder à colocação do flange do nicho (n. 2) no lado de dentro da piscina, assegure-se de que as cabeças cilíndricas dos parafusos (n. 21), previamente colocados, coincidem com o espaço reservado para eles na parte posterior do flange. (Fig.
- Page 34 Para evitar perdas de tensão nos cabos elétricos, os cabos utilizados deverão ter as secções adequadas em função do comprimento. Comprimento (m) Secção cabo 0-20 1,5 mm 20-30 2,5 mm 30-50 4 mm O cabo do foco não deve ser substituído em nenhuma hipótese. O cabo fornecido garante um grau de estanqueidade IPX8. A utilização de qualquer outro cabo pode provocar a perda da estanqueidade e, consequentemente, a destruição do foco.
- Page 35 6. SISTEMAS DE CONTROLO DOS PROJECTORES DE LEDS: Em instalações apenas com focos Mini de LEDs, o controlo pode ser realizado através do próprio alimentador. Se a instalação dispor também de focos Color plus, o alimentador permite a sincronização dos focos Color plus com os focos Mini de LEDs.
- Page 36 Seqüência de cores automática: Seleção da seqüência de cores entre sete programas. Cada programa vem definido pelo tempo da presença de cada cor e pela duração da transição de uma cor para outra, de acordo com a tabela abaixo: TEMPORIZAÇÃO DA TEMPORIZAÇÃO DA SEQUENCIA ORDEM DAS COLORES...
-
Page 37: Advertências De Segurança
6.2.3. Diagrama das ligações elétricas Tanto no caso de uma configuração TOP como de uma configuração ECO, dever-se-á efetuar a ligação de dois cabos em paralelo aos dois bornes 12VCA do alimentador, com qualquer foco (rede 12V), como se se tratasse de mais um foco Color plus. - Page 38 ENGLISH Nº CODE DESCRIPTION 32382 36655 32383 36657 34185 36659 04582R0004 Face plate 33686R0101 Stainless face plate 33351R0002 DIN 966 A4 M-6x24 Punt. screw 04582R0002 Floodlamp housing clamp 7020704012 DIN 912 A4 M-4x12 screw 7021448016 DIN 7981 A4 4,8x16 screw 7021548025 DIN 7982 A4 4,8x25 screw 08557R0001...
- Page 39 FRANÇAIS Nº CODE DESCRIPTION 32382 36655 32383 36657 34185 36659 04582R0004 Couvercle enjoliveur 33686R0101 Couvercle enjoliveur inox 33351R0002 Vis DIN 966 A4 M-6x24 Punt 04582R0002 Bride liner 7020704012 Vis DIN 912 A4 M-4x12 7021448016 Vis DIN 7981 A4 4,8x16 7021548025 Vis DIN 7982 A4 4,8x25 08557R0001 Joint adhésif pour le projecteur...
- Page 40 DEUTSCH Nº ARTIKEL NR. BESCHREIBUNG 32382 36655 32383 36657 34185 36659 04582R0004 Abdeckring 33686R0101 Abdeckring Edelstahl 33351R0002 Schraube DIN 966 A4 M-6x24 04582R0002 Flansch Einbaunische 7020704012 Schraube DIN 912 A4 M-4x12 7021448016 Schraube DIN 7981 A4 4,8x16 7021548025 Schraube DIN 7982 A4 4,8x25 08557R0001 Anhaftende Dichtung für 32382R0100...
- Page 41 -41-...
- Page 42 Fig. 9 -42-...
- Page 43 SACOPA, S.A.U. “MINI” LED LIGHT FOR SWIMMING POOL PRODUCTS: PRODUITS: PROJECTEUR “MINI”À LEDS POUR PISCINE PRODUCTOS: PROYECTOR “MINI” DE LED’S PARA PISCINA PRODOTTI: PROIETTORI “MINI” A LED PER PISCINA PRODUKTE: MINI-SCHEINWERFER MIT LEDS FÜR SWIMMINGPOOLS PRODUTOS: PROJETOR “MINI” DE LEDS PARA PISCINA DÉCLARATION CE DE CONFORMITÉ...
- Page 44 TECHNICAL CHARACTERISTICS CARACTERISTIQUES TECHNIQUES CARACTERISTICAS TECNICAS DATI TECNICI TECHNISCHE ANGABEN CARACTERISTICAS TECNICAS Ø163 CONCRETE POOL / PISCINA HORMIGÓN DESCRIPTION PREFABICATED POOL / PISCINA PREFABRICADA PANELLED POOL / PISCINA DE PANELES Rated voltage / Tension nominale / Tensión nominal Tensione nominale / Anschlusspannung / Tensão nominal Current supply / Type de courant / Tipo de corriente / Tipo di corrente / Stromtype / Tipo de corrente Power / Pouvoir / Potencia / Potere / Macht / Poder...
Need help?
Do you have a question about the MINI 32382 and is the answer not in the manual?
Questions and answers