Table of Contents
Advertisement
Advertisement
Table of Contents

Related Manuals for Avid Technology S1


Summary of Contents for Avid Technology S1
- Page 1 Avid S1 Guide Installation and Overview...
- Page 2 Legal Notices © 2019 Avid Technology, Inc., (“Avid”), all rights reserved. This guide may not be duplicated in whole or in part without the written consent of Avid. For a current and complete list of Avid trademarks visit: http://www.avid.com/legal/trademarks-and-other-notices Bonjour, the Bonjour logo, and the Bonjour symbol are trademarks of Apple Computer, Inc.
-
Page 3: Safety Compliance
60950-1-07; 2nd edition, EN 60950-1:2006 /A11, /A1, /A12, /A2, IEC 60950-1:2005/A1, /A2, UL 62368-1, Second Edition, CAN/CSA 62368-1-14, EN 62368-1:2014 /A11 and IEC 62368-1:2014 (Second Edition) Avid Technology Inc., has been authorized to apply the appropriate NRTL mark on its compliant equipment. Power Safety Input Rating Avid S1: 12Vdc, 2.8A... -
Page 4: Table Of Contents
Hardware Switches on S1 Control Surface ........ -
Page 5: Introduction
After installing the S1 control surface and EuControl software, see the Using EuControl Surfaces.pdf for instructions on how to use S1 and other Avid media controllers to record, edit, and mix in Pro Tools. Thanks to the EUCON protocol, most steps for Pro Tools are also applicable in other EUCON-aware applications from our development partners, including Logic Pro X, Cubase, Nuendo, Pyramix and more (see the EUCON Application Setup.pdf to learn how to set up EuControl communication with these applica-... -
Page 6: What's Included
• Welcome pack, which includes the EuControl software Activation Card, S1 Welcome card, Health and Safety Guide Additional Recommended Items Although it can be used standalone, you will get the most out of the S1 by using it with one or more supported iOS or Android tablets (not included). -
Page 7: About This Guide
This guide shows how to install S1 and EuControl software, and provides an overview of the S1 control surface. For workflow examples that show how to use S1 with Pro Tools and other EUCON-compatible applications, see the Using EuCo- ntrol Surrfaces.pdf. . -
Page 8: Hardware Switches On S1 Control Surface
Hardware Switches on S1 Control Surface The names of switches on the control surface are in bold, such as Sel. The Surface SHIFT switch on the S1 is indicated by bold text, in all-caps to distinguish it from references to the Shift Modifier switch below fader strip 1, and the Shift key on your com- puter keyboard. -
Page 9: How To Use This Pdf Guide
Knowledge Base or join the worldwide Avid user community on the User Conference. www.avid.com/S1-Support Products and Developers Learn about Avid products; download demo software or learn about our Development Partners and their plug-ins, applications, and hardware. -
Page 10: Installation And Setup
Unpacking S1 Open the S1 box and find the white Welcome/Start Here envelope. • You will use the included Activation card to activate your S1 and download EuControl software later in the installation pro- cedure. Remove the cardboard tray holding your S1 accessories (Ethernet cable, Link plate (for joining two S1s together), power adapter, and power cables). -
Page 11: Connecting S1
S1 cannot connect to your workstation computer using a wireless connection. A hard-wired network connection is required. • If you want to connect the S1 to a local area network, or to connect additional S1 units and/or an Avid Dock, connect the Ether- net cable to an Ethernet router or switch, and make sure the router or switch is powered on before powering on the S1. - Page 12 S1. If a more rigid solution is required, clip the included S1 Link plate to the underside of one unit (both ends of the Link plate are also magnetic), being sure to orient it correctly as shown below.
-
Page 13: Installing Eucontrol Software
Next, install the latest version of EuControl software onto your workstation computer. An Internet connection is required to down- load EuControl. Activate! If you have not already done so, follow the instructions on the included Avid S1 Activation card to ac- tivate S1. Doing so makes EuControl software, documentation, and other software available in your Avid account. - Page 14 EuControl Auto-launch Apps selector (Mac shown) From the Auto-launch Apps sub-menu, choose any of the following (you can enable more than one): • EuControl (for S1, S3, Dock, Control, and Artist Series) • WSControl (for S4 and S6) • MTRX •...
-
Page 15: Create Your Surface In Eucontrol Settings
Create Your Surface in EuControl Settings EuControl can be configured to launch automatically upon starting your computer (use the Auto-Launch Apps choices in the Eu- Control menu). EuControl is responsible for finding, linking, and communicating with all Avid media controllers on the network. You can use the different tabs in the EuControl Settings window to manage surfaces, pair surfaces with tablets, connect to work- stations, and more. - Page 16 Avid S1 in the My Surfaces list. For example, when only a Dock and/or S3 is present, only one Avid Control app can be used. When a Dock and one S1 is present, up to two Avid Control apps can be used. For each additional S1 in the My Surfaces list an- other Control app can be added, up to the maximums listed below.
- Page 17 Make sure an S1, but no other Control app/tablets, are already in the Surfaces and Master Tablet column of My Surfaces . Drag a Control app from All Surfaces and drop it on top of the same row as an S1. This Control app becomes a Hybrid.
- Page 18 • A Hybrid tablet’s Meters view follows banking on the S1 to which it is linked. • If an S1 has a tablet linked in Hybrid mode, and a second tablet is added to the My Surfaces list as a Master, the originally linked Hybrid tablet becomes an S1 Meters tablet.
- Page 19 The Surfaces tab provides the following lists and controls. 1– All Surfaces All Surfaces shows all Avid media controllers on the network. A device shown in light gray is already connected either to your own or another instance of EuControl running on a different workstation. In both cases, it is not selectable. 2–...
- Page 20 Updating S1 Firmware After installing EuControl, make sure your S1 is running the latest firmware. The firmware is provided within EuControl, so an In- ternet connection is not required. To update S1 firmware: Click (Mac) or double-click (Windows) the EuControl icon and select EuControl Settings .
-
Page 21: Installing And Connecting Avid Control
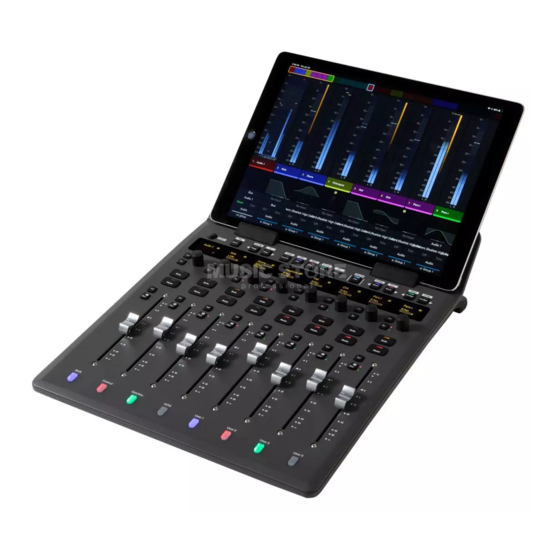
• All Control app/tablets appear in the My Surfaces list in EuControl See the Avid Audio Control Guide.pdf for instructions on installing and connecting the app. Place each Avid Control tablet in a stand built into the S1. The Control app supports both landscape and portrait views. Tablet installed on S1 To keep your tablet charged, connect its charging cable to the USB port on the back of the Dock. -
Page 22: Connecting A Footswitch
Connecting a Footswitch The S1 has a 1/4-inch footswitch input on the back panel, which can be configured in EuControl Settings to control punch in and out of recording in your DAW, or for engaging talkback. Footswitch input on the back of S1 For more information on configuring the footswitch, see the Using EuControl Surfaces.pdf. -
Page 23: Confirming Eucon
Verify that the channel strip displays above the fader strips show the track names for the first 8 tracks in the Pro Tools session. Channel Encoder displays showing track names (first eight tracks shown) In the Pro Tools Mix window, verify that the names of the tracks currently banked to the channel strips on S1 are highlighted with blue-green borders. -
Page 24: Connecting A Second Workstation
Connecting a Second Workstation The S1 can control applications running on a second computer that is connected to the same network as the primary EuControl computer, referred to in this guide as a workstation. If EuControl is running on the same workstation as all your audio/video ap- plications you can skip these instructions. -
Page 25: How To Proceed
Attach . If you are using the Control app without any other Artist Series controllers, you must use this method to switch workstations. How to Proceed to become familiar with the different sections, controls, and displays on the S1. S1 Surface Controls Overview For operational information and workflow examples, see the Using EuControl Surfaces.pdf. -
Page 26: S1 Surface Controls Overview
S1 Surface Controls Overview This section provides an overview of the surface controls on the S1. For workflow examples that show how to use the S1 in com- bination with other control surfaces, the Control app, and/or Pro Tools, see the Using EuControl Surfaces.pdf. -
Page 27: Channel Strips
Channel Strips S1 provides 8 channel strips, each with a display, an Assignable Channel Encoder (each with its own encoder Sel and In switches), automation indicator LEDs, a Solo switch, a Mute switch, a 100mm motorized touch-sen- sitive fader, a channel select ( Sel ) switch, a record engage ( Rec )/Automation Mode ( A ) switch, and a level me- ter. - Page 28 Latch Touch/Latch Write Preview Off + Trim Read + Trim Touch + Trim Latch + Trim Touch/Latch + Trim Write + Trim The red LED flashes while writing automation. The green LED flashes in Preview mode. S1 Surface Controls Overview...
-
Page 29: Channel Strip Displays
Display Sleep To preserve display life, the channel displays enter sleep mode when not in use. This can be set in EuControl Settings (see the Using EuControl Surfaces.pdf for information on OLED Screen Saver Time ). S1 Surface Controls Overview... -
Page 30: Assignable Channel Encoders
L L L L L L L L L L L L L L L L L L Channel displays in Channel Mode, showing “Kick” as the attentioned track Channel Mode is useful for editing EQs and plug-ins that have many parameters. S1 Surface Controls Overview... - Page 31 Basic Channel Encoder Use When S1 is first powered on, the Channel Encoders are in Normal Mode and Pan is assigned to the Channel Encoders by default. Each Channel Encoder controls pan for its corresponding track on the strip. To quickly access pan control on the Channel Encoders in Normal Mode: Press the Pan Channel Encoder Assignment switch.
-
Page 32: Channel Encoder Assignment Switches
Knob Set is an array of controls used by EuControl-compatible applications to control plug-ins, EQs, dynamics, aux sends, and other functions using the controls on the S1. Some of these Knob Sets also have sub-menus. One of the switches is always selected, and the associated parameters are assigned to the Channel Encoders until another Channel Encoder Assignment switch is pressed. - Page 33 Channel Encoders. In addition, < Page lights orange if there is a previous page and Config mode is enabled, and lights green if Config mode is enabled but there is no previous page. The X switch is not yet implemented. S1 Surface Controls Overview...
-
Page 34: Fader Banking Controls
Bank and Nudge Pro Tools The S1 Bank and Nudge switches can also bank the Mix and/or Edit windows in Pro Tools. To have Pro Tools follow S1 banking, in Pro Tools go to Setup > Preferences , open the Mixing tab, and in the Controllers section enable Edit Window Follows Bank Selection and/or Mix Window Follows Bank Selection . -
Page 35: Track Color Switches (Modifiers And User 1-4)
Track Color Switches (Modifiers and User 1–4) Track Color switches at the bottom of each fader strip show the assigned track colors for tracks banked to the surface. On each S1, the four left switches provide Modifier functionality, and the four right switches provide customizable User switches. -
Page 36: Appendix A. Specifications
Appendix A: Specifications All specifications subject to change. Avid S1 Module: Mechanical Avid S1 Mechanical Specifications Parameter Specification Height (front) 1.3 in (33 mm) Height (rear) 4.1 inches (103 mm) Width 12.4 in (316 mm) Depth 14.9 in (377 mm) Weight 4.17 lbs... -
Page 37: Dimensions
[4.1] 103.9 Test Mode The Avid S1 has a self-test mode that lets you test the fader, LEDs and knob touch-sensitivity. This self-test mode is similar to “Vegas Mode” on other control surfaces. To enable Test Mode on the S1: Power the S1 off. -
Page 38: Appendix B. Compliance
Appendix B: Compliance Model Name: Avid S1 Model #: 9100-65814 Environmental Compliance Disposal of Waste Equipment by Users in the European Union This symbol on the product or its packaging indicates that this product must not be disposed of with other waste. Instead, it is your responsibility to dispose of your waste equipment by handing it over to a designated collection point for the recycling of waste electrical and electronic equipment. -
Page 39: Emc (Electromagnetic Compliance)
EMC (Electromagnetic Compliance) Avid declares that this product complies with the following standards regulating emissions and immunity: • FCC Part 15 Class B • CAN ICES-003 Class B • EN 55032 Class B • AS/NZS CISPR 32 Class B • CISPR 32 Class B •... - Page 40 Technical Support (USA) Product Information Visit the Online Support Center For company and product information, www.avid.com/support www.avid.com visit us on the web at...
Need help?
Do you have a question about the S1 and is the answer not in the manual?
Questions and answers