Table of Contents
Advertisement
Quick Links
Advertisement
Table of Contents

Related Manuals for AnyTone AT-318P


Summary of Contents for AnyTone AT-318P
- Page 1 Qixiang Electron Science & Technology Co., Ltd. www.qxdz.cn...
- Page 2 AT-318P TWO W AY R A DI O...
- Page 3 When programming the transceiver, read the factory initial data first, then rewrite the frequency and signaling etc., otherwise errors may occur because of different frequency band etc. User Manual Applied to: AT-318P UHF FM Transceiver VHF FM Transceiver Programming Software: QPS318P_1.00...
- Page 4 SAFETY INFORMATION FOR USER transceiver is excellently designed with advanced technology. Please observe the following precautions to perform your obligation, prevent personal injury and ensure the safety of transceiver usage. Keep the transceiver and accessories away from children. Please do not try to open or modify the transceiver without permission, non-professionals process may also cause damage.
-
Page 5: Table Of Contents
CONTENTS UNPACKING ............................1 Supplied Accessories .........................1 STANDARD ACCESSORIES/OPTIONAL ACCESSORIES ..............2 Standard Accessories ..............................2 Optional Accessories ..............................2 BATTERY INFORMATION ........................3 How to Charge ................................3 PREPARATION .............................4 Installing / Removing the Battery ..........................4 Installing / Removing the Antenna ..........................5 Installing / Removing the Belt Clip ..........................5 Installing the Additional Speaker/ Microphone (Optional) ..................6 GETTING ACQUAINTED ........................7 Indicator Status and Beep ............................9... - Page 6 CONTENTS Transmitting ................................13 Power Switch ................................13 ON/OFF VOX ................................13 ON/OFF Highlight Torch ............................14 Emergency Alarm ..............................14 Battery Save Setup ..............................14 CTCSS / DCS Encode and Decode ..........................14 Time-out Timer ................................15 Resume Factory Default ............................15 Maintaining and Cleaning ............................15 TECHNICAL SPECIFICATIONS ......................16 TROUBLE SHOOTING GUIDE ......................17 Professional FM Transceiver...
-
Page 7: Unpacking
UNPACKING Carefully unpack the transceiver. We recommend you to identify the items listed in the following table before discarding the packing material. If any items are missing or have been damaged during shipment, please contact dealers immediately. Supplied Accessories Item Number Quantity QA06V(136-174MHz) -
Page 8: Standard Accessories/Optional Accessories
STANDARD ACCESSORIES/OPTIONAL ACCESSORIES Standard Accessories Antenna* Li-ion Battery Pack Charger AC Adaptor Belt Clip QA06V (136-174MHz) (1300mAh) QBC-42L QPS-07 BC06 QA06U (400-480MHz) etc. QB-43L * Note: For frequency of antenna, please refer to label indicated in the bottom of the antenna. Instruction Qualification Manual... -
Page 9: Battery Information
BATTERY INFORMATION How to Charge Plug the AC adaptor into the AC outlet(100V-240V), the indicator light will light green. Plug the battery or transceiver into the charger. AC input A: Make sure that the battery terminals are in contact with charging terminals well. -
Page 10: Preparation
PREPARATION Installing / Removing the Battery ■ Installing the Battery Lay the battery to face the back of the radio. Press the button of battery, the latch in button of transceiver locks will release. After hearing a "click" sounds, the battery has been locked. ■... -
Page 11: Installing / Removing The Antenna
PREPARATION Installing / Removing the Antenna Installing the Antenna: ■ Screw the antenna into the connector on the top of the transceiver by holding the antenna at its base and turning it clockwise until secure. ■ Removing the Antenna: Turn the antenna anticlockwise till the antenna separates the connector of the transeceiver to remove it. -
Page 12: Installing The Additional Speaker/ Microphone (Optional)
PREPARATION Installing the Additional Speaker/ Microphone (Optional) Unveil the MIC-SP jack cover and then insert the Speaker/Microphone plug into MIC-SP jack. Note: The transceiver is not completely waterproof while using the Speaker/Microphone. Professional FM Transceiver... -
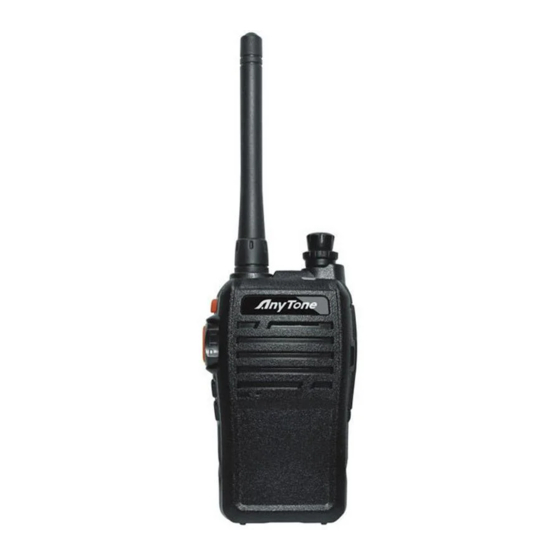
Page 13: Getting Acquainted
GETTING ACQUAINTED Professional FM Transceiver... - Page 14 GETTING ACQUAINTED Antenna POWER / VOLUME Switch: Turn clockwise to switch on the transceiver, and turn anticlockwise till hearing “Click” to switch off the transceiver. After switching on the transceiver, turn clockwise to increase the volume and anticlockwise to decrease the volume. Indicator light Highlight Torch LAMP Key...
-
Page 15: Indicator Status And Beep
GETTING ACQUAINTED Indicator Status and Beep Warning on low voltage The red light twinkles. Transmitting Lighten the red light. Receiving Lighten the green light. Reading Frequency: Red light twinkles Reading/Writing Frequency Writing Frequency: Green light twinkles Key Operation Voices "DU" into any function, "DU DU" to exit any function. [PF1] &... -
Page 16: Auxiliary Functions
GETTING ACQUAINTED AUXILIARY FUNCTIONS Users can setup the key [PF1] and [PF2] to be one of the optional functions as bellows : • Squelch off • Monitor • Current Channel Power Enquiry • Frequency Reverse • Talk Around • Battery Capacity Enquiry •... -
Page 17: Basic Operations
BASIC OPERATIONS Switch on / off Transceiver Switch on Transceiver: Under power-off state, turn [POWER / VOLUME] clockwise till hearing "Click" to switch on the transceiver. The transceiver will announce "welcome to use" when power- on and announce the current channel. Switch off Transceiver: Under power-off state, turn [POWER / VOLUME] anticlockwise till hearing "Click"... -
Page 18: Channel Selection
BASIC OPERATIONS Channels Selection Under the standby conditions, turn channel selector knob to choose the desired channel, and the transceiver will announce the adjusted channel. Turn clockwise to increase the channel, anticlockwise to decrease the channel. NOTE: The transceiver will emit "DiDi" beep when current channel is blank. Receiving You can hear the transmitting party's calling when the channel you are operating is called and the LED light turns green. -
Page 19: Transmitting
BASIC OPERATIONS Transmitting Before transmitting, make sure that the channel you want to use is not in busy state through monitoring for a while by pressing the programmed Squelch off [PF2] key. Under these conditions, press the [PTT] key and speak into microphone. Please keep around 2.5-5cm distance between microphone and your lip. -
Page 20: On/Off Highlight Torch
BASIC OPERATIONS ON/OFF Highlight Torch Under standby condition, press LAMP key and the transceiver will emit "DU' beep, and then turn on the Highlight Torch. Repeating the above operation will turn off the Highlight Torch. Emergency Alarm Under standby condition, press and hold LAMP Key for 3 seconds, the transceiver will start the emergency alarm function. -
Page 21: Time-Out Timer
BASIC OPERATIONS Time-out Timer The purpose of the Time-out Timer is to prevent any caller from using a channel for an extender period of time. If you continuously transmit for a period of time that exceeds the programmed time set in advance, the transceiver will stop transmitting with voice prompt. Users can set TOT timer by programming software. -
Page 22: Technical Specifications
TECHNICAL SPECIFICATIONS General VHF:136~174MHz Frequency Range UHF: 400~520MHz Channel Capacity 16 channels Operating Voltage 7.4V DC ±20% Battery Life More than 12 Hours (1300mAh), by 5-5-90 work cycle Frequency Stability ±2.5ppm Operating Temperature -20℃~ +55℃ Size 117x62x35mm (with battery pack) Weight 179g (with battery pack , antenna) Professional... -
Page 23: Trouble Shooting Guide
TROUBLE SHOOTING GUIDE Problem Corrective Action The battery pack may be exhausting. Recharge or replace the battery pack. No Power The battery pack may not be installed correctly. Remove the battery pack and install it again. Battery power dies shortly after correctly The battery pack life is finished.
Need help?
Do you have a question about the AT-318P and is the answer not in the manual?
Questions and answers