Miele HS19 Operating Instructions Manual
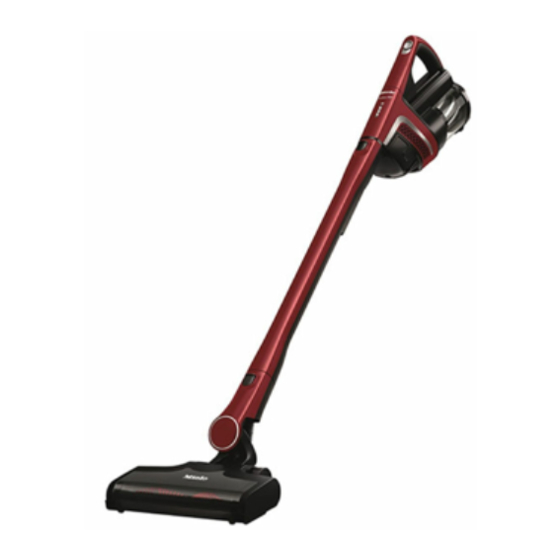
Cordless stick vacuum cleaner
Hide thumbs
Also See for HS19:
- Operating instructions manual (276 pages) ,
- Operating instructions manual (48 pages) ,
- Operating instructions manual (144 pages)
Table of Contents
Advertisement
Advertisement
Table of Contents

Related Manuals for Miele HS19


Summary of Contents for Miele HS19
- Page 1 Operating instructions Cordless stick vacuum cleaner en-GB HS19 M.-Nr. 11 419 150...
-
Page 2: Table Of Contents
Contents Warning and Safety instructions................ 4 Caring for the environment ................ 11 Guide to the appliance .................. 12 Installation and connection ................ 14 Assembling the vacuum cleaner ................14 Connecting the Comfort handle ................15 Connecting the PowerUnit and the suction tube ..........15 Inserting the battery .................... - Page 3 Contents Service........................ 34 Contact in case of malfunction ................34 Warranty ........................ 34 Warranty in the UAE ....................34 Optional accessories .................. 35 Electrical connection for the UK................ 36...
-
Page 4: Warning And Safety Instructions
“Installation and connection” chapter as well as the safety instruc- tions and warnings. Miele cannot be held liable for injury or damage caused by non- compliance with these instructions. Keep these operating instructions in a safe place and pass them on to any future owner. - Page 5 Warning and Safety instructions The vacuum cleaner must only be used to vacuum dry floor sur- faces. Do not vacuum people or animals. Any other types of use, modifications or alterations are not permitted. This vacuum cleaner can only be used by people with reduced physical, sensory or mental capabilities, or lack of experience or knowledge, if they are supervised whilst using it or have been shown how to use it in a safe way and understand and recognise the con-...
- Page 6 Miele authorised service technician. Otherwise the warranty will be invalidated. Repairs should only be carried out by a Miele authorised service technician. Repairs and other work by unqualified persons can cause considerable danger to users.
- Page 7 Warning and Safety instructions Miele can only guarantee the safety of the appliance when genu- ine Miele replacement parts are used. Faulty components must only be replaced with genuine Miele replacement parts. Cleaning Do not immerse the vacuum cleaner or any accessories supplied with it in water.
- Page 8 Do not vacuum at head height and do not let the suction get any- where near a person's head. Accessories Only use genuine accessories with the “ORIGINAL Miele” logo on the packaging. The manufacturer cannot otherwise guarantee the safety of the product. Safety instructions and warnings for AP01 battery, LG01...
- Page 9 The AP01 battery, the LG01 charger and the LS03 charger cradle are designed for use with the Miele HS19 vacuum cleaner. For safety reasons, the vacuum cleaner must not be used with a battery, char- ger or charger cradle produced by another manufacturer.
- Page 10 Avoid contact with the eyes and skin. In the event of contact, rinse thoroughly with water and seek medical advice. Please contact Miele Service before sending the AP01 battery. Correct use Do not drop or throw the AP01 battery. For safety reasons, do not continue to use an AP01 battery which has been damaged.
-
Page 11: Caring For The Environment
Caring for the environment with Miele. Ensure that it presents no Disposal of the packing mater- danger to children while being stored for disposal. The packaging is designed to protect the appliance from damage during Disposing of old batteries transportation. The packaging materials... -
Page 12: Guide To The Appliance
Guide to the appliance... - Page 13 Guide to the appliance a Comfort handle b Release catch for Comfort handle (on the back) c Dust container handle d Dust container with pre-filter, fine dust filter and motor protection filter e PowerUnit with battery connection and connections for Comfort handle, suc- tion tube, Electrobrush and dust container f Release catches for battery (on both sides of the battery) g Charging socket (at the bottom of the battery)
-
Page 14: Installation And Connection
- ergonomic (reduced strain on the Installation and connection wrist) Assembling the vacuum cleaner - convenient cleaning of large surfaces You can assemble the vacuum cleaner The advantages of placing the in 2 different ways. PowerUnit at the top of the vacuum cleaner are as follows: - convenient cleaning underneath fur- niture... -
Page 15: Connecting The Comfort Handle
Connecting the Comfort handle Depending on how your vacuum cleaner is configured, you can connect the Comfort handle to either the suction tube or the PowerUnit. Press the release catch and remove the Comfort handle by pulling up- wards. Connecting the PowerUnit and the suction tube ... -
Page 16: Inserting The Battery
Push the PowerUnit connector down on to the suction tube from above un- til it audibly clicks into place (right im- age detail). Push the battery along the guide lines until it audibly clicks into place in the PowerUnit. -
Page 17: Connecting The Electrobrush
Connecting the Electrobrush General battery information Depending on how your vacuum The rechargeable battery is supplied cleaner is configured, you can connect not fully charged. either the PowerUnit connector or the Charge the battery completely before suction tube connector to the Electro- using it for the first time. -
Page 18: Charging The Battery (Without Wall Mounting)
Charging the battery (without wall Charging the battery (with wall mounting) mounting) You can store the vacuum cleaner up- There are 2 ways to store and charge right and charge the battery directly. the vacuum cleaner in the supplied wall bracket. You will need a suitable location near a free power socket for mounting the appliance on the wall. -
Page 19: Wall Mounting
Wall mounting The supplied wall bracket has a mount- ing plate with a bag of screws attached to the back. Attach the mounting plate to the point on the wall where you want the wall mounting to be. Remove the bag of screws. ... -
Page 20: Attaching The Mounting Plate
Attaching the mounting plate 2 plugs and 2 T20 TORX screws are supplied for attaching the mounting plate to the wall. You will also need a battery-operated screwdriver or a drill (with a drilling dia- meter of 6 mm). Depending on how your vacuum cleaner is configured, select a distance of 45 cm or 98 cm between the bottom edge of the mounting plate and the... -
Page 21: Connecting The Wall Bracket
Connecting the wall bracket The charging process will start. Battery charging state indicator (while charging) The battery charging state is displayed on the PowerUnit. Slide the wall bracket down into the mounting plate from above until it audibly clicks into place. Charging capa- Display city... -
Page 22: Battery Charging State Indicator (While In Use)
You can display the charging state for Using the accessories supplied 4 seconds at any time by pressing the On/Off switch on the Comfort handle. If the battery has not been used for a long time and has run down, it will go into a safe mode. -
Page 23: Electrobrush Multi Floor Xxl (Seb 430 Or Seb 435)
Tip: The suction tube is not a conveni- ent option for cleaning carpeted stairs. ent option for cleaning upholstery or car seats. Miele offers a range of suitable ac- cessories for many special applica- Additional AP01 battery and LS03 tions (see “Optional accessories”). -
Page 24: Use
Switching on and off Pull the plug out of the charging socket on the battery. If you have put the vacuum cleaner away in the the wall bracket for stor- age, take it out. Once the battery has been charged twice, push it into the charger cradle until it audibly clicks into place. -
Page 25: Illuminating The Work Area
The Electrobrush on your vacuum Replacement parts are available from cleaner is equipped with BrilliantLight to your Miele dealer or from the Miele illuminate the work area. Spare Parts Dept. Self-standing function for short pauses in vacuuming... - Page 26 Lift the dust container upwards to re- The cover at the bottom of the dust move it. container will open and the dust will fall out. The contents of the container can be Turn the lid of the dust container back disposed of with normal domestic to its original position.
-
Page 27: Cleaning The Fine Dust Filter
Cleaning the fine dust filter Once it is clean, replace the fine dust filter in its position in the dust con- The fine dust filter is located in the dust tainer. container. Clean the fine dust filter at least once a ... - Page 28 Unlock the motor protection filter by Replace the pre-filter in the dust con- turning it anti-clockwise and lift it up- tainer. wards to remove it. Risk of damage caused by incor- rect cleaning. The pre-filter can become damaged and be less effective as a result.
-
Page 29: Cleaning The Dust Container
Cleaning the dust container Removing threads and hairs Place the Electrobrush/handheld Clean the dust container as required. brush upside down on a level, clean Remove the dust container. surface. Empty the dust container over a bin and lift the pre-filter upwards to re- move it. -
Page 30: Replacing The Rechargeable Battery
Removing the roller brush Replacing the rechargeable battery (Not possible with the handheld brush) An original Miele AP01 lithium-ion re- chargeable battery (HX LA) is required. You can take the roller brush out of the Electrobrush in order to remove stub-... -
Page 31: Error Messages
Middle and top lights “Battery not recognised” error flash quickly Insert an original Miele AP01 lithium-ion re- chargeable battery (HX LA). Top light flashes quickly “Comfort handle not recognised” error Remove the Comfort handle and reconnect it (see “Installation and connection”... -
Page 32: Problem Solving Guide
Problem solving guide Many malfunctions and faults that can occur in daily operation can be easily remedied. Time and money will be saved because a service call will not be needed. The following guide may help you to find the reason for a malfunction or a fault, and to correct it. - Page 33 Charge the battery exactly as described in these operating instructions (see “Installation and con- nection” – “Charging the battery”). An original Miele battery has not been inserted. Insert an original Miele AP01 lithium-ion re- chargeable battery (HX LA). The charger is still plugged in.
-
Page 34: Cleaning And Care
For information on the appliance war- tions for the dust container in the ranty specific to your country, please “Maintenance” section. contact Miele. See back cover for ad- dress. The vacuum cleaner and all plastic ac- cessories can be cleaned with a propri- In the UK, your appliance warranty is etary cleaner suitable for plastic. -
Page 35: Optional Accessories
Purchasing accessories cushions, curtains, covers etc. Original Miele accessories are available Crevice nozzle, 300 mm (SFD 10) from the Miele webshop, the Miele Cus- Extra long crevice nozzle for cleaning in tomer Service Department and from folds, crevices and corners. your Miele dealer. -
Page 36: Electrical Connection For The Uk
Electrical connection for the All electrical work should be carried out by a suitably qualified and competent person in strict accordance with current national and local safety regulations (BS 7671 in the UK). The voltage and fre- quency are given on the data plate loc- ated underneath the vacuum cleaner. - Page 40 Fax: 011-46 900 001 Fax: +65 6735 1161 800-MIELE (64353) E-mail: customercare@miele.in E-Mail: info@miele.com.sg E-Mail: info@miele.ae Internet: www.miele.in Internet: www.miele.sg Website: www.miele.ae Manufacturer: Miele & Cie. KG, Carl-Miele-Straße 29, 33332 Gütersloh, Germany SMxxx - 4219 M.-Nr. 11 419 150 / 00...
Need help?
Do you have a question about the HS19 and is the answer not in the manual?
Questions and answers