Table of Contents
Advertisement
Advertisement
Table of Contents

Related Manuals for ClonerAlliance Flint 4KP Plus


Summary of Contents for ClonerAlliance Flint 4KP Plus
- Page 1 ClonerAlliance Flint 4KP Plus User Manual...
- Page 2 ClonerAlliance Flint 4KP Plus User Manual This documentation describes how to use ClonerAlliance Flint 4KP Plus (Model: CA1090F4P) device. Copyright Notice Copyright © ClonerAlliance® Inc. All rights reserved. Documentation Version 1.1 No part of this publication may be reproduced, transmitted, transcribed, stored in a retrieval system, or translated into any language or computer language, in any form or by any means, electronic, mechanical, magnetic, optical, chemical, manual, or otherwise, without the prior written permission of ClonerAlliance®...
- Page 3 Before using ClonerAlliance Flint 4KP Plus, please ensure that you read and un derstand the safety precautions below: 1. Do not attempt to open the case of ClonerAlliance Flint 4KP Plus or modify it in any way, as this will void the warranty.
-
Page 4: Table Of Contents
..................47 Record/Capture with ClonerAlliance App... - Page 5 Preview videos for live streaming. Connect ..................54 Install software .
-
Page 6: Getting Started
GETTING STARTED 1.1 Box Contents • a. ClonerAlliance Flint 4KP Plus • e. USB3.0(male) to USB TypeC cable • b. Quick User Guide • f. USB2.0 TypeA female to male connector • c. HDMI Cable • g. USB2.0(female) to USB TypeC connector •... -
Page 7: Product Diagram
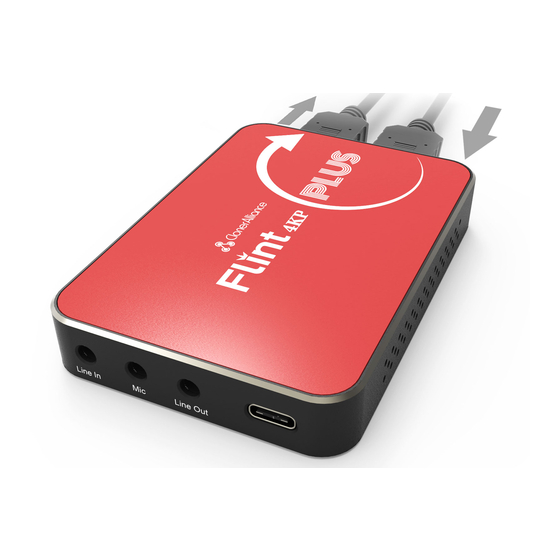
1. Line Out: Stereo audio output port. 2. Mic: 3.5MM Microphone input port. 3. Line In: Stereo audio input port. 4. USB TypeC: Connect a USB3.0(male) to USB TypeC cable between ClonerAlliance Flint 4KP Plus and PC. 1.2. Product Diagram... - Page 8 ClonerAlliance Flint 4KP Plus User Manual 5. IN: Connect an HDMI cable between the source video player and ClonerAlliance Flint 4KP Plus. 6. OUT: Connect an HDMI cable between ClonerAlliance Flint 4KP Plus and TV. 1.2. Product Diagram...
-
Page 9: Software Installation
1. Install HDMLCloner Pro Helper HDMLCloner Pro Helper is a smart program to record video discs, game videos, homemade videos or anything from any video source under Windows OS working together with ClonerAlliance Flint 4KP Plus. • Download HDMLCloner Pro Helper software from https://static.cloneralliance.com/download/hdmlclonerpro.exe... - Page 10 ClonerAlliance Flint 4KP Plus User Manual Note: Prior to installing HDMLCloner Pro Helper, please make sure you are using Windows 7 or later versions and your PC is equipped with USB 2.0 or 3.0 port. 2. Register HDMLCloner Pro Helper Please register HDMLCloner Pro Helper first before using, otherwise it can only be used for 7 days.
- Page 11 ClonerAlliance Flint 4KP Plus User Manual real name and code. Then click ”OK” to finish the registration. • Obtain the registration code of HDMLCloner Pro Helper. Scan the QR code below to get the code directly. Or visit https://www.cloneralliance.com/register, fill in your product S/N.
-
Page 12: Install Obs Studio (Windows, Mac, And Linux Users)
ClonerAlliance Flint 4KP Plus User Manual FSXXXXXXXX Click.Here For more details about registering HDMLCloner Pro Helper, visit here to read step by step instructions. 2.2 Install OBS Studio (Windows, Mac, and Linux Users) Open Broadcaster Software is a Free and open source software for video recording and live streaming. Download and start streaming quickly and easily on Windows, Mac or Linux. - Page 13 ClonerAlliance Flint 4KP Plus User Manual 2.2. Install OBS Studio (Windows, Mac, and Linux Users)
-
Page 14: Record/Capture Videos To Pc
RECORD/CAPTURE VIDEOS TO PC. 3.1 Connect 1. Connect the video player to the “IN”port on ClonerAlliance Flint 4KP Plus via an HDMI cable. 2. Connect the TV to the “OUTPUT”port on ClonerAlliance Flint 4KP Plus via an HDMI cable. 3. Connect the USB3.0(male) to USB TypeC cable between ClonerAlliance Flint 4KP Plus and PC. - Page 15 ClonerAlliance Flint 4KP Plus User Manual • For Windows After all devices are connected properly, when you power on all devices, go to “Device manager”, it will show “CA FLINT”under “Cameras”and “Sound, video and game controllers”: 3.1. Connect...
- Page 16 ClonerAlliance Flint 4KP Plus User Manual • For Linux Connect ClonerAlliance Flint 4KP Plus to PC via USB TypeC cable, go to the “Sound/Input”, it will show it as “CA FLINT 4KP USB Device”in the list. 3.1. Connect...
- Page 17 ClonerAlliance Flint 4KP Plus User Manual • For Mac OS Connect ClonerAlliance Flint 4KP Plus to Mac, go to“Settings/Sound/Input” it also shows“CA FLINT 4KP Audio Device” among the list. 3.1. Connect...
- Page 18 ClonerAlliance Flint 4KP Plus User Manual 3.1. Connect...
-
Page 19: Record/Capture For Windows Users
ClonerAlliance Flint 4KP Plus User Manual 3.2 Record/Capture for Windows users Please download HDMLCloner Pro Helper software and install it on your PC first. See details about Install and register HDMLCloner Pro Helper (Windows Users) 1. After all devices are connected properly, insert the video disc into the drive of the video player and run HDMLCloner Pro Helper. - Page 20 ClonerAlliance Flint 4KP Plus User Manual 2. Click to start recording. 3.2. Record/Capture for Windows users...
- Page 21 ClonerAlliance Flint 4KP Plus User Manual 3. Click to stop recording. Tip: During recording, you can also click to pause at any 3.2. Record/Capture for Windows users...
- Page 22 ClonerAlliance Flint 4KP Plus User Manual time. When you want to resume, please click to continue recording. Besides, Click take screenshots, click capture animation clicking Software interfaces may vary depending on the version. 3.2. Record/Capture for Windows users...
- Page 23 ClonerAlliance Flint 4KP Plus User Manual 4. After recording, click to view the recorded video. Then you can click to play back the video directly. 3.2. Record/Capture for Windows users...
- Page 24 ClonerAlliance Flint 4KP Plus User Manual HDMLCloner Pro Helper also supports recording videos at the scheduled time. Click to enter the ”Setup” window. Then click the ”Schedule Recording” button. Please enable schedule recording first, and set the Start time and duration for schedule recording. Then click “OK”. Then videos will be recorded automatically at the scheduled time.
- Page 25 ClonerAlliance Flint 4KP Plus User Manual 3.2. Record/Capture for Windows users...
-
Page 26: Record/Capture For Mac Os Users
ClonerAlliance Flint 4KP Plus User Manual 3.3 Record/Capture for Mac OS users 1. After all devices are connected properly, insert the video disc into the drive of the video player and launch Quick Time Player. 2. Set up Camera/Microphone/Quality as following:... - Page 27 ClonerAlliance Flint 4KP Plus User Manual 3. You can capture your movie now. 3.3. Record/Capture for Mac OS users...
-
Page 28: Record/Capture For Linux Users
ClonerAlliance Flint 4KP Plus User Manual 3.4 Record/Capture for Linux users 1. After all devices are connected properly, insert the video disc into the drive of the video player and launch OBS Studio software. 2. In source column, click “+”to add video capture device:... - Page 29 ClonerAlliance Flint 4KP Plus User Manual 3. Please set up as following: 3.4. Record/Capture for Linux users...
- Page 30 ClonerAlliance Flint 4KP Plus User Manual 4. In source column, click “+”to add audio capture device: 3.4. Record/Capture for Linux users...
- Page 31 ClonerAlliance Flint 4KP Plus User Manual 5. If you need to monitor the audio during preview/recording, please also modify the settings in advanced audio properties: 3.4. Record/Capture for Linux users...
- Page 32 ClonerAlliance Flint 4KP Plus User Manual 6. Now you can start recording and streaming. 3.4. Record/Capture for Linux users...
- Page 33 ClonerAlliance Flint 4KP Plus User Manual 3.4. Record/Capture for Linux users...
-
Page 34: Record/Capture Game Console With Pc
RECORD/CAPTURE GAME CONSOLE WITH PC. 4.1 Connect 1. Connect the game console to the “IN”port on ClonerAlliance Flint 4KP Plus via an HDMI cable. 2. Connect the TV to the “OUTPUT”port on ClonerAlliance Flint 4KP Plus via an HDMI cable. - Page 35 ClonerAlliance Flint 4KP Plus User Manual L i n e I n • For Windows After all devices are connected properly, when you power on all devices, go to“Device manager”, it will show“CA Flint” under “Cameras”and “Sound, video and game controllers”:...
- Page 36 ClonerAlliance Flint 4KP Plus User Manual • For Linux Connect ClonerAlliance Flint 4KP Plus to PC via USB TypeC cable, go to the “Sound/Input”, it will show it as “CA FLINT 4KP USB Device”in the list. 4.1. Connect...
- Page 37 ClonerAlliance Flint 4KP Plus User Manual • For Mac OS Connect ClonerAlliance Flint 4KP Plus to Mac, go to“Settings/Sound/Input” it also shows“CA FLINT 4KP Audio Device” among the list. 4.1. Connect...
- Page 38 ClonerAlliance Flint 4KP Plus User Manual 4.1. Connect...
-
Page 39: Record/Capture Game Console Videos To Pc
ClonerAlliance Flint 4KP Plus User Manual 4.2 Record/capture game console videos to PC You can see details about record/capture game console videos at Record/capture videos to PC. 4.2. Record/capture game console videos to PC... -
Page 40: Play Game Console On Pc Without Tv
PLAY GAME CONSOLE ON PC WITHOUT TV With ClonerAlliance Flint 4KP Plus, you can use your PC’s screen to play game console. No TV required. 5.1 Connect L i n e I n L i n e I n... -
Page 41: Play Game Console For Windows Users
ClonerAlliance customers get the best gaming experience in HDMLCloner Pro Helper, our developers add a new viewing mode as ” Playing game mode” . Under the ” Playing game mode” , our software sets the“FPS” of ClonerAlliance Flint 4KP Plus to the highest and selects the fastest “Picture Render Engine”automatically. Do you want to experience it now? Let’s get started. - Page 42 ClonerAlliance Flint 4KP Plus User Manual Please connect game console to the HDMI port of ClonerAlliance Flint 4KP Plus with HDMI cable then power up the game console. Step 4: Launch HDMLCloner Pro Helper software, it will recognize ClonerAlliance Flint 4KP Plus device automatically and show the game console’s screen after connected.
- Page 43 ”Playing game mode”. In this mode, it will present ultra high flow and ultra low latency. Note: • ClonerAlliance Flint 4KP Plus device supports up to 4K input resolution, and the output will be 1080p@60fps auto...
-
Page 44: Play Game Console For Mac Os Users
ClonerAlliance Flint 4KP Plus User Manual 5.3 Play game console for Mac OS users 1. After all devices are connected properly, insert the video disc into the drive of the video player and launch Quick Time Player. 2. Please confirm the setting of Camera/Microphone/Quality as below. - Page 45 ClonerAlliance Flint 4KP Plus User Manual 3. You can capture your game now. 5.3. Play game console for Mac OS users...
-
Page 46: Play Game Console For Linux Users
ClonerAlliance Flint 4KP Plus User Manual 5.4 Play game console for Linux users 1. After all devices are connected properly, insert the video disc into the drive of the video player and launch OBS Studio software. 2. In source column, click “+”to add video capture device:... - Page 47 ClonerAlliance Flint 4KP Plus User Manual 3. It’s recommended that to use 60pfs frame rate while game recording/streaming, please set up as following: 5.4. Play game console for Linux users...
- Page 48 ClonerAlliance Flint 4KP Plus User Manual 4. In source column, click “+”to add audio capture device: 5.4. Play game console for Linux users...
- Page 49 ClonerAlliance Flint 4KP Plus User Manual 5. If you need to monitor the audio during preview/recording, please also modify the settings in advanced audio properties: 5.4. Play game console for Linux users...
- Page 50 ClonerAlliance Flint 4KP Plus User Manual 6. Now you can start recording and streaming. 5.4. Play game console for Linux users...
- Page 51 ClonerAlliance Flint 4KP Plus User Manual 5.4. Play game console for Linux users...
-
Page 52: Record/Capture Videos To Mobile
1. Connect the video player to the “IN”port on ClonerAlliance Flint 4KP Plus via an HDMI cable. 2. Connect ClonerAlliance Flint 4KP Plus to Android phone with the USB2.0(female) to USB MicroB OTG cable or USB typeA to typeC connector. - Page 53 ClonerAlliance Flint 4KP Plus User Manual 6.1. Connect...
- Page 54 ClonerAlliance Flint 4KP Plus User Manual • For USB MicroB socket phone: Please use USB TypeC (female) to USB (male) connector and MicroB cable to connect to your Android phone. 6.1. Connect...
-
Page 55: Record/Capture With Cloneralliance App
ClonerAlliance Flint 4KP Plus User Manual 6.2 Record/Capture with ClonerAlliance App Step 1: Please connect source device properly. Step 2: Please install Cloner Alliance APP on your phone and launch it after finishing installation. It will display source video on your phone. - Page 56 ClonerAlliance Flint 4KP Plus User Manual Step 3: Set up resolution, bitrate and duration (short video capture) by tapping Settings and go in Video capture menu as fol 6.2. Record/Capture with ClonerAlliance App...
- Page 57 ClonerAlliance Flint 4KP Plus User Manual lowing picture shows: Video Capture • Resolution: 1920*1080; 1280*720; 720*480 • Bitrate: 100KBps10000KBps • Duration: 3min to infinity 6.2. Record/Capture with ClonerAlliance App...
- Page 58 ClonerAlliance Flint 4KP Plus User Manual Step 4: then to record video as configured in ”Preview and recorder” and tap to stop recording (short video will stop automatically as duration configured). Step 5: to check all files have been saved.
-
Page 59: Preview Videos For Live Streaming
PREVIEW VIDEOS FOR LIVE STREAMING. You can use ClonerAlliance Flint 4KP Plus in OBS Studio to preview/record/livestream videos, which is a popular open source software for video recording and live streaming. 7.1 Connect l i n e o u t... -
Page 60: Install Software
4. LED Indicator: Stable Blue indicates ClonerAlliance Flint 4KP Plus is in working mode. 7.2 Install software If you want to use OBS to preview/record/livestream videos via ClonerAlliance Flint 4KP Plus, you need to install both HDMLCloner Pro Helper and OBS Studio first. - Page 61 ClonerAlliance Flint 4KP Plus User Manual Launch OBS Studio software on PC, Click “+”icon under “Sources”window, and select “Video Capture Device”: Step 2: Select“CA FLINT”in the drop box next to“Device”and at Set Audio Output Mode, please select“Output desktop audio (DirectSound), Audio Device to “CA FLINT”:...
- Page 62 ClonerAlliance Flint 4KP Plus User Manual Step 3: Please make sure the “Sample rate”in “Audio”settings is set to “48KHz”. 7.3. Setting for preview video...
- Page 63 ClonerAlliance Flint 4KP Plus User Manual Step 4: Then you can start recording or streaming video: 7.3. Setting for preview video...
- Page 64 ClonerAlliance Flint 4KP Plus User Manual 7.3. Setting for preview video...
-
Page 65: Frequently Asked Questions
Can I use multiple ClonerAlliance Flint 4KP Plus devices on one PC at the same time? Sure, both bundled software HDMLCloner Pro Helper and OBS studio can support multiple ClonerAlliance Flint 4KP Plus devices working on one PC at the same time, you just need to add and select devices individually as following:... - Page 66 ClonerAlliance Flint 4KP Plus User Manual You can easily distinguish each device through video preview window.
- Page 67 No, ClonerAlliance Flint 4KP Plus can be powered by USB port with PC. Can I Watch The Videos On My TV When I Use ClonerAlliance Flint 4KP Plus To Record The Videos? Yes. ClonerAlliance Flint 4KP Plus can passthrough HDMI video signal out to TV while recording video. You can enjoy...
- Page 68 Why Does It Only Have Sound But No Video After Switching Back To Preview Screen With ClonerAlliance Flint 4KP Plus? Please use a USB Hub to provide power supply for ClonerAlliance Flint 4KP Plus independently, then it will work well. Why Is There No Audio When Running Open Broadcaster Software(OBS) With ClonerAlliance Flint 4KP Plus? Please adjust the setting of OBS accordingly, it could be resolved easily.
- Page 69 How to deal with PC doesn’t recognize ClonerAlliance Flint 4KP Plus device? Please change another USB port and replug in, it’ll help. Why are audio and video out of sync when I use OBS studio with ClonerAlliance Flint 4KP Plus? Please set up as following and it will perform normally.
- Page 70 ClonerAlliance Flint 4KP Plus User Manual And please make sure sample rate in OBS Studio is also set to 48KHz.
- Page 71 ClonerAlliance Flint 4KP Plus User Manual If your video and audio are still not synchronized, please adjust video delay value in “SourcefilterVideo delay(Async)” around 470ms according to your circumstance.
- Page 72 ClonerAlliance Flint 4KP Plus User Manual...
- Page 73 ClonerAlliance Flint 4KP Plus User Manual...
- Page 74 ClonerAlliance Flint 4KP Plus User Manual...
-
Page 75: Product Specifications
PRODUCT SPECIFICATIONS 1920x1080 640x480, 720x480, 720x576, 800x600, 1024x768, 1280x720, Input 1280x1024, 600x1200, 1920x1080, 3840x2160(60HZ, 30HZ, 24HZ), Output 4096x2160(60HZ) Recording Up to 60 fps @ 1920x1080 Output for MJPEG,YUY2 Video stan NTSC, PAL dard (input) Input signal HDMI, Line in, Mic Output sig... -
Page 76: After Sales Warranty
AFTER SALES WARRANTY ClonerAlliance Inc. provides 60Day No Hassle Return(No Additional Fee) and 2Year Replacement Warranty Service for all hardware. Please rest assured to use ClonerAl liance products. -
Page 77: Contact Us
CONTACT US If you encounter any problem when using our products, please contact us by support@cloneralliance.com or call 18449CLONER (toll free) and we will serve you with utmost satisfaction. We’ll offer a satisfying discount on batch purchase and affiliate program. If you are interested, please contact us by market@cloneralliance.com. -
Page 78: Disclaimer
DISCLAIMER HDMI is a registered trademark of HDMI Licensing, LLC. USB is a registered trade mark of USB Implementers Forum. HDMI and USB are registered trademarks of their respective companies. ClonerAlliance Inc. is not affiliated with those companies. - Page 79 Toll free: 18449CLONER Support Email: support@cloneralliance.com Market Email: market@cloneralliance.com www.cloneralliance.com Copyright ClonerAlliance Inc. All rights reserved.
Need help?
Do you have a question about the Flint 4KP Plus and is the answer not in the manual?
Questions and answers