Table of Contents
Advertisement
Available languages
Available languages
Quick Links
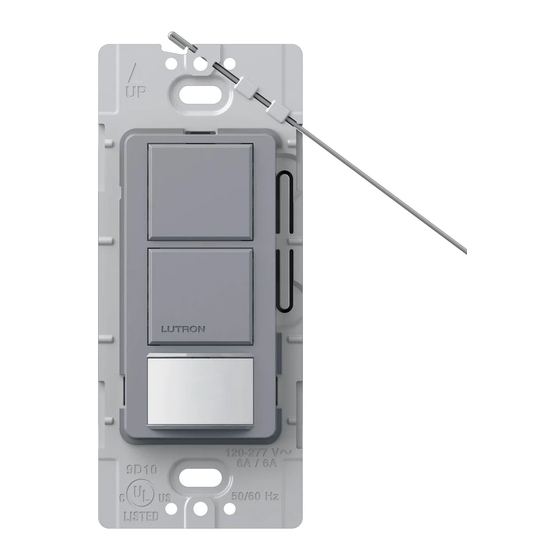
Dual-Circuit Occupancy
Sensing Switch
MS-OPS6-DDV
MS-PPS6-DDV
Occupancy
Partial-ON only
Single-pole only
Two circuits, each rated at:
Lighting
(incandescent, halogen, CFL, LED, ELV, MLV,
electronic fluorescent, magnetic fluorescent)
120-277 V~ 50 / 60 Hz 6 A
Fan
120 V~ 50 / 60 Hz 4.4 A 1/6 HP
Combined lighting and fan load
120 V~ 50 / 60 Hz 4.4 A
P/N 032444 Rev. A 11/2013
English
Circuit 1
Tap Button
Top
programming
button
Bottom
programming
button
Circuit 2
Tap Button
Major motion coverage:
30 ft × 30 ft (9 m × 9 m) [900 ft
2
(81 m
Minor motion coverage:
2
20 ft × 20 ft (6 m × 6 m) [400 ft
(36 m
Lutron Electronics Co., Inc.
7200 Suter Road
Coopersburg, PA 18036-1299 U.S.A.
www.lutron.com
®
Important Notes
Please read before installing.
®
1. Device will not function if it is not
grounded. Both bare and green ground
wires are required to connect to ground.
If no ground is available, consult an
electrician.
2. Device will not function if Black wires
(Circuit 1/Line 1) are not wired.
3. This product is rated to control 6 A per
circuit. Circuits may NOT be wired in
parallel to control loads greater than 6 A.
4. CAUTION: Risk of Electric Shock —
More than one disconnect switch may be
required to de-energize the equipment
before installing the unit, rewiring, or
replacing bulbs.
5. When power is applied, the dual-
circuit sensing switch can be manually
turned on or off after 60 seconds and
will automatically control the load after
2 minutes.
6. The dual-circuit sensing switch requires
an unobstructed view of the room and
line-of-sight to detect motion.
7. Hot objects or moving air currents can
affect the performance of the dual-circuit
sensing switch and may cause the sensor
to turn on unexpectedly or maintain its
current state longer than desired.
8. CAUTION: To reduce the risk of
overheating and possible damage to
other equipment, DO NOT use to control
receptacles.
9. Install in accordance with all national and
local electrical codes.
10. For indoor use only. Operate between 32 °F
and 104 °F (0 °C and 40 °C).
11. DO NOT exceed 20 devices at 120 V~ or
7 devices at 277 V~ on a single branch
circuit.
12. Clean with a soft damp cloth only. DO NOT
use any chemical cleaners.
Limited Warranty (Valid only in U.S.A., Canada, Puerto Rico, and
the Caribbean). Lutron will, at its option, repair or replace any unit
that is defective in materials or manufacture within five years after
purchase. For warranty service, return unit to place of purchase or
mail to Lutron at 7200 Suter Rd., Coopersburg, PA 18036-1299,
postage pre-paid. This warranty is in lieu of all other express
warranties, and the implied warranty of merchantability is limited
to FIVE years from purchase. This warranty does not cover the cost
of installation, removal or reinstallation, or damage resulting from
2
)]
misuse, abuse, or damage from improper wiring or installation.
This warranty does not cover incidental or consequential damages.
Lutron's liability on any claim for damages arising out of or in
2
)]
connection with the manufacture, sale, installation, delivery,
or use of the unit shall never exceed the purchase price of the
unit. This warranty gives you specific legal rights, and you may
have other rights which vary from state to state. Some states do
not allow the exclusion or limitation of incidental or consequential
damages, or limitation on how long an implied warranty may last,
so the above limitations may not apply to you.
Lutron and Maestro are registered trademarks of Lutron
Electronics Co., Inc.
© 2013 Lutron Electronics Co., Inc.
Wiring
1
Turn power OFF
WARNING! Shock Hazard. May result in serious injury or death. Turn power OFF at circuit
breaker(s) before installing the unit, rewiring, or replacing bulbs.
A.
B.
O
O
OR
O
Single-Line
Two-Line*
* Wiring must comply with NEC code for wiring Multiple Branch Circuits: Where two or more branch circuits
supply devices or equipment on the same yoke, a means to simultaneously disconnect the ungrounded
conductors supplying those devices shall be provided at the point at which the branch circuits originate.
2
Connect dual-circuit sensing switch
A. Single-Line Wiring
Black
120-277 V~
Black-Orange
Neutral
B. Two-Line Wiring
Line 1
Black
120-277 V~
Line 2
Black-Orange
120-277 V~
Neutral 2
Neutral 1
1
Device will not function if Black wires (Circuit 1/ Line 1) are not wired.
2
Device will not function if it is not grounded.
NOTE: Leave wallplate off if custom settings are desired. See Custom Settings instructions on reverse side.
3
Turn Power ON
A.
B.
O
OR
O
O
4
Wait for 60 seconds before manual switching
• The sensing switch will not manually control the load for 60 seconds.
5
Wait for an additional 60 seconds for automatic switching
• Once power has been restored, the sensing switch will not
automatically control the load for the first 2 minutes.
O
O
O
1
Black
Black-Orange
Bare
Green
Ground
2
1
Black
Black-Orange
Bare
Green
Ground
2
O
O
O
Load 1
Load 2
Load 1
Load 2
60 s
60 s
Advertisement
Table of Contents

Related Manuals for Lutron Electronics Maestro MS-OPS6-DDV


Summary of Contents for Lutron Electronics Maestro MS-OPS6-DDV
- Page 1 • Once power has been restored, the sensing switch will not 60 s Lutron and Maestro are registered trademarks of Lutron automatically control the load for the first 2 minutes. Electronics Co., Inc. © 2013 Lutron Electronics Co., Inc. ®...
-
Page 2: Adjustable Settings
Adjustable Settings Questions? Before proceeding, select your preferred settings from the table below; default settings are shown in bold. For additional instructions, information, and product Read all instructions before continuing. application information, please review Application Note #489 (P/N 048489) at www.lutron.com/DCSensorInstall Press and hold the The setting is saved... -
Page 3: Notas Importantes
• Cuando se restablezca la energía, el sensor de detección no controlará 60 s Lutron y Maestro son marcas comerciales registradas de Lutron automáticamente la carga durante los primeros dos minutos. Electronics Co., Inc. © 2013 Lutron Electronics Co., Inc. ®... -
Page 4: Solución De Problemas
Configuraciones ajustables ¿Alguna pregunta? Antes de continuar, seleccione su configuración preferida de la siguiente tabla; los parámetros predeterminados se Para obtener instrucciones adicionales, información indican en negrita. Lea todas las instrucciones antes de continuar. general e información de aplicaciones de producto, revise la Nota de aplicación Nº... -
Page 5: Remarques Importantes
à vous. • Dès que le courant est rétabli, le commutateur de détection www.lutron.com 60 s Lutron et Maestro sont des marques déposées de Lutron Electronics ne peut contrôler automatiquement la charge pour les Co., Inc. 2 premières minutes. -
Page 6: Dépannage
Paramètres de réglages Questions? Avant de commencer, choisissez vos réglages préférés dans le tableau ci-dessous ; les réglages par défaut sont indiqués Pour des instructions et des informations sur en gras. Lisez toutes les instructions avant de continuer. l'application du produit, veuillez consulter la note d’utilisation #489 (nº... -
Page 7: Observações Importantes
• Quando a alimentação for restaurada, a chave sensora não controlará 60 s Lutron e Maestro são marcas comerciais registradas da Lutron automaticamente a carga nos primeiros dois minutos. Electronics Co., Inc. © 2013 Lutron Electronics Co., Inc. ®... -
Page 8: Resolução De Problemas
Configurações ajustáveis Dúvidas? Antes de continuar, selecione suas configurações preferenciais a partir da tabela abaixo; a configuração padrão é exibida em Para obter outras instruções, informações e negrito. Leia todas as instruções antes de continuar. orientação sobre uso do produto, leia a Nota de Uso 489 (P/N 048489) no site Aperte e mantenha A configuração...
Need help?
Do you have a question about the Maestro MS-OPS6-DDV and is the answer not in the manual?
Questions and answers