
Related Manuals for Gude DHH 1050/11 T ECO


Summary of Contents for Gude DHH 1050/11 T ECO
- Page 1 DHH 1050/11 T ECO English # 02012 © Copyright Güde GmbH & Co. KG - Birkichstrasse 6 - 74549 Wolpertshausen - Germany...
- Page 2 CHOKE...
-
Page 4: General Safety Instructions
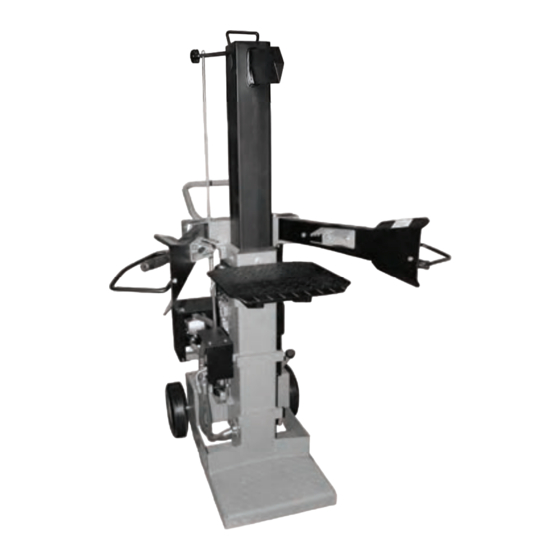
Thank you for purchasing the Güde wood splitter and enjoying confidence in our products. !!! Please read carefully the Operating Instructions before putting the appliance into operation!!! A.V. 2 Any reprints, even partial, are subject to approval. Technical changes reserved. Pictures just an illustration Appliance Robust wood splitter, special-steel splitting knife, all steel parts with high-quality powder painting including high-quality... - Page 5 13. Wear working gloves when working. 14. Wear safety boots when working. 15. Appliance alteration, adjustment, cleaning and maintenance and failure recovery can only be executed when the engine is switched off. 16. Keep the place where the appliance is operated clean, with no wood, waste wood and bark. Behaviour in case of emergency Provide first aid appropriate to the injury and call qualified medical help as soon as possible.
-
Page 6: Symbol Explanation
• Use an appropriate supporting tool for splitting heavy or big pieces. • Tool change, adjustment, cleaning, maintenance and fault removal must only be performed when the engine is switched off. Pull the plug out of socket! • All protective and safe equipment must be refitted immediately after repair and maintenance are finished. - Page 7 Environment protection: Any damaged and Dispose waste Packing cardboard disposed electric or professionally so as not material may be electronic appliances to harm the delivered to collecting must be delivered to environment centres for recycling. appropriate collecting centres. Package: Protect against This side up Fragile moisture...
-
Page 8: Other Risks
Always wear specified protective clothes and work cautiously. Always wear protective glasses when working with the appliance. Wood chips created during the splitting proceed can fall down Always wear specified and injure especially legs of the protective clothes and work operator. -
Page 9: Transport And Storage
Transport and storage Wood splitters are fitted with big wheels. Grab the handle on the splitting post with both hands and slightly tilt the splitter back when transporting the machine. To make tilting easier, stand on the curved caliper under the engine. To prevent hydraulic oil leak, never transport the splitter laid down. - Page 10 Tip: Lubricate sheet foots up and down first! 3. Now put screws through the bracket and operating arm from above (pic. 12) 4. Secure the screw with a lock nut. (pic. 13) 5. Now you can tighten the operating arm. Now insert the safety pins included in the supply to the back of the bracket with operating arm as illustrated in (pic.
- Page 11 Engine monitoring (pic. 1) The engine oil quality is decisive for correct output of the driving unit and operation life. Use only suitable and high-quality lubricants; unsuitable lubricants cause damage to the appliance and lead to immediate warranty expiry (SAE 10 W 40 specification multi-purpose semi-synthetic lubricant recommended). There might be no engine oil or just a small amount of it (filling for factory test) when dispatching the appliance.
- Page 12 Handling Lift setting The working output can be increased by reducing the splitting knife reverse running for pieces of wood smaller than app. 50 cm and when more wood needs to be split. Proceed as follows: Put a short piece of wood on the splitting table, move the splitting knife approximately 2 cm above the wood and switch the knife off (press the red button on the switch and pull the plug out of socket).
- Page 13 Open the fuel tap Put the engine switch to the “ON“ position (pic. 3) Make sure the engine is cold when being started. Turn on the engine choke (pic. 4; pos. “CHOKE“) Turn the speed control lever (pic. 4; pos. “START“) to full speed. First, pull shortly the starting cable so that it is stretched.
-
Page 14: Safety Instructions For Inspection And Maintenance
Failures - causes - removal Failure Cause Removal Too little hydraulic oil Hydraulic oil to be filled in Splitter without Starting rod and lever system bent; hydraulic follower Rod and lever system to be readjusted, necessary output at the valve not pushed inside to full extent. appropriate nuts to be tightened. - Page 15 Keep the splitter clean at all times. Use regularly sold hydraulic oil (HLP 46 # 42004 or any other product of identical viscosity) for changing the hydraulic oil. The oil level in the splitter must always be between min. and max marks. Make sure the splitter is always in an erected position.
-
Page 16: Eg-Konformitätserklärung
Bei einer nicht mit uns abgestimmten Änderung der Geräte verliert diese Erklärung ihre Gültigkeit. In a case of alternation of the machine, not agreed upon by us, this declaration will loose its validity. Bezeichnung der Geräte: - DHH 1050/11 T ECO Machine desciption: Artikel-Nr.: - 02012 Article-No.: Einschlägige EG-Richtlinien:...
Need help?
Do you have a question about the DHH 1050/11 T ECO and is the answer not in the manual?
Questions and answers