Advertisement
Quick Links
Advertisement

Related Manuals for Euro-Pro 9110


Summary of Contents for Euro-Pro 9110
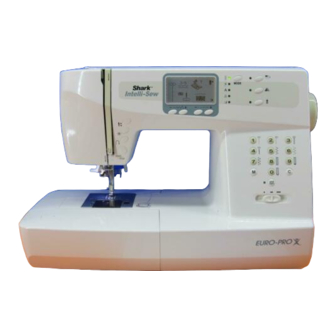
- Page 1 All manuals and user guides at all-guides.com Another quality product from Model 9110...
- Page 2 All manuals and user guides at all-guides.com...
- Page 3 All manuals and user guides at all-guides.com...
- Page 4 All manuals and user guides at all-guides.com...
- Page 5 All manuals and user guides at all-guides.com...
- Page 6 All manuals and user guides at all-guides.com...
- Page 7 All manuals and user guides at all-guides.com...
- Page 8 All manuals and user guides at all-guides.com...
- Page 9 All manuals and user guides at all-guides.com...
- Page 10 All manuals and user guides at all-guides.com 04 05 06 07 08 09 10 11 23 24 25 26 27 28 29 30 31 32 33 34 36 37 38 39 41 42 50 51 52 53 54 55 56 57 58 59 61 62 63 64 66 67 68 69 70 71...
- Page 11 All manuals and user guides at all-guides.com 006186008 006905008 006102008 006813008 006907008 006904008 006900008 006172008 006916008 006016008 006917008 006914008 006099008 R12373210 TA10943209 006008001 006084009 006012008 006014148 006015009 R60033210 006020008 006185008...
- Page 12 All manuals and user guides at all-guides.com Caution: Always make sure that the machine is unplugged from power source and the main switch is on "O". when the machine is not in use and before inserting or removing parts.
- Page 13 All manuals and user guides at all-guides.com Please Note: The setting of the speed limiting adjustment lever will limit the maximum speed of the machine. Attention:...
- Page 14 All manuals and user guides at all-guides.com Attention: Turn power switch to off "O" ) when carrying out any of the above operations!
-
Page 15: Needle, Fabric, Thread Selection Guide
All manuals and user guides at all-guides.com Attention: Turn power switch to off. ( "O") when carrying out any of the above operations! NEEDLE, FABRIC, THREAD SELECTION GUIDE Please Note: - In general, fine threads and needles are used for sewing fine fabrics, and thicker threads are used for sewing heavy fabrics. - Page 16 All manuals and user guides at all-guides.com...
- Page 17 All manuals and user guides at all-guides.com...
- Page 18 All manuals and user guides at all-guides.com Please Note: When the bobbin winder switch is placed on the left, "bobbin winding position", the machine will not sew and the handwheel will not turn. To start sewing, push the bobbin winder switch to the right "sewing position".
- Page 19 All manuals and user guides at all-guides.com Attention: Turn power switch to off ("O") before inserting or removing the bobbin.
- Page 20 All manuals and user guides at all-guides.com Please Note: It is important to carry out the threading correctly as by not doing so several sewing problems could result.
- Page 21 All manuals and user guides at all-guides.com...
- Page 22 All manuals and user guides at all-guides.com Attention: Turn power switch to the off position ("O").
- Page 23 All manuals and user guides at all-guides.com...
- Page 24 All manuals and user guides at all-guides.com...
- Page 25 All manuals and user guides at all-guides.com...
- Page 26 All manuals and user guides at all-guides.com...
- Page 27 All manuals and user guides at all-guides.com...
- Page 28 All manuals and user guides at all-guides.com...
- Page 29 All manuals and user guides at all-guides.com MODE...
- Page 30 All manuals and user guides at all-guides.com...
- Page 31 All manuals and user guides at all-guides.com...
- Page 32 All manuals and user guides at all-guides.com Please Note: The Direct mode patterns and buttonholes cannot be memorized.
- Page 33 All manuals and user guides at all-guides.com...
- Page 34 All manuals and user guides at all-guides.com...
- Page 35 All manuals and user guides at all-guides.com...
- Page 36 All manuals and user guides at all-guides.com...
- Page 37 All manuals and user guides at all-guides.com Attention: The overcasting foot should be used to sew with patterns 05 and 08 only and do not set the stitch width narrower than "5.0". It is possible that needle could hit the presser foot and break when sewing other patterns and width.
- Page 38 All manuals and user guides at all-guides.com Please Note: It takes practice to sew blind hems. Always make a sewing test first.
- Page 39 All manuals and user guides at all-guides.com...
- Page 40 All manuals and user guides at all-guides.com Please Note: Before sewing a buttonhole on your project, practice on a scrap piece of the same type of fabric.
- Page 41 All manuals and user guides at all-guides.com NOTE Make no gap here P U S P U S Please Note: When you select any buttonhole pattern, LCD screen will be demonstrated the warning animation message display , it is to remind you to lower the buttonhole lever.
- Page 42 All manuals and user guides at all-guides.com P U S Please Note: After finishing the buttonhole stitch, LCD screen will be demonstrated the warning animation message display , it is to remind you to lift the buttonhole lever.
- Page 43 All manuals and user guides at all-guides.com NOTE Make no gap here Please Note: It is suggested that you use interfacing on the backside of the fabric.
- Page 44 All manuals and user guides at all-guides.com...
- Page 45 All manuals and user guides at all-guides.com Please Note: If thin thread is used, the stitching may be coarse. If this occurs, sew the eyelet twice one on top of the other.
- Page 46 All manuals and user guides at all-guides.com NOTE Make no gap here NOTE Make no gap here...
- Page 47 All manuals and user guides at all-guides.com Please Note: When lowering the presser foot, do not push in the front of the presser foot, otherwise the darning will not be sewn with the correct size. Please Note: When you select any buttonhole pattern or darning pattern, LCD screen will be demonstrated the warning animation message display, it...
- Page 48 All manuals and user guides at all-guides.com Attention: Zipper foot should be used for sewing width center needle position straight stitch only. It is possible that needle could hit the presser foot and break when sewing other patterns. 2 inch...
- Page 49 All manuals and user guides at all-guides.com...
- Page 50 All manuals and user guides at all-guides.com...
- Page 51 All manuals and user guides at all-guides.com...
- Page 52 All manuals and user guides at all-guides.com Please Note: When sewing very thin fabrics, it is suggested that you use interfacing on the backside of the fabric.
- Page 53 All manuals and user guides at all-guides.com QUILTING...
- Page 54 All manuals and user guides at all-guides.com Please Note: It can also use the all purpose foot and gather fabric by hand by lowering the tension setting to below 2 and pulling the lower thread to gather the material.
- Page 55 All manuals and user guides at all-guides.com...
- Page 56 All manuals and user guides at all-guides.com Please Note: Free motion darning is accomplished without the sewing machine internal feed system. Movement of the fabric is controlled by the operator. It is necessary to coordinate sewing speed and movement of fabric.
- Page 57 All manuals and user guides at all-guides.com...
- Page 58 All manuals and user guides at all-guides.com Please Note: Always try to sew first without the walking foot accessory which should be used only when necessary.
-
Page 59: Patchwork Stitching
All manuals and user guides at all-guides.com PATCHWORK STITCHING PATCHWORK STITCHING... - Page 60 All manuals and user guides at all-guides.com...
- Page 61 All manuals and user guides at all-guides.com Please Note: The patterns 30-39 can be elongation and mirror simultaneously.
- Page 62 All manuals and user guides at all-guides.com Please Note: - Pattern 16-29 cannot be mirror imaged. - Mirror imaged patterns can also be combined with other patterns.
- Page 63 All manuals and user guides at all-guides.com Please Note: When using twin needles, use the "T" presser foot regardless of what kind of sewing will be carried out. Attention: Only use the twin needle (part code: 006020008). Use of any other needle may bend the needle or damage the machine.
- Page 64 All manuals and user guides at all-guides.com Please Note: - Multiple patterns selecting from pattern modes can be combined and sewn together. This machine has 4 modules of program memory and each module can retain 20 units of stitches. Patterns 16-29 cannot be entered into memory. All the units in the memory can be edited to set its function such as Stitch length, Stitch width, Elongation, Mirror, and Auto-lock.
- Page 65 All manuals and user guides at all-guides.com Please Note: When the memory the full with 20 units of patterns, the machine will beep to signal it. Attention: The selected pattern will be cleared from the memory module after closing the machine if you do not press the "...
- Page 66 All manuals and user guides at all-guides.com Please Note: The stitch length, stitch width, Elongation, Mirror, and Auto-lock of the patterns can be adjusted manually.
- Page 67 All manuals and user guides at all-guides.com Please Note: If the cursor stays in a vacant position in the end, the machine will start sewing from the first pattern. If the cursor stays under a specific pattern, the machine will start sewing from that pattern.
- Page 68 All manuals and user guides at all-guides.com...
- Page 69 All manuals and user guides at all-guides.com Bobbin winding The bobbin winder is winding the bobbin. Please Note: If the problem is still not solved, please contact your local dealer. Attention: During the sewing, if the thread get jammed inside the hook stopping the needle from moving and you continue pressing the foot control, the security switch will stop the machine completely.
- Page 70 All manuals and user guides at all-guides.com...
- Page 71 All manuals and user guides at all-guides.com Attention: Turn the power switch off and wait until the lamp has cooled down before touching it. Please Note:...
- Page 72 All manuals and user guides at all-guides.com Attention: Disconnect the power cord from the wall socket before cleaning the screen and sewing machine surface, otherwise injury or electrical shock may result. Attention: Disconnect the machine from the wall outlet before carrying out any maintenance.
- Page 73 All manuals and user guides at all-guides.com...
- Page 74 All manuals and user guides at all-guides.com...
- Page 75 All manuals and user guides at all-guides.com...
- Page 76 All manuals and user guides at all-guides.com...
- Page 77 All manuals and user guides at all-guides.com...
- Page 78 All manuals and user guides at all-guides.com...
- Page 79 All manuals and user guides at all-guides.com 021D3B0101 (C)( ) Aug/05 EURO-PRO 9110(9000B)
Need help?
Do you have a question about the 9110 and is the answer not in the manual?
Questions and answers