Table of Contents
Advertisement
Advertisement
Table of Contents

Related Manuals for Euro-Pro 9025


Summary of Contents for Euro-Pro 9025
- Page 1 Another quality product from 9025 Instruction Manual Instruction Manual Model Model EURO-PRO Operating LLC, 4400 Bois Franc, St. Laurent, Quebec H4S 1A7 Tel. 1 (800) 361-4639 94 Main Mill Street, Door 16, Plattsburgh, New York 12901 T el. 1 (800) 361-4639...
-
Page 2: Important Safety Instructions
IMPORTANT SAFETY INSTRUCTIONS When using an electrical appliance, basic safety always be 5.Keep fingers away from all moving parts. Special care is followed including the following: required around the sewing machine needle. Read all instructions before using this sewing machine. 6.Always use the proper needle plate, The wrong plate can cause the needle to break. -
Page 3: Accessories
"INSTRUCCION DE SEGURIDAD IMPORTANTE" "Cuando usar una ma quina de coser ele ctrica, la precaucion o oxigeno se administra." basica hay que slempre se seguido, incluiendo el sequito." 8. "Para desconectar, carrar todos dominados a la posicio n "O", "Leer todas instruccio n antes de usar esa ma quina de coser." entonces quitar el enchufe desde la salida."... - Page 4 Congratulations: Estimado Cliente: Le felicitamos muy cordialmente por su nueva EURO-PRO As the owner of a new sewing machine, ma quina de coser. you will enjoy precision quality stitching on all types of fabrics, from multiple layers of denim to delicate silks.
-
Page 5: Table Of Contents
Details of the machine.................2/3 Detalles de la ma quina ...............2/3 Accessories ....................4 Accesorios....................4 Fitting the snap-in sewing table..............5 Ajusta la snap-in mesa plana corrediza..........5 Connecting machine to power source ............6 Conecta la ma quina al fuente ele ctrico ..........6 Changing the bulb ..................7 Cambio de la bombilla................7 Two-step presser foot lever..............8 Palanca alza-prensatelas con dos escalones ........8... -
Page 6: Thread Tension
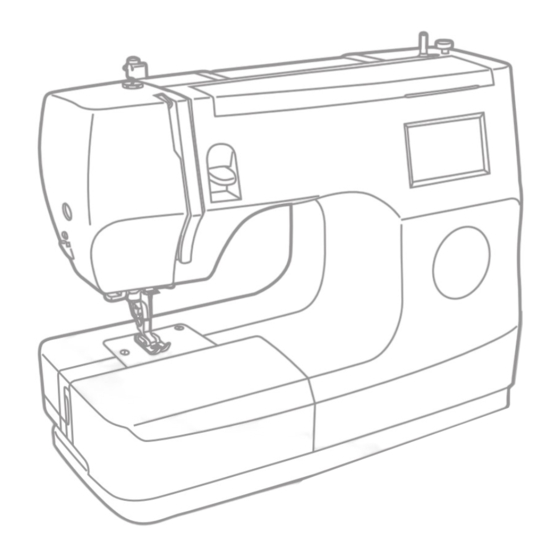
1. Stitch width dial 2. Thread tension dial 3. Stitch length dial 4. Presser foot pressure 5. Thread take-up lever 6. Reverse sewing lever 7. Thread cutting 8. Presser foot 9. Needle plate 10. Sewing table and accessory box 11. Bobbin stopper 12. - Page 7 14. Handle 15. Bobbin winder 16. Spool pin 17. Hand wheel 18. Patten selector dial 19. Power switch 20. Main plug socket 21. Bobbin thread guide 22. Upper thread guide 23. Presser foot lever 14. Asa de transporte 15. Devanadera 16.
-
Page 8: Electronic Display
Standard accessories / Standard accesories Standard accessories Standard accesories a. All purpose foot a. Pie universal b. Zipper foot b. Pie para cremallera c. Buttonhole foot c. Pie para ojales d. Button sewing foot d. Pie para coser botones 006806008 006905008 006909008 006914008... - Page 9 Keep the snap-in sewing table horizontal, and push it in the direction of the arrow. (1) The inside of the snap-in sewing table can be utilized as an accessory box. To open, lift up at the point of the arrow. (2) Guarda la horizontalidad de la snap-in mesa plana corrediza y lo empuje a la direccio n de saeta.
- Page 10 Connect the machine to a power source as illustrated. (1) This appliance is equipped with a polarized plug which must be used with the appropriate polarized outlet. (2) Attention: Unplug power cord when machine is not in use. Foot control Foot control regulates the sewing speed.
- Page 11 Disconnect the machine from the power supply by removing the plug from the main socket! Loosen screw "A" as illustrated.(1) Remove the cover "B". Unscrew the bulb and fit new one "C".(2) Replace the cover and tighten screw. Should there be any problem. Ask your local dealer for advice. Desenchufar la maquina de la red electrical Destornillar el tornillo "A"...
- Page 12 When sewing several layers or thick fabrics, the presser foot can be raised a second stage for easy positioning of the work. (A) Para coser ropas extremamente gruesas se puede ensanchar el pasaje de la ropa debajo del pie subiendo la palanca del alza-prensatelas de un escalo n. (A) The presser foot pressure of the machine has ben pre-set and requires no particular readjustment according to the type of fabric (light-or-heavy weight).
- Page 13 Raise the presser foot clamp "a". (1) Attach the presser foot holder "b" as illustrated. Attaching the presser foot Lower the presser foot holder "a" until the cut-out "c" is directly above the pin "d". (2) Raise the lever "e" Lower the presser foot holder "a"...
- Page 14 Place empty bobbin on spindle. (3) Winder spindle / Devanadera Take the thread from the spool through the guide to the bobbin. (1/2) Wind the thread a few times by hand around the empty bobbin in a clockwise direction. Push the bobbin to the right towards the bobbin winding position.
- Page 15 When inserting or removing the bobbin, the needle must be fully raised. Open the hinged cover. (1) Hold the bobbin case with one hand. Insert the bobbin so that the thread runs in a clockwise direction (arrow). (2) Put the thread under the tension spring. (3) Hold the bobbin case by the hinged latch.
- Page 16 Change the needle regularly, especially if it is showing signs of wear and causing problems. Insert the needle following the illustrated instructions. A Loosen the needle clamp screw and tighten again after inserting the new needle. (1) B The flat side of the shaft should be towards the back. C/D Insert the needle as far up as it will go.
- Page 17 Attention: Turn power switch to off ("O"). Raise the needle bar. Follow completely the numbered sequence in upper threading. Should you skip or fail to properly engage the thread with any of the thread guides, you will not sew properly. (1-5) Continue to draw the thread down and into the needle bar thread guide.
- Page 18 Lower thread tension To test the bobbin thread tension, remove the bobbin case and bobbin and hold it by suspending it by the thread. Jerk it once or twice. If the tension is correct, the thread will unwind by about an inch or two.
- Page 19 Hold the upper thread with the left hand. Turn the handwheel forwards until the needle is raised. (1) Pull on the upper thread to bring the lower thread up through the stitch plate hole. Lay both threads to the back under the presser foot.
- Page 20 At the end of seam, press down the reverse sewing lever. Sew a few reverse stitches. Release the lever and the machine will sew forwards again. (Illustration #1, Fig.A.) Al final de la costura apretar el boto n de retroceso. Coser algunos puntos hacia atra s.
- Page 21 NEEDLE, FABRIC, THREAD SELECTION GUIDE NEEDLE SIZE FABRICS THREAD 9-11(65-75) Lightweight fabrics-thin cottons, voile, serge, silk , muslin, Light-duty thread in cotton, nylon or polyester. Qiana, interlocks, cotton knits, tricots, jerseys, crepes, woven polyester, shirt & blouse fabrics. 12(80) Medium weight fabrics-cotton, satin, kettleclote, sailcloth, double knits, lightweight woollens.
- Page 22 TAMANO DE AGUJA TEJIDO HILO 9-11(65-75) Tejido de peso ligero-Algodo n delgado, Voile, Sarga, Seda Hilo de derecho ligero en algodo n, nilon o poliestero. Muselina, Quiana, Traba, Tejedura de algodo n, Tricot, Jersey, Crepes, Tejido polieste rico, Camisa & Tejido de blusa. 12(80) Tejido de peso medio-Algodo n, Raso, Lona, Tejedura doble, Tejido de lana de peso ligero.
- Page 23 Raise the needle to its highest position Press lever "A" right down The threader automatically swings to the threading position "B" Take the thread round the hook "C" Take the thread in front of the needle round the hook "D" from bottom to top Release lever "A"...
- Page 24 Stitch width dial Stitch length dial S1-S2 To select a stitch, simply turn the Pattern selector dial, located on the Disco para puntada zigzag Disco de longitud de puntada S1-S2 right side of the machine. The Pattern selector dial may be turned in either direction.
- Page 25 Outline of LCD information a. Sewing Pattern b. Normal sewing pattern c. Sewing pattern (S1) d. Sewing Pattern (S2) e. Stitch length f. Stitch width g. Presser foot Example pattern "H"- (Illustration #2) A - Regular setting B - S1 setting C - S2 setting Plan general de informacion en la pantalla de cuatro lineas a.
- Page 26 Buttonholes/ Ojal Practical Stitches/ Motivo de costura pra ctico...
- Page 27 Practical Stitches/ Motivo de costura pra ctico...
-
Page 28: Stitch Selection
Turn the stitch selection dial so that the pointer is set to the straight stitch position. (A) Generally speaking, the thicker the fabric, thread and needle, the longer the stitch should be. Stitch length dial Stitch width dial /Disco de longitud de puntada /Disco para puntada Girar el boto n selector de puntos de manera que el indicador se haya fijado en la posicio n de la puntada recta. - Page 29 Turn the stitch selection dial to "B" Function of zigzag dial The maximum zigzag stitch width for zigzag stitching is "5", however, the width can be reduced on any patterns. The width increases as you move zigzag dial from "0" to "5". For twin needle sewing, never set the width wider than "3".
- Page 30 For hems, curtains, trousers, skirts, etc. Blind hem for stretch fabrics. Position "D" on selection dial. Blind hem/ lingerie for firm fabrics. Position "E" on selection dial. Set the machine as illustrated. Note: It takes practice to sew blind hems. Always make a sewing test first.
- Page 31 Seams, neatening, visible hems. Turn stitch length dial to "S1" or "S2", The stitch width can be adjusted to suit the fabric. Standard overlock Position "F" on selection dial. For fine knits, jerseys, neck edges, ribbing. (B) Double overlock stitch Position "G"...
-
Page 32: Darning
Install the darning plate. (1) Position the work under the foot. Place the button on the marked position, lower the foot, adjust stitch width to "0" and sew a few securing stitches. Adjust the stitch width. Turn the handwheel to check that the needle goes cleanly into the left hole of the button (adjust the stitch width according to the button), and sew on the button. - Page 33 Preparation: Remove the zigzag foot and attach the buttonhole foot. Adjust the stitch length dial between Stitch length dial Stitch width dial 0.5-1. The density of the stitch depends on thickness of the fabric. Note: Always test sew a buttonhole. To prepare the fabric: Measure the diameter of the button and add 0.3 cm (1/8") for the bartacks.
- Page 34 Preparar Disco para puntada zigzag Disco de longitud de puntada 1. Sacar el pie zig-zag y colocar el pie ojalador. 2. Medir el dia metro y el espesor del boto n y agregar 3 mm para marcar los remates del ojal en la tela. 3.
- Page 35 Set the machine as illustrated. (1) Dial selector on "A" The zip foot can be inserted right or left, depending on which side of the foot you are going to sew. (2) To sew past the zip pull, lower the needle into the fabric, raise the presser foot and push the zip pull behind the presser foot.
- Page 36 For hems in fine or sheer fabrics. Set the machine as illustrated. (1) Pattern selector on "A" Neaten the edge of the fabric. At the beginning of the hem, turn under the edge twice by about 3 mm (1/8") and sew 4-5 stitches to secure.
- Page 37 Sewing on lace and elastic, darning, mending, reinforcing edges. Set the machine as illustrated. (1) Pattern selector on "C". Place patch in position. The stitch length can be shortened to produce very close stitches. (A) When mending tears, it is advisable to use a piece of backing fabric to reinforce.
- Page 38 Triple straight stitch: (1/3) Pattern selector on "A" or "B" For hardwearing seams. Turn the stitch length dial to "S1" or "S2" The machine sews two stitches forwards and one stitch backwards. This gives triple reinforcement. Triple zig-zag: (2/4) For hardwearing seams, hems and decorative seams. Turn the stitch length dial to "S1"...
- Page 39 Seams, hems, T-shirts, underwear, etc. Set the machine as illustrated. (1) This stitch can be used for all types of jersey as well as for woven fabrics. (2) Sew at 1 cm (1/4") from the fabric edge and trim the surplus fabric.
- Page 40 Decorative effects, cushions, tablecloths, etc. Set the machine as illustrated. Various stitches are suitable for sewing on cord, e.g. Zig-zag, Triple zig-zag, decorative stitches. (1) Insert the cord between the spring covering the cord groove and the foot. The cord should run in the groove. One, two or three cords can be sewn on.
- Page 41 Set the machine as illustrated (1). Install the darning plate (2). Remove the presser foot clamp. (3) Attach the darning foot to the presser foot holder. The lever "A" should be behind the needle clamp screw "B". Press the darning foot on firmly from behind with your index finger and tighten the screw "C"...
-
Page 42: Gathering
Set the machine as illustrated. Turn the switch width dial and stitch length dial to the same colour code and adjust to suit the fabric. Shell hem "A" Pattern selector on "F" For decorative edges. Suitable for edges on sheer, fine and stretch fabrics. The larger stitch should go just over the edge of the fabric to create the shell effect. - Page 43 First set the Pattern Selector at "A" for straight stitching. By moving the zig-zag width dial you can set the needle at any position you select. For center position, set the zig-zag with dial at 2.5. Set Pattern Selector at "A" Insert the quilting guide in presser foot holder and set the space as you desire.
- Page 44 Set the Pattern Selector at "A" 1.Attach the gathering foot. 2.Sew a single row or multiple rows of straight stitches. Pull the lower thread to gather more of the material. 3.if more gathering in required, loosen the upper thread (to about 2) so that the lower thread lies on the under side of the material.
- Page 45 These stitches are used to join two pieces of fabric while leaving a space between their edges. 1. Fold over the edges of the two pieces of fabric for the hem and baste the edges to a thin piece of paper leaving a small space between them. 2.
-
Page 46: The Walking Foot Accessory
It is easier to guide the fabric and you have a better view of the seam when using the standard, regular foot on your machine. Your Attaching head EURO-PRO sewing machine offers excellent stitch quality on a Needle wide range of fabrics from delicate chiffons to multiple layers of screw &... -
Page 47: Applique
Turn stitch length dial to the desired length. Turn pattern selector dial to small zig zag width. Cut out the applique design and baste it to the fabric. Sew slowly around the edge of the design. Trim excess material outside the stitching. Make sure not to cut any stitches. - Page 48 Set the machine as illustrated above. Remove the presser foot and the presser foot holder. Attach the darning plate. Lower presser foot lever before starting to sew. Adjust the stitch width according to the size of lettering or design. Preparation for Monogramming and Embroidering Draw the desired lettering or design on the right side of the fabric.
- Page 49 Monogramming Sew, moving the hoop slowly along the lettering. Make sure you maintain a constant speed. When the letter is finished. Secure the threads with a few straight stitches. Embroidering Stitch along the outline of the design by moving embroidery hoop.
- Page 50 Attention: Disconnect the machine from the electricity supply by removing the plug from the mains socket. When cleaning the machine, it must always be disconnected from the electricity supply. Remove the stitch plate: Turn the handwheel until the needle is fully raised. Open the hinged front cover and unscrew the needle plate screw withe the screw driver.(1) Cleaning the feed dog:...
- Page 51 Atencio n: Antes de la limpieza desconectar la ma quina quitando el enchufe de la red ele ctrica. Quitar la placa de la aguja: Girar el volante hasta que la aguja este en el punto ma s alto. Abrir la tapa con charnela y sacar el tornillo de la placa de aguja por el destornillador.
- Page 52 Monogramming Darning Stitch Satin Stitch Embroidery Stitch Applique Zig-Zag Stitch (5mm) Double Needle Automatic Buttonhole Zig-Zag Stitch Scallop Stitch Stretch Blind Hem Double Overlock (1mm) Shell Stitch straight Stitch Double Blanket Twin Needle Topstitch Button Sewing Stitch Decorative Stitch Fagoting Stitch (Center Needle Position) Decorative Stitch (Straight Stitch Center...
- Page 53 Double Square Zipper Stitch (Straight Decorative Stitch Mending Stitch Decorative Stitch Decorative Stitch Embroidery Stitch, Left Needle Position) Bridge Stitch Cording Stitch Free Motion Quilting Fine Fabric Buttonhole Elastic Overlock Stitch Lace Insertion Overlock Stitch Leaf Stitch Decorative Stitch Decorative Stitch Decorative Stitch Feather Stitch Arrowhead Stitch...
- Page 54 Problem Cause Correction Upper thread breaks 1.The machine is not threaded correctly 1.Rethread the machine 2.The thread tension is too tight 2.Reduce the thread tension (lower number) 3.The thread is too thick for the needle 3.Select a larger needle 4.The needle is not inserted correctly 4.Remove and reinsert the needle (flat side towards the back) 5.The thread is round wound the spool holder pin 5.Remove the reel and wind thread onto reel...
-
Page 55: Tensio N Del Hilo
Problema Cause Correccio n El hilo superior se rompe 1.La ma quina esta mal enhebrada 1.Enhebrar la ma quina correctamente 2.La tension del hilo es demasiado fuerte 2.Disminuir la tension del hilo superior (nu mero menor) 3.El hilo es demsiado grueso para la aguja 3.Usar una aguja ma s gruesa 4.La aguja no esta colocada correctamente 4.Colocar la aguja correctamente (el lado plano hacia atra s) - Page 56 021V630101(B)( / ) Dec/03 EURO-PRO 9025(8630LCD)
Need help?
Do you have a question about the 9025 and is the answer not in the manual?
Questions and answers