
Related Manuals for Euro-Pro 380


Summary of Contents for Euro-Pro 380
-
Page 1: Instruction Manual
Another quality product from Instruction Manual Instruccion Manual Model / Modelo Boston, MA, 02465 EURO-PRO Operating LLC: 4400 Bois Franc, St. Laurent, Quebec H4S 1A7 Tel.: 1 (800) 361-4639, www.euro-pro.com... -
Page 2: Important Safety Instructions
Return the appliance to EURO-PRO Operating LLC for examination, repair, electrical or mechanical 15. Do not unplug by pulling on cord. To unplug, grasp the plug, adjustment. - Page 3 INSTRUCCION DE SEGURIDAD IMPORTANTE “Cuando usar una máquina eléctrica, la precaucion basica hay que 8. “Para desconectar, carrar todos dominados a la posición “0”, slempre se seguido, incluiendo el sequito.” entonces quitar el enchufe desde la salida.” “Leer todas instrucción antes de usar esa máquina de coser.” 9.
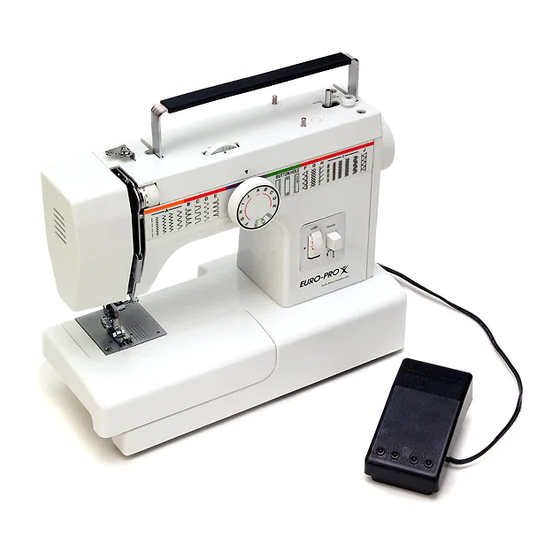
- Page 4 Congratulations: Estimado Cliente: As the owner of a new sewing machine, you will enjoy precision Le felicitamos muy cordialmente por su nueva máquina de quality stitching on all types of fabrics, from multiple layers of coser. denim to delicate silks. Vd.
- Page 5 Principal parts / Detalles de la màquina Thread tension dial Tensión del hilo Thread take-up lever Palanca tensora de hilo Presser Foot Prensstela Needle plate Placa de la aguja Sewing table Mesa plana corrediza y coja de accesorios Bobbin stopper Tapón de bobina Stitch length dial Disco de la longitud de puntada...
- Page 6 Principal parts / Detalles de la màquina 15. Handle 15. Asa de transporte 16. Bobbin winder 16. Devanadera 17. Spool pin 17. Portabobinas 18. Hand wheel 18. Volante 19. Power switch 19. Interruptor principal 20. Main plug socket 20. Enchufe de conexión 21.
- Page 7 Accessories / Accesorios Standard Accessories Bonus Feet 1. Bobbins (3) A. buttonhole foot 2. Felt (2) B. Button sewing foot 3. Machine oil C. Zipper foot 4. Seam ripper D. Blind stitch foot 5. Screw driver 6. Set of needles 7.
-
Page 8: Threading Upper Thread
Threading the upper thread / Enhebrado del hilo superior Caution: Before threading, turn the power switch to “Off”. • Raise the needle bar to its highest position. • Follow exactly the lettered threading sequence illustrated. If you skip a step or fail to properly engage the thread in any of the thread guides, the machine will not sew properly. - Page 9 Twin needle (not included) / Agujas gemelas (no incluso) • Turn stitch length dial to the desired stitch length. •Turn stitch selector to straight stitch. • Make sure that the two threads used to thread the twin needle are of the same weight.
- Page 10 Fitting the snap-in sewing table / Ajusta la snap-in mesa plana corrediza Hold the snap-in sewing table horizontally and push it in Giarda la horizontalidad de la snap-in mesa plana corrediza y lo empuje a la dirección de la saeta. (Mirar the direction of the arrow.
- Page 11 Connecting machine to power source / Conecta la máquina al fuente eléctrico CAUTION: ATENCION: Always make sure that the machine is unplugged from power Desenchufe la máquina del toma corriente source and the main switch is on “Off” when the machine is not in cuando no la use.
- Page 12 Changing the bulb / Cambio de la bombilla CAUTION: ATENCIÓN: Make sure to disconnect the electrical Desenchufar la máquina de la red eléctrical. supply from the wall outlet before changing the bulb. • El interruptor de la luz se encuentra en dentro •...
- Page 13 Two-step presser foot lever / Palanca alza-prensatelas con dos escalones When sewing several layers of thick fabric, the presser foot can be raised to a second higher level to facilitate the placement of the fabric “A”. (See fig. 1) Para coser ropas extremamente gruesas se puede ensanchar el pasaje de la ropa del pie subiendo la palanca del alza-prensatelas de un escalón “A”.
- Page 14 Drop Feed Control / Control De Gota A. Push feed dog lever down to drop feed dog below needle plate for darning, embroidery and button sewing. B. Push feed dog lever up to raise feed dog above needle plate for normal sewing.
- Page 15 Attaching the presser foot holder / Montaje del porta-pie Attention: Turn the power switch to “off” before carrying out any of the operations below. Raise the needle to its highest position and raise the presser foot lever. Attach the presser foot holder "b" to the presser foot bar ”a”. (See fig. 1) Attaching the presser foot: Lower the presser foot bar "a"...
- Page 16 Winding the bobbin / Embobinado del hilo inferior Release clutch by turning clutch knob toward you. Draw thread from spool through bobbin winder tension disc from front to back as shown. Pull end of thread through hole in bobbin as shown. Place bobbin onto bobbin winder shaft with end of thread coming from the top of the bobbin.
- Page 17 Inserting the bobbin / Colocación de la canilla Attention: Turn the power switch to “off” before inserting or removing the bobbin. When inserting or removing the bobbin, the needle must be raised to its highest position. (Fig. 1) • Open the hinged cover (1). •...
- Page 18 Changing the needle (System 130/750H) / Colocación de la aguja (sistems 130/750H) Caution: Turn power switch to “Off” before inserting or removing the needle. Replace the needle at the first sign of thread breakage or skipped stitches. Select the correct type and size of needle for the fabric to be sewn. Turn the balance wheel towards you until the needle is at its highest position.
- Page 19 Thread tension / Tensión del hilo Note: The bobbin thread tension has been adjusted at the factory and readjustment is usually not required. Lower thread tension To test the bobbin thread tension, remove the bobbin case and bobbin from the machine and hold the bobbin case suspended by the thread.
- Page 20 Bringing up the lower thread / Subir el hilo inferior Hold the upper thread with your left hand. Turn the handwheel towards you with your right hand until the needle goes down and comes up again to its highest position (Fig. 1). •...
- Page 21 Reverse sewing / Coser hacia atrás Reverse sewing is used for locking the end of seams and where reinforcement is needed. At the end of a seam, press down the reverse sewing lever (Fig 1) and touch the foot control lightly. Sew a few reverse stitches. (Fig.
- Page 22 Machine needle / fabric / thread Needle, Fabric, Thread Selection Guide NEEDLE SIZE FABRICS THREAD Lightweight fabrics - thin cottons, voile, serge, silk, Light-duty thread in cotton, nylon or 9-11 (65-75) muslin, Qiana, interlocks, cotton knits, tricots, jerseys, polyester. crepes, woven polyester, shirt & blouse fabrics. Medium weight fabrics - cotton, satin, kettlecloth, 12 (80) sailcloth, double knits, lightweight woolens.
- Page 23 Guía de seleción de aguja / tejdo / hilo TAMAÑO DE AGUJA TEJIDO HILO Tejido de peso lígero-Algodón delgado, voile, Sarga, Seda Hilo de derecho lígero en algodón, Muselina, Quiana, Traba, Tejedura de algodón, Tricot, Jersey, 9-11 (65-75) nilon o poliestero. Crepes, Tejido poliestérico, Camisa &...
- Page 24 Fabric - Thread - Needle Table / Tabla de Telas - Hilos - Agujas La presión del Longitud del Puntadas Indicator de pie prensatela Tensión Length of Stiches TELAS HILOS AGUJAS Pressure of Indication of FABRIC THREAD NEEDLES Recto / ST. Zig Zag / ZZ Presser Foot Tension...
- Page 25 Sewing (Pattern Selector) & Operation / Coser (Selector de Modelo) Y Tabla de Función PONTADA EL MODELOS LONGITUD DEL PUNTA DEL PIE PRENSATELA LA PANACA STITCH NO. STITCH PATTERNS STITCH LENGTH PRESSER FOOT DROP FEED PUNTADA RECTO STRAIGHT STITCH zigzag zigzag COSTURA INVISIBLE BLIND HEM...
- Page 26 Sewing on buttons / Coser botones Put the Foot Pressure Regulator to position 2. (see fig. 1) Position the work under the foot. Place the button on the marked position and lower the foot. Set the pattern selector knob on and sew a few securing stitches.
- Page 27 How to sew buttonholes / Coser ojales Preparation: Remove the zigzag foot and attach the buttonhole foot. Adjust the stitch length dial between 0.5-1. The density of the stitch depends on the thickness of the fabric. Note: Always test sew a buttonhole. To prepare the fabric: Measure the diameter of the button and add 0.3 cm (1/8”) for the bartacks.
- Page 28 Zippers and piping / Colocación de cremalleras Set the pattern selector dial to straight stitch as shown in Fig. 1. Set the stitch length control between 1-4 (according to thickness of fabric). The zipper foot can be inserted to the right or left, depending on which side of the zipper you want to sew.
- Page 29 Darning / Remiendos • Turn stitch length dial to the desired length. • Turn stitch selector to straight stitch. • Position the fabric to be darned under the presser foot together with the underlaying fabric to be used. • Lower the presser foot and alternately sew forward or reverse using the lever.
- Page 30 Attaching lace / Como pegar encajes • Turn stitch length dial to the desired length. • Turn stitch selector to straight stitch. • Fold in the edge of the fabric (approximately 1/4” or 6mm.) • Place the lace under the folded edge of the fabric allowing it to underlap the fabric slightly as required by the pattern of the lace.
- Page 31 Appliqué / Aplicación • Turn stitch length dial to the desired length. • Turn pattern selector dial to small zigzag width. • Cut out the appliqué design and baste is to the fabric. • Sew slowly around the edge of the design. •...
- Page 32 Monogramming and embroidering with embroidery hoop* / Monogramas borados usando el aro de bordas* Pattern Selector Selector el Modelos Stitch length dial Disco de longitud de puntada Fig. 1 Presser foot regulator Presion de Pie Preparation for Monogramming & Embroidering* •...
- Page 33 Monogramming and embroidering (continued) / Monogramas y bordados (continue) Monogramming • Sew, moving the hoop* slowly along the lettering. Make sure that you maintain a constant speed. • When the letter is finished, secure the threads with a few straight stitches. *Note: Embroidery hoop is not included with the machine.
- Page 34 3-Step zigzag / Zigzag cosido Sewing on lace and elastic, darning, mending, reinforcing edges. • Set the machine as illustrated. Pattern selector on- • Place patch in position. The stitch length can be shortened to produce very close stitches. (Fig. 1) •...
- Page 35 Overlock stitches / Puntos overlock Seams, neatening, visible hems. Turn stitch length dial to position 4. Stretch overlock position on selction dial. For fine knits, jerseys, neck, edges, ribbing. All overlock stitches are suitable for sewing and neatening edges and visible seams in one operation.
- Page 36 Blind hem - lingerie stitch / Costura invisible - punto de lenceria For hems, curtains, trousers, skirts, etc. Stitch length dial Disco de longitud de puntada Blind hem/lingerie for fine fabrics. Set the machine as illustrated. (1) Note: It takes practice to sew blind hems. Always make a sewing test first. •...
- Page 37 Stitch selection / Elección del punto Stitch length dial Disco de longitud de puntada Triple straight stitch. Pattern selector see Fig. 1. For hard wearing seams. • Turn the stitch length dial to 4. See Fig. 1. • The machine sews two stitches forwards and one stitch backwards. This gives triple reinforcement.
- Page 38 Cutting the thread / Cortar el hilo Cutting the thread: • Turn the handwheel till the needle is in its upper most highest position. • Lift the foot up. • Pull the fabric out and attach the thread around the cutter (see fig.
- Page 39 Maintenance / Manutención de la máquina Caution: Always make sure that the machine is unplugged from the power source and the main switch us on “Off” (0) before inserting or removing any parts and before cleaning. Remove the stitch plate: Turn the handwheel until the needle is fully raised.
- Page 40 Trouble shooting guide PROBLEM PROBABLE CAUSE CORRECTION The machine is not threaded correctly. Rethread the machine. The thread tension is too tight. Reduce the thread tension (lower number). Upper thread The thread is too thick for the needle Select a larger needle. The needle is not inserted correctly.
- Page 41 Eliminación de averias PROBLEMA CAUSA CORRECCIÓN La máquina estámal enhebrada Enhebrar la máquina correctamente. La tension del hilo es demasiado fuerte. Disminuir la tension del hilo superior (número menor). El hilo superior se El hilo es demsiado grueso para la aguja. Usar una aguja más gruesa.
- Page 42 This warranty is extended to the original purchaser of the unit and excludes all other legal and/or conventional warranties. The responsibility of EURO-PRO Operating LLC if any, is limited to the specific obligations expressly assumed by it under the terms of the limited warranty. In no event is EURO-PRO Operating LLC liable for any indirect, incidental or consequential damages of any nature whatsoever.
- Page 43 GARANTÍA LIMITADA DE 25 AÑOS EURO-PRO Operating LLC garantiza el cabezal de la máquina de coser y cualquiera de sus partes que no estén cubiertas por la siguiente garantía de 2 años, o aquellas sujetas al desgaste normal, por un período de 25 años desde la fecha de compra original, contra cualquier falla de materiales o fabricación, sujeto a las siguientes condiciones, exclusiones y excepciones.
Need help?
Do you have a question about the 380 and is the answer not in the manual?
Questions and answers