Table of Contents
Advertisement
Advertisement
Table of Contents

Related Manuals for Euro-Pro 385X


Summary of Contents for Euro-Pro 385X
-
Page 1: Instruction Manual
Instruction Manual Instruccion Manual Manuel D’instruction 385X Model / Modelo / Modéle EURO-PRO Operating LLC 94 Main Mill Street, Door 16, Plattsburgh, NY 12901, Tel.: 1 (800) 361-4639 4400 Bois Franc, St. Laurent, Quebec, H4S 1A7 , Tel.: 1 (800) 361-4639... -
Page 2: Important Safety Instructions
IMPORTANT SAFETY INSTRUCTIONS When using an electrical appliance, basic safety precautions should always be followed, including the following: Read all instructions before using (this sewing machine) DANGER To reduce the risk of electric shock: An appliance should never be left unattended when plugged in. Always unplug this appliance from the electric outlet immediately after using and before cleaning. -
Page 3: Instrucciones Importantes De Seguridad
INSTRUCCIONES IMPORTANTES DE SEGURIDAD Siempre deberá seguir las precauciones de seguridad básicas al usar este aparato eléctrico, incluyendo las siguientes precauciones: Lea todas las instrucciones antes de usar esta máquina de coser PELIGRO Para reducir el riesgo de choques eléctricos: Se requiere supervisión constante de este aparato cuando esté... - Page 4 - 3 -...
-
Page 5: Table Of Contents
CONTENTS Name of parts ................................7-8 Accessories ..................................9 Before sewing (Power supply and sewing lamp) ......................10 Removing extension table .............................. 11 Free-arm sewing................................11 Winding the bobbin ................................. 12 Removing bobbin case and bobbin..........................13 Inserting bobbin into bobbin case ........................... 13 Inserting bobbin case into shuttle race ........................... - Page 6 CONTENIDO Piezas principales.................................7-8 Accesorios..................................9 Antes de coser ................................1 0 Uso de la mesa ajustable para coser tejidos de gran superficie..................11 Coser a brazo libre (Freearm) ............................11 Bobinar ................................... 12 Retirar el casquillo de la bobina y la bobina ........................13 Colocar la bobina en el casquillo de la bobina .......................
- Page 7 CONTENU Pieces principales ................................7-8 Accessoires..................................9 Avant de coudre ................................1 0 Utilisation de la table pour pousser pour pouvoir coudre des grandes surfaces de toile..........11 Coudre à bras libre................................. 11 Remplir la canette ................................12 Sortir la capsule de la canette et la canette ........................13 Mettre la canette dans la capsule...........................
-
Page 8: Name Of Parts
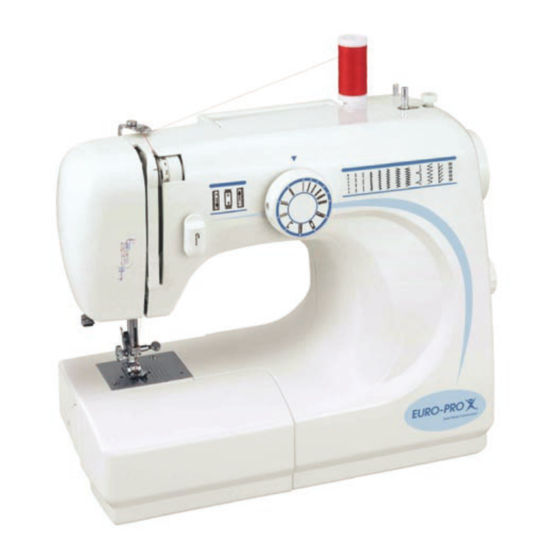
Name Of Parts (Front View) / Piezas Principales (Parte Delantera) Pieces Principales (Face Avant) 1. Spool pin 1. Tiges porte-bobines 2. Bobbin winder stopper 2. Arrêt bobineur 3. Pattern selector dial 3. Sélecteur de point 4. Stitch length dial 4. Longueur de point 5. - Page 9 Rear View / Vista Posteriore / Face Arrière 1. Axe bobineur 1. Bobbin winder spindle 2. Guide-fil supérieur 2. Upper thread guide 3. Levrier presse-étoffe 3. Presser foot lever 4. Vis de serrage 4. Thumb screw 5. Plaque aiguille 5. Needle plate 6.
-
Page 10: Accessories
Accessories Accesorios Accessoires Accessorios standard (1) Accessoires standard (1) Standard accessories (1) a. Pie universal a. Pied universel a. All purpose foot b. Pie para ojales b. Pied boutonnière b. Buttonhole foot c. Pie para puntada invisible c. Pied pour ourlet invisible c. -
Page 11: Before Sewing (Power Supply And Sewing Lamp)
Before Sewing / Antes de Coser / Avant de Coudre Fit plug into the machine. Insert plug into the mains socket. Sewing speed can be varied by the foot control. Note: Use only FDM model KD-1902 foot controller with sewing machine. CAUTION: Always disconnect the machine from the power source when the machine is not being used, when cleaning the machine or when changing the lamp. -
Page 12: Removing Extension Table
Removing Extension Table Uso De La Mesa Ajustable Para Coser Tejidos De Gran Superficie Utilisation De La Table Pour Pousser Pour Pouvoir Coudre Des Grandes Surfaces De Toile Hold the left end of the table and pull it out in direction of the arrow. La mesa ajustable se puede colocar o retirar tirando de ella en el sentido que indica la flecha. -
Page 13: Winding The Bobbin
Winding The Bobbin / Bobinar / Remplir La Canette 1. Release coupling knob. Fig. 1 2. Thread as shown. Fig. 2 3. When bobbin is filled, re-engage coupling knob. Push bobbin winder spindle in direction of the arrow. When bobbin winding is completed, return spindle to its original position. -
Page 14: Removing Bobbin Case And Bobbin
Removing Bobbin Case And Bobbin / Retirar El Casquillo De La Bobina Y La Bobina Sortir La Capsule De La Canette Et La Canette Fig. 2 Fig. 3 Fig. 1 Hinged latch Palanca Levier basculable 1. Raise the needle to its highest position and open shuttle race cover. (Fig. 1) 2. -
Page 15: Inserting Bobbin Case Into Shuttle Race
Inserting Bobbin Case Into Shuttle Race Colocar El Casquillo De La Bobina En La Guia Del Agarrador Introduire La Porte De La Canette Dans Le Bras De La Machine À Coudre 1. Raise the needle to its highest position. Pull the thread to the front, Finger open the latch of the bobbin case and hold it. -
Page 16: Threading Upper Thread & Twin Needle Threading
Threading Upper Thread / Enhebrar El Hilo Superior Introduction Du Fil Supérieur Pass the thread from A to E as shown. Enhebre el hilo según se indica de A-E. Introduction du fil de A à E. Twin needle threading La aguja melliza enhebrando Enfilage pour aiguille jumelée Pass the thread from front to rear through needle and pull approx. -
Page 17: Drawing Up The Bobbin Thread
Drawing Up The Bobbin Thread / Subir El Hilo De Rosca Inferior / Faire Monter Le Fil Inférieur 1. Hold the upper thread with left hand, turn the hand wheel slowly towards you until the needle goes down and comes up. Then stop the hand wheel when the take up lever is at its highest position. -
Page 18: Levelling Machine
Levelling Machine / Estabilidad De La Máquina Positionnement De La Machine Down Hacia abajo En bas Hacia arriba En haut - 17 -... -
Page 19: Adjusting Thread Tension
Adjusting Thread Tension / Ajustar Las Tensiones Del Hilo De Rosca Réglage De La Tension Du Fil Upper thread tension Upper thread tension may be adjusted by turning the thread tension dial. Normal upper thread tension: 4 - 6 A. Normal thread tension B. -
Page 20: Regulating The Presser Foot Pressure
Regulating The Presser Foot Pressure / Regular La Presión Del Pie Prensatela / Réglage De La Tension Du Pied À Coudre 1. Push down the lever for the desired pressure; for light fabrics set lever at 3, set at 2 for medium fabrics and at 1 for heavy fabrics. 2. -
Page 21: Changing Needle
Changing Needle / Reemplazo De La Aguja / Changement De L´aiguille Needle clamp screw Tornillo de abrazadera de la aguja Vis pincant l´aiguille Tighten Apretar Pincer Loosen Aflojar Défaire Flat face side away from you Lado plano hacia la parte posterior Côté... -
Page 22: Fabric-Thread-Needle-Table
Fabric-Thread-Needle-Table / Tabla De Tejidos-Hilo-Aguja Survue Des Tissus Des Fils Et Des Aiguilles Please pay attention to the following list as a guide for sewing different types of fabric. Tenga en cuenta el tipo de tejido que va a usar. Faites attention aux indications pour les différents tissus . -
Page 23: Sewing (Pattern Selector) And Operation Table
Sewing (Pattern Selector) And Operation Table Tabla De Costura, Selector De Diseño Coudre (Choix Du Motif De Couture) & Equipement De Couture Drop feed Stitch length Presser foot Stitch patterns Avance Largo de puntada Costura, diseño Griffes Longuer de piqûre Pied de couture Motif de couture d’entraînement... -
Page 24: To Start Sewing
To Start Sewing / Comienzo De La Costura / Nous Commencons À Coudre Important hints: 1. Raise the take-up lever to its highest position before starting and after stopping sewing. 2. Hold both threads about 10 cms to the rear of the machine for the first two or three stitches. 3. -
Page 25: How To Finish Stitches
How To Finish Stitches / Remate De La Costura / Fin D´une Couture 1. Sew to the edge of seam. 2. Push the reverse button and sew in reverse for about 3-4 cms. 3. Raise needle into its highest position. 4. -
Page 26: Straight Stitch
Straight Stitch / Puntada Recta / Piqûre Droite 1. This type of stitching is used more frequently. 2. The zigzag presser foot can be used for both straight and zigzag sewing. 3. For sewing light fabric, use a smaller stitch size. (Refer to page 21 for dial setting). 1. -
Page 27: Overcasting
Overcasting / Sobrehilar / Enlancer Use these stitches for oversewing rough edges. Con estas puntadas se evita que se deshilen de los bordes. Avec ce mode de couture, vous évitez que des arêtes de coupures se défassent. Straight And Zigzag Stretch Stitches / Costura Recta Elástica / Couture Elastique Use this stitch with knitted, tricot or other stretchy fabrics. -
Page 28: Blind Stitch
Blind Stitch / Costura Oculta / Ourlet Invisible 1. Fold fabric as shown. 2. Finish the seam as shown. 1. Doble el tejido como se muestra. 2. Ejecute la puntada oculta como se muestra. 1. Pliez le tissus comme décrit. 2. - Page 29 Adjust the width to obtain the correct seam. Utilice el pie oculto de costura. Ajuste el ancho y la posición de la aguja mientras cosa para obtener una costura correcta. Utilisez le pied de couture pour ourlet. Vérifiez la largeur de l´ourlet et la position de l´aiguille pendant que vous coudez pour que l´ourlet devienne régulier.
-
Page 30: Button Sewing
Button Sewing / Cosido de Botones / Coudre des Boutons Use the foot for sewing buttons. Utilice el pie para botones. Utilisez le pied de couture des boutons. Match Fósforo Allumette (Use drop feed see page 19) 1. Lower drop feed. 2. -
Page 31: Zipper Sewing
Zipper Sewing / Costura De Cremalleras / Coudre Un Fermoir Éclair Use the zipper foot Utilice pie para cremalleras Utilisez le pied de fermoir éclair Select straight stitch. 1. Zipper foot is designed to sew close to a raised edge, thus preventing sewing on zipper. -
Page 32: Buttonhole Sewing
Stitch length Rueda de longitud La longueur du point... -
Page 33: Hemming
Hemming (Optional) / Ruedos, Orlar (OpcIonal) / Faire Des Ourlets (Option) 1. Raise the foot and the needle to its highest position. Replace the foot with the picot foot. 3 mm 2. Fold over the fabric edge by about 3 mm and place it under the foot. Secure the folded edge with a few stitches. -
Page 34: Twin Needle
Twin Needle (Optional) / Doble Aguja (Opcional) / Aiguille Jumellé (Option) Put in the twin needle with the flat side backwards. Thread the machine as for normal sewing, leading both threads to needle and passing their ends separately through its eye. Sewing width should not exceed the third widest stitch width, as this will break the needles. -
Page 35: Quilter
Quilter (Optional) / Acolchado (Opcional) / Guide Ouatuer (Option) 1. Slide the arm through the hole on top of the pressure foot holder. 2. Move the quilter to the required stitch distance. 1. Coloque la regla de acolchado en la guía sobre la palanca del pie de cosido. -
Page 36: Free Motion Darning
FREE MOTION DARNING (Optional) / ZURCIDA DE BRAZO LIBRE (Opcional) / REPRISE (Option) Move the drop feed control down to lower the feed dogs. (1) Remove the presser foot clamp. (2) Straight Stitch Attach the darning/embroidery foot to the presser foot bar. The lever (A) should be behind the needle clamp screw (B). -
Page 37: Overlock Stitches
Overlock stitches (Optional) / Puntos overlock (Opcional) / Point Overlock (Option) Overlock S titches Seams, neatening, visible hems. Set the stitch length dial to “4”. Stretch overlock: For fine knits, jerseys, neck edges, ribbing. (A) All overlock stitches are suitable for sewing and neatening edges and visi- ble seams in one operation. -
Page 38: Quilting Foot
Quilting foot (Optional) / Pie para acolchar (Opcional) / Pied de ouatinage (Option) Set pattern selector as illustrated (Straight Stitch). Insert the quilting guide in the presser foot holder and set the space as you desire. Move the fabric over and sew successive rows with the guide riding along on the previous row of stitching. -
Page 39: Gathering Foot
Gathering foot (Optional) / Pie para fruncir (Opcional) / Pied de fronceur (Option) Set the pattern selector as illustrated. Attach the gathering foot. Straight Stitch Sew a single row or multiple rows of straight stitches. Couture droite If more gathering is required, loosen the upper thread tension to below 2 so that the lower thread lies on the under side of the material. -
Page 40: Appliqué
Applique (Optional) / Aplicación (Opcional) / Appliqué (Option) Turn the stitch length dial to the desired length. Turn pattern selector dial to zigzag. Satin stitch foot Select a narrow zigzag width. Pied à broder Zigzag Stitch Cut out the applique design and baste it to the fabric. Couture zigzag Sew slowly around the edge of the design. -
Page 41: Walking Foot
Walking foot (Optional) / Pie regular (Opcional) / Pied de transport supérieur (Option) Note: The walkong foot accessory is optional. it is not included with this machine. Always try to sew first without the walking foot accessory which should be used only when necessary. -
Page 42: Maintenance (Cleaning And Oiling)
Maintenance / Limpieza / Nettoyage 1. Raise needle to its highest position. 2. Take out the bobbin case. 3. Turn the latch knob A as illustrated. 4. Take off shuttle race cover. 5. Take out shuttle hook. 6. Clean and oil shuttle race and hook, thereafter replace all parts in reverse order. -
Page 43: Checking Performance Problems - Troubleshooting
Troubleshooting Guide Guía Diagnóstico de Problemas Problem Probable cause What to do Disturbio Probable causa Solución - Feed dog down - Raise feed dog - Stitch length dial on “0“ - Set dial between 1 and 4 Fabric does not move - Light presser foot pressure - Increase pressure La tela no se mueve... -
Page 44: Comment Remédier Soi-Même Aux Petits Problèmes
Guide De Dépannage Dérangement Cause probable Réparation - La machine ne coud pas, seulement la roue - Veuillez tirer sur le bouton d´embrayage Le tissu n´est pas fonctionne transporté - La roue de la largeur des piqûres est en position “0“ - Mettez-la sur 1-4 - La pression du tissu est trop faible - Augmentez la pression du tissu... - Page 45 EURO-PRO Operating LLC will, at its option, repair or replace this sewing machine free of charge if it fails to operate according to specifications due to factory defects in materials or workmanship within one year from date of purchase. For 25 years from date of purchase, EURO-PRO Operating LLC will repair or replace defective sewing machine head parts;...
- Page 46 EURO-PRO Operating LLC pourra, à son choix, réparer ou remplacer cette machine à coudre sans frais de votre part si elle manque de fonctionner en conformité avec les spécifications établies par EURO-PRO Operating LLC à cause de défectuosités de fabrication matérielles ou de main d’œuvre pendant un an suivant la date d’achat d’origine.
- Page 47 Durante 25 años desde la fecha de compra, EURO-PRO Operating LLC reparará o reemplazará...
Need help?
Do you have a question about the 385X and is the answer not in the manual?
Questions and answers