EverFocus EDH5240 Operation Instructions Manual
2 megapixel full hdcctv indoor ir dome camera
Hide thumbs
Also See for EDH5240:
- Operation instructions manual (23 pages) ,
- Specifications (7 pages) ,
- Operation instructions manual (23 pages)
Table of Contents
Advertisement
Quick Links
All manuals and user guides at all-guides.com
Please read this manual first for correct installation and operation. This manual should be retained for future
reference. The information in this manual was current when published. The manufacturer reserves the right
to revise and improve its products. All specifications are therefore subject to change without notice.
PRECAUTIONS
1. Do not install the camera near electric or magnetic fields.
Install the camera away from TV/radio transmitters, magnets, electric motors, transformers and audio
speakers since the electromagnetic fields generated from these devices may distort the video image.
2. Never disassemble the camera beyond the recommendations in this manual nor introduce
materials other than those recommended herein.
Improper disassembly or introduction of corrosive materials may result in equipment failure or other
damage.
3. Try and avoid facing the camera toward the sun.
In some circumstances, direct sunlight may cause permanent damage to the sensor and/or internal
circuits.
4.
Keep the power cord away from water and other liquids and never touch the power cord with
wet hands.
Touching a wet power cord with hands or touching the power cord with wet hands may result in electric
shock.
5. Never install the camera in areas exposed to water, oil or gas.
Water, oil or gas may result in equipment failure, electric shock or, in extreme cases, fire.
6. Cleaning
Do not touch the surface of the sensor directly with the hands. Use a damp soft cloth to remove any
dirt from the camera body. Use lens tissue or a cotton tipped applicator and ethanol to clean the sensor
and the camera lens. Please do not use complex solvents, corrosive or abrasive agents for cleaning.
7. Do not operate the camera beyond the specified temperature, humidity or power source ratings.
Use the camera at temperatures within 0 ~ 40 (32
input power source is 12VDC/24VAC.
2 Megapixel Full HDcctv
Indoor IR Dome Camera
Operation Instructions
Model No.
℉
~ 104
℉
) and humidity between 20~80%. The
EDH5240
Advertisement
Table of Contents

Related Manuals for EverFocus EDH5240


Summary of Contents for EverFocus EDH5240
- Page 1 2 Megapixel Full HDcctv Indoor IR Dome Camera Operation Instructions EDH5240 Model No. Please read this manual first for correct installation and operation. This manual should be retained for future reference. The information in this manual was current when published. The manufacturer reserves the right to revise and improve its products.
-
Page 2: Table Of Contents
All manuals and user guides at all-guides.com TABLE OF CONTENTS 1. PRODUCT OVERVIEW......................2 1.1 Main Features ............................... 2 1.2 Package Contents............................2 1.3 Specifications ..............................3 1.4 Dimensions ..............................4 2. MAJOR PARTS: NAMES AND FUNCTIONS ................4 3. 3-AXIS GIMBAL BRACKET ..................... 7 4. -
Page 3: Product Overview
IR LEDs to produce detailed images under low or no light conditions out to a range of 20m/65 feet or more, the EDH5240 easily accommodates a wide range of indoor applications while delivering stunning image quality. -
Page 4: Specifications
Please Note: If an item appears to have been damaged in shipment, replace it properly in its carton and notify the shipper. If any items are missing, notify your EverFocus Electronics Corp. Sales Representative or Customer Service. The shipping carton is the safest container in which the unit may be transported. -
Page 5: Dimensions
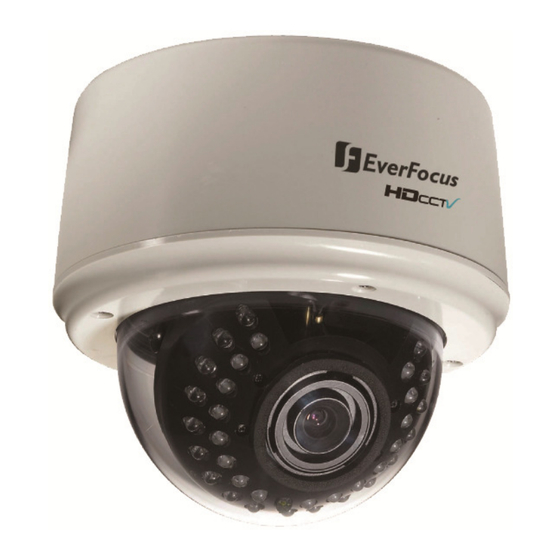
All manuals and user guides at all-guides.com Certifications FCC/CE 1.4 Dimensions 2. MAJOR PARTS: NAMES AND FUNCTIONS Front View 1. Outer Base 3. Lens 2. IR LEDs 4. Light sensor 5. Cover - 4 -... - Page 6 All manuals and user guides at all-guides.com Side View 6. Focus Adjust 7. Zoom Adjust 8. HDCC-TV Video Output 9. Power Input Back View 10. Video Test Output 11. OSD menu joystick 1. Base The camera unit sets in the dome base, when it is shipped from the factory. This base is used for surface mounting, and is discarded for flush mounting.
- Page 7 All manuals and user guides at all-guides.com 2. IR LEDs 3. Lens The included vari-focal, DC iris lens allows manual adjustment of the field of view (zoom & focus). 4. Light Sensor Light sensor is used to detect the lighting level the environment. (The light sensor is “down” when the internal camera module is properly positioned).
-
Page 8: Axis Gimbal Bracket
All manuals and user guides at all-guides.com 3. 3-AXIS GIMBAL BRACKET The 3-axis gimbal enables installers to easily mount the camera on a wall or ceiling and then using the built in tilt and dual axis 180° twist, to adjust the viewing angle to the desired direction. With this unique 3-axis positioning system, installers can capture images from virtually any angle, without compromising performance. -
Page 9: Installation
All manuals and user guides at all-guides.com 4. INSTALLATION An EDH5240 camera may be mounted in two ways: surface mount and flush mount. Select the one that meets your needs. Installation - Surface Mount 1. Paste the drilling template on the ceiling or wall. Please refer to the drilling template below. - Page 10 All manuals and user guides at all-guides.com 5. Pull the cables to be connected to power and video cables into the outer base from the ceiling or wall. Attach power supply pigtail adapter to power wire if needed. 6. Take a long Phillips pan head screw with a washer and tighten it into a plastic anchor. Repeat the same step until all the 4 screws are fixed to the wall.
- Page 11 All manuals and user guides at all-guides.com 8. Insert inner base into outer base and secure using the 4 Phillips removed in the earlier step. Preposition camera so it is facing approximately in the desired direction. 9. Attach video test cable to test point on rear of camera module. Aim and focus the camera. Remove test cable.
- Page 12 All manuals and user guides at all-guides.com 10. Once the camera view is as desired, attach the cover to outer base with the captive hex head screws. Installation - Flush Mount 1. Paste the drilling template on the ceiling or wall. Please refer to the drilling template below. 2.
- Page 13 All manuals and user guides at all-guides.com 4. Remove dome cover (hex, captive screws) 5. Unscrew the 4 Philips screws (retain for future use) to detach the inner base from the outer base. Set aside the outer base. 6. Screw the 2 spring tabs in the orientation shown to the slots at both sides of the inner base using the 4 Philips head screws provided.
- Page 14 All manuals and user guides at all-guides.com 7. Attach power and video cables from source to cables from camera and push excess wire back into hole. Fold the spring tabs up. 8. Preposition camera so it is facing approximately in the desired direction. 9.
- Page 15 All manuals and user guides at all-guides.com 10. The spring tabs will open automatically to support the camera against the ceiling. 11. Use the long Phillips pan head screws (x4) provided to screw the base to the ceiling. Do NOT use washers.
-
Page 16: Osd Menu & Configuration
All manuals and user guides at all-guides.com 12. Attach video test cable to test point on rear of camera module. Aim and focus the camera. Remove test cable. 13. Screw the cover back to the base with captive hex head screws. 4. - Page 17 All manuals and user guides at all-guides.com Menu Tree L e n s — D C S h u t t e r — A u t o ; 1 / 5 0 ; 1 / 6 0 ; 1 / 1 0 0 ; 1 / 1 2 0 ; 1 / 2 5 0 ; 1 / 5 0 0 ; 1 / 7 0 0 ; 1 / 1 0 0 0 ;...
-
Page 18: Exposure
In this section, user can do camera settings including Lens, Shutter, Iris, AGC, BLC and Anti-flicker. Please select the item by moving the joystick UP or DOWN. Select “Return” to return to the previous menu. 4.1.1 Lens DC mode is fixed in Lens level for EDH5240 camera. - 17 -... -
Page 19: Shutter
All manuals and user guides at all-guides.com 4.1.2 Shutter Select the shutter mode by moving the joystick LEFT or RIGHT. Select from Auto,1/50,1/60,1/100,1/120,1/250,1/500,1/700,1/1000,1/1600,1/2500,1/5000 and 1/8000. 4.1.3 AGC (Auto Gain Control – basic low light signal amplification) Select the level you would like to choose by moving the joystick LEFT or RIGHT. The more the level of gain increases, the brighter the screen, but the level of noise increases as well. -
Page 20: Day/Night
All manuals and user guides at all-guides.com Select “Return” to return to the previous menu. 4.3 Day/Night These settings control the operation of the camera when the illumination level changes. Choices are Color at all times; B/W at all times; or color when illumination is bright, switching to B/W in low light. Please select one of the 3 modes below by moving the joystick UP or DOWN then press “Set”... -
Page 21: D-Effect
Select “Return” to return to the previous menu. 4.4.5 Language Select OSD language. EDH5240 camera supports multiple languages including English, German, Russian, French, Spanish, Traditional Chinese, Simplified Chinese and Japanese. Move the joystick UP or DOWN to select a language then press “Set” button to save the setting. -
Page 22: Default
All manuals and user guides at all-guides.com 4.4.6 Default Select “Yes” to load system settings to default factory values. Or select “No” to disregard this option. 4.5 Image Adjust In this section, user can adjust Sharpness, Brightness and Contrast of the image. Please select the item by moving the joystick UP or DOWN. - Page 23 EverFocus USA - California: EverFocus USA - New York: 1801 Highland Avenue, Unit A, Duarte, CA 91010, USA 415 Oser Avenue, Unit S, Hauppauge, NY 11788, USA TEL: +1 626 844 8888 TEL: +1 631 436 5070...
Need help?
Do you have a question about the EDH5240 and is the answer not in the manual?
Questions and answers