
Related Manuals for Klarstein 10031996


Summary of Contents for Klarstein 10031996
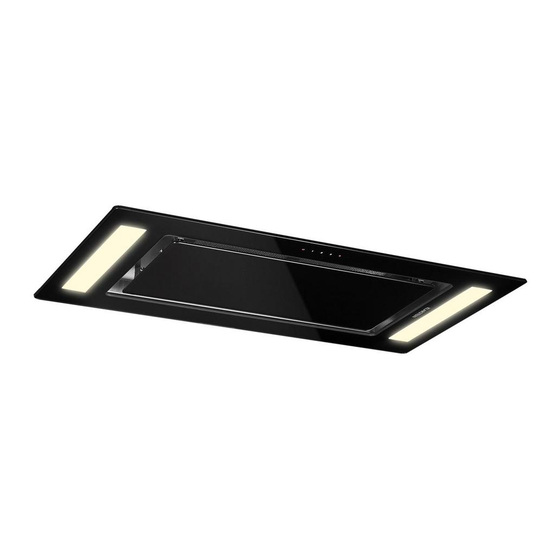
- Page 1 Dunstabzugshaube Range Hood Campana extractora Hotte aspirante Cappa aspirante 10031996 10032864...
-
Page 3: Table Of Contents
Bedienfeld und Tastenfunktionen 6 Italiano 51 Installationsvorbereitungen 7 Installation 1 1 Filterwechsel 13 Hinweise zur Entsorgung 14 10032864 TECHNISCHE DATEN Artikelnummer 10031996, 10032864 Stromversorgung 220-240 V ~ 50-60 Hz KONFORMITÄTSERKLÄRUNG Hersteller: Chal-Tec GmbH, Wallstraße 16, 10179 Berlin, Deutschland. Dieses Produkt entspricht den folgenden Europäischen Richtlinien: 2014/30/EU (EMV) -
Page 4: Sicherheitshinweise
SICHERHEITSHINWEISE Wichtige Hinweise zum Abluftbetrieb WARNUNG Vergiftungsgefahr durch zurückgesaugte Abgase! Betreiben Sie das Gerät nicht im Abluftbetrieb, wenn es zusammen mit einer raumluftabhängigen Feuerstätte betrieben wird und keine ausreichende Luftzirkulation garantiert wird. Raumluftabhängige Feuerstätten, wie Gas-, Öl-, Holz- oder Kohleheizungen, Boiler oder Durchlauferhitzer) beziehen die Luft aus dem Raum und führen Sie durch ein Abluftrohr oder eine Kamin ins Freie. -
Page 5: Abmessungen
ABMESSUNGEN... -
Page 6: Bedienfeld Und Tastenfunktionen
BEDIENFELD UND TASTENFUNKTIONEN Tastenfunktionen POWER: Drücken Sie die Taste, um das Gerät ein- oder auszuschalten. Diese Taste schaltet den Motor aber nicht das Licht aus. Halten Sie die Taste 3 Sekunden lang gedrückt, um den Abzug zu öffnen oder zu schließen. So erreichen Sie bei der Reinigung alle Oberflächen, während das Gerät aus ist. -
Page 7: Installationsvorbereitungen
INSTALLATIONSVORBEREITUNGEN Benötigte Werkzeuge: Handschuhe, Kreuzschlitz-Schraubenzieher, Tisch, Leiter, Säge, Lineal, Bohrmaschine. Schritt 1: Versichern Sie sich, dass der Abstand von der Herdplatte zur Abzugshaube den angegebenen Abmessungen entspricht. Der Anstand zwischen Herd und Abzugshaube sollte zwischen 65-150 cm liegen. - Page 8 Schritt 2: Über dem Herd benötigen Sie eine Öffnung mit den im Bild angegebenen Maßen. Verstärken Sie die Decke um die Öffnung mit einem Rahmen aus Latten oder Edelstahl, entsprechend der im Bild angegebenen Maße.
- Page 9 Schritt 3: Sie können die Abluft entweder nach außen Ableiten oder die Abzugshaube im Umluftbetrieb (obere Bilder) betreiben. Wenn Sie die Luft ableiten, befestigen Sie das Ende des Abluftrohrs am Ausgang in Ihrer Decke oder Wand (unteres Bild).
- Page 10 Schritt 4: Installieren Sie eine und befestigen Sie sie an der Decke pder Wand. Die Steckdose sollte sich in unmittelbarer Nähe des Netzkabels befinden.
-
Page 11: Installation 1
INSTALLATION Schritt 1 Schritt 2 Öffnen Sie den Karton und Entfernen Sie alle Verpackungsteile und untersuchen Sie alle Teile auf mögliche legen Sie die Abzugshaube auf einen Transportschäden. stabilen Tisch. Schritt 3 Schritt 4 Passen Sie die Richtung des Luftauslasses Öffnen Sie die Abdeckplatte und entsprechend ihrem Auslass an Wand entfernen Sie den Filter und die 6... - Page 12 Schritt 5 Schritt 6 Bringen Sie die Abzugshaube zu zweit Schieben Sie die Abzugshaube in in die Nähe des Deckenlochs. Eine dritte das Deckenloch. Stellen Sie die 4 Person muss den Stecker in die vorher Schrauben unten an der Haube dann so installierte Steckdose stecken.
-
Page 13: Filterwechsel
FILTERWECHSEL Schalter auf der rechten Seite... -
Page 14: Hinweise Zur Entsorgung
HINWEISE ZUR ENTSORGUNG Befindet sich die linke Abbildung (durchgestrichene Mülltonne auf Rädern) auf dem Produkt, gilt die Europäische Richtlinie 2012/19/EU. Diese Produkte dürfen nicht mit dem normalen Hausmüll entsorgt werden. Informieren Sie sich über die örtlichen Regelungen zur getrennten Sammlung elektrischer und elektronischer Gerätschaften. - Page 15 Preparation before installing 19 Installation 23 Filter Change 25 Hints on Disposal 26 10032864 TECHNICAL DATA Item number 10031996, 10032864 Power supply 220-240 V ~ 50-60 Hz DECLARATION OF CONFORMITY Producer: Chal-Tec GmbH, Wallstraße 16, 10179 Berlin, Germany. This product is conform to the following European...
-
Page 16: Safety Instructions
SAFETY INSTRUCTIONS Important notes about the extraction mode WARNING Risk of poisoning from exhaust gases sucked back. Never operate the device in extraction mode simultaneously with an open flue appliance when there is not adequate airflow guaranteed. Open fl ue combustion equipment (for example, gas, oil, wood or coal-fi red heaters, tankless water heaters, water heaters) pulls combustion air from the room and runs it through an exhaust pipe or chimney to the outside. -
Page 17: Dimensions
DIMENSIONS... -
Page 18: Overview And Key Functions
OVERVIEW AND KEY FUNCTIONS Key Functions ON/OFF: Touch this button to turn the hood on/off.This button can turn off the motor but not the light. All surfaces for cleaning, while motor is not working. Touch and hold for 3 seconds to open/close damper (completely open), Thus you can reach Red light in stand- by mode. -
Page 19: Preparation Before Installing
PREPARATION BEFORE INSTALLING Required Tools: gloves, cross head screw, desk, ladder, saw, ruler, electric drill. Step 1: Confirm the height of hood hung on the ceiling above the gas cooker according to the distance required on user manual. - Page 20 Step 2: Open the hole above the gas cooker according to the size required in user manual and reinforce inside of ceiling by batten or stainless steel plate according to size shown in picture...
- Page 21 Step 3: According to actual layout of kitchen to choose range hood function of internal recycle or outside,to confirm the direction of exhaust pipe,the open the hole in ceiling or the wall.
- Page 22 Step 4: Install the power socket,and fix it on the ceiling and wall,position of power socket may connect with power plug.
-
Page 23: Installation
INSTALLATION Step 1 Step 2 Please check if the carton of hood is Take out spare parts and foam,then take OK,then open the carton to confirm if the out the hood to put on the flat desk to spare parts is complete. avoid fallen. - Page 24 Step 5 Step 6 To lift and hood body by 2 persons to Lift the hood into the hole opened near the opened hole in the ceiling,the before,then adjust the screw of 4 third person insert power plug into the bayonets until the hood body is aligned power socket which is prepared firstly.
-
Page 25: Filter Change
FILTER CHANGE Switch at the right side... -
Page 26: Hints On Disposal
HINTS ON DISPOSAL According to the European waste regulation 2012/19/ EU this symbol on the product or on its packaging indicates that this product may not be treated as household waste. Instead it should be taken to the appropriate collection point for the recycling of electrical and electronic equipment. - Page 27 Instalación 35 Cambios de filtros 37 Retirada del aparato 38 10032864 DATOS TÉCNICOS Número de artículo 10031996, 10032864 Suministro eléctrico 220-240 V - 50-60 Hz DECLARACIÓN DE CONFORMIDAD Fabricante: Chal-Tec GmbH, Wallstraße 16, 10179 Berlín (Alemania). Este producto cumple con las siguientes directivas...
-
Page 28: Indicaciones De Seguridad
INDICACIONES DE SEGURIDAD Notas importantes acerca del modo de extracción ADVERTENCIA Peligro de muerte, riesgo de intoxicación provocado por gases en combustión aspirados. Nunca ponga en funcionamiento la función de acción simultáneamente con un dispositivo que genere calor en una estancia estanca si no se ha garantizado una ventilación sufi ciente. -
Page 29: Dimensiones
DIMENSIONES... -
Page 30: Panel De Control Y Botones
PANEL DE CONTROL Y BOTONES Funciones de los botones POWER: Pulse el botón para encender o apagar el aparato. Este botón apaga el motor pero no la luz. Mantenga el botón pulsado durante 3 segundos para abrir o cerrar el conducto del tiro. Así llegará a todas las superficies durante la limpieza mientras el aparato esté... -
Page 31: Pasos Previos A La Instalación
PASOS PREVIOS A LA INSTALACIÓN Herramientas necesarias: Guantes, destornillador de estrella, mesa, escalera, sierra, nivel, taladro. Paso 1: Asegúrese de que la distancia de la placa de cocción a la campana cumpla con las dimensiones indicadas. La distancia entre la placa y la campana extractora debe estar comprendida entre 65 y 150 cm. - Page 32 Paso 2: Sobre la placa necesita un orificio con las medidas indicadas en la imagen. Refuerce el techo alrededor de la abertura con un marco de latón o acero inoxidable que cuente con las medidas indicadas en la imagen.
- Page 33 Paso 3: Puede colocar el conducto de extracción hacia el exterior o la campana extractora en modo ventilación (imagen superior). Si extrae el aire, fije el extremo del conducto de extracción a la salida de su techo o pared (imagen inferior).
- Page 34 Paso 4: Instálelo y fíjelo al techo o a la pared. La toma de corriente debe estar situada cerca del cable de alimentación.
-
Page 35: Instalación
INSTALACIÓN Paso 1 Paso 2 Abra la caja y examine todas las piezas Retire todas las partes del embalaje y para detectar posibles daños producidos coloque la campana extractora sobre durante el transporte. una mesa estable. Paso 3 Paso 4 Ajuste la orientación de la salida de aire Abra la placa guía y extraiga el filtro y en función de su salida a la pared o al... - Page 36 Paso 5 Paso 6 Monte entre dos personas la campana Desplace la campana por el orificio extractora cerca del orificio del techo. del techo. Coloque 4 tornillos bajo la Una tercera persona debe conectar campana de manera homogénea para el enchufe a la toma de corriente que los 4 sujeten el marco del techo y la previamente instalada.
-
Page 37: Cambios De Filtros
CAMBIOS DE FILTROS Interruptor en el lado derecho... -
Page 38: Retirada Del Aparato
RETIRADA DEL APARATO Si el aparato lleva adherida la ilustración de la izquierda (el contenedor de basura tachado) entonces rige la normativa europea, directiva 2012/19/UE. Este producto no debe arrojarse a un contenedor de basura común. Infórmese sobre las leyes territoriales que regulan la recogida separada de aparatos eléctricos y electrónicos. - Page 39 Installation 47 Changement de filtre 49 Conseils pour le recyclage 50 10032864 FICHE TECHNIQUE Numéro d’article 10031996, 10032864 Alimentation 220-240 V ~ 50-60 Hz DÉCLARATION DE CONFORMITÉ Fabricant : Chal-Tec GmbH, Wallstraße 16, 10179 Berlin, Allemagne. Ce produit est conforme aux directives européennes...
-
Page 40: Consignes De Sécurité
CONSIGNES DE SÉCURITÉ Remarques importantes concernant le mode d‘extraction AVERTISSEMENT Danger de mort, risques d‘intoxication ! Par la ré-aspiration de gaz de combustion. Ne jamais utiliser la fonction d’aspiration de l’appareil en même temps qu’un foyer dépendant de l’air ambiant si l’air frais est insuffi sant. -
Page 41: Dimensions
DIMENSIONS... -
Page 42: Panneau De Commande Et Touches
PANNEAU DE COMMANDE ET TOUCHES Touches de fonction POWER : Appuyez sur cette touche pour allumer ou éteindre l’appareil. Cette touche permet d’éteindre le moteur mais pas l’éclairage. Maintenez la touche 3 secondes pour ouvrir ou fermer l’évacuation. Vous pouvez ainsi nettoyer toutes les surfaces lorsque l’appareil est éteint. -
Page 43: Préparation Avant L'installation
PRÉPARATION AVANT L’INSTALLATION Outils nécessaires : gants, tournevis cruciforme, table, échelle, scie, règle, perceuse. Etape 1 : Vérifiez que l’espacement entre la plaque de cuisson et la hotte aspirante correspond aux dimensions indiquées. L’espacement entre la cuisinière et la hotte aspirante doit mesurer entre 65 et 150 cm. - Page 44 Etape 2 : Au-dessus de la cuisinière, vous aurez besoin d’une ouverture dont les dimensions sont indiquées sur le schéma. Renforcez le plafond autour de l’ouverture à l’aide d’un cadre en lattes ou en inox ayant les dimensions indiquées sur le schéma.
- Page 45 Etape 3 : Vous pouvez diriger les gaz de combustion vers une conduite d’évacuation ou bien utiliser la hotte en mode recyclage d’air (schéma d’en haut). Si vous branchez une conduite d’extraction, fixez l’extrémité du tuyau d’extraction à l’évacuation de votre plafond ou mur (schéma d’en bas).
- Page 46 Etape 4 : Installez la prise d’alimentation et fixez-la sur le plafond ou au mur. La prise doit se trouver à proximité immédiate du câble secteur.
-
Page 47: Installation
INSTALLATION Etape 1 Etape 2 Ouvrez le carton et examinez les pièces Retirez tous les éléments d’emballage et pour contrôler leur bon état après posez la hotte aspirante sur une table livraison. solide. Etape 3 Etape 4 Ajustez l’orientation de l’évacuation Ouvrez la plaque de protection et retirez d’air en fonction de votre sortie d’air le filtre et les 6 vis. - Page 48 Etape 5 Etape 6 Faites-vous aider d’une deuxième Poussez la hotte aspirante dans le trou personne pour soulever la hotte et la au plafond. Posez ensuite les 4 vis au- tenir près de l’ouverture dans le plafond. dessous de la hotte de façon à ce que Une troisième personne devra brancher les 4 griffes s’accrochent fermement au la fiche dans la prise précédemment...
-
Page 49: Changement De Filtre
CHANGEMENT DE FILTRE Interrupteur sur le côté droit... -
Page 50: Conseils Pour Le Recyclage
CONSEILS POUR LE RECYCLAGE Le pictogramme ci-contre apposé sur le produit signifie que la directive européenne 2012/19/UE s‘applique (poubelle à roues barrée d’une croix). Ces produits ne peuvent être jetés dans les poubelles domestiques courantes. Renseignez- vous concernant les règles appliquées pour la collecte d’appareils électriques et électroniques. - Page 51 Pannello dei comandi e tasti funzione 54 Preparare l`installazione 55 Installazione 59 Sostituzione del filtro 61 Smaltimento 62 10032864 DATI TECNICI Articolo numero 10031996, 10032864 Alimentazione 220-240 V ~ 50-60 Hz DICHIARAZIONE DI CONFORMITÀ Produttore: Chal-Tec GmbH, Wallstraße 16, 10179 Berlino, Germania. Questo prodotto è conforme alle seguenti direttive europee:...
-
Page 52: Avvertenze Di Sicurezza
AVVERTENZE DI SICUREZZA Note importanti circa la modalità di estrazione AVVERTIMENTO Pericolo di morte, pericolo di intossicazione da gas di scarico! Non azionare l´apparecchio con funzione di scarico mentre è attivo un impianto di riscaldamento che utilizza l´aria ambiente, se l´areazione non è... -
Page 53: Misure
MISURE... -
Page 54: Pannello Dei Comandi E Tasti Funzione
PANNELLO DEI COMANDI E TASTI FUNZIONE Tasti funzione POWER: premere il tasto per accendere o spegnere il dispositivo. Questo tasto spegne il motore ma non la luce. Tenere premuto il tasto per 3 secondi per aprire o chiudere la cappa aspirante. In questo modo si raggiungono tutte le superfici da pulire quando il dispositivo è... -
Page 55: Preparare L`installazione
PREPARARE L`INSTALLAZIONE Attrezzi necessari: guanti, cacciavite a croce, tavolo, scaletta, sega, righello, trapano. Fase 1: Assicurarsi che la distanza tra i fornelli e la cappa aspirante corrisponda alle misure indicate. La distanza tra i fornelli e la cappa aspirante deve essere compresa tra 65 e 150 cm. - Page 56 Fase 2: Sopra i fornelli è necessario che ci sia un‘apertura con le misure indicate nella figura. Rafforzare il soffitto attorno all‘apertura con dei listelli o con una piastra in acciaio inossidabile, seguendo le misure indicate nella figura.
- Page 57 Fase 3: L‘aria di scarico può essere espulsa all‘esterno oppure la cappa aspirante può essere messa in funzione in modalità ricircolo dell´aria (figura in alto). Durante lo scarico dell‘aria, collegare l‘estremità del tubo di scarico all‘uscita del soffitto o della parete (figura in basso).
- Page 58 Fase 4: Installare la presa al soffitto o alla parete. La presa deve trovarsi vicino al cavo di alimentazione.
-
Page 59: Installazione
INSTALLAZIONE Fase 1 Fase 2 Aprire la confezione e accertarsi che i Rimuovere completamente il materiale componenti non si siano danneggiati di imballaggio e poggiare la cappa durante il trasporto. aspirante su un tavolo stabile. Fase 3 Fase 4 Regolare la direzione dell'uscita dell'aria Aprire la piastra di copertura e rimuovere in base allo scarico sulla parete o sul il filtro e le 6 viti. - Page 60 Fase 5 Fase 6 Portare la cappa aspirante in prossimità Far scorrere la cappa aspirante nel del foro nel soffitto servendosi di un foro del soffitto. Regolare le 4 viti sul aiutante. Una terza persona deve fondo della cappa in modo che tutti inserire la spina nella presa installata in quattro gli intagli siano ben fissati al precedenza.
-
Page 61: Sostituzione Del Filtro
SOSTITUZIONE DEL FILTRO Interruttore sul lato destro... -
Page 62: Smaltimento
SMALTIMENTO Se sul prodotto è presente la figura a sinistra (il cassonetto dei rifiuti mobile sbarrato), si applica la direttiva europea 2012/19/UE. Questi prodotti non possono essere smaltiti con i rifiuti normali. Informarsi sulle disposizioni vigenti in merito alla raccolta separata di dispositivi elettrici ed elettronici. Non smaltire i vecchi dispositivi con i rifiuti domestici.
Need help?
Do you have a question about the 10031996 and is the answer not in the manual?
Questions and answers