Advertisement
Quick Links
Advertisement

Related Manuals for Stevens AeroModel Swift 100


Summary of Contents for Stevens AeroModel Swift 100
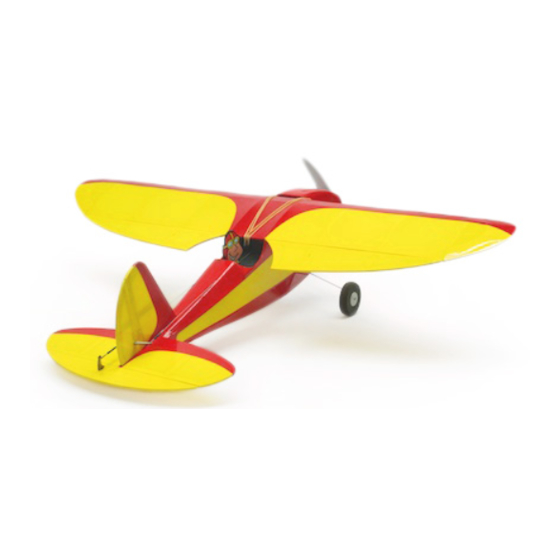
- Page 1 AR6410LBL Based Micro Aerobat! Wing Span: 21 inches | Wing Area: 92 square inches | Average Flying Weight: 3.3 ounces Build Instructions - Version 1.18 (revised 05.15.2014) Swift (100) - Build Instructions © 2014 Stevens AeroModel, all rights reserved.! Page 1...
- Page 2 Build Instructions WARRANTY Stevens AeroModel guarantees this kit to be free from defects in both material and workmanship at the date of purchase. This warranty does not cover any component parts damaged by use or modification. In no case shall Stevens AeroModel’s liability exceed the original cost of the purchased kit. Further, Stevens AeroModel reserves the right to change or modify this warranty without notice.
- Page 3 British classic and features spunky lines and solid sport aerobatic performance. Designed to receive popular E-Flite micro electronics, the 3 oz flying weight and low wing loading of the Swift 100 makes an ideal model for larger indoor venues or smaller outdoor flying sites.
- Page 4 Many of the suggested items listed below are available at your local hobby shop. For your convenience, Stevens AeroModel stocks all the power system components and most of the building supplies required to complete this kit. If you have difficulties sourcing any of these items locally, please visit our website, stevensaero.com to purchase the items necessary to complete your model.
- Page 5 Build Instructions Sheet Wood Inventory Swift (100) - Build Instructions © 2014 Stevens AeroModel, all rights reserved.! Page 5...
- Page 6 Build Instructions Builder’s Notes Swift (100) - Build Instructions © 2014 Stevens AeroModel, all rights reserved.! Page 6...
- Page 7 Please check our website for updates to these instructions before starting the build. To obtain downloads and updates to this model aircraft kit, please visit the product page at stevensaero.com Swift (100) - Build Instructions © 2014 Stevens AeroModel, all rights reserved.! Page 7...
- Page 8 1-7. With parts properly seated, proceed to tack glue each former to retain within fuselage assembly at the tab and notch locations. □ Fit F9 (sheet 08/09, 3/32 in. balsa) to fuselage side and F2. Tack glue to retain. Swift (100) - Build Instructions © 2014 Stevens AeroModel, all rights reserved.! Page 8...
-
Page 9: Table Of Contents
Build Instructions Step 1 Step 5 Bottom View Step 2 Step 6 Build part F3 Bottom View Step 3 Step 7 Step 4 Step 8 Swift (100) - Build Instructions © 2014 Stevens AeroModel, all rights reserved.! Page 9... - Page 10 Tape part in position using a low tack painters tape and allow to dry thoroughly prior to bonding. Swift (100) - Build Instructions © 2014 Stevens AeroModel, all rights reserved.! Page 10...
-
Page 11: Step
Build Instructions Step 9 Step 13 Step 10 Step 14 Step 11 Step 15 Step 12 Step 16 Swift (100) - Build Instructions © 2014 Stevens AeroModel, all rights reserved.! Page 11... -
Page 12: Step
F22. Fit and bond keel to the right and left notches in bottoms of all formers, motor mount, and edge of F19. Swift (100) - Build Instructions © 2014 Stevens AeroModel, all rights reserved.! Page 12... -
Page 13: Step
Build Instructions Step 17 Step 21 Step 18 Step 21 Cont. Step 19 Step 22 F22b F22a Bottom View Step 20 Step 22 Cont. Bottom View Swift (100) - Build Instructions © 2014 Stevens AeroModel, all rights reserved.! Page 13... -
Page 14: Step
Reference detail sheet for part positioning. □ Fit and bond center shape stringer F29 (sheet 03/09, 1/20 in. balsa) to right and left fuselage side. Reference detail sheet for part location Swift (100) - Build Instructions © 2014 Stevens AeroModel, all rights reserved.! Page 14... - Page 15 Build Instructions Step 23 Step 26 Cont. Step 24 Step 27 Step 25 Step 28 F28a and F28b Step 26 Step 29 Bottom View Swift (100) - Build Instructions © 2014 Stevens AeroModel, all rights reserved.! Page 15...
-
Page 16: Step
□ □ Fit trailing edge W4 (sheet 07/09, 3/32 in. balsa) to ribs W2, and W3. Properly seat then tack glue assembled parts to retain within assembly. Swift (100) - Build Instructions © 2014 Stevens AeroModel, all rights reserved.! Page 16... -
Page 17: Step
Build Instructions Step 30 Step 32 Step 30 Cont. Step 33 W1a and W1b Step 30 Cont. Step 34 Step 31 Step 35 Swift (100) - Build Instructions © 2014 Stevens AeroModel, all rights reserved.! Page 17... -
Page 18: Step
CA to thoroughly bond part to assembly. Repeat for the right wing tip. Trim excess leading edge stock just beyond left rib W3. Repeat for right side. □ Swift (100) - Build Instructions © 2014 Stevens AeroModel, all rights reserved.! Page 18... - Page 19 Build Instructions Step 36 Step 40 Step 37 Step 41 “Tack Glue” Step 38 Step 42 Step 39 Step 43 Trim 1/4 in. Leading edge Bottom View Swift (100) - Build Instructions © 2014 Stevens AeroModel, all rights reserved.! Page 19...
- Page 20 45 degree angle. Note: Ensure that you sand the leading edges on the correct side so that you will end up with a LEFT and a RIGHT aileron. Swift (100) - Build Instructions © 2014 Stevens AeroModel, all rights reserved.! Page 20...
- Page 21 Build Instructions Step 44 Step 48 Step 45 Step 49 Bottom View Step 46 Step 50 Round leading edge Bottom View Step 47 Step 51 Bottom View Swift (100) - Build Instructions © 2014 Stevens AeroModel, all rights reserved.! Page 21...
- Page 22 Fit the 1/2 in. length of cut dowel (from step above) through formers F10 and F9, leaving □ about 1/4 in. extending aft of former F10. Swift (100) - Build Instructions © 2014 Stevens AeroModel, all rights reserved.! Page 22...
- Page 23 Step 52 Step 58 .031” Landing gear wire Step 53 Step 59 1/8 in. Dowel Bottom View Step 56 Step 60 1/8 in. Dowel Bottom View Swift (100) - Build Instructions © 2014 Stevens AeroModel, all rights reserved.! Page 23...
- Page 24 Finished length should be at least 5-1/2 in. Connect pushrods to receiver, then mount receiver on F2 with double sided servo tape □ (DUB-634). Swift (100) - Build Instructions © 2014 Stevens AeroModel, all rights reserved.! Page 24...
- Page 25 Build Instructions Step 61 Step 65 Step 62 Step 66 Step 63 Step 67 Rudder Step 64 Step 68 Snake Bends Bottom View Swift (100) - Build Instructions © 2014 Stevens AeroModel, all rights reserved.! Page 25...
- Page 26 Important! Model must balance 1/8-1/4 in. behind the main wing spar (see plan sheet for balance point). Congratulations! Your Swift (100) is complete! Follow the Flight Control Setup to prepare your Swift (100) for flight. Swift (100) - Build Instructions © 2014 Stevens AeroModel, all rights reserved.! Page 26...
- Page 27 Build Instructions Step 69 Step 73 Step 70 Step 74 Step 71 Step 74 Cont. Step 72 Complete! Bottom View Swift (100) - Build Instructions © 2014 Stevens AeroModel, all rights reserved.! Page 27...
- Page 28 Check Wing Attachment Points - Always make sure you inspect for damage and wear. Make sure that the wing and retaining rubber bands, are properly attached. Swift (100) - Build Instructions © 2014 Stevens AeroModel, all rights reserved.! Page 28...
- Page 29 Congratulations! Once you’ve completed your first flights, you will have noticed that the Stevens AeroModel Swift (100) is a very stable model airplane. When built straight, and trimmed for level flight, it should readily return to “wings level” from any attitude. When flying, we never miss an opportunity to allow an onlooker to get a little “stick-time”.
Need help?
Do you have a question about the Swift 100 and is the answer not in the manual?
Questions and answers