Table of Contents
Advertisement
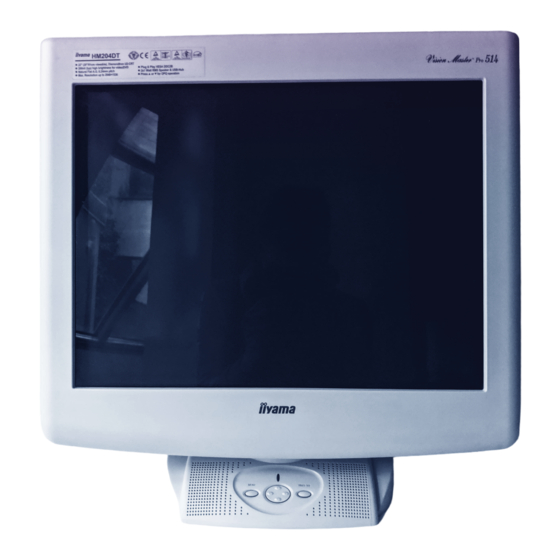
HM204DT A
USER MANUAL
TABLE OF CONTENTS
FOR YOUR SAFETY............................................................
SAFETY PRECAUTIONS............................................
CUSTOMER SERVICE................................................
CLEANING...................................................................
BEFORE YOU OPERATE THE MONITOR..........................
FEATURES..................................................................
ACCESSORIES...........................................................
FOR WINDOWS 95/98/2000/ME/XP USERS.................
LOCATION OF CONTROLS........................................
CONNECTING YOUR MONITOR..................................
OPERATING THE MONITOR................................................
ADJUSTMENT MENU CONTENTS..............................
POWER MANAGEMENT FEATURE.............................
SELF DIAGNOSIS FUNCTION........................................
TROUBLE SHOOTING........................................................
APPENDIX............................................................................
SPECIFICATIONS.......................................................
PRESET MODES.........................................................
CONNECTOR PIN ASSIGNMENT.................................
Thank you very much for choosing the iiyama Vision Master color monitor.
We recommend that you take a few minutes to read carefully through this brief but comprehensive
manual before installing and switching on the monitor. Please keep this manual in a safe place
for your future reference.
All manuals and user guides at all-guides.com
ENGLISH
DEUTSCH
1
FRANCAIS
1
4
NEDERLANDS
4
5
SVENSKA
5
5
ITALIANO
5
6
7
8
9
15
15
16
18
18
19
19
Advertisement
Table of Contents

Related Manuals for Iiyama Vision Master Pro 514 HM204DT A


Summary of Contents for Iiyama Vision Master Pro 514 HM204DT A
-
Page 1: Table Of Contents
PRESET MODES............CONNECTOR PIN ASSIGNMENT......... Thank you very much for choosing the iiyama Vision Master color monitor. We recommend that you take a few minutes to read carefully through this brief but comprehensive manual before installing and switching on the monitor. Please keep this manual in a safe place... - Page 2 All manuals and user guides at all-guides.com Congratulations! The display you have just purchased carries the TCO’03 Displays label. This means that your display is designed, manufactured and tested according to some of the strictest quality and environmental requirements in the world. This makes for a high performance product, designed with the user in focus that also minimizes the impact on our natural environment.
- Page 3 To meet the FCC requirements, the specified signal cables below should be used. Signal Cable MB38 (Enclosed): 242Z013-01 Signal Cable MB31 (Optional): 242Z017-01 CAUTION Changes or modifications not expressly approved by iiyama could void the users authority to operate the equipment under FCC compliance regulations. CANADIAN DEPARTMENT OF COMMUNICATIONS COMPLIANCE STATEMENT This digital apparatus does not exceed the Class B limits for radio noise emissions from digital apparatus as set out in the radio interference regulation of the Canadian department of communications.
-
Page 4: For Your Safety
STOP OPERATING THE MONITOR WHEN YOU SENSE TROUBLE If you notice any abnormal phenomena such as smoke, strange sounds or fumes, unplug the monitor and contact your dealer or iiyama service center immediately. Further use may be dangerous and can cause fire or electric shock. - Page 5 All manuals and user guides at all-guides.com CAUTION MAINTAIN GOOD VENTILATION Ventilation slots are provided to keep the monitor from overheating. Covering the slots may cause fire. To allow adequate air circulation, place the monitor at least 10 cm (or 4 inches) from any walls. Do not remove the tilt stand when operating the monitor.
- Page 6 All manuals and user guides at all-guides.com OTHERS ATTENTION FOR USING THE OPQ FUNCTION (=Optimize Picture Quality) Due to the nature of the Diamondtron U3-CRT, misconvergence, misalignment of the aperture grille, picture shaking or burn-in of phosphors may happen when displaying a high-white picture for a long time while the OPQ function is active.
-
Page 7: Customer Service
All manuals and user guides at all-guides.com CUSTOMER SERVICE NOTE If you have to return your unit for service and the original packaging has been discarded, please contact your dealer or iiyama service center for advice or replacement packaging. CLEANING WARNING... -
Page 8: Before You Operate The Monitor
However, all guarantees and warranties are void for any problems or damage caused by a power cable not supplied by iiyama. FOR WINDOWS 95/98/2000/ME/XP USERS Windows 95/98/2000/Me/XP Monitor Information File for iiyama monitors may be obtained via the Internet, using the address: http://www.iiyama.com (U.S.A.) http://www.iiyama.co.uk (U.K.) -
Page 9: Location Of Controls
All manuals and user guides at all-guides.com LOCATION OF CONTROLS A Speakers Front The volume control is performed with the On Screen Display. Press the Buttons and then the Menu Button continuously when the Menu is not displayed. B Power Indicator C Input Select Button (VIDEO 1/2) Select either VIDEO IN 1 or 2 for the signal input when both of the signal inputs are... -
Page 10: Connecting Your Monitor
The cable supplied with the monitor is for a standard 15 pin D-Sub connector. If a special cable is required please contact your local iiyama dealer or regional iiyama office. -
Page 11: Operating The Monitor
All manuals and user guides at all-guides.com OPERATING THE MONITOR To create the best picture, your iiyama Vision Master has been preset at the factory with the signal timings listed on page 19 in PRESET MODES. If an incorrect picture appears during the operation, adjust the image by following the procedure shown below to get the desired picture. -
Page 12: Adjustment Menu Contents
All manuals and user guides at all-guides.com ADJUSTMENT MENU CONTENTS Direct You can skip the Menu pages and display an adjustment scale directly by using the following button operations. l Volume Control: Press the Buttons and then the Menu Button continuously when the Menu is not displayed. - Page 13 All manuals and user guides at all-guides.com Main Menu Sub-Menu Problem / Option Button to Press Too dull Direct Contrast Too intense Color NOTE Input video signal level: The factory preset is 0.7Vp-p. Control To change to 1.0Vp-p, hold down the button until 1.0V appears on screen.
- Page 14 All manuals and user guides at all-guides.com Main Menu Sub-Menu Problem / Option Button to Press Too small Zoom Too large Screen Too small Control H-Size Too large Too small V-Size Too large Too far to the left H-Position Too far to the right Too low V-Position Too high...
- Page 15 All manuals and user guides at all-guides.com Main Menu Sub-Menu Problem / Option Button to Press To correct misconvergence H-Convergence for vertical lines Picture To correct misconvergence Quality V-Convergence for horizontal lines To correct vertical H-Moire wavy lines Moiré is the result of interference between the phosphor layout and the NOTE video signal.
- Page 16 All manuals and user guides at all-guides.com Main Menu Sub-Menu Problem / Option Button to Press To correct discoloration Top-Left Landing To correct discoloration Top-Right To correct discoloration Bottom-Left To correct discoloration Bottom-Right Return to Menu Return to Main Menu. Too far to the left OSD H-Position Too far to the right...
- Page 17 All manuals and user guides at all-guides.com Main Menu Sub-Menu Option Any changes are automatically saved in Auto Save Recall the memory when the On Screen Display disappears. Function Turning off the power should be avoided while NOTE using the Menu. Reset Factory-preset data is restored.
-
Page 18: Power Management Feature
B Turn ON the monitor. Diagnosis A A color bar picture is displayed: The monitor is working normally. Check the computer. B A color bar picture is not displayed: The monitor may be damaged. Contact your dealer or iiyama service center. OPERATING THE MONITOR... -
Page 19: Trouble Shooting
THE MONITOR or if the problem persists. If you are experiencing a problem which is not described below or you cannot correct the problem, discontinue using the monitor and contact your dealer or iiyama service center for further assistance. Problem... - Page 20 All manuals and user guides at all-guides.com Problem Check o The audio equipment (computer etc.) is ON. No sound. o The Audio Cable is properly connected. o If the headphone is connected, disconnect it. o The Volume is turned up. o The audio output level of the audio equipment is within the specification of the monitor.
-
Page 21: Appendix
All manuals and user guides at all-guides.com APPENDIX SPECIFICATIONS 22" (20.0" / 51cm viewable), Aperture Grille pitch: 0.24mm, Diamondtron U3-CRT, 90 degree deflection, Short persistence phosphor, Anti-reflection & Anti-static coating Sync Frequency Horizontal: 30.0-142.0kHz, Vertical: 50-200Hz Video Bandwidth 390MHz dot clock Recommended Resolution 1600 ×... -
Page 22: Preset Modes
All manuals and user guides at all-guides.com PRESET MODES The following chart indicates the Factory Preset Modes. Sync Polarity Vertical Horizontal VESA Timing Name Frequency Frequency 640×400 @70Hz 31.47kHz 70.0Hz Negative Positive 31.47kHz Negative Negative 640×480 @60Hz 59.9Hz 640×480 @85Hz Negative 43.27kHz 85.0Hz... - Page 23 All manuals and user guides at all-guides.com IIYAMA CORPORATION 710-1 Kitaowaribe, Nagano-shi 381-0014 Japan This manual is printed on recycled paper. Dieses Handbuch ist auf Recyclingpapier gedruckt. Ce manuel est imprimé sur du papier recyclé. Deze handleiding is op kringlooppapier gedrukt.
Need help?
Do you have a question about the Vision Master Pro 514 HM204DT A and is the answer not in the manual?
Questions and answers