
Related Manuals for Tenma ST-8920


Summary of Contents for Tenma ST-8920
- Page 1 Pressure & Flow Meter User Manual Part Number: ST-8920 www.element14.com www.farnell.com www.newark.com www.cpc.co.uk Page <1> 12/04/18 V1.0...
-
Page 2: Table Of Contents
Table of Contents 1. Features ........................3 2. Specifications ......................3 3. Button ........................4 4. Display Elements ..................... 5 5. Changing Setup Options ..................6 5-1. Setup Options ............................6 5-2. Entering or Exiting Setup ........................6 5-3. Changing a Setup Option ........................6 5-4. Duct dimension units Setting .........................6 5-5. Duct Shape and Parameters Setting ......................7 5-6. Choose Duct Shape ..........................7 5-7. Parameters Setting ..........................7 5-8. Auto Power Off Mode ..........................8... -
Page 3: Features
1. Features • Larger LCD display with backlight. • Relative time clock on MAX, MIN and AVG provides a time reference for measurement. • Pressure, velocity or air flow measurement provides Zero Adjust. • Display pressure, Air velocity or air flow plus environment Temperature simultaneously. • Easy to calculate the area of a rectangular or circular duct. • USB interface, USB to UART Bridge Controller. •... -
Page 4: Button
2-3. Range of Air Velocity Air Velocity Range Resolution Accuracy ±2.5% of reading m/s(meter per second) 1-80 0.01 at 10 m/s ft/min(feet per minute) 200-15733 Accuracy is function km/h(kilometers per hour) 3.6-288 0.1 of velocity and MPH(miles per hour) 2.24-178.66 0.01 duct 0.01 size Knots(nautical miles per hour) 2-154.6... -
Page 5: Display Elements
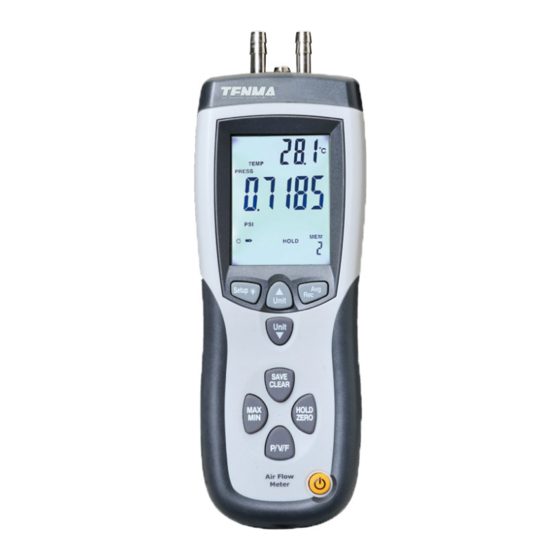
4. Display Elements 1. min: sec or hour: min Display.. 2. Pressure, Velocity, Flow or temperature modes are active 3. Primary Display. 4. Units of air velocity. 5. Units of pressure. 6. The indication of meter communicating to PC. 7. Auto Power Off mode indicators. 8. Duct Shape choices. 9. -
Page 6: Changing Setup Options
5. Changing Setup Options Use Setup to chose duct shape and set the duct parameters. Sleep mode, Max/min/avg mode menu setting and clear memory. The thermometer stores the settings in its memory. 5-1. Setup Options Option Menu item Settings Duct dimension units Unit Set duct dimension units in or cm Duct Shape and parameters Duct Shape Set area of measuring air flow... -
Page 7: Duct Shape And Parameters Setting
5-5. Duct Shape and Parameters Setting When the meter is in parameters setup mode. The screen is show number of the last duct shape and size that is entered. If the duct is different than the stored version, then find the proper duct type for the measurement (rectangular or round). 5-6. Choose Duct Shape • When the meter is in setup mode, Press “Unit ” or “Unit ” to scroll to the duct shape setup option. • Press “Avg/Rec” button. The screen shows the “ ”(rectangle) or “ ”(circular). •... -
Page 8: Auto Power Off Mode
5-8. Auto Power Off Mode The meter enters sleep mode (default). That is to say, the meter will automatically shut off after 20 minutes if no button press occurs for 20 minutes. When the meter is in Setup mode, the display shows SETUP. Press “Unit ” or “Unit ” 11 to scroll to the “SLP” page . Press “Avg/Rec” to indicate “On” or “OFF”. Press “Unit ” or “Unit ” until the setting you want to use appears on the display. Press “Avg/Rec’’ to store the new setting in memory. On (sleep mode on) or OFF (sleep mode off). -
Page 9: Ciear Memory Setting
5-10. Clear Memory Setting • When the meter is in Setup mode, Press “Unit ” or “Unit ” to scroll to the clear memory setup option. • Press “Save/Clear’’ to select the desired sample. There are three choices for selecting. PRESS VEL FLOW: clear all pressure, velocity and flow sample data. PRESS: clear all pressure sample data. VEL: clear all velocity sample data. FLOW: clear all flow sample data. -
Page 10: Measuring Velocity
5-12. Measuring Velocity The Meter uses standard ambient conditions (temperature=21.1°C/70°F, barometric pressure= 14.7 PSI / 1013 mbar), to approximate actual velocity and flow. The primary display number is air velocity, the device measures air velocity, and it features 5 selectable units of velocity measure: m/s, ft/min, km/h, MPH, knots. • Press “P/V/F” to enter Velocity mode and press “Unit ” to select unit. • C onnect the hoses to the pitot tube and to the Meter. The “Input(+)” pressure port on the Meter connects to the white hose from the total pressure connection of the pitot tube. The “Ref (-)” pressure port on the Meter connects to the black hose from the static pressure connection of the pitot tube. The tubing open to ambient conditions press and hold “Hold/Zero” for 2 seconds to zero out the display. •... -
Page 11: Displaying Temperature
5-14. Displaying Temperature Ambient temperature is displayed on the secondly show as a reference. The temperature can be displayed in either °C or °F. Press “Unit ” to select unit °C or °F. 5-15. Holding the Displayed Readings • Press “Hold/Zero” to freeze the readings on the display .The display shows HOLD. • Press “Hold/Zero” again to turn off the HOLD function 5-16. Viewing the MIN, MAX, and AVG Readings • Press “MAN/MIX” to step through the maximum (MAX), minimum (MIN), or the average (AVG) readings. The elapsed time since entering MAX/MIN/AVG mode, or the time at which the minimum or maximum occurred appears on the display. •... -
Page 12: Error Codes
Users of this data sheet should check for themselves the Information and the suitability of the products for their purpose and not make any assumptions based on information included or omitted. Liability for loss or damage resulting from any reliance on the Information or use of it (including liability resulting from negligence or where the Group was aware of the possibility of such loss or damage arising) is excluded. This will not operate to limit or restrict the Group’s liability for death or personal injury resulting from its negligence. Tenma is the registered trademark of the Group. © Premier Farnell Limited 2016. www.element14.com www.farnell.com www.newark.com...
Need help?
Do you have a question about the ST-8920 and is the answer not in the manual?
Questions and answers