Table of Contents
Advertisement
Quick Links
GB
D
F
I
NL
E
P
N
GAS WARNING:
GS-26-TurboSwirl2-GW-WH07.8
Do not use this fan in the same room at the same time as a gas or fuel burning fire,
unless the flue has been tested under these conditions of use by a competent person.
CEILING FAN
DECKENVENTILATOR
VENTILATEUR DE PLAFOND
VENTILATORE DA SOFFITTO
PLAFONDVENTILATOR
VENTILADOR DE TECHO
VENTOINHA DE TECTO
TAKVIFTE
78673
78422
Advertisement
Table of Contents

Related Manuals for Westinghouse 78673


Summary of Contents for Westinghouse 78673
- Page 1 78673 78422 CEILING FAN DECKENVENTILATOR VENTILATEUR DE PLAFOND VENTILATORE DA SOFFITTO PLAFONDVENTILATOR VENTILADOR DE TECHO VENTOINHA DE TECTO TAKVIFTE GAS WARNING: Do not use this fan in the same room at the same time as a gas or fuel burning fire, unless the flue has been tested under these conditions of use by a competent person.
- Page 2 COMBO-MOUNT - Your fan is already equipped with the patented Combo-Canopy (U.S.Patent No. 4,729,725 and Taiwan Patent No. 40,516) allowing for flush mount, or downrod installation on either normal or vaulted ceilings. Choose the system that best suits your needs. COMBO-HALTERUNG –...
- Page 3 FLUSH MOUNT INSTALLATION - For low ceilings BÜNDIG ABSCHLIESSENDE INSTALLATION – Für niedrige Decken MONTAGE ENCASTRÉ – Pour plafonds bas INSTALLAZIONE A FILO DEL SOFFITTO - Per soffitti bassi INSTALLATIE VLAK TEGEN HET PLAFOND – Voor lage plafonds INSTALACIÓN AL RAS: Para cielo rasos bajos INSTALAÇÃO COM MONTAGEM EMBUTIDA –...
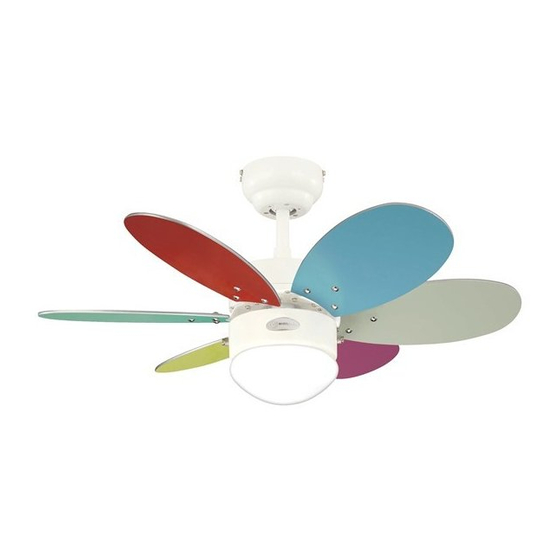
- Page 4 COMBO-BLADE - Combo-Blades feature two high quality finishes on one blade. Select the one that best complements your decor, or change the style with just a flip of the blade. COMBO-BLADE – Die Combo-Blades weisen zwei hochwertige Oberflächenvergütungen je Flügelblatt auf. Durch Umkehrung der Flügelblätter können Sie einen zu Ihrem Dekor passenden oder völlig neuen Stil erzeugen.
-
Page 5: Safety Tips
SAFETY TIPS READ AND SAVE THESE INSTRUCTIONS WARNING: TO REDUCE THE RISK OF FIRE, ELECTRIC SHOCK, OR INJURY TO PERSONS, OBSERVE THE FOLLOWING: Proceed with caution. Read all instructions before beginning the installation. WARNING! This fan may be operated only with a 2-pole switch with a 3mm contact opening each. Only an authorized electrician should execute the installation. -
Page 6: Note Sulla Sicurezza
PRÉCAUTIONS LISEZ CES INSTRUCTIONS ET GARDEZ-LES ATTENTION : AFIN DE RÉDUIRE LE RISQUE D'INCENDIE, D'ÉLECTROCUTION OU DE BLESSURES, VEUILLEZ SUIVRE LES INSTRUCTIONS SUIVANTES : Soyez prudent. Lisez toutes les instructions avant de commencer l’installation. ATTENTION ! Ce ventilateur peut être actionné uniquement à l’aide d’un interrupteur bi-polaire équipé de deux ouvertures de 3 mm. Le ventilateur doit être installé... -
Page 7: Consejos De Seguridad
VEILIGHEIDSTIPS DEZE INSTRUCTIES LEZEN EN BEWAREN WAARSCHUWING: NEEM HET VOLGENDE IN ACHT OM HET RISICO VAN BRAND, ELEKTRISCHE SCHOK OF LETSEL VAN PERSONEN TE VERMINDEREN: Ga voorzichtig te werk. Lees alle instructies voordat u aan de installatie begint. WAARSCHUWING! Deze ventilator mag slechts worden gebruikt met een 2-polige schakelaar, elk met een contactopening van 3 mm. De installatie mag alleen door een bevoegde elektricien worden uitgevoerd. -
Page 8: Conselhos De Segurança
CONSELHOS DE SEGURANÇA LEIA E GUARDE ESTAS INSTRUÇÕES ATENÇÃO: PARA REDUZIR O RISCO DE INCÊNDIO, CHOQUE ELÉCTRICO OU DANOS PESSOAIS, FAÇA O SEGUINTE: 1. Proceda com cuidado. Leia as instruções antes de começar a fazer a instalação. 2. ATENÇÃO: Esta ventoinha só pode ser manobrada com um interruptor bipolar com uma abertura de contacto de 3mm cada. 3. - Page 9 Unpack and inspect fan carefully to be certain all contents are included. Turn off power at fuse box to avoid possible electrical shock. Ventilator auspacken und sicherstellen, dass alle Bestandteile vorhanden sind. Stromzufuhr am Sicherungskasten unterbrechen, um einen Stromschlag zu vermeiden.
- Page 10 Remove the screws and star washers from the two mating holes (1) on the canopy. Loosen (do not remove) the screws in the mating slots (2) on the canopy. Rotate the mounting bracket and remove from the canopy. Die Schrauben und Sternscheiben aus den zwei entsprechenden Bohrungen (1) der Abdeckung entfernen. Die Schrauben in den entsprechenden Schlitzen (2) der Abdeckung lockern (nicht ganz herausdrehen).
- Page 11 Drill two mounting holes in the ceiling joist and securely screw the mounting bracket to the ceiling using the washers and wood screws provided. The mounting plate should be able to hold a weight of at least 15.9kgs (35 lbs). NOTE - Proper care must be taken when mounting to concrete ceilings. For safe mounting, these ceilings may require stronger screws and plastic plugs or anchors than supplied with the product.
- Page 12 GS-26-TurboSwirl2-GW-WH07.8...
- Page 13 ZUGKETTE- PULL CHAIN WIRING OPTION VERKABELUNGSOPTION From House: KLEMMBLOCK TERMINAL BLOCK Vom Haus: Buchse: Connector: Positiv (= Live) (L) Live (L) Negativ (N) Neutral (N) Erdung Ground Kabel entsprechend der obigen Abbildung zum Follow diagram above to make wiring connections to the termi- Anschlussblock an die Deckenplatte verlegen.
- Page 14 LEDNINGSFØRING - NEDTREKKSKJEDE KLEMMBLOCK Vom Haus: Buchse: Positiv (= Live) (L) Negativ (N) Erdung Følg koblingsskjemaet over for å koble ledningene til tilkoplingspunktet på monteringsbraketten. VEDETTÄVÄÄ KETJUKATKAISINTA ALTERNATIV KEDJEKONTAKT KÄYTETTÄESSÄ ANSLUTNINGSPLINT Från huset: Till JAKORASIA Talon sähköverkosta: kontaktdon: Strömförande (L) Liittimeen: Jännitteellinen (L) Nolledare (N)
- Page 15 ĶĒDES PAVIKLŠANAS LÜLITIKETI JUHTMESTIKU ÜHENDAMINE ELEKTROINSTALĀCIJAS IESPĒJA KLEMMIPLOKK GALĒJAIS BLOKS Majast: No nama: Konnektorisse:: Savienotājam: Faas (L) Aktīvs (Live - L) Neutraal (N) Neitrāls (N) Maandus Iezemējums Klemmiploki ja paigalduskronsteini vaheliste juhtmete Sekojiet augstāk sniegtajai diagrammai, lai izveidotu ühendamisel järgige ülaltoodud diagrammi juhiseid. elektroinstalācijas savienojumus ar galējo bloku uz piestiprināšanas kronšteina.
- Page 16 LÁNCOS HÚZÓKAPCSOLÓS VÁLTOZAT OŽIČENJE ZA POTEZNI LANAC HUZALOZÁSA Izvor napajanja PRIKLJUČNICA kućne instalacije: SORKAPOCS A háztól: Csatlakozóhoz: konektor: Faza (L) Fázis (L) Nula (N) Nulla (N) Uzemljenje Föld Za spajanje žica na priključnicu sklopa za postavljanje, A rögzítőlapon levő sorkapocs bekötéséhez a fenti ábra szerint slijedite gornji crtež.
- Page 17 FLUSH MOUNT OPTION Guide motor wires through the base of the canopy as shown and attach canopy directly to top of motor housing with flush mount screws and lock washers provided. Tighten screws securely. NOTE: IF YOU ARE INSTALLING YOUR FAN USING THE FLUSH MOUNT METHOD, PROCEED DIRECTLY TO STEP #12. BÜNDIG ABSCHLIESSENDE OPTION Die Motorkabel laut Abbildung durch die Abdeckungsbasis führen und Abdeckung mit den mitgelieferten Befestigungsschrauben und Sicherungsscheiben an der Oberseite des Motorgehäuses befestigen.
- Page 18 GS-26-TurboSwirl2-GW-WH07.8...
- Page 19 DOWNROD MOUNT OPTION Remove clamp pin (2) and cross pin (1) from downrod. Loosen setscrew in downrod ball (3) until ball moves easily up and down the downrod. Do not remove ground wire (4) from downrod. Slide downrod ball down, exposing cross pin (5). Do not remove ball completely. Remove cross pin and save for later use. HÄNGEROHR-OPTION Den Sicherungsstift (2) und Kreuzzapfen (1) vom Hängerohr entfernen.
- Page 20 GS-26-TurboSwirl2-GW-WH07.8...
- Page 21 Lower the canopy over the lead wires, plug and yoke(1) on motor assembly. Feed lead wires and plug through the downrod & ball assembly. Abdeckung über Kabel, Stecker und Joch (1) auf die Motoreinheit schieben. Kabel und Stecker durch das Hängerohr und die Sicherungskugel führen. Posez la garniture par-dessus les fils de connexion, la chape et la prise de courant (1) sur l’assemblage de moteur.
- Page 22 Re-install cross pin into downrod and slide downrod ball up until cross pin fits firmly into ball. Tighten set screw in ball. Sicherungsstift wieder in das Hängerohr einstecken und Sicherungskugel soweit nach oben schieben, bis diese fest in der Kugel sitzt. Die Stellschraube in der Kugel festziehen.
- Page 23 Loosen set screws in downrod coupling (1). Insert downrod into downrod coupling. Make sure to align hole in downrod with the hole in coupling. Install yoke cross pin (2) through yoke and downrod. Insert clamp pin (3) into cross pin until it snaps into place. Tighten set screws (1) in coupling. Die Stellschrauben in der Hängerohrkupplung (1) lockern.
- Page 24 Carefully lift fan assembly onto mounting bracket. Rotate fan until notch on downrod ball (1) engages the ridge (2) on the mounting bracket. This will allow for hands free wiring. Die Ventilatoreinheit vorsichtig anheben und auf die Deckenplatte anbringen. Den Ventilator so lange drehen, bis die Kerbe an der Sicherungskugel (1) in den Halterungssteg (2) an der Deckenplatte einrastet.
- Page 25 With bracket holding fan assembly, attach the male/female plug connection (1) from the fan to the terminal block. Attach the ground wire (2) from the downrod to the mounting bracket. PROCEED DIRECTLY TO STEP #13. Da nun die Ventilatoreinheit an der Deckenplatte hängt, können Sie den Stecker-/ Buchsen-Anschluss (1) vom Ventilator an den Klemmblock anbringen. Das Erdungskabel (2) vom Hängerohr mit der Deckenplatte verbinden.
- Page 26 GS-26-TurboSwirl2-GW-WH07.8...
- Page 27 For flush mount option, raise fan assembly and place onto hook from mounting bracket into a closed hole on the canopy. This will allow for hands free wiring. With bracket holding fan assembly, attach the male/female plug connection (1) from the fan to the terminal block. Note: The single ground wire plug from the mounting bracket will not be connected if using the flush mount method.
- Page 28 GS-26-TurboSwirl2-GW-WH07.8...
- Page 29 For flush mount fans, carefully lift fan from the mounting bracket, making sure not to break any wire connections. For downrod fans, slide the canopy up to the mounting bracket. The canopy has two mating slots (1) and two mating holes (2). Position both slots on canopy directly under and in line with two screws in the mounting bracket (3).
- Page 30 GS-26-TurboSwirl2-GW-WH07.8...
- Page 31 Install two screws and star washers into the mating holes of the canopy and tighten to secure the canopy to the mounting bracket. Zwei Schrauben und Sternscheiben in die entsprechenden Bohrungen der Abdeckung legen und so fest schrauben, dass die Abdeckung sicher an der Deckenplatte befestigt ist.
- Page 32 Attach blade brackets to blades using the blade bracket screws (1), fabric washers (2), and decorative nuts (3). Die Flügelblatthalterungen an die Flügelblätter mittels der Halterungsschrauben (1), Textilunterlegscheiben (2) und Schmuckmuttern (3) anbringen. Attachez les pales aux supports de pales à l’aide des vis des supports de pales (1), des rondelles en tissu (2) et des écrous décoratifs (3). Installare le staffe sulle pale servendosi delle apposite viti (1), delle rosette in tessuto (2) e dei dadi decorativi (3) forniti.
- Page 33 If plastic shipping stabilizer tabs are attached to motor, remove and discard. Attach blade assembly to motor using the noise-dampening motor gaskets and motor screws provided. Tighten screws securely. NOTE: Some models do not utilize motor gaskets, washers, or stabilizer tabs. Sind Versandstabilisierungsstücke aus Kunststoff am Motor befestigt, diese abnehmen und wegwerfen.
- Page 34 GS-26-TurboSwirl2-GW-WH07.8...
- Page 35 Install light bulb(s) (50 watt max., not included). Install glass shade by gently pushing clips inside the shade until they snap into place and hold the glass shade in place. Glühbirne(n) einschrauben (maximal 50 Watt, nicht mitgeliefert). Das Glasteil vorsichtig in die Klemmen innen im Schirm schieben, bis sie einrasten und das Glas fest sitzt.
- Page 36 Assemble decorative fob and extension chains from hardware bag to fan and light kit (optional) pull chains by inserting end of chain into chain coupling. Confirm chains are held by lightly pulling both chains in coupling. Die Verlängerungszugketten mit den dazugehörenden Endstücken am Ventilator und an den Zugketten der Leuchte (optional) befestigen, indem das Ende der langen Zugkette in das Kettenverbindungsstück eingefügt wird.
- Page 37 GS-26-TurboSwirl2-GW-WH07.8...
- Page 38 GS-26-TurboSwirl2-GW-WH07.8...
-
Page 39: Operation And Maintenance
OPERATION & MAINTENANCE Operation Turn on the power and check operation of fan. The pull chain controls the fan speeds as follows: 1 pull - high; 2 pulls - medium; 3 pulls - low; 4 pulls - off. Speed settings for warm or cool weather depend on factors such as room size, ceiling height, number of fans and so on. -
Page 40: Betrieb Und Wartung
BETRIEB UND WARTUNG Betrieb Strom einschalten und Ventilator beobachten. Die Drehgeschwindigkeit wird durch die Zugkette folgendermaßen geregelt: einmal ziehen - hohe; zweimal ziehen - mittlere; dreimal ziehen – geringe Geschwindigkeit; viermal ziehen - aus. Die Geschwindigkeitseinstellungen für warme oder kalte Wetterbedingungen sind von verschiedenen Faktoren, wie z.B. Zimmergröße, Deckenhöhe, Anzahl der Ventilatoren etc. abhängig. Der Schiebeschalter regelt die Richtung: vorwärts oder rückwärts. -
Page 41: Fonctionnement Et Entretien
FONCTIONNEMENT ET ENTRETIEN Fonctionnement Mettez le ventilateur en marche et vérifiez son fonctionnement. L’interrupteur à chaîne commande les vitesses du ventilateur de la façon suivante : lorsque vous tirez 1 fois sur la chaîne, le ventilateur fonctionne au niveau le plus fort. Lorsque vous tirez 2 fois sur la chaîne, le ventilateur fonctionne au niveau moyen. -
Page 42: Funzionamento E Manutenzione
FUNZIONAMENTO E MANUTENZIONE Funzionamento Accendere il ventilatore e verificarne il funzionamento. La catenella regola la velocità del ventilatore, nel modo seguente: 1 tiro - alta; 2 tiri - media; 3 tiri - bassa; 4 tiri - spento. Le impostazioni caldo/freddo dipendono da vari fattori, come la misura della stanza, l’altezza del soffitto, il numero di ventilatori presenti, ecc. -
Page 43: Verhelpen Van Storingen
BEDIENING EN ONDERHOUD Bediening Schakel de voeding in en controleer of de ventilator werkt. De trekketting regelt de snelheid van de ventilator als volgt: 1 maal trekken - hoog; 2 maal trekken - matig; 3 maal trekken - laag; 4 maal trekken - uit. De snelheidsinstellingen voor warm of koud weer hangen af van factoren zoals de grootte van het vertrek, de hoogte van het plafond, het aantal ventilatoren en dergelijke. -
Page 44: Operación Y Mantenimiento
OPERACIÓN Y MANTENIMIENTO Operación Encienda el ventilador y verifique su funcionamiento. La cadenilla de tiro controla las velocidades del ventilador de la siguiente manera: 1 jalón – rápida; 2 jalones - mediana; 3 jalones - lenta; 4 jalones - apagado. Las velocidades para clima cálido o frío dependen de factores como el tamaño de la habitación, la altura del ventilador, el número de ventiladores, etc. - Page 45 FUNCIONAMENTO E MANUTENÇÃO Funcionamento Ligar a ventoinha e verificar o seu funcionamento. A corrente de puxar controla as velocidades da ventoinha da seguinte maneira: 1 puxão – velocidade rápida; 2 puxões - velocidade média; 3 puxões - velocidade lenta; 4 puxões - ventoinha apagada. As velocidades para clima quente ou frio dependem de factores como o tamanho da dependência, a altura da ventoinha, o número de ventoinhas, etc.
- Page 46 Drift og vedlikehold Drift Slå på strømmen, og kontroller viftens betjeningsfunksjoner. Nedtrekkskjedet regulerer viften på følgende måte: 1 trekk - høy hastighet; 2 trekk - mellomhastighet; 3 trekk - lav hastighet; 4 trekk - av. Hastighetsinnstilling for varmt og kaldt vær vil avhenge av faktorer som romstørrelse, takhøyde, antall vifter osv.
- Page 47 Meaning of crossed-out wheeled dustbin: Do not dispose of electrical appliances as unsorted municipal waste, use separate collection facilities. Contact you local government for information regarding the collection systems available. If electrical appliances are disposed of in landfills or dumps, hazardous substances can leak into the groundwater and get into the food chain, damaging your health and well-being.
- Page 48 Значення зображення перекресленого я ику для сміття на колесах: Не викидайте електричні прилади як несортовані муніципальні відходи, користуйтесь відведеними для цього засобами збору. Для отримання інформації щодо наявності систем збору зверніться до місцевих органів врядування. При викиданні електроприладів до смітників або куп сміття шкодливі речовини можуть потрапити до ґрунтових вод та потім до ланцюжків живлення, що...
- Page 49 41066 Moenchengladbach, Germany c/o GeoLogistics Ltd. Hawthorn Road, Castle Donington Derby, United Kingdom DE74 2QR Westinghouse Lighting Corporation, a Westinghouse Electric Corporation licensee is a registered trademark of Westinghouse Electric Corporation Made in China © 2007 WESTINGHOUSE LIGHTING CORPORATION GS-26-TurboSwirl2-GW-WH07.8...
Need help?
Do you have a question about the 78673 and is the answer not in the manual?
Questions and answers