Advertisement
Advertisement

Related Manuals for Whirlpool ACMT 6533/IX/2


Summary of Contents for Whirlpool ACMT 6533/IX/2
- Page 1 ACMT 6533/IX/2...
-
Page 2: Table Of Contents
English ،عربي Operating Instructions COOKER AND OVEN Contents Operating Instructions,1 Safety instructions,3 Description of the appliance-Overall view,11 Description of the appliance-Control Panel,11 Installation,12 Start-up and use, 14 Clock/Minute Minder Operation Using the hob,18 Care and maintenance,19... -
Page 3: Safety Instructions,3
Before using the appliance carefully read Health and Safety and Use and Care guides. Keep these instructions close at hand for future reference. These instructions shall also be available on website: www.whirlpool.eu SAFETY OF OTHERS IS VERY IMPORTANT Y OUR SAFETY This manual and the appliance itself provide important safety warnings, to be read and observed at all times. - Page 4 CAUTION : The appliance is not intended to be operated by means of an external timer or separate remote controlled supply system. - Do not store explosive or flammable substances such as aerosol cans and do not place or use gasoline or other flammable materials in or n ear the appliance: a fire may break out if the appliance is inadvertently switched on.
- Page 5 CORRECT USE CAUTION : The cooking process has to be supervised. A short cooking process has to be supervised continuously. WARNING : Unattended cooking on a hob with fat or oil can be dangerous and may result in fire. Never try to extinguish a fire with water, but switch off the appliance and then cover flame e.g. with a lid or a fire blanket.
- Page 6 DECLARATION OF CONFORMITY - This appliance meets the Eco Design requirements of European Regulations ECODESIGN Directive 2009/125/ EC TABLE OF CHARACTERISTICS Oven dimensions 32,4x45,5x41,3cm (HxWxD) 61 l Volume Useful width 42 cm measurements depth 44 cm relating to the oven height 8.5 cm compartment Voltage and...
- Page 7 ﻋﺮﺑﻲ ﺑﻴﺎﻧﺎﺕ ﺗﻘﻨﻴﺔ ﻣﻘﺎﻳﻴﺲ ﺍﻟﻔﺮﻥ ﺳﻢ 32,4x45,5x41,3cm ()ﻃﻮﻝ×ﻋﺮﺽ×ﻋﻤﻖ ﻟﺘﺮ ﺍﻟﺤﺠﻢ ﺍﻟﻌﺮﺽ 24 ﺳﻢ ﺍﻟﻤﻘﺎﻳﻴﺲ ﺍﻟﻤﻼﺋﻤﺔ ﻣﺘﻌﻠﻘﺔ ﺍﻟﻌﻤﻖ 44 ﺳﻢ ﺑﺤﺠﺮﺓ ﺍﻟﻔﺮﻥ ﺍﻻﺭﺗﻔﺎﻉ 5.8 ﺳﻢ ﺍﻧﻈﺮ ﻟﻮﺣﺔ ﺍﻟﺒﻴﺎﻧﺎﺕ ﺟﻬﺪ ﺗﺰﻭﻳﺪ ﺍﻟﻄﺎﻗﺔ ﻭﺗﺮﺩﺩﻩ لوح التسخين الكهربائي 0071 واط األمامي األيسر 0021 واط الخلفي...
- Page 8 ﻋﺮﺑﻲ ﻋﺮﺑﻲ اﻟﺘﻨﻈﯿﻒ واﻟﺼﯿﺎﻧﺔ ﺗﻨﻈﯿﻒ أو ﺻﯿﺎﻧﺔ ﻋﻠﯿﮫ اﻓﺼﻞ ﺟﮭﺎزك ﻋﻦ اﻟﻜﮭﺮﺑﺎء ﻗﺒﻞ إﺟﺮاء أﯾﺔ أﻋﻤﺎل ﻻ ﺗﺴﺘﺨﺪم أﺟﮭﺰة اﻟﺘﻨﻈﯿﻒ ﺑﺎﻟﺒﺨﺎر ﺗﺄﻛﺪ أن اﻟﺠﮭﺎز ﻣﻄﻔﺄ ﻗﺒﻞ اﺳﺘﺒﺪال اﻟﻤﺼﺒﺎح ﻟﺘﺠﻨﺐ اﺣﺘﻤﺎﻟﯿﺔ ﺣﺪوث ﺻﺪﻣﺔ ﻛﮭﺮﺑﺎﺋﯿﺔ ﻻ ﺗﺴﺘﺨﺪم اﻟﻤﻨﻈﻔﺎت اﻟﺨﺸﻨﺔ اﻟﻜﺎﺷﻄﺔ أو اﻟﻤﻜﺸﻄﺎت اﻟﻤﻌﺪﻧﯿﺔ اﻟﺤﺎدة ﻟﺘﻨﻈﯿﻒ زﺟﺎج ﺑﺎب اﻟﻔﺮن ﻷﻧﮭﺎ ﻗﺪ ﺗﺨﺪش اﻟﺴﻄﺢ ﻣﻤﺎ ﻗﺪ ﯾﺆدي إﻟﻰ ﺗﮭﺸﯿﻢ اﻟﺰﺟﺎج...
- Page 9 ﻋﺮﺑﻲ ﺗﺤﺬﯾﺮ ﯾﺠﺐ ﺗﻨﻔﯿﺬ ھﺬه اﻹﺟﺮاءات ﺑﻮاﺳﻄﺔ ﻓﻨﻲ ﻛﮭﺮﺑﺎء ﻣﺆھﻞ ﻞ اﻟﺠﮭﺎز ﺑﻐﺎز ﺳﺎﺋﻞ، ﯾﺠﺐ ﺷﺪ ﺑﺮﻏﻲ اﻟﺘﻨﻈﯿﻢ ﻗﺪر اﻟﻤﺴﺘﻄﺎع إذا ﺗﻢ ﺗﻮﺻﯿ ﻋﻤﻮدﯾﺎ ﻋﻨﺪ اﻋﺘﻤﺎد اﺳﻄﻮاﻧﺔ اﻟﻐﺎز، ﯾﺠﺐ أن ﺗﺴﺘﻘﺮ اﺳﻄﻮاﻧﺔ اﻟﻐﺎز أو ﻣﺴﺘﻮﻋﺐ اﻟﻐﺎز ﻛﻤﺎ ﯾﺠﺐ اﺳﺘﺨﺪم ﺧﺮطﻮﻣﺎ ﻣﻌﺪﻧﯿﺎ ﻣﺮﻧﺎ أو ﺻﻠﺒﺎ ﻟﺘﻮﺻﯿﻞ اﻟﻐﺎز ﯾﺠﺐ...
- Page 10 اﺣﺘﻔﻆ ﺑﮭﺬه اﻟﺘﻌﻠﯿﻤﺎت ﺑﺎﻟﻤﺘﻨﺎول ﻛﻤﺮﺟﻊ ﻣﺴﺘﻘﺒﻠﻲ اﻗﺮأ ﺗﻌﻠﯿﻤﺎت اﻟﺼﺤﺔ واﻟﺴﻼﻣﺔ واﻻﺳﺘﺨﺪام واﻟﻌﻨﺎﯾﺔ ﺑﺤﺬر ﻗﺒﻞ اﺳﺘﺨﺪام اﻟﺠﮭﺎز ﺗﺘﻮﻓﺮ ھﺬه اﻟﺘﻌﻠﯿﻤﺎت أﯾﻀﺎ ﻋﻠﻰ اﻟﻤﻮﻗﻊ اﻹﻟﻜﺘﺮوﻧﻲ www.whirlpool.eu ﻟﻠﻐﺎﯾﺔ ﺳﻼﻣﺘﻚ وﺳﻼﻣﺔ اﻵﺧﺮﯾﻦ ﻣﮭﻤﺔ ﯾﻮﻓﺮ ھﺬا اﻟﺪﻟﯿﻞ واﻟﺠﮭﺎز ﻧﻔﺴﮫ ﺗﺤﺬﯾﺮات ھﺎﻣﺔ ﻟﻠﺴﻼﻣﺔ، ﯾﺠﺐ ﻗﺮاءﺗﮭﺎ واﻟﺘﻘﯿﺪ ﺑﮭﺎ داﺋﻤﺎ...
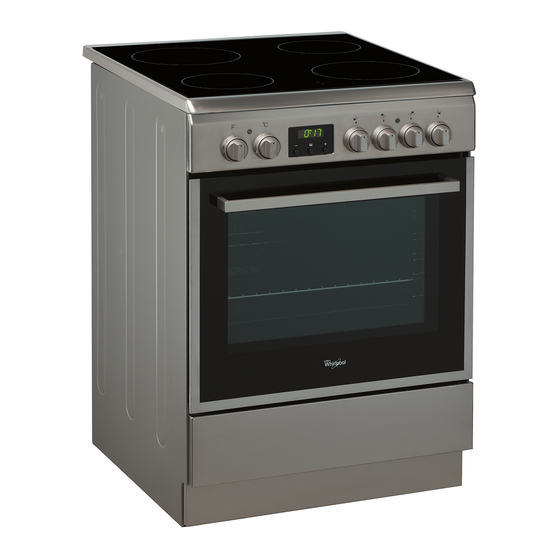
- Page 11 Description of the appliance Overall view 1.Glass ceramic hob 2.Control panel 3..Sliding grill rack 4.DRIPPING pan 5.Adjustable foot 6.GUIDE RAILS for the sliding racks 7.position 5 8.position 4 9.position 3 10.position 2 11.position 1 M M M Description of the appliance Control panel 1.SELECTOR knob 2.THERMOSTAT knob...
-
Page 12: Installation
Installation Electrical connection Positioning and levelling Fitting the power supply cable The appliance may be installed alongside any To open the terminal board: cupboards whose height does not exceed that of the • Insert a screwdriver into the side tabs of the hob surface. - Page 13 • Secure the power supply cable by fastening the The cooker is fitted with a safety chain to be fixed by cable clamp screw then put the cover back on. means of a screw (not supplied with the cooker) to the wall behind the appliance, at the same height as Connecting the supply cable to the electricity mains the chain is attached to the appliance.
-
Page 14: Start-Up And Use
Start-up and use The first time you use your appliance, heat the empty Cooking modes oven with its door closed at its maximum temperature A temperature value can be set for all cooking modes for at least half an hour. Ensure that the room is well between 60°C and Max, except for the following modes ventilated before switching the oven off and opening the oven door. - Page 15 Function Function Function TRADITIONAL Both the top and bottom heating elements will come on. When using this traditional OVEN cooking mode, it is best to use one cooking rack only. If more than one rack is used, the heat will be distributed in an uneven manner. The rear heating element and the fan are switched on, thus guaranteeing the BAKING distribution of heat in a delicate and uniform manner throughout the entire oven.
-
Page 16: Clock/Minute Minder Operation ,16
Clock/Minute Minder Operation Programming cooking COOKING PROCESS A cooking mode must be selected before icon programming can take place. DISPLAY •• •• Programming the cooking duration AUTO button several times until icon 1. Press the icon TIMER icon and the DUR digits on the DISPLAY begin to flash. 2. -
Page 17: Oven Cooking Advice Table
Oven cooking advice table Cooking Foods Weight Rack Position Pre-heating Recommended Cooking modes (in kg) time temperature time (minutes) (minutes) Duck 65-75 Roast veal or beef 70-75 Traditional Pork roast 70-80 Oven Biscuits (short pastry) 15-20 Tarts 30-35 Tarts 20-30 Fruit cakes 2 or 3 40-45... -
Page 18: Using The Hob
Using the glass ceramic The glue applied on the gaskets leaves traces of They are similar to the other cooking zones on the hob grease on the glass. Before using the appliance, we and are therefore easy to use. To ensure you use the recommend you remove these with a special non- hob correctly, all you need to do is consult the cooking abrasive cleaning product. -
Page 19: Care And Maintenance
Care and maintenance Switching the appliance off Cleaning the glass ceramic hob Disconnect your appliance from the electricity supply Do not use abrasive or corrosive detergents (for before carrying out any work on it. example, products in spray cans for cleaning barbecues and ovens), stain removers, anti-rust products, powder Cleaning the oven detergents or sponges with abrasive surfaces: these may... - Page 20 Removing and fitting the oven door: WARNING! Oven must not be operated with inner door glass removed! 1.Open the door 2.Make the hinge clamps of the oven door rotate WARNING! When reassembling the inner door backwards completely (see photo) glass insert the glass panel correctly so that the text written on the panel is not reversed and can be easily legible.
- Page 21 أنظ ر الج انبي العل وي وق م بف ك الج زء الج انبي فك وإعادة تركيب باب الفرن الصورة لتنظي ف كم ا فك اللوح الزجاجي، ثم اب دأ ف ي عملي ة ا أفتح الباب " الصيانة والعناية بالجھاز "...
- Page 22 ﺍﻟﻌﻨﺎﻳﺔ ﻭﺍﻟﺼﻴﺎﻧﺔ ﺇﻳﻘﺎﻑ ﺗﺸﻐﻴﻞ ﺍﻟﺠﻬﺎﺯ ﻓﺤﺺ ﻣﻄﺎﻁ ﺍﻟﻔﺮﻥ ﺍﻓﺤﺺ ﻣﻄﺎﻁ ﺍﻟﺒﺎﺏ ﺣﻮﻝ ﺍﻟﻔﺮﻥ ﺑﺸﻜﻞ ﻣﻨﺘﻈﻢ. ﺇﺫﺍ ﺗﻠﻒ ﺍﻟﻤﻄﺎﻁ، ﺍﻟﺮﺟﺎء ﺍﺗﺼﻞ .ﺍﻓﺼﻞ ﺟﻬﺎﺯﻙ ﻋﻦ ﺗﺰﻭﻳﺪ ﺍﻟﻄﺎﻗﺔ ﻗﺒﻞ ﺇﻧﺠﺎﺯ ﺃﻱ ﻋﻤﻞ ﻟﻪ ﺑﺄﻗﺮﺏ ﻣﺮﻛﺰ ﺧﺪﻣﺔ ﻣﺎ ﺑﻌﺪ ﺍﻟﺒﻴﻊ. ﻧﻮﺻﻲ ﺑﻌﺪﻡ ﺍﺳﺘﺨﺪﺍﻡ ﺍﻟﻔﺮﻥ ﺇﻟﻰ ﺃﻥ ﻳﺘﻢ ﺍﺳﺘﺒﺪﺍﻝ .ﺍﻟﻤﻄﺎﻁ...
- Page 23 استخدام رف التسخين السيراميكي .الغراء الملصق على السدادات يترك آثار تشحيم على الزجاج لوحة عادية أو سريعة إعداد إيقاف تشغيل قبل استخدام الجهاز، نحن ننصح بإزالة هذه البقايا بواسطة منتج طهي الخضروات والسمك ،تنظيف غير كاشط. خالل الساعات القليلة األولى من االستخدام طهي...
- Page 24 جدول نصائح الطهي في الفرن وقت الطهي وقت اإلحماء المسبق متغير درجة الحرارة موضع الطهي في األرفف الوزن الطعام المطلوب طهيه الشواية من األسفل )(دقيقة )(بالدقائق )(مئوية )(الوزن المخبوزات 75-80 الزانيا 75-80 الحد األقصى كانيلوني 75-80 نودلز مطهية في الفرن لحوم...
- Page 25 تشغيل مراقب الساعات/الدقائق أيقونة عملية الطهي !برمجة الطهي .يجب اختيار وضع الطهي قبل أن تتم البرمجة الشاشة •• •• أيقونة التلقائي برمجة مدة الطهي أيقونة المؤقت بالوميضDUR عدة مرات إلى أن تبدأ أيقونة وخانات اضغط على زر زر إنقاص الوقت .على...
- Page 26 سيتم تشغيل كل من عنصري التسخين العلوي والسفلي عند نمط استخدام نمط الطهي التقليدي، من األفضل استخدام رف واحد الفرن التقليدي للطهي فقط. إذا تم استخدام أكثر من رف، يتم توزيع التسخين .بطريقة غير متساوية يتم تشغيل عنصر التسخين الخلفي والمروحة، مما يضمن توضيع الحرارة...
- Page 27 بدء التشغيل واالستخدام ال تضع أبدا أغراضا في الجهة السفلية من الفرن؛ وذلك لتحاشي عند استخدامك لجهازك ألول مرة، قم بإحماء الفرن الفارغ إتالف طالء المينا. ال تستخدم الوضع 1 في الفرن إلى عند الطهي بينما يكون بابه مغلقا، بدرجة الحرارة القصوى ولنصف .بواسطة...
- Page 28 طوقسلا مدع لجأ نم 380-415 380-415 380-415 V 2N~ ىلع ،زاهجلل يضرعلا H05RR-F 4x4 CEI-UNEL 35363 امدنع لاثملا ليبس H05VV-F 4x4 CEI-UNEL 35746 قلست لفط لواحي L2 L1 هنإف ،نرفلا باب ةسلس بيكرت بجي !ةقفرملا نيمأتلا دقوم ديوزت مت ةسلسب يهطلا بجي...
- Page 29 ﺍﻟﺘﺮﻛﻴﺐ ﺍﻟﺘﻮﺻﻴﻼﺕ ﺍﻟﻜﻬﺮﺑﺎﺋﻴﺔ ﺗﺤﺪﻳﺪ ﺍﻟﻤﻮﺿﻊ ﻭﺍﻻﺭﺗﻔﺎﻉ ﻣﻼءﻣﺔ ﻛﺒﻞ ﺗﺰﻭﻳﺪ ﺍﻟﻄﺎﻗﺔ ﻣﻦ ﺍﻟﻤﻤﻜﻦ ﺗﺮﻛﻴﺐ ﺍﻟﺠﻬﺎﺯ ﺇﻟﻰ ﺟﺎﻧﺐ ﺧﺰﺍﻧﺔ ﻻ ﻳﺘﻌﺪﻯ ﺍﺭﺗﻔﺎﻋﻬﺎ ﺳﻄﺢ ﺭﻑ :ﻓﺘﺢ ﺍﻟﻠﻮﺣﺔ ﺍﻟﻨﻬﺎﺋﻴﺔ .ﺍﻟﺘﺴﺨﻴﻦ • ﺑﺎﺳﺘﺨﺪﺍﻡ ﻣﻔﻚ، ﻓﻚ ﺍﻷﻟﺴﻨﺔ ﺍﻟﺠﺎﻧﺒﻴﺔ ﺍﻟﺨﺎﺻﺔ ﺑﻐﻄﺎء ﺍﻟﻠﺤﺔ ﺍﻟﻨﻬﺎﺋﻴﺔ؛ ﺗﺄﻛﺪ ﻣﻦ ﺃﻥ ﺍﻟﺤﺎﺋﻂ ﺍﻟﺬﻱ ﻳﻼﻣﺲ ﺍﻟﺠﻬﺔ ﺍﻟﺨﻠﻔﻴﺔ ﻣﻦ ﺍﻟﺠﻬﺎﺯ، ﻣﺼﻨﻮﻉ ﻣﻦ ﻣﻮﺍﺩ ﺍﻓﺘﺢ...
- Page 30 وصف الجهاز نظرة عامة ﻟﻮﺣﺔ ﺍﻟﺘﺤﻜﻢ ﺿﻮء ﻣﺆﺷﺮ ﺍﻟﺜﺮﻣﻮﺳﺘﺎﺕ ﻣﺆﺷﺮ ﻟﻮﺡ ﺍﻟﺘﺴﺨﻴﻦ ﺍﻟﻨﺸﻂ M M M ﻣﻔﺘﺎح ﺳﺎﻋﺔ ﺗﺤﻜﻢ ﺑﺼﻔﻴﺤﺔ ﺗﺴﺨﻴﻦ ﻛﻬﺮﺑﺎﺋﻴﺔ اﻟﺘﻮﻗﻴﺖ ﻣﻔﺘﺎﺡ ﺍﻟﺜﺮﻣﻮﺳﺘﺎﺕ ﻣﻔﺘﺎﺡ ﺍﻻﺧﺘﻴﺎﺭ ﻣﻔﺘﺎﺡ ﺻﻔﻴﺤﺔ ﺍﻟﺘﺴﺨﻴﻦ ﺍﻟﻜﻬﺮﺑﺎﺋﻴﺔ...
- Page 32 Whirlpool EMEA S.p.A. Via Carlo Pisacane n.1 20016 Pero (MI), Italy 02/2016-19514089500 VAT number: IT00693740425 XEROX FABRIANO www.whirlpool.com...
Need help?
Do you have a question about the ACMT 6533/IX/2 and is the answer not in the manual?
Questions and answers