Table of Contents
Advertisement
Quick Links
Advertisement
Table of Contents

Related Manuals for Chauvin Arnoux C.A 1246


Summary of Contents for Chauvin Arnoux C.A 1246
- Page 1 GB - User’s manual C.A 1246 Thermo-hygrometer...
- Page 2 The product is declared recyclable following an analysis of the life cycle in accordance with standard ISO 14040. Chauvin Arnoux has adopted an Eco-Design approach in order to design this appliance. Analysis of the complete life- cycle has enabled us to control and optimize the effects of the product on the environment. In particular this appliance exceeds regulation requirements with respect to recycling and reuse.
-
Page 3: Table Of Contents
1.3. Spare parts ..................................4 1.4. Inserting the batteries ..............................5 2. PRESENTATION OF THE INSTRUMENT ..........................6 2.1. C.A 1246 ..................................6 2.2. Functions of the instrument ............................7 2.3. On/Off key ..................................7 2.4. Function keys ................................. 7 2.5. -
Page 4: First Use
1. FIRST USE 1.1. DELIVERY CONDITION Thermo-hygrometer C.A 1246 Supplied in a cardboard box with: „ three AA or LR6 alkaline batteries, „ one USB-micro USB cord, „ one multilingual getting started guide, „ one multilingual safety data sheet, „ one test report, „... -
Page 5: Inserting The Batteries
1.4. INSERTING THE BATTERIES Notches to hang up the instrument. Non-skid pads Magnet for attachment to a metallic surface. Battery compartment cover. „ Press the tab of the battery compartment cover and lift it clear. „ Withdraw the battery compartment cover. „... -
Page 6: Presentation Of The Instrument
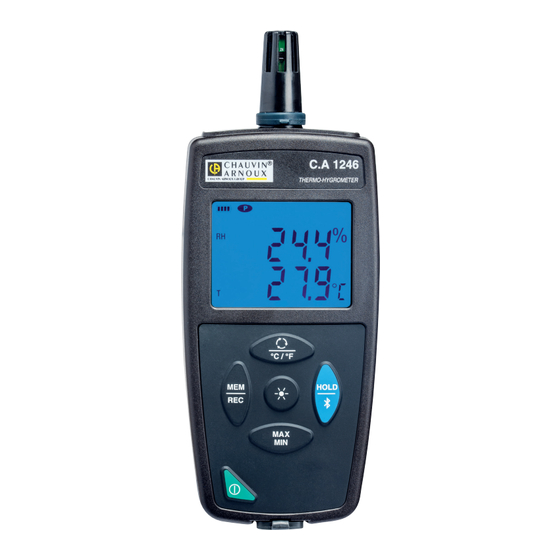
2. PRESENTATION OF THE INSTRUMENT 2.1. C.A 1246 Cap protecting the sensor. Temperature and humidity sensor. C.A 1246 THERMO-HYGROMETER Backlit LCD display unit. Keypad with 5 keys. °C / ° F HOLD On/Off key. Type B micro-USB connector. -
Page 7: Functions Of The Instrument
2.2. FUNCTIONS OF THE INSTRUMENT The C.A 1246 is a thermo-hygrometer. It is used to measure temperatures from -10 to +60°C and relative humidity from 3 to 98% RH. This instrument is easy to use. It has extensive stand-alone capabilities and can display: „... -
Page 8: Display
2.5. DISPLAY MIN MAX MEM FULL HOLD Secondary display unit. Dp T Main display unit. T Dp When the measurement exceeds the limits (positive or negative), the instrument displays OL. : indicates that auto-off is disabled and the instrument is in permanent mode. „... -
Page 9: Use In Stand-Alone Mode
3. USE IN STAND-ALONE MODE The instrument can operate in two modes: „ the stand-alone mode described in this section, „ the record mode, in which it is controlled by a PC. This mode is described in the next section. 3.1. -
Page 10: Recording The Measurements
„ The MAX MIN key can be pressed to monitor the minimum and maximum values. Press the key a second time and the instru- ment displays the maximum (on both display units). A third press and the instrument displays the minimum. A fourth press and it returns to the current values. -
Page 11: Use In Recording Mode
4. USE IN RECORDING MODE The instrument can operate in two modes: „ the stand-alone mode described in the previous section, „ the record mode, in which it is controlled by a PC. This mode is described below. 4.1. CONNECTION The device has 2 communication modes: „... -
Page 12: Bluetooth Link
4.4. BLUETOOTH LINK The instrument has a low-energy Bluetooth 4.0 link that requires no pairing. „ Activate Bluetooth on your PC. If your PC does not have a Bluetooth link, you can add a board or Bluetooth adapter connected to a USB port (see §1.2). Since Windows 7 does not manage low-energy Bluetooth, a specific USB/Bluetooth adapter must be used (see §1.2). - Page 13 4.5.2. DATE AND HOUR The Instrument menu lets you set the your instrument’s date and time. These cannot be changed while recording or when a recording session has been scheduled. By clicking , you can choose the date and time display formats. 4.5.3.
- Page 14 Before starting a recording session, make sure that the battery life is sufficient, or else connect the instrument to an external power supply to a wall outlet using a micro USB cord. 4.5.5. DISPLAY , then opening the Thermo-hygrometer tab, you can modify the display of the measurements on the instrument By clicking on in the same way as you can by pressing the or °C/°F keys.
- Page 15 4.5.10. REAL-TIME MODE Click Real-time data under the name of your instrument to see the measurements being made on the instrument as they are made. 4.5.11. FORMATTING THE MEMORY OF THE INSTRUMENT The internal memory of the instrument is already formatted. But if there is a problem (if it becomes impossible to read or to write), it may be necessary to reformat it (in Windows).
-
Page 16: Technical Characteristics
5. TECHNICAL CHARACTERISTICS 5.1. REFERENCE CONDITIONS Quantity of influence Reference values Temperature 23 ± 2°C Relative humidity 45% to 75% Supply voltage 3 to 4.5V Electric field < 1V/m Magnetic field < 40A/m The intrinsic uncertainty is the error specified for the reference conditions. 5.2. - Page 17 5.2.4. PSYCHROMETRIC DIAGRAM The atmospheric air that surrounds us is a mixture of: „ dry air, „ and water vapour, generally invisible, that may be found in liquid form (condensation). There exists on the quantity of water vapour (or absolute humidity) a limiting value beyond which any additional quantity of water vapour immediately turns into liquid water.
-
Page 18: Memory
5.2.5. INFLUENCE OF TEMPERATURE ON THE HUMIDITY MEASUREMENT Relative humidity (%) ±5 ±5 ±5 ±4 ±4 ±3 ±4 ±4 ±4 ±4 ±4 ±4 ±4 ±5 ±5 ±4 ±3 ±2 ±2 ±2 ±3 ±3 ±3 ±3 ±4 ±4 ±5 ±4 ±4 ±3 ±2 ±2... -
Page 19: Power Supply
5.6. POWER SUPPLY The instrument is supplied by three 1.5V LR6 or AA alkaline batteries. It is possible to replace the batteries by rechargeable NiMH batteries of the same size. But the rechargeable batteries, even when correctly charged, will not reach the voltage of the alkaline batteries and the life indicated will be The voltage range ensuring correct operation is from 3 to 4.5V for the alkaline batteries and 3.6V for the rechargeable batteries. -
Page 20: Maintenance
See you on our site: www.chauvin-arnoux.com Then go to “Support”, then “Download our software”, then “C.A 1246”. Updating the embedded software may reset the configuration and cause the loss of the recorded data. As a precaution, save the data in memory to a PC before updating the embedded software. - Page 21 Embedded software update procedure „ Download the .bin file from our web site, then press and hold the MEM key and switch the instrument on by pressing the key. The instrument displays BOOT. „ Release the keys and the instrument displays COPY, indicating that it is ready to receive the new software. „...
-
Page 22: Warranty
7. WARRANTY Except as otherwise stated, our warranty is valid for 24 months starting from the date on which the equipment was sold. Extract from our General Conditions of Sale provided on request. The warranty does not apply in the following cases: „... - Page 24 FRANCE INTERNATIONAL Chauvin Arnoux Group Chauvin Arnoux Group 190, rue Championnet Tél : +33 1 44 85 44 38 75876 PARIS Cedex 18 Fax : +33 1 46 27 95 69 Tél : +33 1 44 85 44 85 Fax : +33 1 46 27 73 89 Our international contacts info@chauvin-arnoux.com...
Need help?
Do you have a question about the C.A 1246 and is the answer not in the manual?
Questions and answers