
Related Manuals for Electrolux EWF7525DGWA


Summary of Contents for Electrolux EWF7525DGWA
- Page 1 EWF7525DGWA WASHING MACHINE USER MANUAL MÁY GIẶT TÀI LIỆU HƯỚNG DẪN SỬ DỤNG...
-
Page 2: Table Of Contents
ENVIRONMENT CONCERNS ..................33 WE’RE THINKING OF YOU Thank you for purchasing an Electrolux appliance. You’ve chosen a product that brings with it decades of professional experience and innovation. Ingenious and stylish, it has been designed with you in mind. So whenever you use it, you can be safe in the knowledge that you’ll get great results every time. -
Page 3: Safety Information
ENGLISH SAFETY INFORMATION Conditions of use Wash small items such as socks, laces, washable belts etc in a washing bag or This appliance is intended to be used in pillow case as it is possible for such items household and similar applications such as: to slip down between the tub and the ●... - Page 4 After having installed the appliance, check Never use the washing machine if the that it is not standing on the inlet and drain power supply cable, the control panel, the hose and the worktop is not pressing the working surface or the base are damaged electrical supply cable.
-
Page 5: Product Description
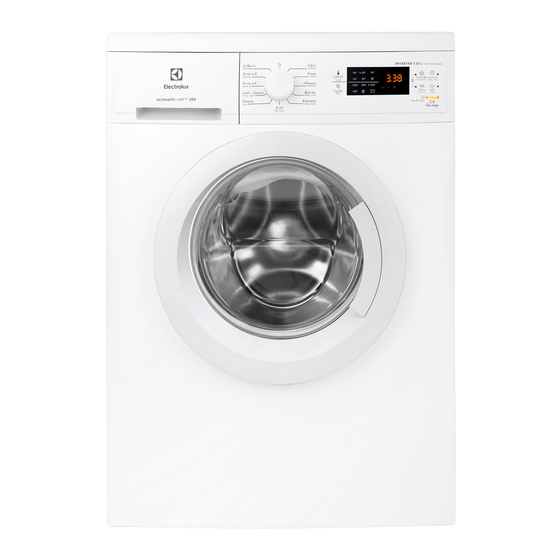
ENGLISH PRODUCT DESCRIPTION Worktop Mains Cable Detergent/Softener Dispenser Water Inlet Hose Control Panel Water Drain Hose Hose Support Door Handle Door Transit Bolts Level Adjustment Feet (Front) Back Feet ACCESSORIES Plastic caps To close the holes on the rear side of the cabinet after the removal of the transit bolts. -
Page 6: Control Panel
CONTROL PANEL Program Selector Knob Extra Rinse Touchpad Delay End Touchpad Spin Selection Touchpad Temperature Touchpad Easy Iron Touchpad Soak Touchpad Display Child Lock Option Start/Pause and Add Clothes Touchpad Program Selector Knob No Spin No spin option eliminates all the Turn this knob to set a program. - Page 7 ENGLISH Temperature Touchpad Set this option before pressing the Start/Pause and after having Press this touchpad repeatedly to selected the required wash program. increase or decrease the wash This function remains enabled even temperature if you want your laundry after the appliance is switched off. to be washed at a temperature different from the one proposed by Setting Child Lock option:...
- Page 8 Soak This option must be selected after choosing the wash This option allows you to soak program, and before pressing heavily soiled clothes and stained the “Start/Pause” touchpad. items at the beginning of the wash For example, if the program before main washing phase.
- Page 9 ENGLISH NOTE To interrupt a program which is running, press this touchpad to If you Do not wish to use the soak pause the machine, the Start/Pause water to wash cloth, please follow pilot light flashes. the steps below: To restart the program from the Press Start/Pause to pause the point at which it was interrupted, washing machine.
- Page 10 Programs + Options Program; Type of load; Max. Spin Options can be Temperature Max. weight of load combined This position to reset program/switching off the machine. Cottons; White and coloured 1200 rpm Cold to 90°C cotton with heavy level of soil;...
- Page 11 ENGLISH Program; Type of load; Max. Spin Options can be Temperature Max. weight of load combined Quick 20; Synthetic and mixed 800 rpm 30°C fabric items. Light soil and items to freshen up; maximum load 1.5 kg. Daily 60; Coloured cotton e.g. 1200 rpm 30°C, 40°C, shirts, blouses, towels...
-
Page 12: Before First Use
BEFORE FIRST USE Ensure that the electrical and water 3. Select a Cottons cycle at 90 °C, connections comply with the without any laundry in the machine, installation instructions. to remove any manufacturing residue from the drum and tub. Pour 1/2 a... - Page 13 ENGLISH Press the option touchpads, if you If you want to define the end of the want your laundry to be washed washing program, press the “Delay with special functions. End ( )” touchpad repeatedly to choose your washing machine Different functions can be combined working time.
- Page 14 Make sure that no laundry remains Close the door. between the seal and the door. Step 3 - Using Detergent And Additives Detergent Dispenser Drawer Powder or liquid detergent. The detergent dispenser is divided into two compartments. Compartment “MAIN WASH”...
- Page 15 ENGLISH If required, pour fabric softener When you use the liquid into the compartment marked detergent: (the amount used must not Do not use gelatinous or thick exceed the “MAX” mark in the liquid detergents. drawer). Do not put more liquid than the maximum level.
- Page 16 5.2 Interruption Of A Program To drain the water, you have to switch the machine off by pressing To pause press Start/ Pause. The the “On/Off” button to deactivate indicator will start flashing. the appliance. Turn On the machine Press the Start/Pause again.
- Page 17 ENGLISH When The Washing Program Stand By Mode Is Completed, But There Is 5 minutes after the washing program Water In The Drum ends, if you do not deactivate the appliance, the energy saving function (Option “Rinse & Hold ” is used) activates.
-
Page 18: Washing Hints
WASHING HINTS 6.1 Sorting The Laundry Remove persistent stains before washing. Follow the wash code symbols on Rub particularly soiled areas with a each garment label and the special detergent or detergent paste. manufacturer’s washing instructions. Treat curtains with special care. - Page 19 ENGLISH Detergents Type And Rust: oxalic acid dissolved in hot water or a rust removing product Quantity Of Detergent used in cold water. Be careful with Low sudsing detergent is required rust stains which are not recent for this washing machine to since the cellulose structure will prevent oversudsing problems, already have been damaged and...
- Page 20 Water hardness is classified by Not enough washing powder causes: so-called “degrees” of hardness. the washload to turn grey, greasy clothes. Information on hardness of the water in your area can be obtained from Too much washing powder causes:...
-
Page 21: International Wash Code Symbols
ENGLISH INTERNATIONAL WASH CODE SYMBOLS These symbols appear on fabric labels, in order to help you choose the best way to treat your laundry. Energetic wash Max. wash Max. wash Max. wash Max. wash Hand wash DO NOT temperature temperature temperature temperature wash at all... -
Page 22: Care And Cleaning
CARE AND CLEANING WARNING! Select the hottest “Regular” wash program. You must DISCONNECT the appliance from the electricity Use a normal measure of supply, before you can carry out detergent, must be a powder any cleaning or maintenance with biological properties. - Page 23 ENGLISH 8.6 Cleaning The Drawer Bottom After washing cycle finish, residues of softener and water may remain in the softener dispenser. It is recommended to clean the bottom of softener dispenser regularly to remove any residue. To clean the bottom of softener dispenser: 1.
- Page 24 Disconnect the mains plug Clean the filter in the inlet hose from the mains socket. with a stiff brush. Turn off the water tap. 2. Unscrew the inlet hose. 3. Remove the drain hose from the rear support and unhook it from sink or spigot.
-
Page 25: Troubleshooting
ENGLISH TROUBLESHOOTING Certain problems are due to lack of Alarm Code: simple maintenance or oversights, The appliance does not fill with water which can be solved easily without properly. calling out an engineer. Before The appliance does not drain the contacting your local Service Centre, water. - Page 26 Malfunction Possible cause Solution The machine The end of the drain hose is Refer to relevant paragraph fills then too low. in “water drainage” section. empties Error code: immediately: The drain hose is squashed Check the drain hose or kinked. Error code: connection.
- Page 27 ENGLISH Malfunction Possible cause Solution The transit bolts and packing Check the correct installation of have not been removed. the appliance. The support feet have not Check the correct levelling of been adjusted. the appliance. The machine The laundry is not evenly Pause the machine and vibrates or is distributed in the drum.
- Page 28 Malfunction Possible cause Solution Machines based on modern No water is technology operate very visible in the economically using very little drum: water without affecting performance. If you are unable to identify or solve the problem, contact our service centre.
-
Page 29: Technical Data
ENGLISH TECHNICAL DATA Width 57 cm Dimensions Height 85 cm Depth 60 cm Power supply (voltage/frequency) 220-240 V/50 Hz Total power absorbed 2000 W Minimum fuse protection 10 A Maximum 0.8 MPa Water supply pressure Minimum 0.05 MPa Cottons 7.5 kg Mixed 3.5 kg Bedding... -
Page 30: Installation
INSTALLATION 11.1 Positioning When the washing machine is levelled, try to rock it from corner It is important that your to corner. If it does rock, adjust the washing machine stands firm legs again until it is levelled and and level on the floor to ensure does not rock. - Page 31 ENGLISH The end of the drain hose must always be ventilated, i.e. the inside diameter of the drain pipe must be larger than the outside diameter of the drain hose. The drain hose must not be kinked. Run it along the floor; only The inlet hose must not be the part near the drainage point lengthened.
- Page 32 Should the appliance power supply cable need to be replaced, this should be carried out by our Service Centre. When the appliance is installed the power supply cable must be easily accessible. If this appliance is supplied from a...
-
Page 33: Environment Concerns
ENGLISH ENVIRONMENT CONCERNS 12.1 Packaging Materials For more detailed information about recycling of this product, The materials marked with please contact your local city the symbol office, your household waste recyclable. disposal service or the shop >PE<=polyethylene where you purchased the >PS<=polystyrene product. - Page 34 CHÚNG TÔI LUÔN NGHĨ V KHÁCH HÀNG C m ơn b n đã mua thi t b Electrolux. B n đã ch n m t s n ph m trong đó có ch a đ ng c hàng th p niên kinh nghi m chuyên gia và s đ i m i. Tinh t và sành đi u, thi t b này đư...
-
Page 35: Thông Tin V An Toàn
TI NG VI T THÔNG TIN V AN TOÀN Các đi u ki n s d ng B t kỳ đ v t nào ch ng h n như đ ng xu, ghim an toàn , đinh, c vít, đá hay b t kỳ v t Thi t b này nh m s d ng trong các ng d ng nào c ng, s c đ... - Page 36 1.4 AN TOÀN CHO TR EM Sau khi l p đ t thi t b , hãy ki m tra đ đ m b o thi t b không ép lên ng n p và Máy gi t này đư c thi t k không ph i đ...
-
Page 37: Mô T S N Ph M
TI NG VI T MÔ T S N PH M Dây Đi n N m máy Ngăn Đ nh Lư ngB t Gi t/ ng N p Nư c Ch t Làm M m V i Dây ng x B ng Đi u Khi n Giá... -
Page 38: B Ng Đi U Khi N
B NG ĐI U KHI N Nút Ch n Chương Trình Phím Đi u Khi n Delay End (Trì Hoãn) Phím Đi u Khi n Ch n Vòng V t Phím Đi u Khi n Easy Iron (Dễ Là/Ủi) Phím Đi u Khi n Nhi t Đ... - Page 39 TI NG VI T Phím Đi u Khi n Nhi t Đ Đ t tùy ch n này trư c khi nh n Start/Pause (B t Đ u/T m D ng) Nh n phím đi u khi n này nhi u l n và...
- Page 40 Ph i ch n tùy ch n này sau khi Soak (Ngâm) ch n chương trình gi t và trư c Tùy ch n này cho phép b n ngâm khi nh n bàn phím c m ng qu n áo r t b n và đ dùng màu “Start/Pause”.
- Page 41 TI NG VI T ● Thêm Qu n Áo ( Nh n nút Start/Pause l n n a đ b t đ u ch đ gi t m i đã ch n, máy s B n ch có th thêm qu n áo ki m tra và...
- Page 42 Chương Trình + Tùy Ch n Chương trình; Lo i qu n áo; T c Đ V t Có th k t h p các Nhi t đ Tr ng lư ng qu n áo T i Đa tùy ch n t i đa...
- Page 43 TI NG VI T Chương trình; Lo i qu n áo; T c Đ V t Có th k t h p các Nhi t đ Tr ng lư ng qu n áo T i Đa tùy ch n t i đa Quick 20 V i t ng h p và...
-
Page 44: Trư C Khi S D Ng L N Đ U
TRƯ C KHI S D NG L N Đ U Đ m b o r ng các k t n i đi n và nư c 3. Ch n chu kỳ Cottons t i 90 °C, mà phù h p v i các hư ng d n l p đ t. - Page 45 TI NG VI T Nh n các phím đi u khi n tùy ch n, N u b n mu n trì hoãn chương trình n u b n mu n gi t đ v i các ch c gi t, hãy nh n phím đi u khi n tùy năng đ...
- Page 46 Đóng c a l i. Ch c ch n r ng không còn đ gi t gi a mi ng đ m và c a. Bư c 3 - S D ng B t Gi t Và Ch t Ph Gia B t gi t ho c nư...
- Page 47 TI NG VI T Khi nào thì s d ng nư c N u c n, đ ch t làm m m v i gi t t y: vào ngăn đư c đánh d u (lư ng đư c s d ng không Không s d ng b t gi t d ng đư...
- Page 48 5.2 Gián Đo n Chương Trình N u ch báo khóa c a “ ” không t t, đi u này có nghĩa là máy đang Đ t m d ng, hãy nh n Start/Pause (B t nóng lên và m c nư c trên mép Đ...
- Page 49 TI NG VI T Khi Hoàn Thành Chương Ch đ ch Trình Gi t, Nhưng Có Nư c 5 phút sau khi k t thúc chương trình Trong L ng gi t gi t, n u b n không vô hi u hóa thi t b thì...
-
Page 50: G I Ý Gi T
G I Ý GI T Chà nh ng ch b b n đ c bi t b ng Phân Lo i Đ Gi t b t gi t chuyên d ng ho c b t gi t. Tuân theo các bi u tư ng mã gi t X lý... - Page 51 TI NG VI T Lo i Ch t Gi t T y Và Lư ng G s t: axit oxalic hòa tan trong nư c nóng ho c s n ph m lo i b g Ch t Gi t T y s t đư...
- Page 52 Đ c ng c a nư c đư c phân lo i d a theo “đ ” c ng. B n có th l y thông tin v đ c ng c a nư c trong khu v c mình t công ty cung c p nư...
-
Page 53: Các Bi U Tư Ng Mã Gi T Qu C T
TI NG VI T CÁC BI U TƯ NG MÃ GI T QU C T Bi u tư ng này xu t hi n trên nhãn v i đ giúp b n l a ch n cách t t nh t đ x lý... -
Page 54: B O Trì Và V Sinh
B O TRÌ VÀ V SINH C NH BÁO! Đ ch y máy gi t b o trì: B n ph i NG T thi t b kh i ngu n L ng gi t c n ph i không còn đ... - Page 55 TI NG VI T Làm S ch Đáy Ngăn Kéo Làm s ch ngăn ch a b ng bàn ch i đánh răng cũ dư i vòi Sau khi k t thúc chu kỳ gi t, dư nư c. lư ng nư c x v i và nư c có th còn l i trong ngăn đ...
- Page 56 8.8 V Sinh B L c N p Nư c 8.9 Các Nguy Cơ Đóng Băng N u nư c r t c ng ho c ch a các N u máy ti p xúc v i nhi t đ th p v t c n vôi thì...
-
Page 57: Kh C Ph C S C
TI NG VI T KH C PH C S C Mã Báo Đ ng M t s v n đ là do thi u b o trì đơn gi n ho c sơ su t mà có th đư c gi i quy t d dàng mà Máy không đư... - Page 58 Hỏng hóc Nguyên nhân có thể có Giải pháp Ống xả bị đè hoặc bị xoắn lại. Kiểm tra đầu nối ống xả. (Mã lỗi: Máy không Tùy chọn “Rinse & Hold” Nhấn Start/Pause để ráo nước. thể xả hoặc (Hoãn Xả) đã...
- Page 59 TI NG VI T Hỏng hóc Nguyên nhân có thể có Giải pháp Sử dụng quá nhiều bột giặt. Giảm khối lượng bột giặt hoặc sử dụng bột giặt khác. Thời gian chu Mất cân bằng máy. Dùng tay phân bố lại đồ giặt kỳ...
-
Page 60: D Li U K Thu T
D LI U K THU T Chi u R ng 57 cm Các Kích Thư c 85 cm Chi u Cao 60 cm Chi u Sâu Ngu n đi n (Đi n áp / T n su t) 220-240 V/50 Hz T ng đi n h p th... -
Page 61: L P Đ T
TI NG VI T L P Đ T Đ nh V 11.1 Khi máy gi t đư c đ t b ng ph ng, hãy c g ng l c t góc này qua góc Đi u quan tr ng là máy gi t c a kia. - Page 62 đư c kéo dài. N u ng quá ng n và b n không mu n di chuy n vòi nư c, b n s ph i mua ng m i dài hơn, đư c thi t k riêng cho m c đích s d ng...
-
Page 63: Các V N Đ V Môi Trư Ng
TI NG VI T N u thi t b này đư c cung c p t b dây n i dài ho c thi t b di đ ng thì b dây n i dài hay thi t c m di đ ng ph i đư c b trí sao cho không b dính nư... - Page 64 www.electrolux.com...
Need help?
Do you have a question about the EWF7525DGWA and is the answer not in the manual?
Questions and answers