Table of Contents
Advertisement
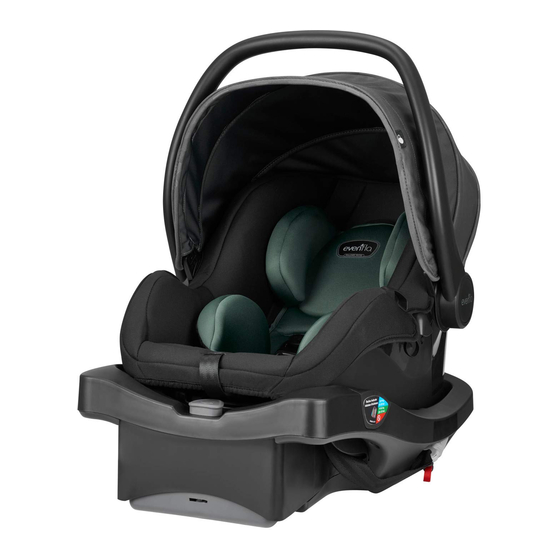
LiteMax DLX
Rear-facing Child
Restraint System
Infant Car Seat
Owner's Manual
Keep for future use
Rear-facing
1.8 to 15.8 kg
(4 to 35 lbs)
43 to 81 cm
(17 to 32 in.)
*See page 6 for complete
requirments.
WARNING
To reduce the risk of serious injury or death, read
this owner's manual prior to installing and using
this child restraint.
©2018 Evenflo Company, Inc.
TM
25701464 9/18
Advertisement
Table of Contents

Subscribe to Our Youtube Channel
Related Manuals for Evenflo LiteMax DLX


Summary of Contents for Evenflo LiteMax DLX
- Page 1 43 to 81 cm (17 to 32 in.) *See page 6 for complete requirments. WARNING To reduce the risk of serious injury or death, read this owner’s manual prior to installing and using this child restraint. ©2018 Evenflo Company, Inc. 25701464 9/18...
- Page 2 More children are killed every year as U.S. Regulatory Notice passengers in car crashes than by any other This child restraint meets all the requirements of type of injury. Federal Motor Vehicle Safety Standard 213. To reduce the risk of SERIOUS INJURY or DEATH, For Canadian Models read this owner’s manual and your vehicle owner’s CANADIAN REGULATORY NOTICE...
-
Page 3: Table Of Contents
Table of Contents (TOC) Proper Installation WITHOUT the Child Requirements ..........6 Convenience Base..........68 Premature Infant Use ..........8 Installation Checklist ..........69 Warnings .............. 10 Installing the Carrier WITHOUT the Convenience LATCH/UAS Warnings ........... 22 Base..............71 Usage Warnings ............ 26 Securing the Child in the Carrier ...... -
Page 4: Child Requirements
MUST meet the size and age At least 2.5 cm requirements below. In addition, Evenflo recommends (1 inch) consulting with your child’s physician before allowing your child to transition from a rear-facing to forward-facing child restraint. -
Page 5: Premature Infant Use
All children should ride rear-facing in the vehicle as long as other resources for parents and medical professionals, at as possible. Preterm and low birth weight infants are at https://www.healthychildren.org/english/safety- additional risk of breathing difficulties and heart problems prevention/on-the-go/Pages/default.aspx when placed in a child restraint. Evenflo requires that the... -
Page 6: Warnings
NEVER leave your infant unattended or other devices not made by Evenflo or in a child restraint in or out of the vehicle. described in these instructions, to the child • Failure to follow these installation instructions restraint. - Page 7 WARNING! DEATH or SERIOUS WARNING! DEATH or SERIOUS INJURY can occur. INJURY can occur. Air Bag Warnings DO NOT place rear-facing child To help prevent serious injury or death: seat on front seat with air bag. • DO NOT use this restraint in the front seat of a vehicle DEATH OR SERIOUS INJURY equipped with an air bag.
- Page 8 38 mm location or call Evenflo at (1.5 inches) of space between any part of the child 1-800-233-5921 (U.S), or 1-937-773-3971 (Canada).
- Page 9 WARNING! DEATH or SERIOUS WARNING! DEATH or SERIOUS INJURY can occur. INJURY can occur. Vehicle Seat Belt Warnings • DO NOT use this child restraint Retractor in a vehicle with seat belts that • ALWAYS read your vehicle automatically move along the owner's manual to determine vehicle frame when the door is what vehicle belts and retractors...
- Page 10 WARNING! DEATH or SERIOUS WARNING! DEATH or SERIOUS INJURY can occur. INJURY can occur. Vehicle Seat Belt Warnings (cont.) • This child restraint must be securely belted to the vehicle, even when it is unoccupied, since in • DO NOT use with lap/shoulder belts a crash an unsecured child restraint system may with two retractors.
- Page 11 WARNING! DEATH or SERIOUS WARNING! DEATH or SERIOUS INJURY can occur. INJURY can occur. Vehicle Seat Belt Warnings (cont.) Lap/Shoulder Belt with Locking Latch Plate If you have any of these types of vehicle belt systems The lap portion of this belt does not listed, these are SAFE to use to install your child loosen once the belt is buckled.
-
Page 12: Latch/Uas Warnings
WARNING! DEATH or SERIOUS WARNING! DEATH or SERIOUS INJURY can occur. INJURY can occur. Center installation in a non-standard LATCH LATCH /UAS Warnings position: Vehicle Top Tether Anchor What is LATCH? Center installation of this child restraint is permitted Points (Forward-Facing Only) LATCH is an acronym using inner Lower Anchor Bars from the outside... - Page 13 DEATH or SERIOUS DEATH or SERIOUS WARNING! WARNING! INJURY can occur. INJURY can occur. LATCH /UAS Warnings LATCH /UAS Warnings - continued • The LATCH system is intended to be used ONLY as • When not in use, the lower anchor connector described in these instructions.
-
Page 14: Usage Warnings
WARNING! DEATH or SERIOUS WARNING! DEATH or SERIOUS INJURY can occur. INJURY can occur. Usage Warnings Usage Warnings - continued WARNING • ALWAYS place the handle in Position 1 or 3 (U.S. models) or Position 1 (Canadian models) when using Children have STRANGLED this child restraint in a vehicle (p. -
Page 15: Safe Practices
Please fill this card out using blue or black ink We've already paid the postage. and mail it NOW, (or register online at: www.evenflo.com/registercarseat) • Always place the handle in Position 3 or 4 before www.evenflo.com/registercarseat Do it today. -
Page 16: Public Notice For Canadian Customers
The information you provide must be complete. Or register online at www.evenflo.com/registercarseatcanada. ATTENTION : Cette carte pourait être importante à la sécurité de installing your child restraint in aircraft. votre enfant. Veuillez remplir cette carte à l’encre bleue ou noire et la poster afin de pouvoir être contacté... -
Page 17: Base Features
Base Features Base Features 5. Vehicle Seat Belt/Lower 1. Level Adjustment Knob 9. Load Leg storage (Not available on all models) Anchor Connector 10. LATCH storage 2. Angle Indicator Assembly Belt Path 3. Leveling Foot 6. One Step Lock-Off 7. SafeZone Load Leg 4. -
Page 18: Child Seat Features
Child Seat Features Child Seat Features 1. Handle 9. Headrest adjustment button 16. Handle adjustment button 2. Canopy* 10. Chest Clip 17. Harness Straps 3. Seat Pad 11. Harness Straps 18. Splitter Plate 4. Harness Covers* 12. Carrier 19. Carrier Release Handle * Not all features are 5. -
Page 19: Using The Handle
Using the Handle Using the Handle (cont.) To change handle positions, squeeze both Handle IMPORTANT: Always secure the child in the carrier. Releases and rotate the handle to the desired Refer to “Securing your Child in the Carrier” on position until it locks into place. p. - Page 20 SafeZone Load Leg Using the Handle (cont.) WARNING MISE EN GARDE The load leg helps minimize crash Position 3 (Travel – U.S.) forces on a baby in a frontal crash. For U.S. models, you ADVERTENCIA It allows the child restraint’s safety may place the handle system to absorb crash energy in this position while...
-
Page 21: Safezone Load Leg
SafeZone Load Leg (cont.) SafeZone Load Leg- (cont.) WARNING Turn the base over as shown. MISE EN GARDE The load leg MUST be locked in a locked position and the foot ADVERTENCIA MUST be in contact with the Pull the load leg out as shown. vehicle floor. - Page 22 SafeZone Load Leg- (cont.) SafeZone Load Leg- Storage Although we recommend To extend load leg, pull leg down using the base with the until it reaches the floor and the load leg, in some cases it indicator turns green. may not be possible, if it CLICK! is not possible you should CLICK!
-
Page 23: Proper Installation With The Convenience Base
Proper Installation WITH the Convenience Base Installation Checklist Child Requirements 1. Secure convenience base to the vehicle • Weight: 1.8 – 15.8 kg (4 – 35 lbs) seat. • Height: 43 – 81 cm (17 – 32 in.) and top of child’s Convenience base is securely installed with lower head is at least 2.5 cm (1 in.) below the top of the anchor connector assembly (shown) -
Page 24: Installing The Convenience Base With The Lower Anchor Connector Assembly
Installing the Convenience Base with the Installation Checklist (cont.) Lower Anchor Connector Assembly WARNING! 2. Secure child in the carrier. DEATH or SERIOUS Refer to p. 77. INJURY can occur. Harness straps are at, or below shoulder level (p. 44). Both buckle tongues are fastened (p. - Page 25 Installing the Convenience Base with the Installing the Convenience Base with the Lower Anchor Connector Assembly (cont.) Lower Anchor Connector Assembly (cont.) WARNING! DEATH or SERIOUS Before you begin, be sure the vehicle is on level ground. INJURY can occur. Remove lower anchor connectors, see p.
- Page 26 Installing the Convenience Base with the Installing the Convenience Base with the Lower Anchor Connector Assembly (cont.) Lower Anchor Connector Assembly (cont.) Base shown with leveling foot in stored position. Knob Recline base until white indicator line is in the correct color zone for Turn the convenience base upside down.
- Page 27 Installing the Convenience Base with the Installing the Convenience Base with the Lower Anchor Connector Assembly (cont.) Lower Anchor Connector Assembly (cont.) Know Your Lower Anchor Open One Step Lock-Off Connector Assembly The lower anchor connector assembly that comes Turn the convenience base right side up. Push down with your child restraint will be below.
- Page 28 Installing the Convenience Base with the Installing the Convenience Base with the Lower Anchor Connector Assembly (cont.) Lower Anchor Connector Assembly (cont.) WARNING! DEATH or SERIOUS Using your full weight, INJURY can occur. push the base into the vehicle seat while pulling Make sure the lower up on the strap to anchor connector assembly...
- Page 29 Checking the Recline with the Base Checking the Recline with the Base (cont.) When using the carrier and the base together: When using the carrier with the base, if the foot 1) Make sure vechicle is on is in the lowest position and level ground.
-
Page 30: Installing The Convenience Base With The Vehicle Lap/Shoulder Belt
Installing the Convenience Base with Installing the Convenience Base with the Vehicle Lap/Shoulder Belt (cont.) the Vehicle Lap/Shoulder Belt Before you begin, be sure the vehicle is on level ground. Store the lower anchor connectors, see p. 95-96. Using your full weight, Knob push the base into the Recline base until... - Page 31 Installing the Convenience Base with Installing the Convenience Base with the Vehicle Lap/Shoulder Belt (cont.) the Vehicle Lap/Shoulder Belt (cont.) Secure the base to your vehicle seat Base shown with by routing the lap/shoulder belt leveling foot in stored through the belt path openings on position.
- Page 32 Installing the Convenience Base with Installing the Convenience Base with the Vehicle Lap/Shoulder Belt (cont.) the Vehicle Lap/Shoulder Belt (cont.) Secure the base to your vehicle seat Close the Lock-Off until by routing the lap belt through the it clicks into place. belt path openings on the sides of the base and through the vehicle Click!
-
Page 33: Placing The Carrier In The Base
Placing the Carrier in the Base Placing the Carrier in the Base (cont.) WARNING! DEATH or SERIOUS INJURY can occur. Recline Indicator 1.8-9 kg Indicateur d’inclinaison (4-20 lbs) 9-15.8 kg • NEVER use this child (20-35 lbs) restraint in the forward-facing position. -
Page 34: Releasing The Carrier From The Base
Releasing the Carrier from the Base Placing the Carrier in the Base (cont.) Move the handle to Position 1 (Carry) by squeezing U.S. Models ONLY Canadian Models ONLY in on both handle releases and rotating the handle Position 1 Position 1 or 3 until it locks into place above the carrier. -
Page 35: Proper Installation Without The Convenience Base
Proper Installation WITHOUT the Convenience Base Installation Checklist Child Requirements 1. Place the child in the carrier. • Weight: 1.8 – 15.8 kg (4 – 35 lbs) The child’s back and bottom are flat against the • Height: 43 – 81 cm (17 – 32 in.) and top of child’s back and bottom surfaces of the carrier. -
Page 36: Installing The Carrier Without The Convenience Base
Installing the Carrier Installation Checklist WITHOUT the Convenience Base 3. Secure child restraint to the vehicle seat. Carrier is securely installed with vehicle seat belt (p. 71-76). The vehicle shoulder strap portion of the seat belt is above the polished area on rear of child restraint (p. - Page 37 Installing the Carrier without the Convenience Installing the Carrier Installing the Carrier WITHOUT the Convenience Base (cont.) Base (cont.) WITHOUT the Convenience Base (cont.) WARNING! DEATH or SERIOUS LAP/ SHOULDER BELT LAP BELT INJURY can occur. In vehicles with a lap/ •...
- Page 38 Installing the Carrier Installing the Carrier WITHOUT the Convenience Base (cont.) WITHOUT the Convenience Base (cont.) Canadian Models ONLY U.S. Models ONLY Position 1 or 3 If the level line is not level with the ground, use a tightly rolled towel or small blanket beneath the front edge of the child restraint to provide enough recline for an infant’s head to lie back comfortably.
-
Page 39: Securing The Child In The Carrier
Installing the Carrier Securing the Child in the Carrier WITHOUT the Convenience Base (cont.) Install Locking Clip (not Locking Clip included), if necessary. installed If your vehicle was built prior to properly model year 1996, and has a lap/ 13 mm shoulder belt that is equipped with (0.5 in.) an emergency locking retractor... - Page 40 Securing the Child in the Carrier (cont.) Securing the Child in the Carrier (cont.) Slide each harness strap over the child’s shoulders. The harness straps must be snug against the child. Insert the buckle tongues A snug strap should not into the buckle.
-
Page 41: Removing The Child From The Carrier
Securing the Child in the Carrier (cont.) Removing the Child from the Carrier Press the red buckle release, and remove the buckle tongues. Push the release button and pull the chest clip apart. To tighten the harness straps, pull the harness adjuster strap on front of the restraint, as shown. -
Page 42: Changing The Crotch Strap Position
Changing the Crotch Strap Position Changing the Crotch Strap Position (cont.) Crotch Strap in the Middle Slot As your child grows, you will need to change the crotch strap position so that it is in the slot closest to your child. - Page 43 Changing the Crotch Strap Position (cont.) Changing the Crotch Strap Position (cont.) To reposition crotch strap, loosen the harness straps (p. 81) and move the strap out of the way. Remove the crotch strap anchor from its position on the bottom of the carrier, and push the anchor up through Anchor the slot to the top of the seat.
-
Page 44: Changing The Waist Strap Position
Changing the Waist Strap Position Changing the Waist Strap Position (cont.) As your child grows, you will need to change the waist strap position so that it is in the slot closest to your child. The waist strap should ALWAYS be as close as To reposition waist straps, possible to, but... - Page 45 Changing the Waist Strap Position (cont.) Changing the Waist Strap Position (cont.) Unhook the front of the child restraint’s seat pad and move it out of the way to expose the waist strap slots and anchors. Remove the waist strap anchor from its position on top of the seat, and push the anchor down through the slot to the...
- Page 46 Changing the Waist Strap Position (cont.) Changing the Waist Strap Position (cont.) Medium size baby Small size baby Small size baby Medium size baby...
-
Page 47: Removing The Lower Anchor Connector Assembly
Removing the Lower Anchor Connector Changing the Waist Strap Position (cont.) Assembly Large size baby To remove the clip, pull the red release strap and remove clip from anchor. Large size baby... - Page 48 Removing the Lower Anchor Connector Removing the Lower Anchor Connector Assembly (cont.) Assembly (cont.) The lower anchor connector that comes with When the lower anchor connector assembly is your child restraint will be below: not in use, you MUST securely store it in the area provided on the bottom or side of the base depending on which style base you have.
-
Page 49: Using As An Infant Carrier
Removing the Lower Anchor Connector Using as an Infant Carrier Assembly (cont.) Secure the child in the carrier by following “Securing Attach the connector to the posts located on each side the Child in the Carrier” p. 77. of the base or on the bottom of the base. A loose lower anchor assembly connector harness and Position 4 hook may injure your child. -
Page 50: Securing Your Child Restraint In Aircraft
WARNING! DEATH or SERIOUS Securing Your Child Restraint in Aircraft INJURY can occur. • NEVER place this carrier near the edges of counter tops, tables, The Federal Aviation Administration (FAA) recommends or other high surfaces. The child’s movements can cause the that you secure your child for air travel in an appropriate child carrier to slide and fall. -
Page 51: Installing Carrier Without Convenience Base In Aircraft
Installing Carrier WITHOUT Convenience Installing Carrier WITHOUT Convenience Base in Aircraft Base in Aircraft (cont.) Place the child restraint on the aircraft seat rear-facing, as shown above. Aircraft Seat Belt Squeeze both Position 3 handle releases and move the handle to Position 3. - Page 52 Installing Carrier WITHOUT Convenience Installing Carrier WITHOUT Convenience Base in Aircraft (cont.) Base in Aircraft (cont.) The aircraft seat belt must be as tight as possible. Route the excess seat belt strap back through the belt slots, as shown above. Using your full weight, push the child restraint firmly onto the aircraft seat while pulling on the excess seat belt strap to tighten.
-
Page 53: Installing The Canopy
Installing Carrier without Convenience Base Installing the Canopy in Aircraft (cont.) Position 1 Click! Insert front canopy end into the holder until it clicks into place. Repeat on the other side. Squeeze both handle releases and move the handle Position 1... -
Page 54: Installing The Accessories
Installing the Accessories Installing the Accessories (cont.) To remove the harness To remove the buckle covers, follow steps for cover, press the red Changing the Harness buckle release under Position (p. 79-82). After the buckle cover and Step 3, slide harness remove buckle tongues. -
Page 55: Removing The Seat Pad
Removing the Seat Pad Removing the Seat Pad • Move handle to Position 4 (p. 36). Unfasten Velcro® on • Unfasten chest clip and crotch buckle (p. 81). back of canopy and • Remove crotch buckle cover (p. 107). pull canopy forward. •... - Page 56 Removing the Seat Pad (cont.) Removing the Seat Pad (cont.) Slide J-clips down and Push both harness straps out of slots on top of through seat pad. child restraint. To replace seat pad, reverse these steps. Push crotch buckle through seat pad. Note: Make sure to place harness strap in the same harness and waist slots as before.
-
Page 57: Replacement Parts
Not available on all models. Styles may vary. To order replacement parts you can order online at www.evenflo.com or contact Evenflo. When you contact us, please have the product model number and date of manufacture (found on the back of the child restraint). -
Page 58: Care And Cleaning
LATCH connectors, the buckle, or any other part of this child restraint, unless found on the date of manufacture label, Evenflo rinsing is permitted, as stated on the back of the buckle for encourages you to dispose of it properly. Most your restraint. -
Page 59: Limited Warranty
SPECIAL OR PUNITIVE DAMAGES OF ANY KIND FOR to repair or replace any Product that is determined BREACH OF THE EXPRESS LIMITED WARRANTY ON to be defective by Evenflo and determined to be covered by this warranty. THIS PRODUCT, OR ANY WARRANTY IMPLIED BY OPERATION OF LAW. -
Page 60: Storing Your Instructions
Storing Your Instructions After thoroughly reading and following these instructions, store instructions under the seat pad on the inside of shell as shown For future reference, record the model number of your child restraint AND the date of manufacture below. Model Number: Date of Manufacture:...
Need help?
Do you have a question about the LiteMax DLX and is the answer not in the manual?
Questions and answers