
Related Manuals for WimTec SanTec PUREA


Summary of Contents for WimTec SanTec PUREA
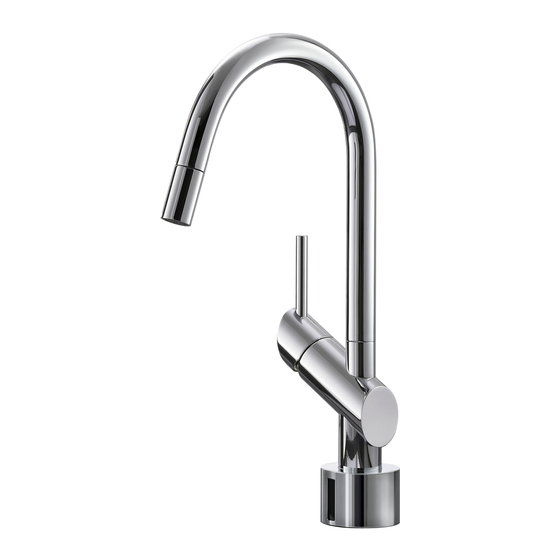
- Page 1 VIVA / PUREA Montage- und Bedienungsanleitung Installation and operating instructions...
-
Page 2: Allgemeine Hinweise
Reinigung mit Dampfstrahlgeräten Diese Anleitung ist gültig für folgende Produkte: SanTec VIVA Art.Nr. 112 283 230 V Art.Nr. 112 276 SanTec PUREA Art.Nr. 112 269 230 V Art.Nr. 112 252 Lieferumfang: Küchenarmatur mit schwenkbaren Zugauslauf und 6 V Batterie bzw. -
Page 3: Technische Daten
VIVA / PUREA Technische Daten 6 V: 230 V: Batterie: Lithium 6 V Betriebsspannung: 230 V / 50 Hz Batterielebensdauer: 100.000 Spülungen (max. 2 Jahre) Leistungsaufnahme: ca. 3 VA Weitere technische Daten: Wasseranschluss: G 3/8” IG Ansprechbereich: ca. 25 cm voreingestellt, 10 - 40 cm einstellbar Nah-Ansprechbereich: ca. - Page 4 VIVA / PUREA Maße in mm Anschlussschema Ø 62 Schmutzfilter Armaturensockel Schmutzfilter Mischer für berührungslose Auslösung Armaturensockel SanTec VIVA / PUREA Küchenarmatur...
- Page 5 VIVA / PUREA Montage Sensorring über Anschlussrohre schieben. ACHTUNG! 2. Armatur mit Steckschlüssel SW9 befestigen - ggf Distanz- Folgende Schritte unbe- platte verwenden. dingt in beschriebener Reihenfolge ausführen! Anschlussschläuche montieren. Steuerbox montieren. Bei allen Schlauchan- schlüssen Dichtungen Schmutzfilter in Eckventile einsetzen. beilegen! T-Stücke am Warm- und Kaltwassereckventil montieren (lt.
- Page 6 VIVA / PUREA Montage ACHTUNG! Schlauch vom Zugauslauf an T-Stück Mischwasser Folgende Schritte unbe- anschließen. dingt in beschriebener Reihenfolge ausführen! Kalt-, Warm- und Mischwasserschläuche von Box an T-Stücke anschließen. Bei allen Schlauchan- schlüssen Dichtungen 9. Sensorring am Elektronikmodul anschließen. beilegen! Spannungsversorgung herstellen (Batterie oder Netz).
- Page 7 VIVA / PUREA Montage Wassertemperatur für berührungslose Auslösung am Mischer in der Steuerbox einstellen. Ggf. Reichweite und Funktionen einstellen (siehe S. 8) Steuerbox mit Deckel schließen. Armatur ist betriebsbereit. SanTec VIVA / PUREA Küchenarmatur...
-
Page 8: Einstellung Der Funktionen
VIVA / PUREA Einstellung der Funktionen Die Armatur verfügt über mehrere, am Dip-Schalter einstellbare Funktionen. Regler ermöglichen das stufenlose Einstellen verschiedener Werte. Alle Einstellungen sind am Elektronikmodul vorzu- nehmen, dies befindet sich in der Armaturenbox. Einstellelemente am Elektronikmodul: 1 2 3 4 5 6 Reichweiten-Regler Fernbereich Anschluss Batteriemodul (nur bei Reichweiten-Regler Nahbereich... - Page 9 VIVA / PUREA Einstellung der Funktionen Einstellregler: Reichweiten-Regler Reichweiten-Regler Zeit-Regler Fernbereich: Nahbereich: für den Sicherheitsspülstopp 25 cm voreingestellt 4 cm voreingestellt 1 min voreingestellt (10 - 40 cm einstellbar) (1 - 10 cm einstellbar) (10 s - 10 min einstellbar) Nach Ablauf der eingestellten A.
- Page 10 VIVA / PUREA Funktionsbeschreibung berührungslose Auslösung Werkseinstellung: Zusätzlich zur manuellen Auslösung über den Mischergriff kann die Armatur berührungslos über den Nahbereich oder Fernbereich ausgelöst werden: 1 2 3 4 5 6 Einschalten über Nahbereich (voreingestellt): DIP Schalter 1=OFF 2 3 4 5 6 EINSCHALTEN: 2 3 4 5 6 Nahbereich...
- Page 11 Werkseinstellung: VIVA / PUREA 1 2 3 4 5 6 Funktionsbeschreibung berührungslose Auslösung 2 3 4 5 6 2 3 4 5 6 Ausschalten über Ende Fernbereich (voreingestellt): DIP Schalter 2=ON 3 4 5 6 Werkseinstellung: AUSSCHALTEN: 1 2 3 4 5 6 3 4 5 6 Automatisch Wasserfluss stoppt nach...
- Page 12 VIVA / PUREA Funktionsbeschreibung Werkseinstellung: Reinigungsstopp: DIP Schalter 3 4 5 6 1 2 3 4 5 6 Dient zum Deaktivieren der Armatur beim Reinigen. Dip Schalter 3 ON = Reinigungsstopp-Funktion aktiviert. 1 2 3 2 3 4 5 6 Dip Schalter 3 OFF = Reinigungsstopp-Funktion deaktiviert (voreingestellt).
- Page 13 VIVA / PUREA Werkseinstellung: Funktionsbeschreibung 4 5 6 1 2 3 4 5 6 Hygienespülung: DIP Schalter 4 und 5 1 2 3 2 3 4 5 6 Dient zum Freispülen der Wasserzuleitungen um Stagnationswasser bei längerer Nichtbenutzung zu vermeiden. 2 3 4 5 6 1 2 3 4 5 Dip Schalter 5 ON = Hygienespülungs-Funktion aktiviert.
- Page 14 VIVA / PUREA Ersatzteile SanTec VIVA 114 072 114 317 114 096 114 065 114 089 114 027 114 195 231 359 114 003 114 041 Art.Nr.: Bezeichnung Art.Nr.: Bezeichnung 114 072 Brauseschlauch 114 027 Mischerkartusche 114 317 Dichtungssatz 114 065 Mischerhebel 114 096 Zugauslauf...
- Page 15 VIVA / PUREA Ersatzteile SanTec PUREA 113 990 114 058 114 034 114 010 114 027 114 188 113 983 231 359 114 003 114 041 Art.Nr.: Bezeichnung Art.Nr.: Bezeichnung 113 990 Brauseschlauch 114 027 Mischerkartusche 114 058 Dichtungssatz 113 983...
- Page 16 VIVA / PUREA Ersatzteile Armaturenbox 114 492 231 205 114 225 116 267 114 201 116 250 114 218 231 380 101 065 Art.Nr.: Bezeichnung Art.Nr.: Bezeichnung 114 492 Mischer 114 225 T-Stück 3/8“ 231 205 Magnetventil 114 201 Elektronikmodul 6 V 116 267 MV-Adapter 116 250...
- Page 17 VIVA / PUREA Notizen SanTec VIVA / PUREA Küchenarmatur...
-
Page 18: General Notes
DIN 1988, OVE/ONOERM E8001 as well as VDE 0100 part 701. When planning and installing sanitary systems, the relevant local, national and international standards and regulations must be complied with! The “general installation conditions” at www.wimtec.com are valid. SanTec VIVA / PUREA Kitchen tap... -
Page 19: Technical Specifications
VIVA / PUREA Technical specifications 6 V: 230 V: Battery: Lithium 6 V Operating voltage: 230 V / 50 Hz Battery life: 100.000 flushings (max. 2 years) Power consumption: approx. 3 VAv Further technical specifications: Water connection: 3/8” inside thread Active range: approx. -
Page 20: Connection Diagram
VIVA / PUREA Dimensions in mm Connection diagram Ø 62 dirt filter Tap stand dirt filter Mixer for non-contact release Tap stand SanTec VIVA / PUREA Kitchen tap... - Page 21 VIVA / PUREA Installation Move sensor ring over connection pipes. Attention! 2. Fix armature by socket key SW9 – use distance plate if Following steps must be necessary. done in order as described necessarily! Mount connection hoses. Install control box. Attach sealings at all connection hoses! Insert dirt filters in corner valves.
- Page 22 VIVA / PUREA Installation Attention! Connect hose from pull outlet to T-part of mixing water. Following steps must be done in order as described Connect cold-, warm- and mixing water hoses from box necessarily! to the T-part. Attach sealings at all Connect sensor ring to electronic module.
- Page 23 VIVA / PUREA Installation Adjust water temperature for non-contact release at the mixer at control box. Adjust active range if necessary (see page 24) Close control box with cover. The tap is ready for operation. SanTec VIVA / PUREA Kitchen tap...
- Page 24 VIVA / PUREA Adjustment of function programs The armature has more, at the DIP-switch adjustable functions. Controllers allow a stepless adjustment of different datas. All adjustments are adjustable at the electronic module, which is situated inside of armature box: 1 2 3 4 5 6 Adjustable controller: Active range controller Active range controller...
- Page 25 VIVA / PUREA 4. DIP switch: DIP switch activation by far range reflex activation by close range reflex stopping by end of far range reflex stopping by self closing function Cleaning stop activated Cleaning stop deactivated Hygiene flushing 24 h Hygiene flushing 3 h Hygiene flushing activated Hygiene flushing deactivated...
- Page 26 VIVA / PUREA Function instruction non-contact release Werkseinstellung: Additionally to manual release by mixer handle the armature can be released by close active range contactless: 1 2 3 4 5 6 Activation by close active range (pre-adjusted): DIP Switch 1=OFF 2 3 4 5 6 Activation: 2 3 4 5 6...
- Page 27 Werkseinstellung: VIVA / PUREA 1 2 3 4 5 6 Function instruction non-contact release 2 3 4 5 6 2 3 4 5 6 Stopping end far active range (pre-adjusted): DIP Switch 2=ON 3 4 5 6 Werkseinstellung: Stopping: 1 2 3 4 5 6 3 4 5 6 Automatic Water flow stops after elap-...
-
Page 28: Function Instruction
VIVA / PUREA Function instruction Werkseinstellung: Cleaning stop function: DIP Switch 3 4 5 6 1 2 3 4 5 6 The armature can be deactivated for example for cleaning the ceramic or the tap. 1 2 3 Dip Switch 3 ON = Cleaning stop is activated 2 3 4 5 6 Dip Switch 3 OFF = Cleaning stop is deactivated (pre-adjusted) 2 3 4 5 6... - Page 29 VIVA / PUREA Werkseinstellung: Function instruction 4 5 6 1 2 3 4 5 6 Hygiene flush: DIP Switch 4 and 5 1 2 3 2 3 4 5 6 Conduces to a flushing if the armature was not used for longer tim to rinse the pipes of stagnancy water.
- Page 30 VIVA / PUREA Spare parts SanTec VIVA 114 072 114 317 114 096 114 065 114 089 114 027 114 195 231 359 114 003 114 041 Art.No.: Description Art.No.: Description 114 072 Water hose 114 027 Mixer cartridge 114 317 Seal set 114 065 Mixer handle...
- Page 31 VIVA / PUREA Spare parts SanTec PUREA 113 990 114 058 114 034 114 010 114 027 114 188 113 983 231 359 114 003 114 041 Art.No.: Description Art.No.: Description 113 990 Water hose 114 027 Mixer cartridge 114 058...
- Page 32 Mains module 231 380 Battery module 6 V inkl. battery WIMTEC Elektronische Steuerungs- u. Meßgeräte GmbH p: A - 3325 Ferschnitz, Freidegg 50, AUSTRIA t: +43 (0) 7473 5000 f: +43 (0) 7473 5000 - 500 m: verkauf@wimtec.com i: www.wimtec.com...
Need help?
Do you have a question about the SanTec PUREA and is the answer not in the manual?
Questions and answers