Sign In
Upload
Download
Table of Contents
Contents
Add to my manuals
Delete from my manuals
Share
URL of this page:
HTML Link:
Bookmark this page
Add
Manual will be automatically added to "My Manuals"
Print this page
×
Bookmark added
×
Added to my manuals
Manuals
Brands
HANYOUNG NUX Manuals
Temperature Controller
TD300
Manual
HANYOUNG NUX TD300 Manual
2 channel programmable temperature controller
Hide thumbs
1
2
Table Of Contents
3
4
5
6
7
8
9
10
11
12
13
14
15
16
17
18
19
20
21
22
23
24
25
26
27
28
29
30
31
32
33
34
35
36
37
38
39
40
41
42
43
44
45
46
47
48
49
50
51
52
page
of
52
Go
/
52
Contents
Table of Contents
Bookmarks
Table of Contents
Table of Contents
Before Starting
Checking Product
Safety Information
Installation Place and Caution Notice
Installation Method
Suffix Code
Dimensions / Panel Cutout and Terminal Arrangement
Terminal Arrangement Method
Initial Screen
Basic Input Mehtod
Name of Operation Screen
Fixed Control Operation
Program Control Operation
Graph Indication and Setup
Errors and Indicators for Various Events
Operation Screen
Setup Screen
Operation Setup
Time/Timer Setup
Program Setup
Sensor Input Setup
Control/Transmission Setup
Inner Signal Setup
Alarm Setup
PID Setup
Inputs at Point of Contect (DI) Setup
Point of Contact Output (DO) Setup
Communication Setup
Other Setup
Input Sepcification
Output Specification
Functions
Communication
Ratings
Operation Environment
Condition of Transport and Storage
Advertisement
Quick Links
1
Table of Contents
Download this manual
ﴍﮐﺖ ﺳﯿﻮان ﻤﻧﺎﯾﻨﺪه اﻧﺤﺼﺎری ﻣﺤﺼﻮﻻت ﻫﺎﻧﯿﺎﻧﮓ ﮐﺮه
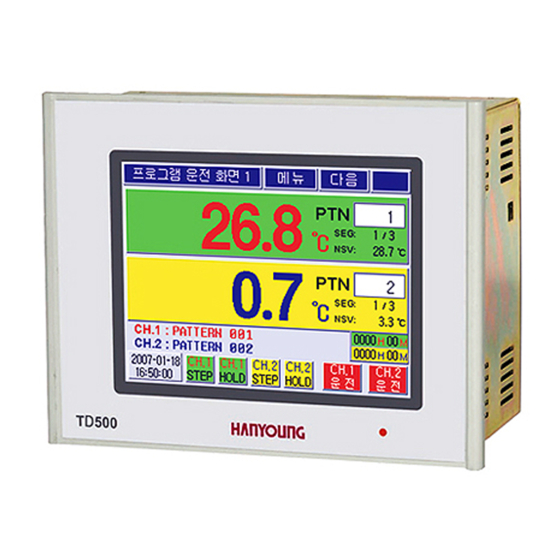
TD500/TD300
2 Channel Programmable Temperature Controller
MANUAL
021-33989001
www.sivancarno.com
021-33989002
Table of
Contents
Previous
Page
Next
Page
1
2
3
4
5
Advertisement
Table of Contents
Need help?
Do you have a question about the TD300 and is the answer not in the manual?
Ask a question
Questions and answers
Related Manuals for HANYOUNG NUX TD300
Temperature Controller HANYOUNG NUX TD500 Manual
2 channel programmable temperature controller (52 pages)
Temperature Controller Hanyoung Nux TD510 Series Operation Manual
Programmable (89 pages)
Temperature Controller HANYOUNG NUX TH500A Manual
Programmable temperature and humidity controller (96 pages)
Temperature Controller HANYOUNG NUX TH300 Manual
Programmable temperature and humidity controller (96 pages)
Temperature Controller HANYOUNG NUX NP200 User Manual
Programmable temperature controller (75 pages)
Temperature Controller HANYOUNG NUX ML-D2H Instruction Manual
Module type temperature control system (54 pages)
Temperature Controller HANYOUNG NUX DX Series Instruction Manual
Digital temperature controller (7 pages)
Temperature Controller HANYOUNG NUX HY-1000 Instruction Manual
Analog temperature controller (2 pages)
Temperature Controller HANYOUNG NUX MC9 Series Operation Manual
Multi channel temperature controller (45 pages)
Temperature Controller HANYOUNG NUX ND4 Instruction Manual
Non-indicating type temperature controller (2 pages)
Temperature Controller HANYOUNG NUX ED6 Instruction Manual
Digital temperature controller (3 pages)
Temperature Controller HANYOUNG NUX DX Series Instruction Manual
Digital temperature controller (4 pages)
Temperature Controller HANYOUNG NUX BR6A Instruction Manual
Digital (3 pages)
Temperature Controller HANYOUNG NUX HY-4500 Instruction Manual
Analog temperature controller (4 pages)
Temperature Controller HANYOUNG NUX RS6 Instruction Manual
Digital temperature controller (2 pages)
Temperature Controller HANYOUNG NUX ML-D Series Instruction Manual
Module type temperature controller (2 pages)
This manual is also suitable for:
Td500
Table of Contents
Print
Rename the bookmark
Delete bookmark?
Delete from my manuals?
Login
Sign In
OR
Sign in with Facebook
Sign in with Google
Upload manual
Upload from disk
Upload from URL


Need help?
Do you have a question about the TD300 and is the answer not in the manual?
Questions and answers