
Subscribe to Our Youtube Channel
Related Manuals for KSB Hyamat K


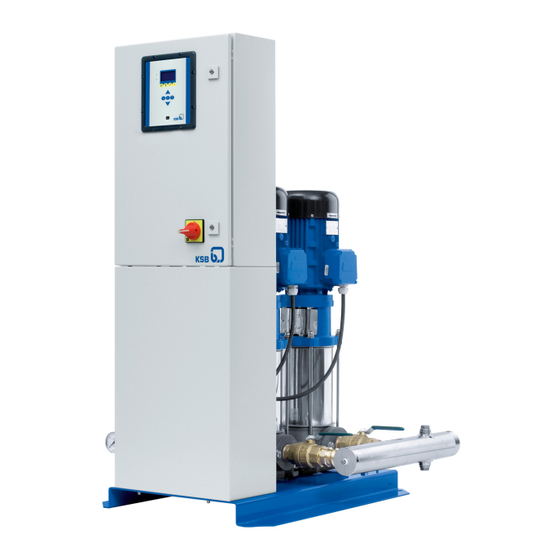
Summary of Contents for KSB Hyamat K
- Page 1 Pressure Booster System Hyamat K From series 2014w33 Installation/Operating Manual...
- Page 2 All rights reserved. The contents provided herein must neither be distributed, copied, reproduced, edited or processed for any other purpose, nor otherwise transmitted, published or made available to a third party without the manufacturer's express written consent. Subject to technical modification without prior notice. © KSB SE & Co. KGaA, Frankenthal 28/05/2019...
-
Page 3: Table Of Contents
Connecting the pressure booster system.................. 24 5.6.3 Connecting the remote ON/OFF input.................... 24 5.6.4 Connecting the dry running protection device................ 24 5.6.5 Connecting the fire alert ........................ 24 5.6.6 Connecting the ambient temperature monitoring device (optional) .......... 25 5.6.7 Connecting the digital inputs (optional).................. 25 Hyamat K 3 of 76... - Page 4 Related Documents .......................... 48 10.1 General assembly drawings with list of components................... 48 10.1.1 Hyamat K with Movitec 2, 4, 6, 10, 15 .................... 48 10.1.2 Hyamat K with Movitec 25, 40, 60, 90 .................... 50 10.2 Flow diagram .............................. 52 10.3 Parameter list.............................. 53 10.4 Fault messages .............................. 70...
- Page 5 Contents EU Declaration of Conformity ...................... 72 Certificate of Decontamination...................... 73 Commissioning Report......................... 74 Index .............................. 75 Hyamat K 5 of 76...
-
Page 6: Glossary
Efficiency (IE = International Efficiency) Manual mode Direct operation on the power supply network, independently of the control unit. Switchgear and controlgear assembly Control cabinet with one or several control units / switchgears and electrical equipment. Hyamat K 6 of 76... -
Page 7: General
The serial number uniquely describes the product and is used as identification in all further business processes. In the event of damage, immediately contact your nearest KSB service facility to maintain the right to claim under warranty. 1.2 Software changes The software has been specially created for this product and thoroughly tested. -
Page 8: Key To Safety Symbols/Markings
In conjunction with one of the signal words this symbol indicates a hazard involving electrical voltage and identifies information about protection against electrical voltage. Machine damage In conjunction with the signal word CAUTION this symbol indicates a hazard for the machine and its functions. Hyamat K 8 of 76... -
Page 9: Safety
▪ Deficits in knowledge must be rectified by means of training and instruction provided by sufficiently trained specialist personnel. If required, the operator can commission the manufacturer/supplier to train the personnel. ▪ Training on the pressure booster system must always be supervised by specialist technical personnel. Hyamat K 9 of 76... -
Page 10: Consequences And Risks Caused By Non-Compliance With This Manual
▪ Make sure the pressure booster system cannot be accessed by unauthorised persons (e.g. children). ▪ Prior to opening the device, pull the mains plug and wait for at least 10 minutes. Hyamat K 10 of 76... -
Page 11: Unauthorised Modes Of Operation
Always observe the limits stated in the product literature. The warranty relating to the operating reliability and safety of the pressure booster system supplied is only valid if the equipment is used in accordance with its intended use. (ð Section 2.2, Page 9) Hyamat K 11 of 76... -
Page 12: Transport/Temporary Storage/Disposal
1. On transfer of goods, check each packaging unit for damage. 2. In the event of in-transit damage, assess the exact damage, document it and notify KSB or the supplying dealer and the insurer about the damage in writing immediately. -
Page 13: Storage/Preservation
4. Always complete and enclose a certificate of decontamination when returning the pressure booster system. (ð Section 12, Page 73) Always indicate any safety and decontamination measures taken. NOTE If required, a blank certificate of decontamination can be downloaded from the following web site: www.ksb.com/certificate_of_decontamination Hyamat K 13 of 76... -
Page 14: Disposal
Contact your local waste disposal partner for returns. If the used electrical or electronic equipment contains personal data, the operator is responsible for deleting it before the equipment is returned. Hyamat K 14 of 76... -
Page 15: Description
4.2 Product information as per Regulation No. 1907/2006 (REACH) For information as per chemicals Regulation (EC) No 1907/2006 (REACH), see http:// www.ksb.com/reach. 4.3 Designation Example: Hyamat K 6 / 1505B / 0,3 Table 5: Designation key Code Description Hyamat Pressure booster system... -
Page 16: Design Details
▪ Stationary dry installation Drive ▪ Electric motor 50 Hz ▪ 2 poles ▪ Efficiency class IE3 to IEC 60034-30 ▪ Special KSB model ▪ For three-phase mains Automation ▪ Control unit (IP54 enclosure) ▪ Control panel (display, keys, LEDs, service interface) ▪... -
Page 17: Configuration And Function
The expected total sound pressure level of 54 dB(A) may develop when all 4 pump sets are running under full-load conditions. On pressure booster systems with acoustic cladding the expected total sound pressure level is reduced by approx. 7 dB(A). Hyamat K 17 of 76... -
Page 18: Scope Of Supply
▪ Terminal strip/terminals with identification for all connections ▪ Circuit diagram and list of electric components ▪ Terminal connection for analog dry running protection ▪ Remote ON/OFF input 4.9 Dimensions and weights For dimensions and weights refer to the outline drawing. Hyamat K 18 of 76... -
Page 19: Installation At Site
▪ The place of installation is well-ventilated. ▪ A suitably dimensioned drain connection (e.g. leading to a sewer) is available. ▪ If expansion joints are used, take note of its creep resistance. Expansion joints must be easily replaceable. Hyamat K 19 of 76... -
Page 20: Installing The Pressure Booster System
1. Mechanically and electrically connect the accumulator in accordance with the original operating manual supplied. 5.4 Connecting the piping CAUTION Air pockets in suction line Pressure booster system cannot prime! ▷ Lay the pipe with a continuously rising slope. Hyamat K 20 of 76... - Page 21 5 Installation at Site 1952:116 Fig. 4: Correct piping connection 1 Suction lift operation 1. Install the piping without transmitting any stresses and strains. 2. Connect the piping to the distribution lines on the inlet side and discharge side. Hyamat K 21 of 76...
-
Page 22: Fitting An Expansion Joint (Optional)
Downstream pressure: 4 bar - 0.5 bar = 3.5 bar. ü A minimum pressure gradient of 5 m is available. 1. Install the pressure reducer in the pipe on the inlet side. 5.5 Acoustic cladding Acoustic cladding reduces the air-borne sound caused by the motors. Hyamat K 22 of 76... -
Page 23: Electrical Connection
Terminal assignment For the terminal assignment refer to the wiring diagram. 5.6.1 Sizing the power cable Determine the cross-section of the power cable based on the total rated power required. Hyamat K 23 of 76... -
Page 24: Connecting The Pressure Booster System
1. Fit the dry running protection device in accordance with the supplied original operating manual. Connect it in the control unit in accordance with the supplied original operating manual. 5.6.5 Connecting the fire alert 1. Establish the connection in accordance with the wiring diagram. Hyamat K 24 of 76... -
Page 25: Connecting The Ambient Temperature Monitoring Device (Optional)
5.6.7 Connecting the digital inputs (optional) 1. Establish the connection in accordance with the wiring diagram. ð Establish the remote reset, setpoint changeover and functional check run functions via the WSD inputs 1 to 3. Hyamat K 25 of 76... -
Page 26: Commissioning/Start-Up/Shutdown
Minor leakage of the mechanical seals during commissioning is normal and will cease after a short period of operation. Have commissioning carried out by specialist KSB staff. ü The original operating manual of the pump set on hand. ü The pipe unions between the pump set and the piping have been re-tightened. -
Page 27: Setting The Dry Running Protection Device
1. Undertake settings via parameters 3-5-15 and 3-5-16. (ð Section 7.5, Page 37) Table 8: Recommended settings for pressure transmitters Stop pressure Start-up pressure 0.5 bar below p 0.2 bar below p Flow monitor The start-up pressure is not adjustable via the flow monitor. Hyamat K 27 of 76... -
Page 28: Start-Up
ð The green LED lights up and signals the system's readiness for operation. Additional instruments ü The pressure booster system has been primed and vented. (ð Section 6.1.2, Page 26) 1. Set the manual-0–automatic selector switch to automatic. ð The green LED lights up and signals the system's readiness for operation. Hyamat K 28 of 76... -
Page 29: Checklist For Commissioning/Start-Up
Check the pre-charge pressure. Enter any deviations from the name plate or order documentation in the commissioning report. Complete the commissioning report together with the operator/user and instruct the operator/ user as to the function of the unit. Hyamat K 29 of 76... -
Page 30: Operating Limits
See name plate. (ð Section 4.4, Page 15) 6.2.4 Fluid handled 6.2.4.1 Permissible fluids to be handled ▪ Clean fluids not chemically or mechanically aggressive to the pump materials ▪ Drinking water ▪ Service water ▪ Cooling water Hyamat K 30 of 76... -
Page 31: Minimum Flow Rate
ü The pressure booster system has been switched off. (ð Section 6.3.1, Page 31) 1. Open vent plug 1 at the accumulator. ð The pressure booster system is being vented and drained. 2. Close vent plug 1 on the accumulator. Applies to the handling of water (Germany only) Hyamat K 31 of 76... -
Page 32: Operation
Changes and restorations can be made via the control panel. (ð Section 7.7, Page 39) 7.1 Control panel Fig. 7: Control panel 1 Display 2 LED display 3 Function keys 4 Navigation keys 5 Service interface Hyamat K 32 of 76... - Page 33 One or more alerts are active. 7.1.3 Function keys You can use the menu keys to access the elements at the first menu level directly. Table 16: Assignment of menu keys Menu Operation Diagnosis Settings Information Hyamat K 33 of 76...
- Page 34 ▪ Displays a help text for each selected menu option. 7.1.5 Service interface The service interface allows a PC/notebook to be connected via an RS232 cable. The service interface serves to parameterise and update the control unit. Hyamat K 34 of 76...
-
Page 35: Service Interface
▪ Functional check run ➡ Time/date ▪ Alternative setpoint ➡ Program outputs ➡ Messages ➡ Main menu Information ➡ Control module ▪ Serial number ➡ ▪ Material number ▪ Firmware ▪ Parameter set ▪ Hardware version Hyamat K 35 of 76... -
Page 36: Quick Menu
You must enter the password under (3-2-1-1) Login to gain access. "S" is displayed. "Factory" level Access level for the manufacturer only. "F" is displayed. NOTE If no keys are pressed for ten minutes, the system will automatically return to the "Standard" access level. Hyamat K 36 of 76... -
Page 37: Displaying And Changing Parameters
1. Press OK to save new parameter values. Step 7: Leaving the parameter menu 1. To leave the parameter menu, press ESC several times. ð The main display is shown. ð The new setpoint is active. Hyamat K 37 of 76... -
Page 38: Displaying And Acknowledging Warning And Alert Messages
ü Logged in at Service level. 1. To delete fault history, press OK. ð 2-1-4 is displayed (deleting history). Step 6: Leaving menu. 1. To leave menu, press ESC several times. ð The main display is shown. Hyamat K 38 of 76... -
Page 39: Saving And Restoring Settings
1. Select parameter 3-2-2-6 (default settings). 2. Position cursor on OK and press OK. ð The control unit is reset to the pressure booster system type. No settings for pressure, dry running protection, etc. Hyamat K 39 of 76... -
Page 40: Operating Modes
An alert (red LED) is output. In this case, the dry running protection and/or remote ON/OFF functions, if enabled, are ignored. When the contact closes, the pump sets will stop depending on demand. The alert is cleared. Hyamat K 40 of 76... -
Page 41: Setting The Ambient Temperature Monitoring Device (Optional)
The following functions can be assigned via the digital inputs: ▪ Remote reset – Activated by pulse to terminals. ▪ Setpoint changeover (see parameter 3-5-9) – Activated by closing the contact, de-activated by opening the contact. ▪ Functional check run – Pulse-activated. Hyamat K 41 of 76... -
Page 42: Servicing/Maintenance
▪ For any work on the pump (set) observe the operating manual of the pump (set). ▪ In the event of damage you can always contact KSB- KSB Service . ▪ A regular maintenance schedule will help avoid expensive repairs and contribute to trouble-free, reliable operation with a minimum of maintenance expenditure and work. -
Page 43: Servicing/Inspection
Verify the pre-charge pressure. Check the accumulator for integrity. (ð Section 8.3, Page 44) Check the automatic switching functionality. Check the cut-in levels and cut-out levels. Check the inflow, inlet pressure, dry running protection, flow monitoring and pressure reducer. Hyamat K 43 of 76... -
Page 44: Setting The Pre-Charge Pressure
5. Fit the protective cap of the membrane-type accumulator valve. Filling the membrane-type accumulator 1. Remove and store the protective cap of the membrane-type accumulator valve. 2. Add nitrogen through the valve. 3. Fit the protective cap of the membrane-type accumulator valve. Hyamat K 44 of 76... -
Page 45: Resetting Dry Running Protection
ü The original operating manual of the frequency inverter is on hand. 1. Set the pump set to manual mode for approx. 10 seconds via the frequency inverter’s control unit. See the original operating manual of the frequency inverter. Hyamat K 45 of 76... -
Page 46: Trouble-Shooting
NOTE Prior to commissioning and maintenance work during the warranty period, consultation with KSB Service is required. Non-compliance with this instruction will lead to forfeiture of any and all rights to claims for damages. If problems occur that are not described in the following table, consultation with the KSB service is required. - Page 47 - Intermittent voltage fluctuations Press reset key and fault ✘ acknowledgement key. ✘ - Phase failure Check individual phases. Replace fuse if necessary. ✘ - Inlet tank empty and/or float switch Check. Remedy defect if applicable. defective/disconnected Hyamat K 47 of 76...
-
Page 48: Related Documents
Fig. 9: General assembly drawing of Hyamat K with Movitec 2, 4, 6, 10, 15 1 Option: pressure transmitter 2 Option: pressure switch 3 Standard version: pressure transmitter 4 Pump connection, suction side 5 Pump connection, discharge side Hyamat K 48 of 76... - Page 49 Control unit for 3 pumps 18 041 018 79-1 Control unit for 6 pumps 18 041 019 838.03 Pressure switch 0 - 11 bar 01 034 231 Set of screw plugs On request 99-23 Installation set per pump 18 040 627 Hyamat K 49 of 76...
-
Page 50: Hyamat K With Movitec 25, 40, 60, 90
743.02 743.01 743.03 743.02 99-23 Fig. 10: General assembly drawing of Hyamat K with Movitec 25, 40, 60, 90 1 Option: pressure transmitter 2 Option: pressure switch 3 Standard version: pressure transmitter 4 Pump connection, suction side 5 Pump connection, discharge side... - Page 51 Control unit for 3 pumps 18 041 018 79-1 Control unit for 6 pumps 18 041 019 838.02 Pressure switch 0 - 11 bar 01 034 231 Set of screw plugs On request 99-23 Installation set per pump 18 040 654 Hyamat K 51 of 76...
-
Page 52: Flow Diagram
10 Related Documents 10.2 Flow diagram 24 17 Fig. 11: Flow diagram for direct connection (grey box: KSB's scope of supply) Hyamat Fig. 12: Flow diagram for indirect connection Number Description Mains water supply Shut-off element Ball valve Water meter Check valve... -
Page 53: Parameter List
10.3 Parameter list Table 25: Overview of parameters Parameter Description Factory settings Possible settings Min. value Max. value Read access right Write access right Betrieb Everybody Nobody Display of operating mode Allgemeines Everybody Nobody General operating status indicators 1-1-1 Systemdruck Everybody Nobody Displaying the measured system pressure Pumpenauslastung %... - Page 54 Parameter Description Factory settings Possible settings Min. value Max. value Read access right Write access right 1-2-1 Betriebsart Pumpen Everybody Everybody Setting the operating mode for each individual pump 1-2-1.1.1 Pumpennummer 1.. 3 Everybody Everybody Entering the pump number for which the operating mode is configured 1-2-1.2.1 Betriebsart Pumpe...
- Page 55 No module, Nobody Nobody Type of connected field bus module Profibus, Modbus 3-1-4 Logo Service Nobody Setting the logo displayed 3-1-4-1 Logo No logo KSB logo, Service Service Selecting the logo displayed dp logo, no logo Steuergerät Everybody Nobody Device-specific settings...
- Page 56 Grundeinstellung Service Service Resetting to default settings Rücksetz Grundeinst Default Default, Service Service 3-2-2-6.1.1 Resetting to default settings Hyamat K, Hyamat V, Hyamat VP, HyaEco VP 3-2-2-7 Edit Pumpe Betr.std. Service Service Editing pump operating hours Pumpennummer 1.. 6 Service Service 3-2-2-7.1.1...
- Page 57 Parameter Description Factory settings Possible settings Min. value Max. value Read access right Write access right 3-2-2-7.2.1 Stunden 0.. 500000 500000 Service Service Hours 3-2-2-7.2.2 Minuten 0.. 59 Service Service Minutes Sekunde 0.. 59 Service Service 3-2-2-7.2.3 Second 3-2-2-8 Reset Betriebsstund. Service Service failed...
- Page 58 Parameter Description Factory settings Possible settings Min. value Max. value Read access right Write access right 3-3-7 Pumpenmod. int/ext Internal Internal, Everybody Service Setting for pump mode via HMI (internal) external or switch (external) Systemeinstellungen Everybody Nobody Parameterisation of system 3-4-1 Saugseite Everybody...
- Page 59 Parameter Description Factory settings Possible settings Min. value Max. value Read access right Write access right 3-4-1-4-8-1 Schwelle 1: AN 0...199 Everybody Service Inlet tank level for relay 1 energised in percent 3-4-1-4-8-2 Schwelle 1: AUS 0...199 Everybody Service Inlet tank level for relay 1 de-energised in percent 3-4-1-4-8-3 Schwelle 2: AN...
- Page 60 Parameter Description Factory settings Possible settings Min. value Max. value Read access right Write access right 3-4-2-1 Drucksensor bei 4mA -100.. 1000 -100 1000 Everybody Service Analog measured value at 4 mA, discharge side 3-4-2-2 Drucksensor bei 20mA 1000 0.. 9999 9999 Everybody Service...
- Page 61 Parameter Description Factory settings Possible settings Min. value Max. value Read access right Write access right 3-5-12 Aktion bei Max Druck Stop pumps Stop pumps, Everybody Customer Parameter for selecting action in case of message only excessively high system pressure (stop pumps or output message only) 3-5-13 Alarm Min Druck...
- Page 62 Parameter Description Factory settings Possible settings Min. value Max. value Read access right Write access right 3-6-9 Zeitverz. Alarme 10.. 999 Everybody Service Time window for suppressing alerts when system pressure is exceeded/undershot 3-6-10 WSD 1 Puls Länge 0.. 99 Everybody Service Water flow detection 1, length of pulse in...
- Page 63 Parameter Description Factory settings Possible settings Min. value Max. value Read access right Write access right 3-7-5.1.1 Stunden 0.. 23 Everybody Customer Hours for daily forced start (check run) 3-7-5.1.2 Minuten 0.. 59 Everybody Customer Minutes for daily forced start (check run) Zwangsanlauf wöchl.
- Page 64 Parameter Description Factory settings Possible settings Min. value Max. value Read access right Write access right 3-7-10.1.1 Alt. Füllst. Monat A Off, Everybody Customer Entering the month in which the alternative January, fill level is deactivated February, March, April, May, June, July, August,...
- Page 65 Parameter Description Factory settings Possible settings Min. value Max. value Read access right Write access right 3-7-8-3 Alt. Sollw. Tag Ein Sunday Sunday, Everybody Customer Entering the weekday on which the Monday, alternative pressure setpoint is activated Tuesday, Wednesday, Thursday, Friday, Saturday Alt.
- Page 66 Parameter Description Factory settings Possible settings Min. value Max. value Read access right Write access right 3-8-1-3 Eingang 3 None None, Service Service Configuration of input 3 forced start (check run), alt. setpoint, leakage, remote acknowledgement, bypass valve, emergency power 3-8-2 Ausgänge Service...
- Page 67 Parameter Description Factory settings Possible settings Min. value Max. value Read access right Write access right 3-8-2-6 Ausgang 6 (FR6) None None, Service Service Configuration of output 6 threshold 1, threshold 2, supply valve, bypass valve, lack of water Meldungen Service Nobody Messages...
- Page 68 Parameter Description Factory settings Possible settings Min. value Max. value Read access right Write access right 3-14-3 Schließverzögerung 0.. 20 Everybody Service Delay time that lapses before valve is closed 3-14-4 Temperatur 0.. 40 Everybody Service Temperature above which the valve is opened 3-14-5 Öffnungszeit...
- Page 69 Parameter Description Factory settings Possible settings Min. value Max. value Read access right Write access right 4-2-3 IO FW-Revision Everybody Nobody IO information on revision of internal communications unit 4-2-4 IO HW-Revision Everybody Nobody IO information on hardware of internal communications unit HMI Info Everybody...
-
Page 70: Fault Messages
Manual off Pump 3 Pump 3 stopped ✘ (independent of automatic mode) Manual off Pump 4 Pump 4 stopped ✘ (independent of automatic mode) Manual off Pump 5 Pump 5 stopped ✘ (independent of automatic mode) Hyamat K 70 of 76... - Page 71 Flushing procedure in progress ✘ Valve opened oftenly Several flushing procedures carried out ✘ Ext. Power Operation Emergency power mode active; maximum system load ✘ limited Factory Test No test carried out in factory ✘ Hyamat K 71 of 76...
-
Page 72: Eu Declaration Of Conformity
67227 Frankenthal (Germany) The manufacturer herewith declares that the product: Hyamat K, Hyamat V, Hyamat SVP, Hyamat SVP Eco KSB order number: ....................▪ is in conformity with the provisions of the following Directives as amended from time to time: –... -
Page 73: Certificate Of Decontamination
We confirm that the above data and information are correct and complete and that dispatch is effected in accordance with the relevant legal provisions....................................Place, date and signature Address Company stamp Required fields Hyamat K 73 of 76... -
Page 74: Commissioning Report
13 Commissioning Report 13 Commissioning Report The pressure booster system specified below has been commissioned today by the undersigned, authorised KSB Service who created this report. Pressure booster system details Type series ............................Size ............................Serial number ............................Order No. -
Page 75: Index
Displaying and acknowledging warning and alert messages 38 Faults Causes and remedies 46 Installation 16 Installation at site 19 Intended use 9 Key to safety symbols/markings 8 LED display 33 Maintenance work 43 Name plate 15 Navigation keys 34 No-flow detection 40 Operating limits 9 Other applicable documents 7 Partly completed machinery 7 Personnel 9 Hyamat K 75 of 76... - Page 76 KSB SE & Co. KGaA Johann-Klein-Straße 9 • 67227 Frankenthal (Germany) Tel. +49 6233 86-0 www.ksb.com...
Need help?
Do you have a question about the Hyamat K and is the answer not in the manual?
Questions and answers