Table of Contents
Advertisement
Quick Links
Advertisement
Table of Contents

Related Manuals for Vision Engineering Hawk MKII


Summary of Contents for Vision Engineering Hawk MKII
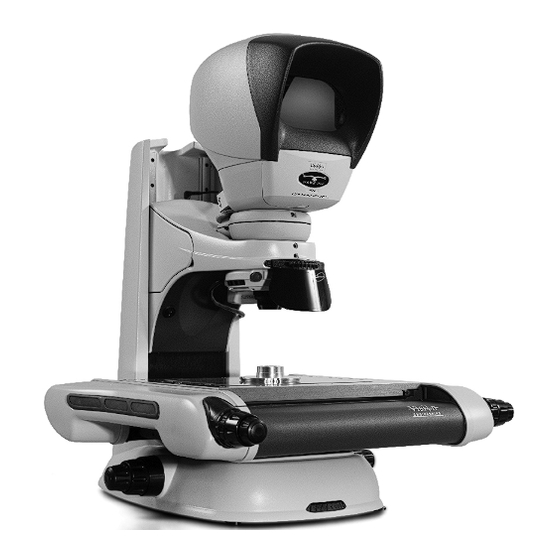
- Page 1 User Guide Hawk MKII 3-Axis Non-Contact Measurement Systems...
- Page 3 With high precision measuring stages, and a range of illumination options to suit all applications. Health & Safety Vision Engineering and its products conforms to the requirements of the EC Directives on Waste Electrical and Electronic Equipment (WEEE) and Restriction of Hazardous Substances (RoHS). EN61326-1:2006...
- Page 4 UNPACKING Unpacking the Hawk stand (all systems) UNPACKING Hawk with M3 software manual system Box 1 Stand Box 2 Head Box 3 PSU - Manual and lighting, and cables Box 4 M3 software pre-installed PC, keyboard and mouse Box 5 Monitor Box 6 M3 USB interface box Box 7 Manual stage (200mm x 150mm) Box 8 Optional accessories...
-
Page 5: Table Of Contents
CONTENTS PACKING CONTENTS CONTENTS Head pack Stand pack Stage pack Control units CNC control PSU Joystick and trackerball Control PSU manual and lighting control Accessories Macro Micro M3 USB Interface box QC-5000 PC ASSEMBLY Removing the transit protection Attaching the stage Ringlight attachment Macro EPI attachment Macro EPI and ringlight attachment... - Page 6 CONTENTS OPERATION Objective lens Episcopic illuminator Symbols and icons Manual and lighting controls Ringlight control Substage ROUTINE MAINTENANCE Graticule adjustment Substage LED replacement Episcopic LED replacement General care Consumable and replacement parts Environmental conditions ACCESSORIES & OPTIONS SERVICE & CALIBRATION RECORD WARRANTY...
-
Page 7: Head Pack
PACKING CONTENTS PACKING CONTENTS See packing list to clarify contents of delivery. Head pack Stand pack Stage pack 150mm x 150mm (manual) 200mm x 150mm (manual) 200mm x 150mm (motorised) 250mm X 150mm (manual) www.visioneng.com/support HAWK MKII 3-Axis Non-Contact Measurement Systems... -
Page 8: Control Units
PACKING CONTENTS Control units CNC control PSU Joystick and trackerball Control PSU manual and lighting control HAWK MKII 3-Axis Non-Contact Measurement Systems www.visioneng.com/support... -
Page 9: Accessories
Substage condenser lens Object lenses Object lenses Micro Lens Options Macro Lens Options Micro Micro LWD Micro SLWD x100 Micro Episcopic Macro Episcopic LED illuminator LED illuminator Camera adaptor Unicam II Ringlight illuminator www.visioneng.com/support HAWK MKII 3-Axis Non-Contact Measurement Systems... -
Page 10: M3 Usb Interface Box
(available from your local PC retailer). QC-5000 PC QC-5000 PC Monitor Keyboard and mouse Note: Please ensure your Windows® operating system is kept up to date through Windows® Update. HAWK MKII 3-Axis Non-Contact Measurement Systems www.visioneng.com/support... -
Page 11: Assembly
Screw the required condenser lens Column through the stage and into the stand. Note: Micro condensers should only be used Stage Assembly with micro lenses when viewing a subject at stage glass level. Logo www.visioneng.com/support HAWK MKII 3-Axis Non-Contact Measurement Systems... -
Page 12: Ringlight Attachment
Macro EPI attachment Note: The same procedure is used to fit either the Macro EPI (illustrated) or the Micro EPI. The Micro EPI cannot have an Objective Holder or Ringlight fitted. Grub Screw Grub Screw HAWK MKII 3-Axis Non-Contact Measurement Systems www.visioneng.com/support... -
Page 13: Macro Epi And Ringlight Attachment
ASSEMBLY Macro EPI and ringlight attachment Grub Screw Grub Screw Securing Screw Securing Screw Micro EPI and lens turret attachment Grub Screw Grub Screw www.visioneng.com/support HAWK MKII 3-Axis Non-Contact Measurement Systems... -
Page 14: Attaching The Head Only
3 x grub screws if not already fitted. Adapter Locate camera and adapter to the locking Locking plate (the locking plate must not be Plate overtight, but enough to hold). Camera Attachment Grub Screws HAWK MKII 3-Axis Non-Contact Measurement Systems www.visioneng.com/support... -
Page 15: Attaching Unicam Ii
ASSEMBLY Head Attaching Unicam II Power Lead Unicam Securing Screws Attaching the anti-glare shield CAUTION: The Anti-Glare Shield is made of plastic and must not be over tightened. Screws www.visioneng.com/support HAWK MKII 3-Axis Non-Contact Measurement Systems... -
Page 16: Inserting The Stage Glass
Check that the stage glass is in contact with all four supports. To level the stage glass, refer to page 18. Stage size Spring location 150 x 150mm Left & Back 200 x 150mm Left & Front HAWK MKII 3-Axis Non-Contact Measurement Systems www.visioneng.com/support... -
Page 17: Cable Connection M3-Ved (Manual Systems)
Mains Power Lighting/Power X, Y and Z PC USB PC USB RINGLIGHT HEAD DISPLAY I/O VREF MAINS POWER IN WARNING:To comply with safety regulations, easy access to the mains socket must be maintained. www.visioneng.com/support HAWK MKII 3-Axis Non-Contact Measurement Systems... -
Page 18: Cable Connection M3-Cnc (Cnc Systems)
Please ensure your Windows® operating system is kept up to date through Windows® Update. Cable connection M3-CNC (CNC systems) Mains Power Display Lighting/Power X, Y and Z MAINS POWER IN WARNING:To comply with safety regulations, easy access to the mains socket must be maintained. HAWK MKII 3-Axis Non-Contact Measurement Systems www.visioneng.com/support... -
Page 19: Cable Connection Qc-5000 (Manual Systems)
X, Y and Z RINGLIGHT HEAD DISPLAY I/O VREF Input 110-240V 50-60Hz Fuse T1.0AH 240V T2.0AH 110V MAINS POWER IN SUB-STAGE ILLUMINATION WARNING:To comply with safety regulations, easy access to the mains socket must be maintained. www.visioneng.com/support HAWK MKII 3-Axis Non-Contact Measurement Systems... -
Page 20: Cable Connection Qc-5000 (Cnc Systems)
J J O O Y Y S S T T I I C C K K VREF MAINS POWER IN TRACKERBALL JOYSTICK WARNING:To comply with safety regulations, easy access to the mains socket must be maintained. HAWK MKII 3-Axis Non-Contact Measurement Systems www.visioneng.com/support... -
Page 21: Start Up / Shut Down Procedure
Close down the measurement software (if applicable). Turn off the Hawk PSU. Shut down the PC or PC and M3 interface box (if applicable). The System is now off and the cables may be safely disconnected if required. www.visioneng.com/support HAWK MKII 3-Axis Non-Contact Measurement Systems... -
Page 22: Setting Up Manual System Controls
Objective Lens Macro - Open Iris - decrease depth of field ON/OFF - Close Iris - increase depth of field Switch Coarse Focus Control Y Axis Fine Illumination Control Focus Power Supply Control X Axis Substage Control Iris Control Levelling Foot Illumination Controls HAWK MKII 3-Axis Non-Contact Measurement Systems www.visioneng.com/support... -
Page 23: Cnc System Controls
- Close Iris - increase depth of field Switch Substage Iris Control Levelling Foot Default Joystick button functions: = Enter = Speed Toggle = Finish Default Trackerball button functions: = Speed Toggle = Finish www.visioneng.com/support HAWK MKII 3-Axis Non-Contact Measurement Systems... -
Page 24: Align Head To Stage
Match the view on the monitor with that in the head - move the camera by using the thumbscrews Tighten the hexagonal headed screws on the locking plate to hold camera in position. HAWK MKII 3-Axis Non-Contact Measurement Systems www.visioneng.com/support... -
Page 25: Operation
Illumination and focus should be adjusted until the image is clear and bright, with good contrast. Maximum contrast gives the best image resolution and allows for the highest level of accuracy and repeatability. Contact the nearest Vision Engineering branch/distributor for further advice. Objective lens Iris control Each Macro objective lens has an adjustable iris which restricts the aperture of the lens. -
Page 26: Episcopic Illuminator
Display I/O Connection to PC or M3 interface box Refer to manual HEAD Viewing Head power VREF Video reference Connection to PC or M3 interface box JOYSTICK Connection to Joystick controller X,Y, Z AXIS MOTOR Connection to the HAWK motor connections HAWK MKII 3-Axis Non-Contact Measurement Systems www.visioneng.com/support... -
Page 27: Manual And Lighting Controls
PC lighting control cable is connected to the ‘Display I/O’ port at the back of the unit. Ringlight illumination Dimmer Knob Illumination ON/OFF switches Sub stage Episcopic illumination illumination Mains On/Off Ringlight status LED Power LED www.visioneng.com/support HAWK MKII 3-Axis Non-Contact Measurement Systems... -
Page 28: Ringlight Control
If the problem cannot be resolved please contact your nearest representative (see back page). In the above Solid Red condition, remove the illuminator and ensure neither the air inlet around the objective, nor the fan outlet are obstructed. HAWK MKII 3-Axis Non-Contact Measurement Systems www.visioneng.com/support... -
Page 29: Substage
• Do not lean on or shake the upper arm of your Hawk product. Note: Contact your local Vision Engineering representative for full details of available training programs. Note: To achieve the very best from your Hawk non-contact measuring system, you should carry out regular routine maintenance as well as undertaking a schedule of service and calibration (see service and calibration record, at the end of this user guide). -
Page 30: Routine Maintenance
ROUTINE MAINTENANCE Routine maintenance is important for the longstanding of the Hawk Measuring System. For more complex maintenance contact the local Vision Engineering representative. Graticule adjustment Undo the securing clip at the base of the front cover and lift the cover off. -
Page 31: Substage Led Replacement
Pull its power lead clear of the socket. Loosen the 2 securing screws and pull the LED assembly clear of the illuminator. The replacement procedure is the reversal of the above. www.visioneng.com/support HAWK MKII 3-Axis Non-Contact Measurement Systems... -
Page 32: General Care
Do not position the instrument close to a radiator or similar heating sys tem. • Do not position the instrument in direct sunlight, or where bright reflections will prevent a com fort able viewing position. HAWK MKII 3-Axis Non-Contact Measurement Systems www.visioneng.com/support... -
Page 33: Accessories & Options
H-144 Control PSU Control PSU QC-5000 PC Control PSU CNC Control PSU CNC QC-5000 PC Manual Manual H-132 H-132 H-131 H-131 Joystick Joystick Trackerball Trackerball Mandatory Parts H-143 H-143 H-144 H-144 Optional Parts www.visioneng.com/support HAWK MKII 3-Axis Non-Contact Measurement Systems... - Page 34 SERVICE & CALIBRATION RECORD SERVICE & CALIBRATION RECORD Hawk serial number ________________ Stage serial number ________________ Date of Date of next Service type Comments Company Signature service service...
- Page 36 If during the warranty period the product is found to be defective, it will be repaired or replaced at facilities of Vision Engineering or elsewhere, all at the option of Vision Engineering. Shipment costs for warranty repairs, to and from Vision Engineering facilities will not, normally, be borne by Vision Engineering.
- Page 37 Visit our website: www.visioneng.com Disclaimer – Vision Engineering Ltd. has a policy of continuous development and reserves the right to change or update, without notice, the design, materials or specification of any products, the information contained within this brochure/datasheet and to discontinue production or distribution of any of the products described.
Need help?
Do you have a question about the Hawk MKII and is the answer not in the manual?
Questions and answers