Table of Contents
Advertisement
Advertisement
Table of Contents

Subscribe to Our Youtube Channel
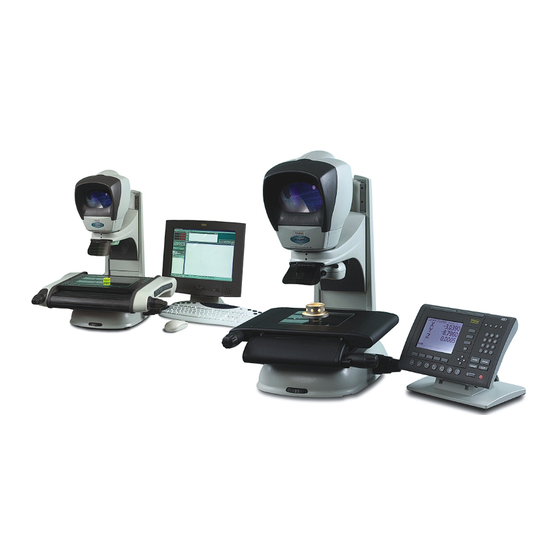
Related Manuals for Vision Engineering Hawk QC-200


Summary of Contents for Vision Engineering Hawk QC-200
- Page 1 User Guide 2 or 3-Axis Manual Non-Contact Measuring System...
- Page 3 Health & Safety INTRODUCTION Vision Engineering and its products conforms to the requirements of the EC Directives on Waste Electrical and Electronic Equipment (WEEE) and Restriction of Hazardous Substances (RoHS).
-
Page 5: Table Of Contents
CONTENTS PACKING CONTENTS CONTENTS Head pack Stand pack Stage pack Accessories packs Illumination and objectives pack QC-200/300 microprocessor pack QC-5000 microprocessor pack ASSEMBLY Stage assembly Ringlight attachment Macro EPI attachment Macro EPI and ringlight attachment Micro EPI and lens turret attachment Attaching the head only Mounting camera to rear Mounting camera to side for image capture... - Page 6 CONTENTS ROUTINE MAINTENANCE Graticule adjustment Changing the illuminator lamp General care Consumable and replacement parts Environmental conditions ACCESSORIES & OPTIONS OTHER SOLUTIONS FROM VISION ENGINEERING Stereo inspection systems Non-contact measuring systems SERVICE & CALIBRATION RECORD WARRANTY...
-
Page 7: Head Pack
PACKING CONTENTS PACKING CONTENTS See packing list to clarify contents of delivery. Head pack Stand pack Stage pack 200mm x 150mm (8" x 6") 150mm x 150mm (6" x 6") www.visioneng.com/support Hawk 2 or 3-Axis Manual Non-Contact Measuring System... -
Page 8: Accessories Packs
PACKING CONTENTS Accessories packs Photographic adaptor Illuminator Power supply Illumination and objectives pack Macro EPI Ringlight and Control box Micro EPI/Turret Assembly Macro Lens Micro Lens Macro Lens Options Micro Lens Options Micro Micro LWD Micro SLWD x100 Hawk 2 or 3-Axis Manual Non-Contact Measuring System www.visioneng.com/support... -
Page 9: Qc-200/300 Microprocessor Pack
PACKING CONTENTS QC-200/300 microprocessor pack QC-200 items included: QC-300 items included: Power lead Power lead Instruction manual Instruction manual QC Quickie Test Slide QC Quickie Test Slide QC-5000 microprocessor pack QC-5000 items included Manual Optional Manual VED Instruction Manual Instruction Manual Encoder Cable Encoder Cable RS232 Comms Cable... -
Page 10: Assembly
ASSEMBLY ASSEMBLY The following paragraphs provide instructions on how to assemble the Hawk Measuring System. In most instances the illustrations are self explanatory; where necessary the illustrations are supported by text. Stage assembly To attach the Stage proceed as follows: Use the red transit handle and focus control covers to lift the stand into the required work position. -
Page 11: Ringlight Attachment
ASSEMBLY Ringlight attachment Securing Screw Securing Screw Macro EPI attachment Note: The same procedure is used to fit either the Macro EPI (illustrated) or the Micro EPI. The Micro EPI cannot have an Objective Holder or Ringlight fitted. Grub Screw Grub Screw www.visioneng.com/support Hawk 2 or 3-Axis Manual Non-Contact Measuring System... -
Page 12: Macro Epi And Ringlight Attachment
ASSEMBLY Macro EPI and ringlight attachment Grub Screw Grub Screw Securing Screw Securing Screw Micro EPI and lens turret attachment Grub Screw Grub Screw Hawk 2 or 3-Axis Manual Non-Contact Measuring System www.visioneng.com/support... -
Page 13: Attaching The Head Only
ASSEMBLY Attaching the head only Head Socket Head Connector Grub Screw Mounting camera to rear Position photographic attachment between the viewing head and its arm. Secure with the grub screws. Attach the adapter to the camera and tighten 3 x grub screws if not Camera already fitted. -
Page 14: Mounting Camera To Side For Image Capture
ASSEMBLY Mounting camera to side for image capture Centring Screws Head Focus Connector Adjustment Camera Interface Photographic Head Socket Attachment Securing Screws Attaching the anti-glare shield CAUTION: The Anti-Glare Shield is made of plastic and must not be over tightened. Grub Screws Hawk 2 or 3-Axis Manual Non-Contact Measuring System www.visioneng.com/support... -
Page 15: Inserting The Illuminator Lamp
ASSEMBLY Inserting the illuminator lamp Press down the lamp/fan assembly release button Lift out the lamp/fan assembly Insert the lamp as shown Check that it is fully pushed into the lamp holder. www.visioneng.com/support Hawk 2 or 3-Axis Manual Non-Contact Measuring System... -
Page 16: Inserting The Stage Glass
ASSEMBLY Inserting the stage glass Note: The stage glass must be handled with care to avoid any fingerprint marks. Align the glass with it's bevelled edges against the springs. Check that the stage glass is in contact with all four supports. To level the stage glass, refer to page 19. -
Page 17: Connecting The Fibre Optic Cable To The Illuminator
ASSEMBLY Connecting the fibre optic cable to the illuminator Unscrew the locking collar. Remove the locking collar and ferrule. Insert the fibre-optic cable through the locking collar and ferrule. Align the grub screw with the indent on the cable and tighten the screw with the hexagonal/Allen key provided. Note: The hexagonal/Allen key is taped to the base of the illuminator. -
Page 18: Qc-200/Qc-300 Microprocessor Assembly
ASSEMBLY QC-200/QC-300 microprocessor assembly Cable connection points are shown on page 13. Microprocessor Shoulder Bolt Stand NOTE: Do Not Over-tighten Microprocessor Microprocessor Standard Stand Bolt Stand Locking Washer Spacer Hawk 2 or 3-Axis Manual Non-Contact Measuring System www.visioneng.com/support... -
Page 19: Cable Connection Points For The Manual Qc-200/Qc-300 System
ASSEMBLY Cable connection points for the manual QC-200/QC-300 system Refer to pages 14 and 15 for detailed connections. Note: Ensure that the voltage selector is turned to the correct setting. Mains Mains Input On/Off Ringlight Connection Switch Input S-Video (QC-300 only) Power Fuse Fuse... -
Page 20: Interconnection Diagram For Manual Hawk System With Qc-200
ASSEMBLY Interconnection diagram for manual Hawk system with QC-200 Hawk 2 or 3-Axis Manual Non-Contact Measuring System www.visioneng.com/support... -
Page 21: Interconnection Diagram For Manual Hawk System With Qc-300
ASSEMBLY Interconnection diagram for manual Hawk system with QC-300 www.visioneng.com/support Hawk 2 or 3-Axis Manual Non-Contact Measuring System... -
Page 22: Interconnection Diagram For Hawk System With Manual Qc-5000
ASSEMBLY Interconnection diagram for Hawk system with manual QC-5000 Hawk 2 or 3-Axis Manual Non-Contact Measuring System www.visioneng.com/support... -
Page 23: Interconnection Diagram For Hawk System With Qc-5000 Ved
ASSEMBLY Interconnection diagram for Hawk system with QC-5000 VED www.visioneng.com/support Hawk 2 or 3-Axis Manual Non-Contact Measuring System... -
Page 24: Setting Up Manual System Controls
SETTING UP Manual system controls SETTING UP Turn on the illuminator power supplies and check that the LED at the centre of the head is illuminated. The manual system controls are identified below. Objective Lens Macro - Open Iris - decrease depth of field On/Off - Close Iris - increase depth of field Switch... -
Page 25: Stand Levelling
SETTING UP Stand levelling Adjust the levelling foot until the stand is stable. Stage glass levelling Fixed Corner Adjust the X and Y axis controls to bring the rear Adjustable left-hand corner of the stage glass (fixed corner) into Glass Supports view. -
Page 26: Operation
Illumination and focus should be adjusted until the image is clear and bright, with good contrast. Maximum contrast gives the best image resolution and allows for the highest level of accuracy and repeatability. Contact the nearest Vision Engineering branch/distributor for further advice. Objective lens Iris control Each Macro objective lens has an adjustable iris which restricts the aperture of the lens. -
Page 27: Episcopic Illuminator
OPERATION Episcopic illuminator The Episcopic illuminator provides through the lens illumination for measuring deep surface features, holes and blind bores. The light follows the optical path through the objective lens. The following adjustment can be made: • Ad just the sur face light ing to suit the com po nent by us ing the thumbwheel and the beam split mir ror. •... -
Page 28: Control Box
OPERATION Control box Icons The icons on the front panel of the control box symbolise the following: On/Off switch Power on indicator Illuminator intensity control Ringlight connection point Refer to manual HEAD Power for viewing unit (boom mount only) Controls The LED ringlight, which can be used with substage illumination, provides above stage il lu mi na tion and is used for illuminating sur face fea tures, blind holes, etc. -
Page 29: Substage
OPERATION Substage The Substage illumination is used for the accurate measurement of through holes, profiles and edge features etc. The depth of field is adjusted by rotating the thumbwheel on the Hawk base. The illumination can be used with spotlight, ringlight and EPI illumination systems. Adjust light intensity by rotating the dial control on the illumination power supply unit. -
Page 30: Taking A Measurement (Qc-300/Qc-5000 Ved)
This procedure will increase repeatability. If looking to measure the form of a feature, it is best to take at least eight points to achieve the most repeatable result. Note: Contact your local Vision Engineering representative for full details of available training programs. Hawk 2 or 3-Axis Manual Non-Contact Measuring System... -
Page 31: Routine Maintenance
ROUTINE MAINTENANCE Routine maintenance is important for the longstanding of the Hawk Measuring System. For more complex maintenance contact the local Vision Engineering representative. Graticule adjustment Undo the securing clip at the base of the front cover and lift the cover off. -
Page 32: Changing The Illuminator Lamp
ROUTINE MAINTENANCE Changing the illuminator lamp WARNING REMOVE POWER FROM THE SYSTEM BEFORE OPENING THE CASE. CAUTION: Allow the illuminator to cool down before carrying out this task. Press down the lamp/fan assembly release button Lift out the lamp/fan assembly Remove the lamp as shown Insert the replacement lamp and check that it is fully pushed into the lamp holder. -
Page 33: General Care
ROUTINE MAINTENANCE General care • Cover the Hawk with a dust cover when not in use. • Remove dust with a soft brush or cleaning cloth. • The viewing screen and lenses should be cleaned with a lens cleaning cloth. •... -
Page 34: Accessories & Options
ACCESSORIES & OPTIONS ACCESSORIES & OPTIONS Hawk 2 or 3-Axis Manual Non-Contact Measuring System www.visioneng.com/support... -
Page 35: Other Solutions From Vision Engineering
OTHER SOLUTIONS FROM VISION ENGINEERING OTHER SOLUTIONS FROM VISION ENGINEERING Vision Engineering manufactures a wide range of stereo inspection and non-contact measuring systems. The following tables provide a summary of the products utilising Vision's technology. For more information on any of these products either visit the website or contact the nearest Vision Engineering branch/distributor. -
Page 36: Non-Contact Measuring Systems
OTHER SOLUTIONS FROM VISION ENGINEERING Non-contact measuring systems Product Picture Features Description • 150mm x 100mm stage 2-axis video measuring system with • x10 - x50 mag options touch screen video processor. Merlin • QC-300 Microprocessor Powerful yet simple to use, ideal for a •... -
Page 37: Service & Calibration Record
SERVICE & CALIBRATION RECORD SERVICE & CALIBRATION RECORD Hawk serial number ________________ Stage serial number ________________ Date of Date of next Service type Comments Company Signature service service... -
Page 39: Warranty
If during the warranty period the product is found to be defective, it will be repaired or replaced at facilities of Vision Engineering or elsewhere, all at the option of Vision Engineering. Shipment costs for warranty repairs, to and from Vision Engineering facilities will not, normally, be borne by Vision Engineering. - Page 40 For more information... Vision Engineering has a network of offices and technical distributors around the world. For more information, please contact your Vision Engineering branch, local authorised distributor, or visit our website. Vision Engineering Ltd. Vision Engineering Inc. Vision Engineering Ltd.
Need help?
Do you have a question about the Hawk QC-200 and is the answer not in the manual?
Questions and answers